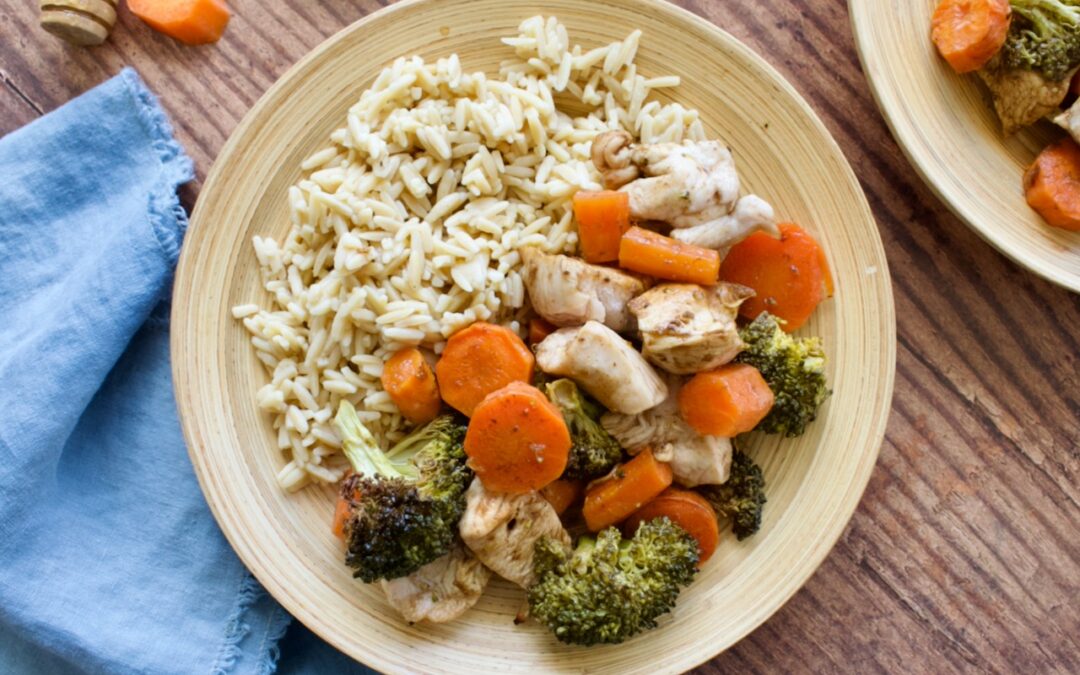
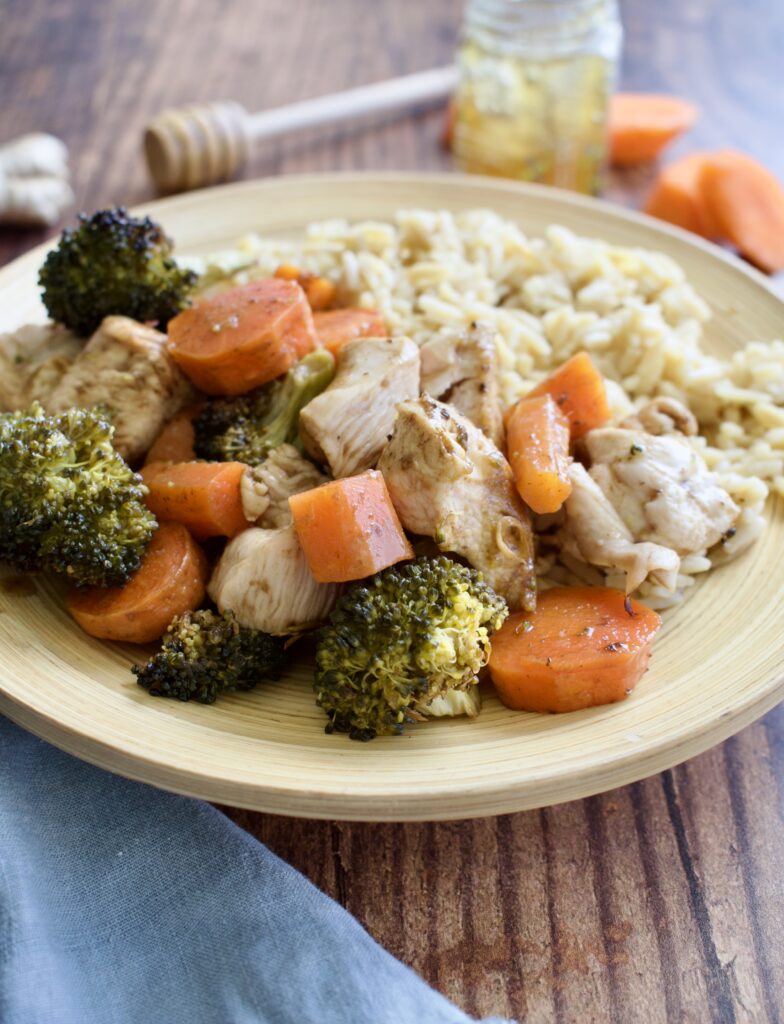
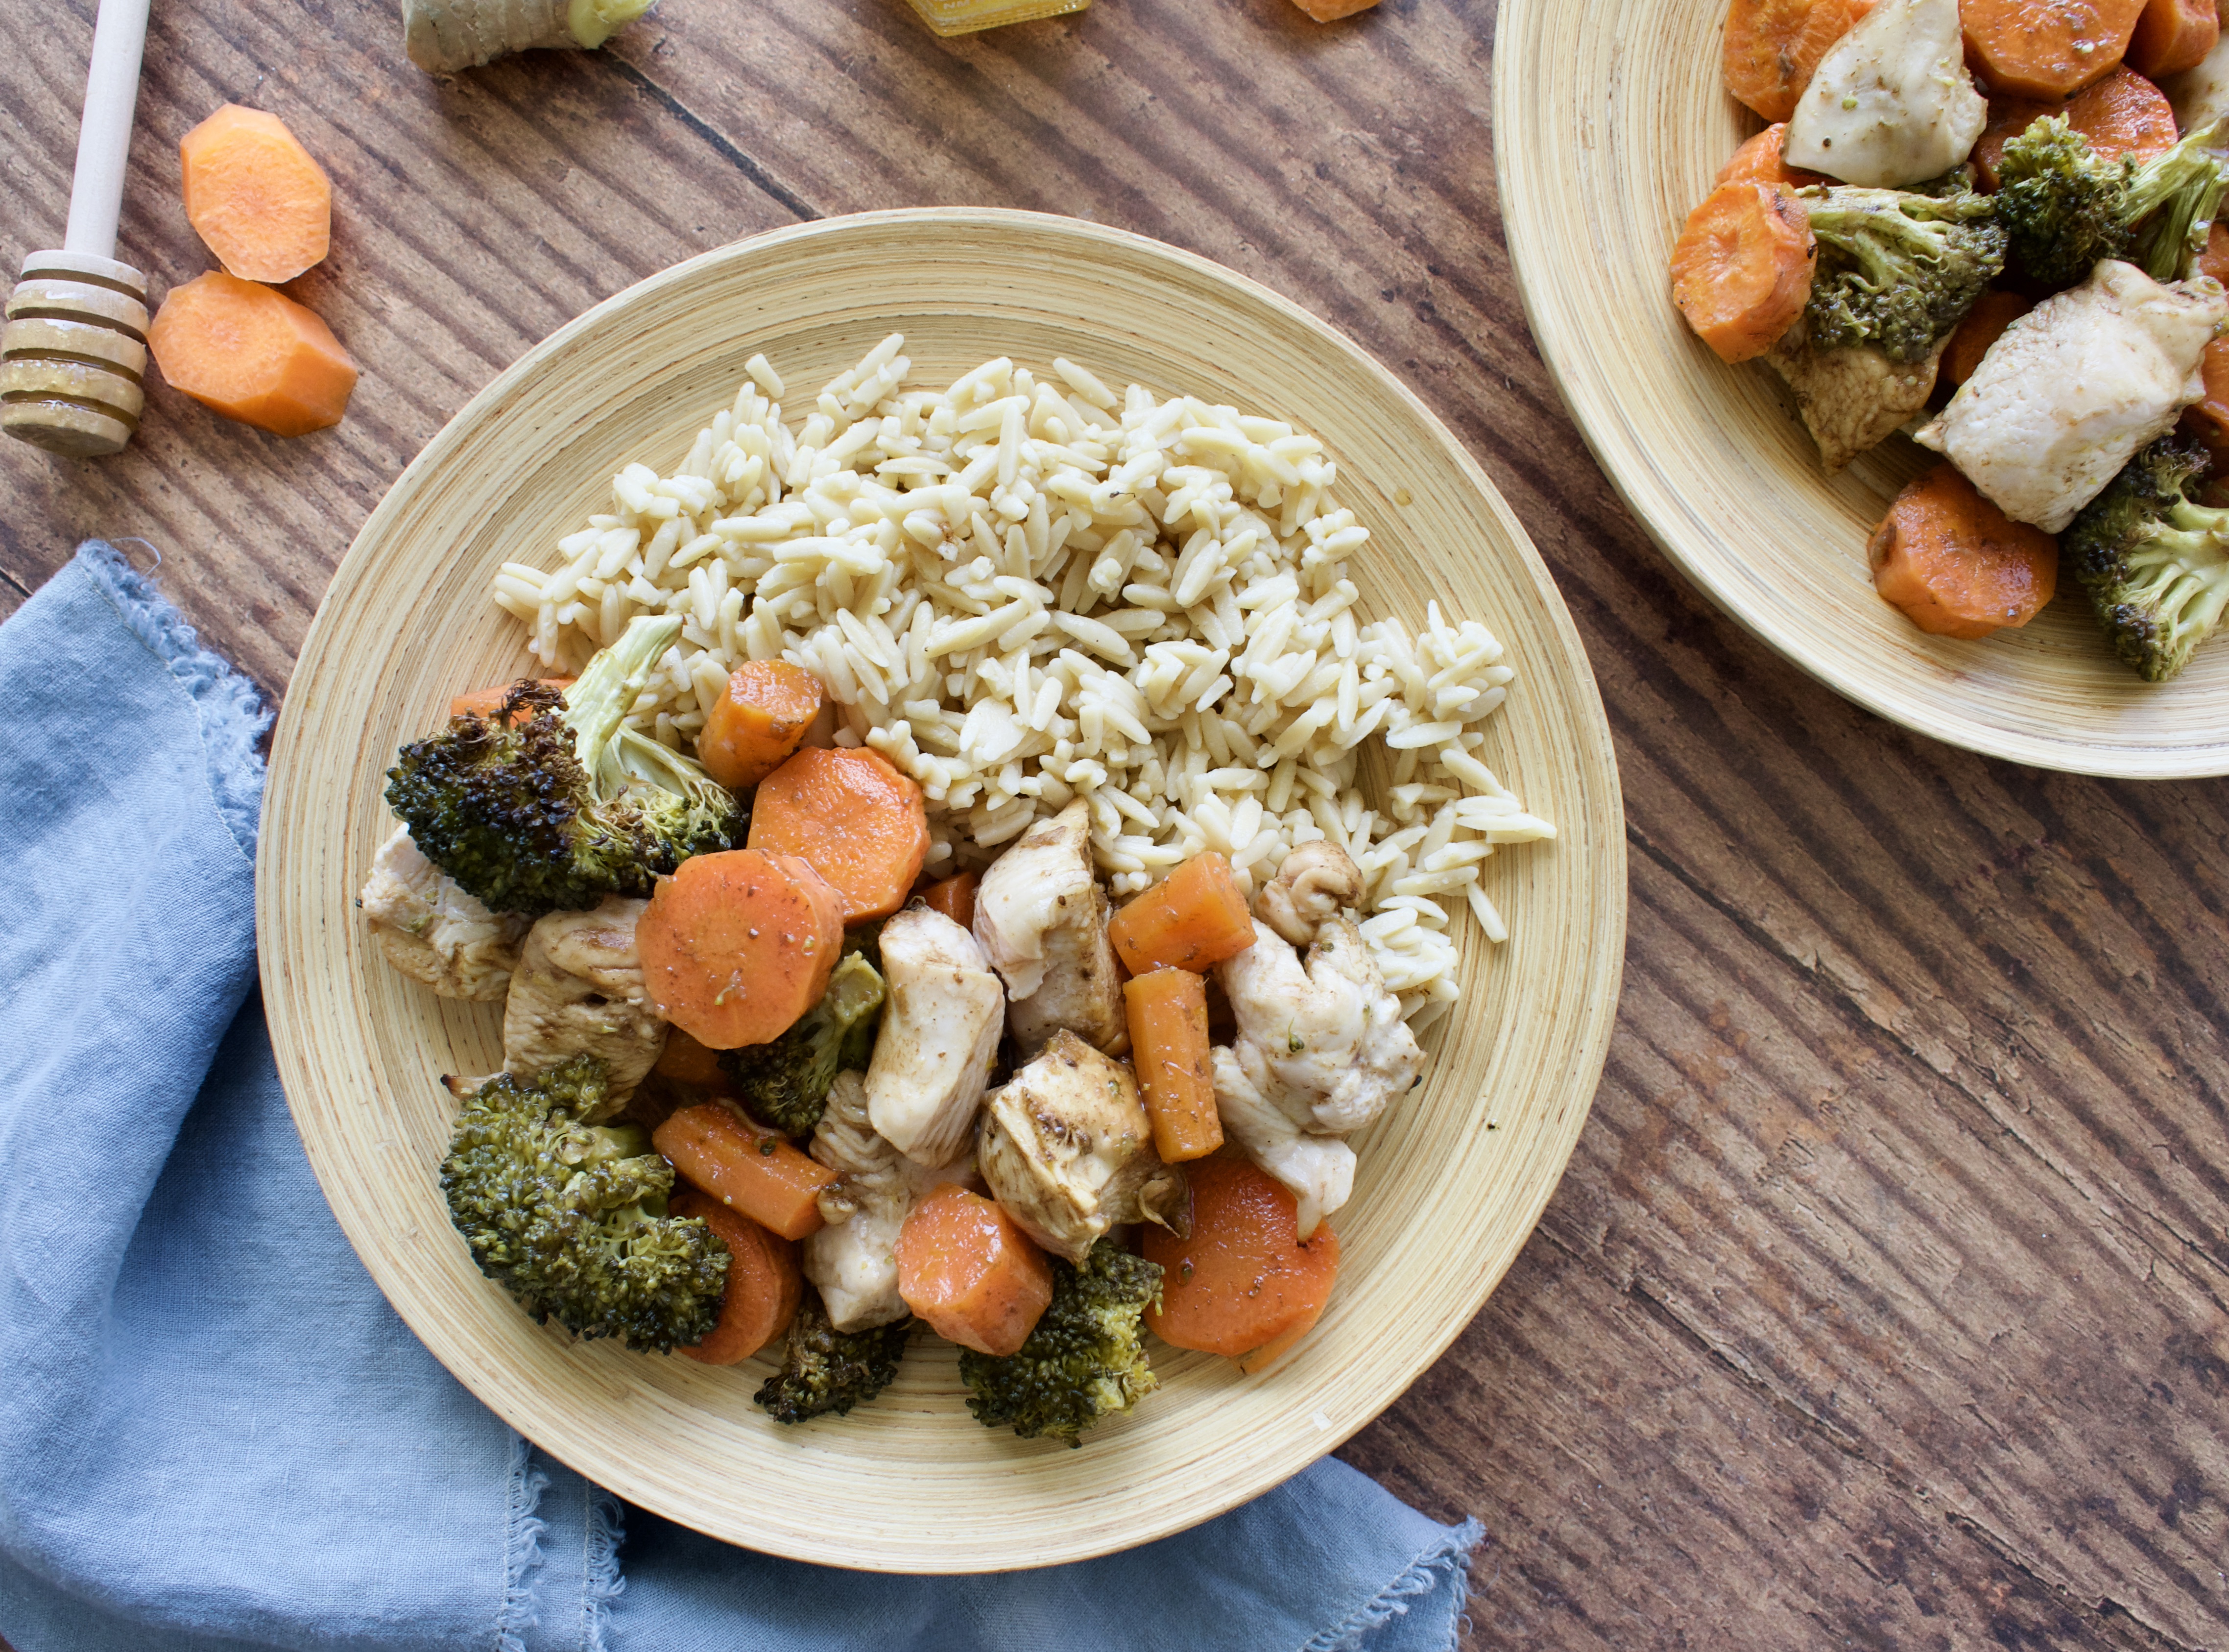
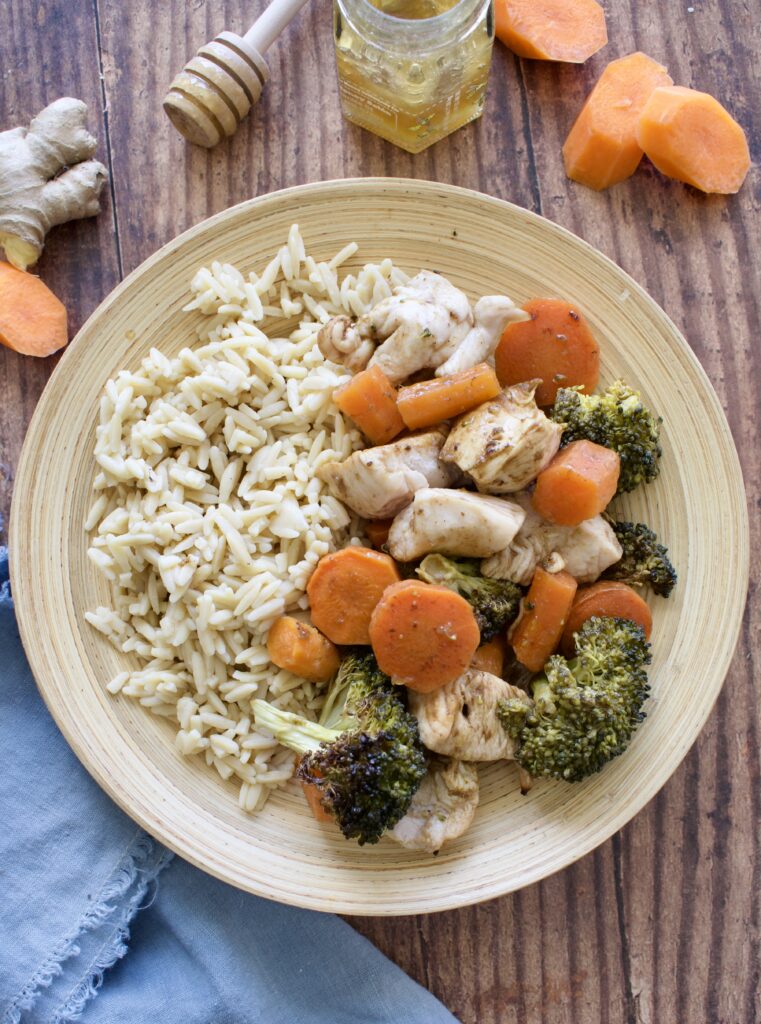
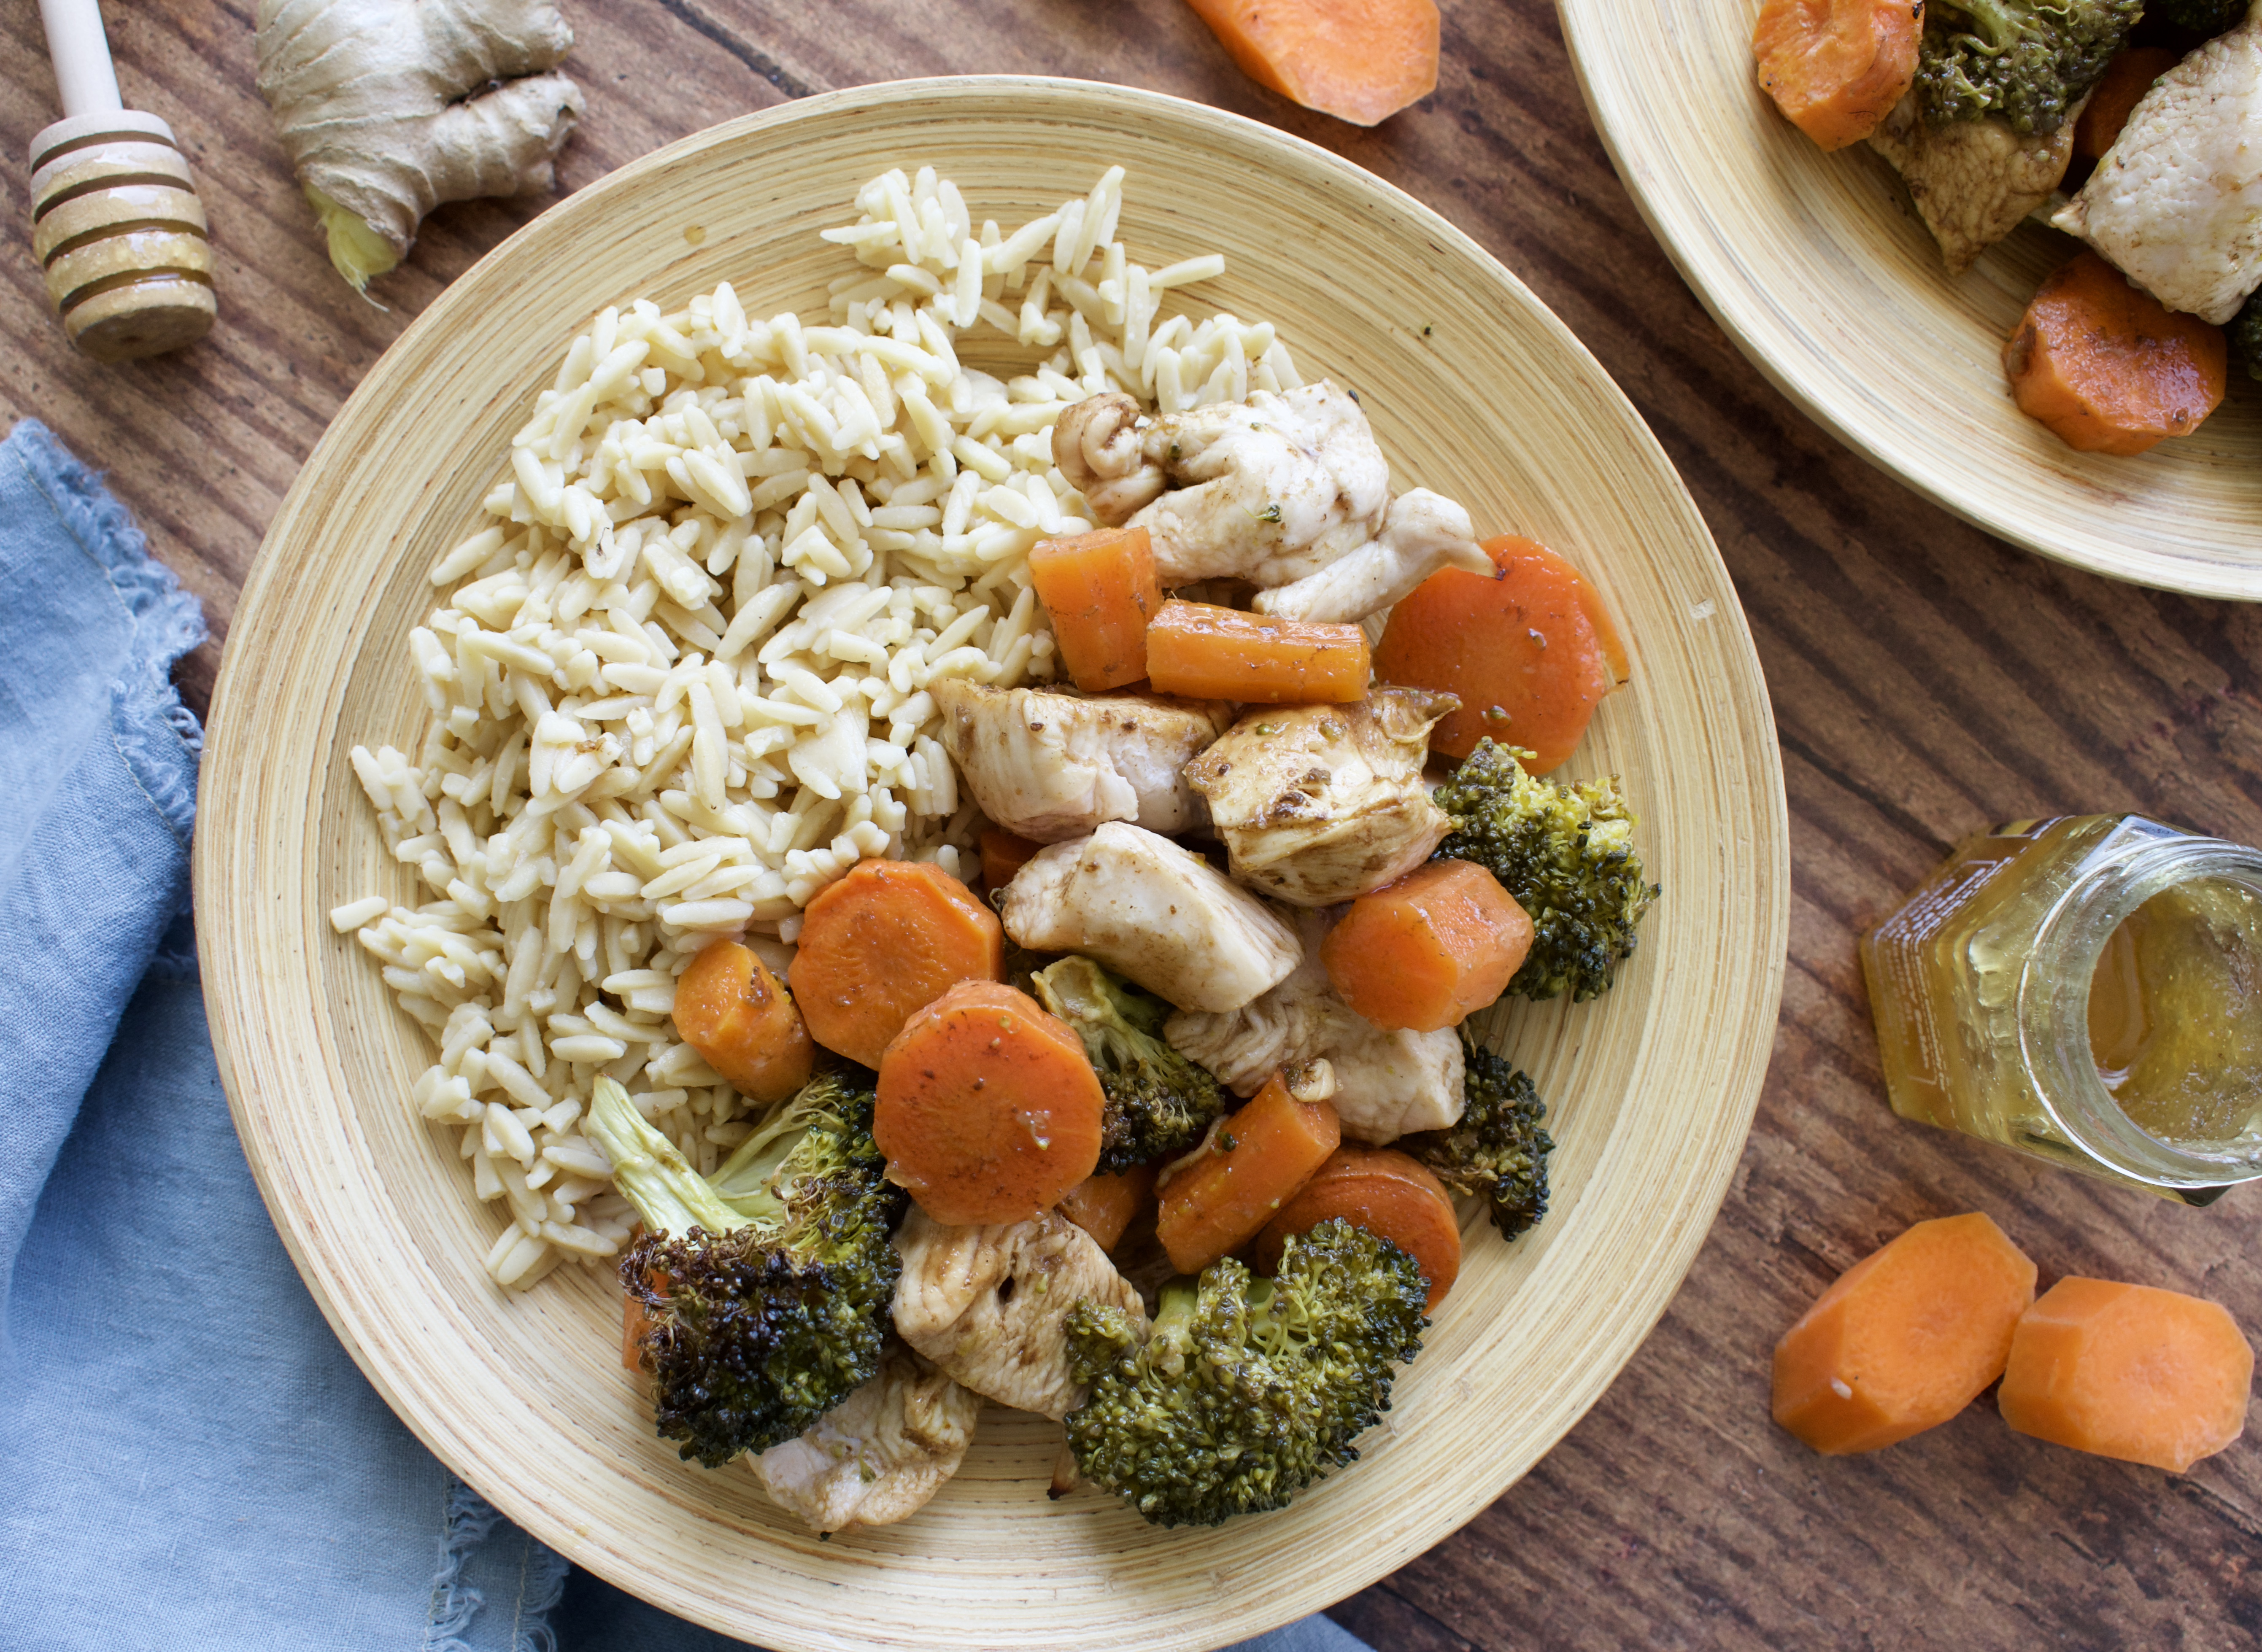
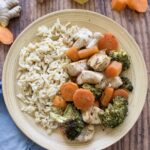
This easy sheet pan dinner is a delicious way to upgrade your standard chicken and vegetable dinner. Coated in a delicious honey balsamic, you’ll love this quick weeknight meal.
honey balsamic chicken and vegetables
Who doesn’t love a simple sheet pan meal? It makes dinner so much easier during a busy week. A lot of sheet pan meals can be boring because they are basically just chicken and veggies on a pan with some olive oil and salt. BORING! We need more flavor, people! That’s why I love this honey balsamic chicken.
This easy dinner is made with a honey balsamic sauce that upgrades your boring chicken and vegetables. I love this meal because it’s made on one sheet pan and doesn’t require reducing the sauce. If I don’t need to take extra steps, then I’m all about it. I wanted to create this meal without having to worry about cooking the sauce separately.
sheet pan honey balsamic chicken and vegetables
This simple sheet pan meal is completely gluten free, dairy free, nut free, and allergy friendly. It’s free of all major allergens, making it the perfect crowd pleasing dish for the entire family (or friends!). This recipe is also completely Paleo.
sheet pan chicken and veggies
Honey Balsamic Chicken and Vegetables
Ingredients:
-chicken
-broccoli
-carrots
-olive oil
-salt
-balsamic
-rice wine vinegar
-honey
-ginger
Process
This is the simplest meal you’ll make! You add your chopped veggies to a sheet pan and begin roasting them while you cut up the chicken and prep the sauce. The sauce is just whisking everything together, no reducing needed. Halfway through cooking, you’ll add the chicken to the sheet pan and toss everything with half of the sauce. Finish roasting until the chicken is cooked through, then toss everything with the remaining sauce. That’s it!
Upgrade your standard chicken and vegetable dish with this quick and easy weeknight dinner made on one pan! Packed with flavor and highly nutritious, this is the ultimate simple dinner recipe.
Toss the carrots and broccoli with the olive oil and salt and lay evenly across a parchment lined baking sheet. Bake for 30 minutes.
While veggies are roasting, prepare your sauce by whisking everything together in a measuring cup. Taste and adjust the ginger and honey to your liking.
After the veggies have been cooking for 30 minutes, add the chicken to the sheet pan and half the sauce. Toss everything and spread evenly across the pan again. Roast for another 15 minutes, until chicken is done and veggies are fork tender.
Remove the tray from the oven and toss everything with the remaining sauce.
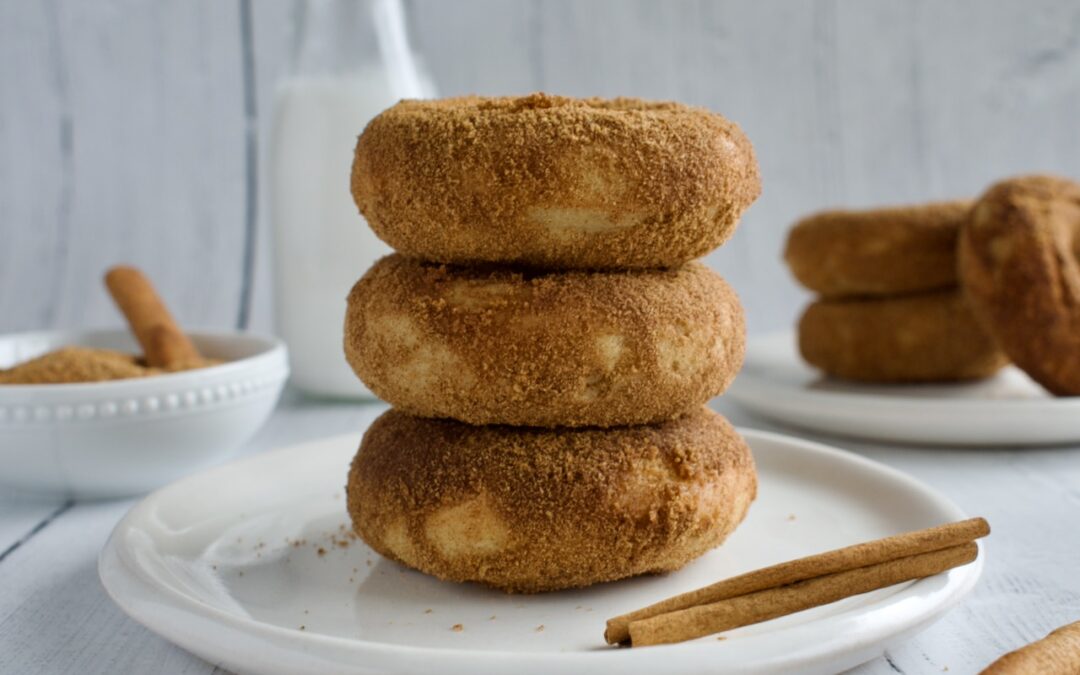
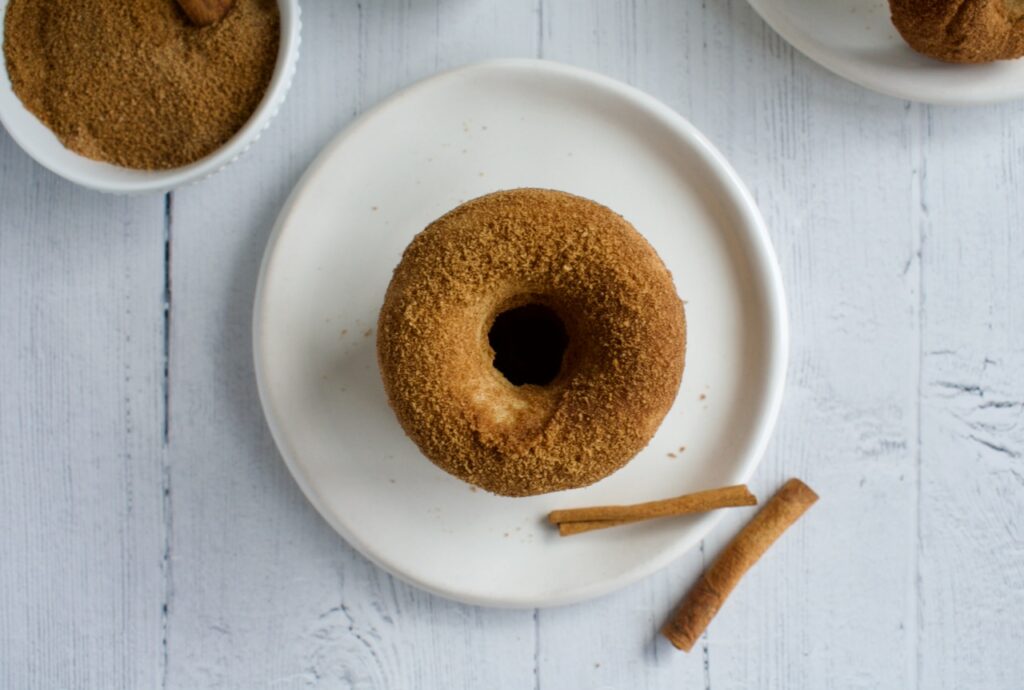
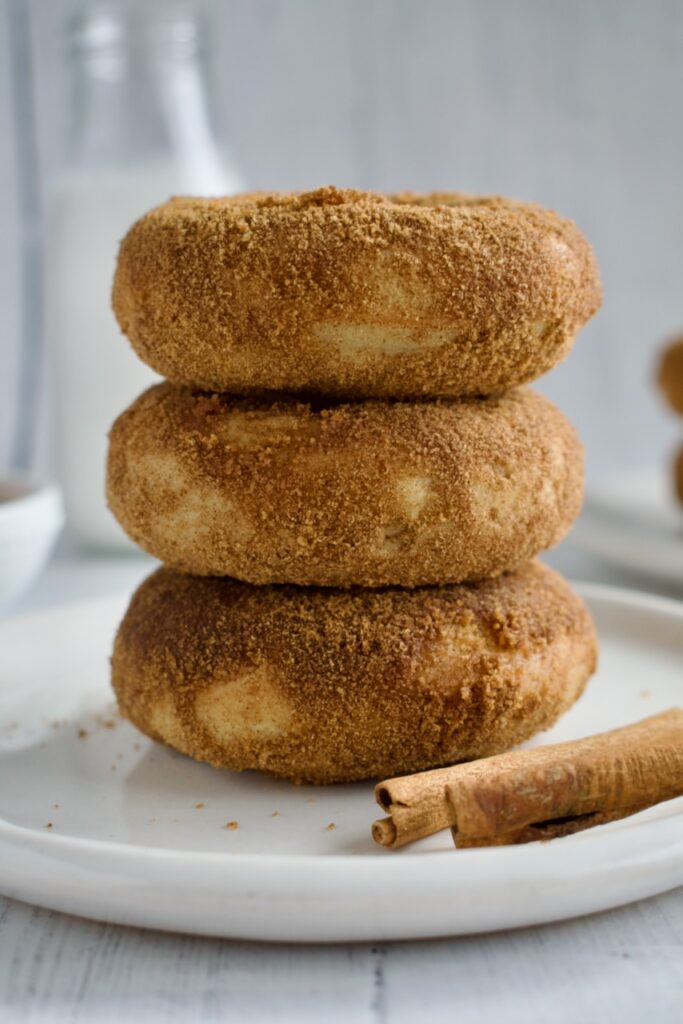
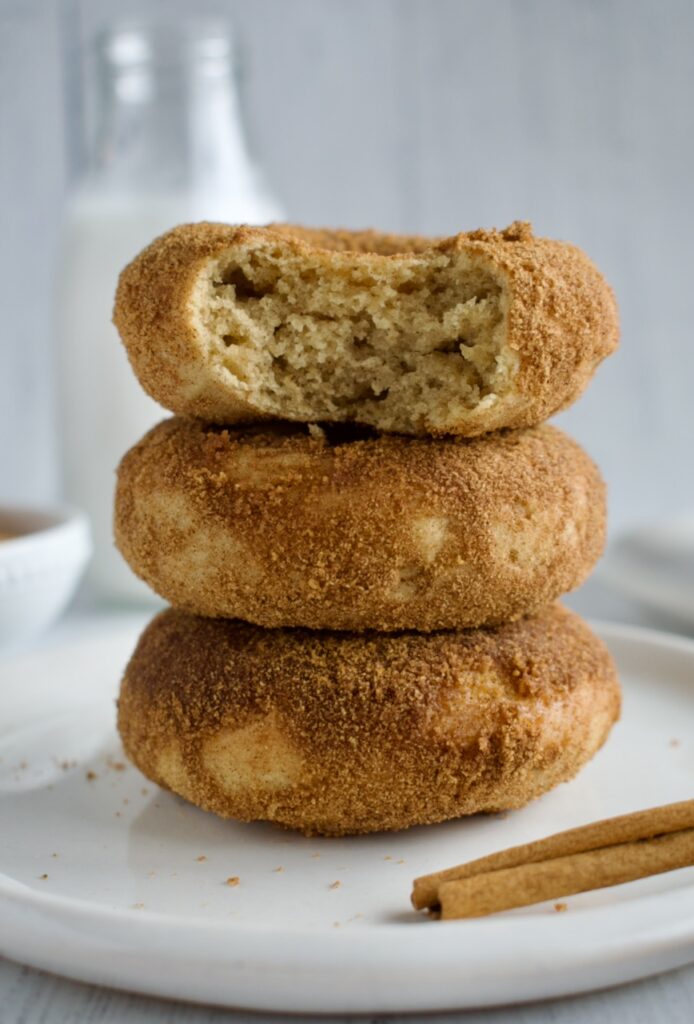
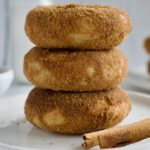
These gluten free donuts are baked and then tossed in a cinnamon sugar coating for pure perfection. Dairy free, refined sugar free, and nut free, how can you go wrong?
gluten free cinnamon sugar donut
I have an important question for you- are you a fried donut person or baked donut person? Let me know in the comments! I’m partial to baked donuts because, well, fried foods can be intense. Also, making baked donuts at home is so much easier. I like that baked donuts are a little denser too.
These gluten free baked donuts are allergy friendly, free of dairy, nuts, and refined sugar. Plus, they are lower sugar than any donut you’d find in the store. My mission is always to create lower sugar baked goods. You don’t need all the sugar usually called for in recipes to make treats taste good! Why not enjoy something delicious without the blood sugar crash? Of course, there is a science to baking with sugar and higher amounts are needed in certain recipes.
gluten free cinnamon sugar donut
Cinnamon Sugar Donuts
Ingredients:
gluten free flour
tigernut or almond flour: this is my favorite way to decrease the amount of sugar needed. Both of these flours are naturally sweet, so you can get away with less added sugar.
cinnamon
baking powder
salt
olive oil: yes, healthy fats in donuts!
maple syrup: there is only 1/4 cup of maple syrup in these donuts making them lower GI.
yogurt: you can use a vegan yogurt like I did (my favorite is Forager) or Greek yogurt if you can have dairy
egg
vanilla
coconut sugar: this unrefined sugar is used to toss the donuts in!
coconut oil
Instructions:
Making donuts is actually super easy. You just combine all the ingredients, pipe the batter into a donut pan, and bake. When the donuts are done, you’ll toss them in cinnamon sugar and try not to eat them all in one sitting.
Sift together the flours and then whisk in the cinnamon, salt, and baking powder.
In a separate bowl, beat together the oil, maple syrup, yogurt, egg, and vanilla extract.
Add the dry to the wet and stir to combine.
Grease a donut pan then pipe the batter into the pan. You will get 8-10 donuts (so you may have to bake in batches if you only have one pan, or you can make donut holes with the remaining batter).
Bake the donuts for 14-16 minutes until a toothpick comes out clean. Let cool for 10 minutes in the pan before flipping the donuts out.
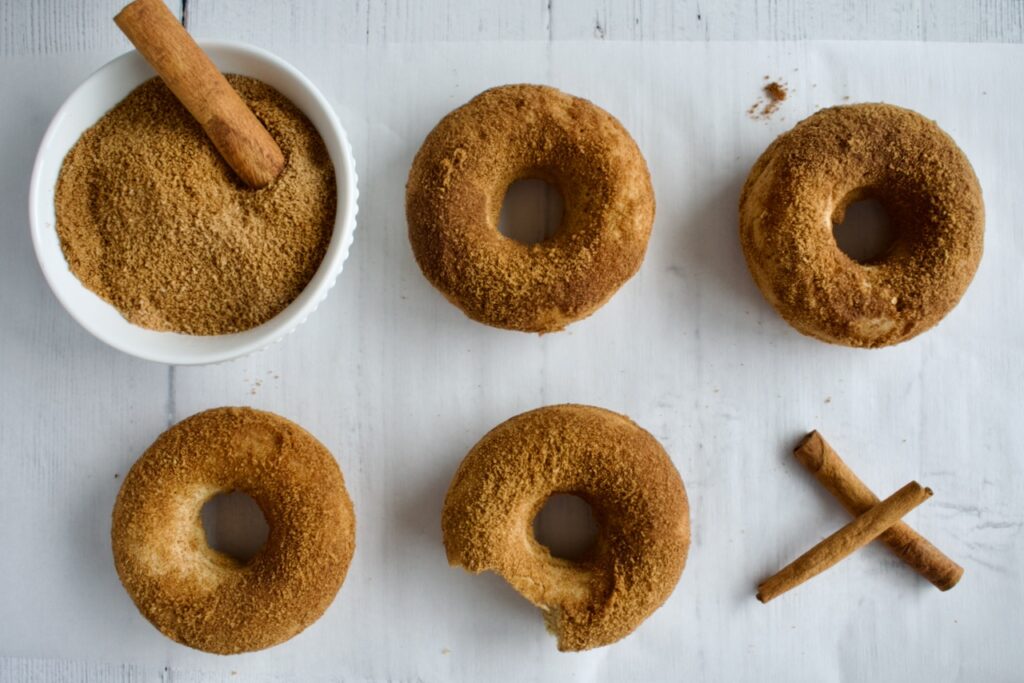
While donuts cool, combine your sugar and cinnamon in a ziplock bag. The amount of cinnamon really depends on your preference. I like to start with 1 tsp and add if desired.
When donuts are cool enough to handle, brush one with the melted coconut oil then place it in the bag of cinnamon sugar. Close the bag and toss the donut until fully coated. Remove to a wire rack and repeat with the remaining donuts.
These donuts taste best fresh, but will last for a couple days at room temperature.
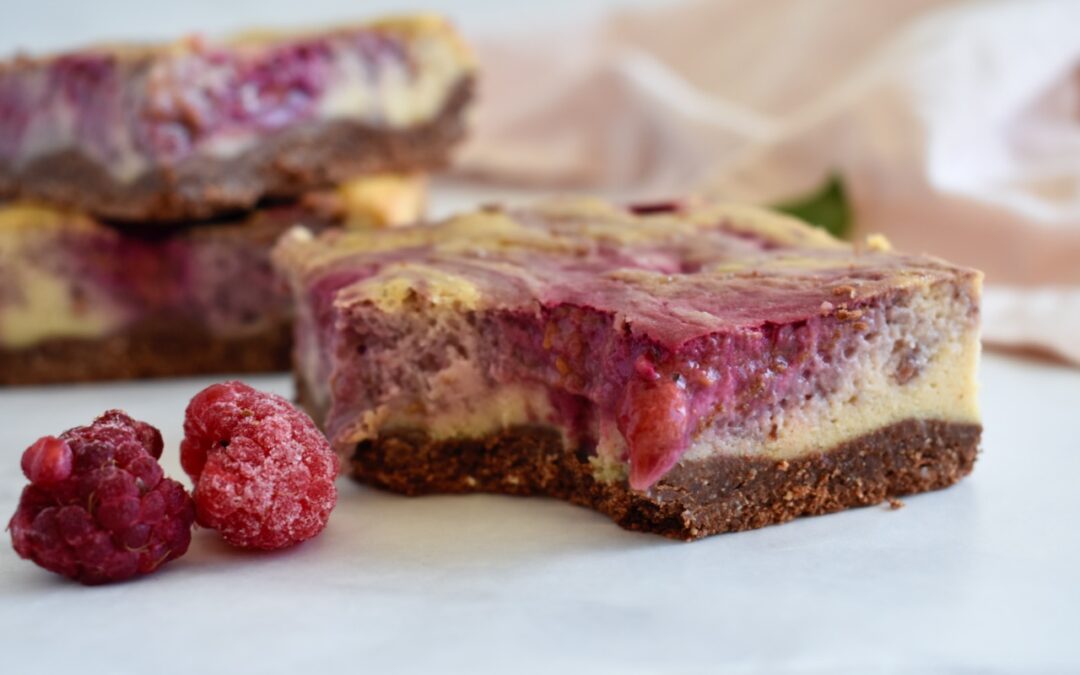
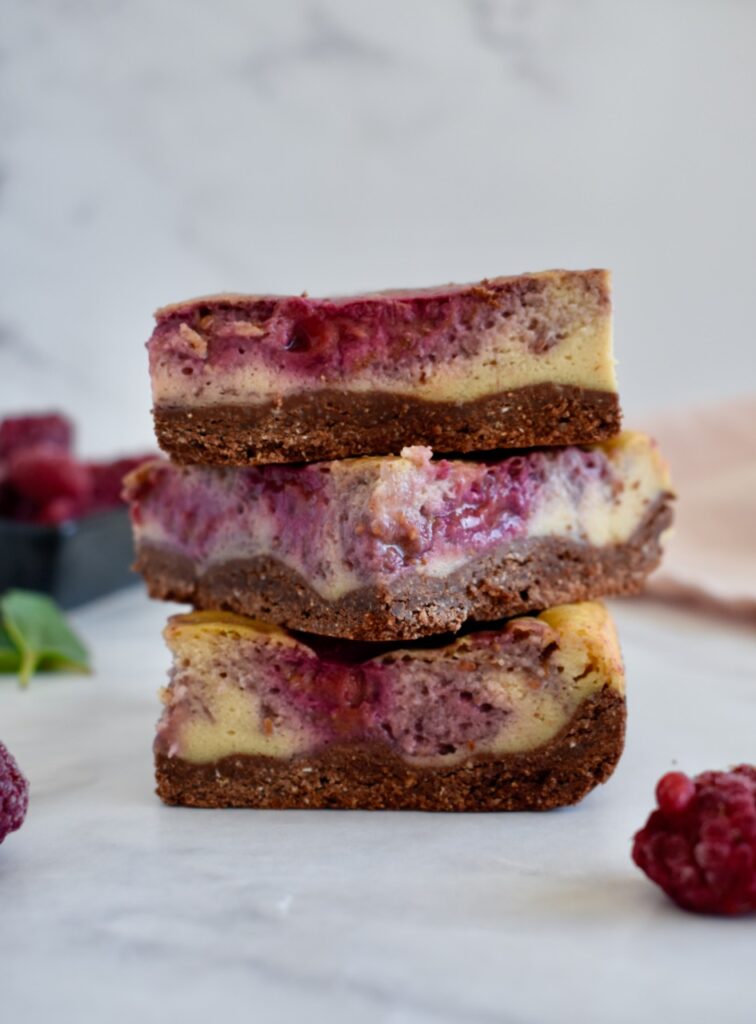
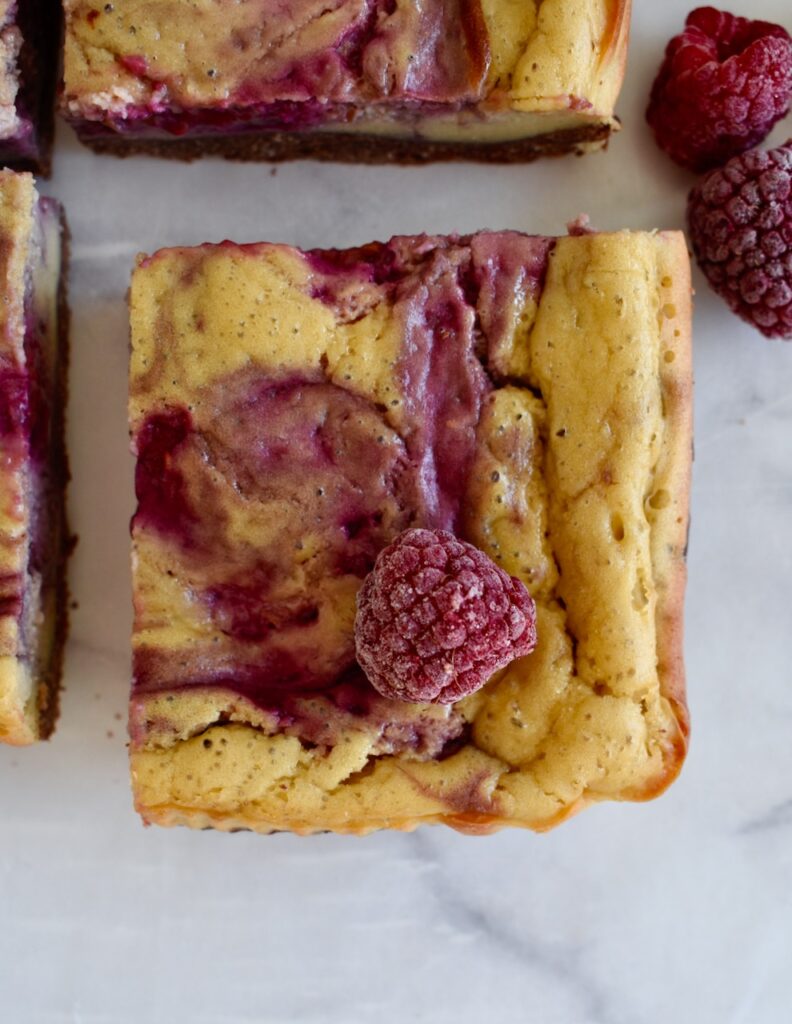
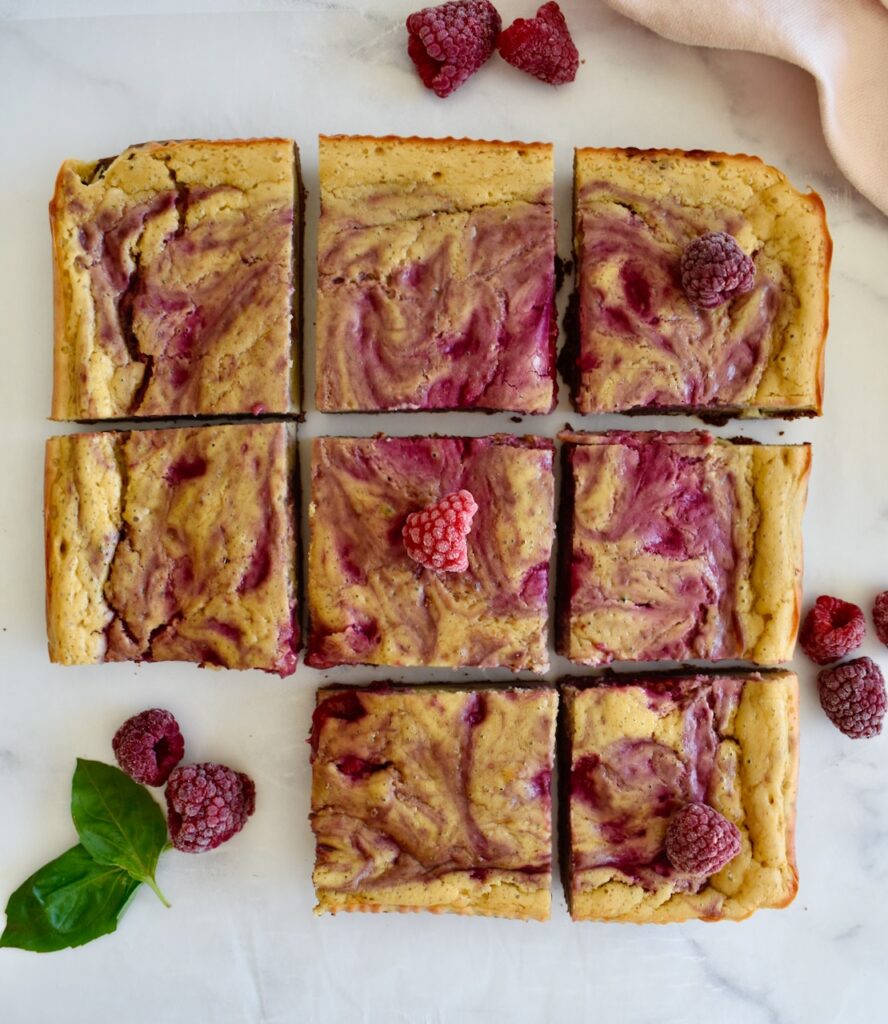
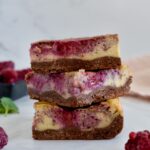
Creamy cheesecake, tangy raspberries, and sweet chocolate make these raspberry cheesecake bars the ultimate sweet treat! This dairy free cheesecake is gluten free, refined sugar free, and can be made nut free & high protein.
dairy free raspberry cheesecake bars
Honestly, who doesn’t like cheesecake? I don’t think I’ve ever met someone who doesn’t! Even though I can’t eat dairy, that doesn’t stop me from making delicious, allergy friendly cheesecakes at home. My cheesecakes are also 10x easier, nut free, and higher in protein.
What’s my secret? I use dairy free yogurt as the base instead of cream cheese. Maybe you’ll tell me this isn’t really cheesecake then, but it still tastes pretty darn good! This keeps the recipe nut free as most dairy free cream cheese brands utilize nuts as the base.
I like to make the easy, healthy, lazy girl version of cheesecake which is where the use of yogurt and protein powder come in. This amps up the nutritional value, doesn’t require the use of any special water bath for baking, and keeps this recipe completely allergy friendly.
gluten free raspberry cheesecake bars with brownie crust
Ingredient Notes
Crust: The gluten free brownie crust is super easy to make. It is a combination of oat flour, tigernut or almond flour, and cocoa powder for the dry ingredients. You mix in some coconut oil and maple syrup and there you have it.
Filling: The filling for this cheesecake is composed of yogurt, maple syrup, eggs, pea protein, and tapioca starch.
Yogurt: I use a vegan yogurt in this recipe. If you use a coconut yogurt, that keeps this dairy free cheesecake completely nut free too! But you can also use Greek yogurt for a higher protein option.
Pea Protein: Yes, I add protein powder to my cheesecake! This is my secret to a thicker batter and higher protein, healthier dessert. Pea protein acts as a flour in baking, so it’s the perfect option. I have not tested any other proteins. If you use a whey based protein, I’d suggest adding 1-2 Tbsp of gluten free flour. If you do not have pea protein available, you can substitute this with 2 Tbsp of a 1:1 gluten free flour mix.
This is my favorite Pea Protein that has no weird additives or sugars. You can use code LEMONSNLYME20 for 20% off your order!
Eggs: I have not tested a vegan version of this recipe.
Raspberry Swirl: The raspberry swirl is super easy to make! All you do is combine raspberries and coconut sugar. You can feel free to use whatever sugar you want, but coconut sugar keeps this recipe refined sugar free. I prefer not to put the raspberry puree through a sieve as I don’t mind the seeds and prefer the extra fiber ;), but you can always do that if you want to.
Raspberry Swirl Cheesecake Bars with Brownie Crust
These healthier dairy free and gluten free cheesecake bars are the ultimate dessert! Creamy cheesecake, tangy raspberry, and sweet chocolate make this a crowd pleaser treat.
1cupfresh or frozen raspberriesif using frozen, make sure to thaw first
1tspcoconut sugar
Instructions
Preheat oven to 350F.
Line a 9×9 inch baking dish with parchment paper and set aside.
Whisk dry ingredients for the crust together first (flours, cocoa powder, salt). Add the wet ingredients and mix to combine until you have a dough.
Press the crust into the bottom of your baking dish into an even layer. Set aside.
To make the cheesecake filling, combine all ingredients together in a blender and blend until combined. You can also use a hand mixer.
Pour batter over the crust and set aside while you make raspberry swirl.
To make the raspberry swirl, blend together the raspberries and sugar until smooth. You have the option to put the raspberry puree through a sieve so there are no seeds, but I find this step unnecessary.
Place dollops of the raspberry puree over the cheesecake then use a knife or chopstick to swirl the puree through the cheesecake filling until you have a nice, even swirl throughout.
Bake the cheesecake for 50-60 minutes until the edges are just set and the middle seems almost not done, but has a slight give to it. Let the cheesecake cool to room temperature and then place in the fridge for at least 3 hours, preferably overnight.
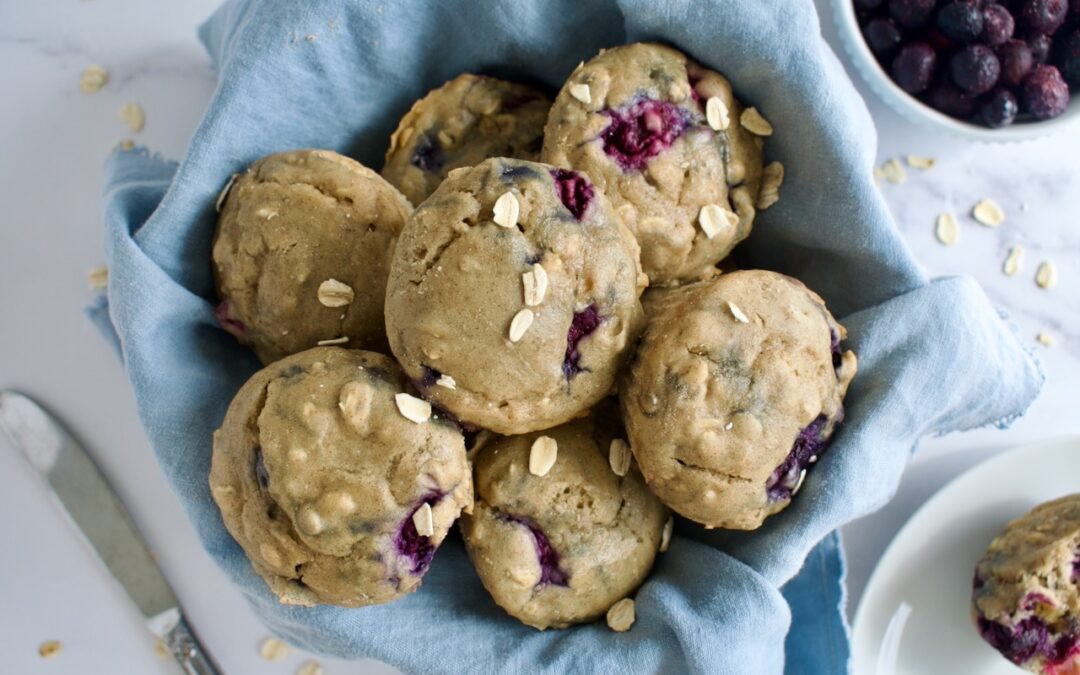
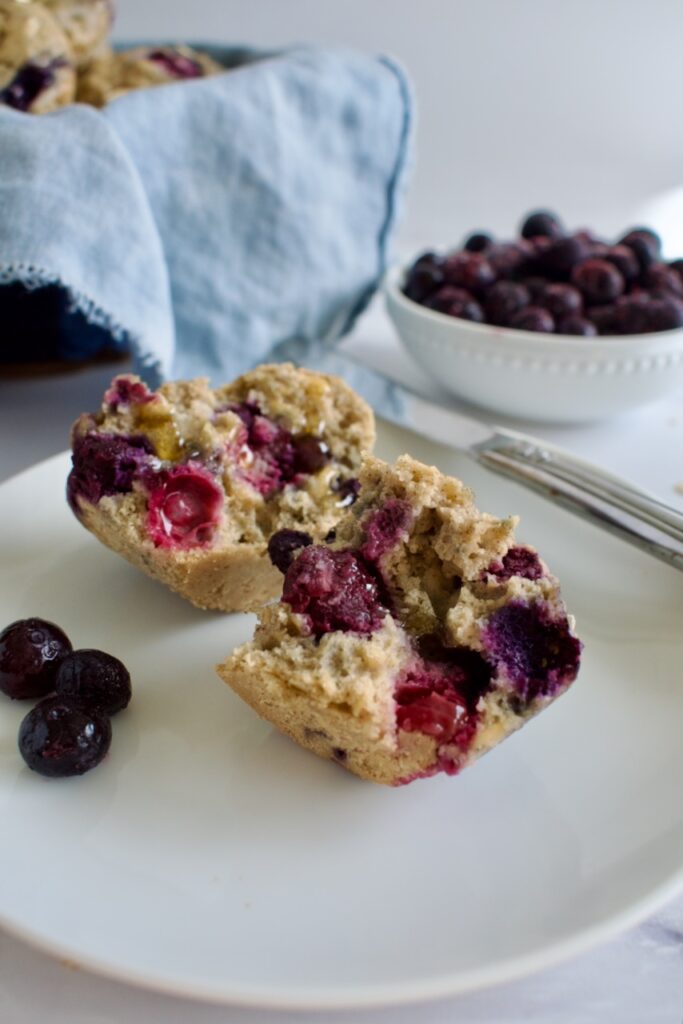
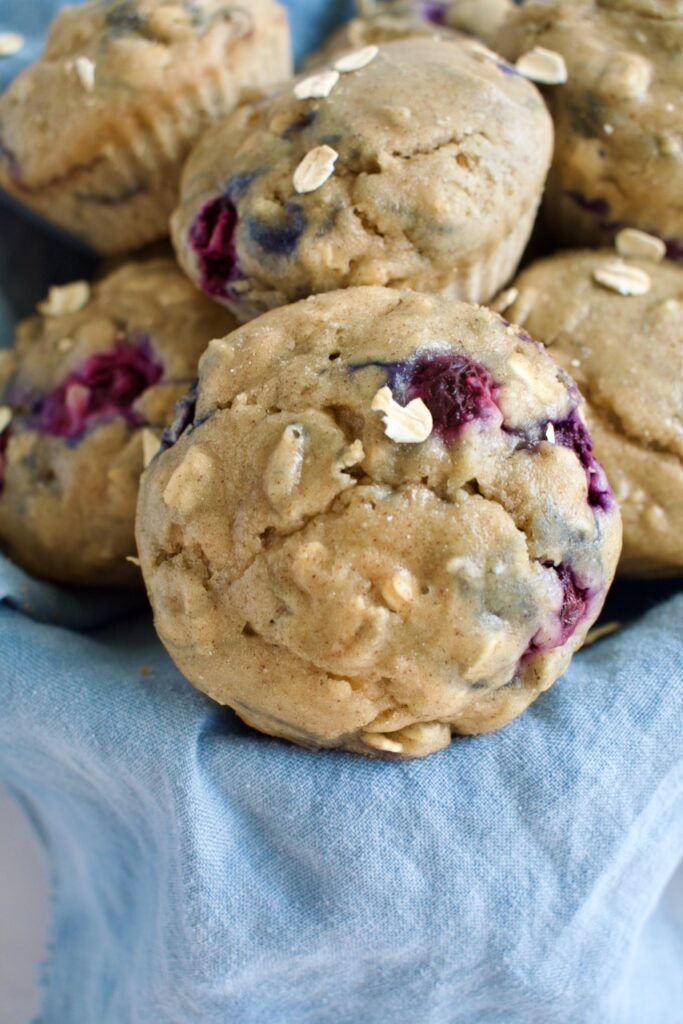
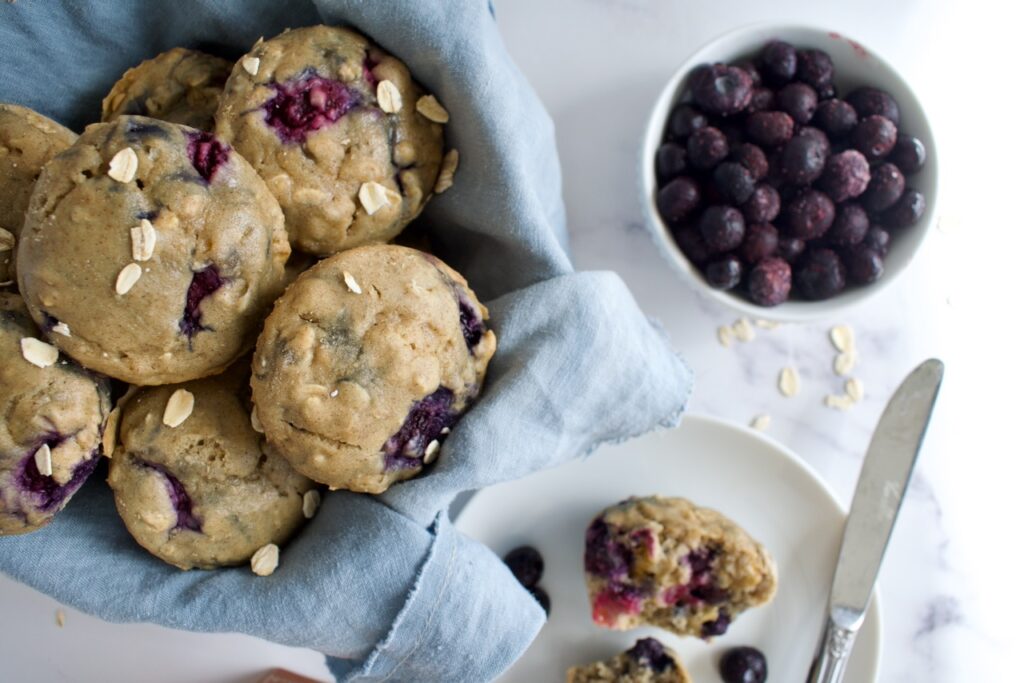
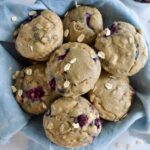
These gluten free blueberry oat muffins are the perfect breakfast muffin- filled with fiber, low sugar, and allergy friendly! These muffins are easy to make and ideal for meal prep.
gluten free blueberry oat muffins
Over this last year, I developed a new found love for oats in all forms (granola, cookies, muffins, etc), so I had to give some oat muffins a try. I don’t like when muffins have too many oats though. It can’t be overbearing! I love these gluten free oat muffins because there is only a 1/2 cup of oats in this recipe and plenty of blueberries.
gluten free blueberry oat muffins
These blueberry muffins are also completely refined sugar free. They are made with maple syrup and only a touch of it. These are the perfect, healthy breakfast muffin as they aren’t sugar loaded, but are packed with fiber from the oats and blueberries, and contain a good heaping of cinnamon. If you want your muffins to be a little sweeter, I suggest sprinkling the tops with coconut or brown sugar before baking or just drizzling your muffin with honey when ready to eat.
gluten free blueberry muffins
How to make gluten free blueberry oat muffins:
First, you’ll whisk together all the dry ingredients. This includes a mix of gluten free flour, tigernut or almond flour, gluten free oats, baking powder, and cinnamon
Second, you’ll beat all the wet ingredients together. This includes eggs, yogurt, maple syrup, oil or butter, and milk. You can use vegan butter and milk to keep this recipe completely dairy free.
Third, you’ll combine the dry with the wet and fold in the blueberries. It’s that simple! Just pop the batter in a muffin tin, bake, cool, eat.
These allergy friendly blueberry muffins are filled with fiber and flavor all while being gluten free, dairy free, and low sugar. These are the perfect, healthy breakfast muffin!
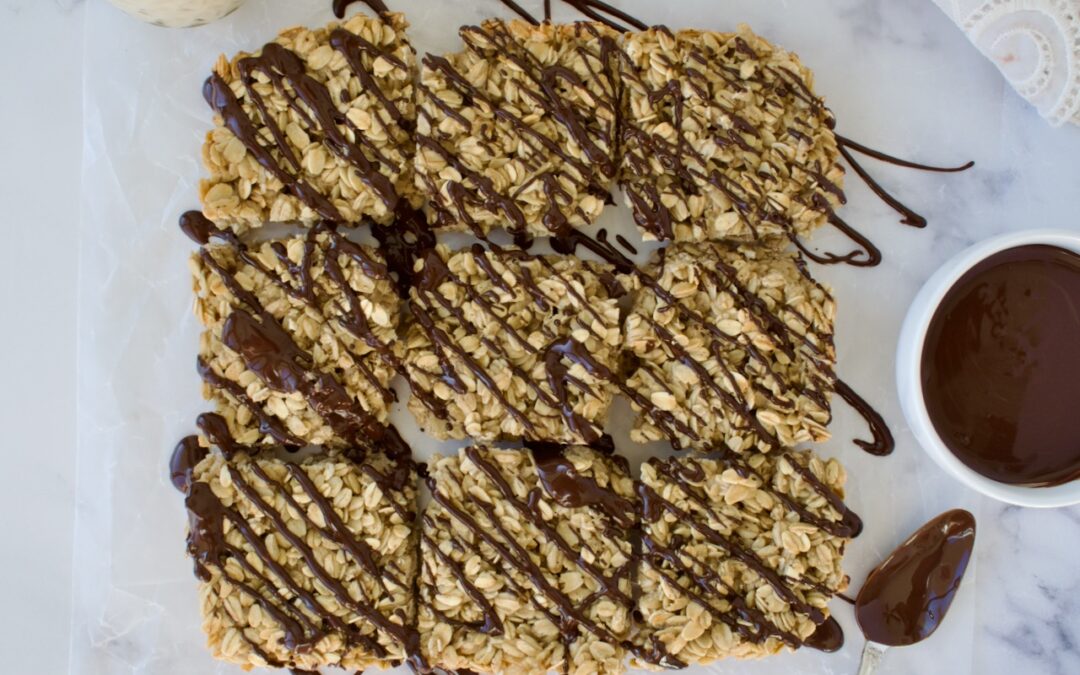
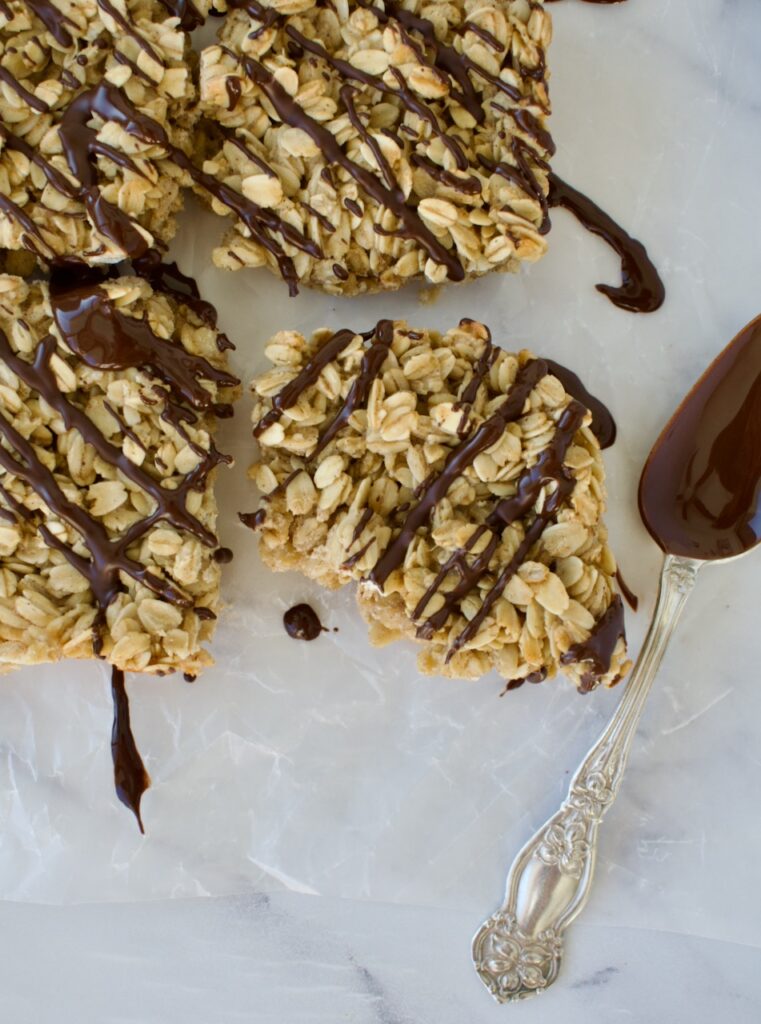
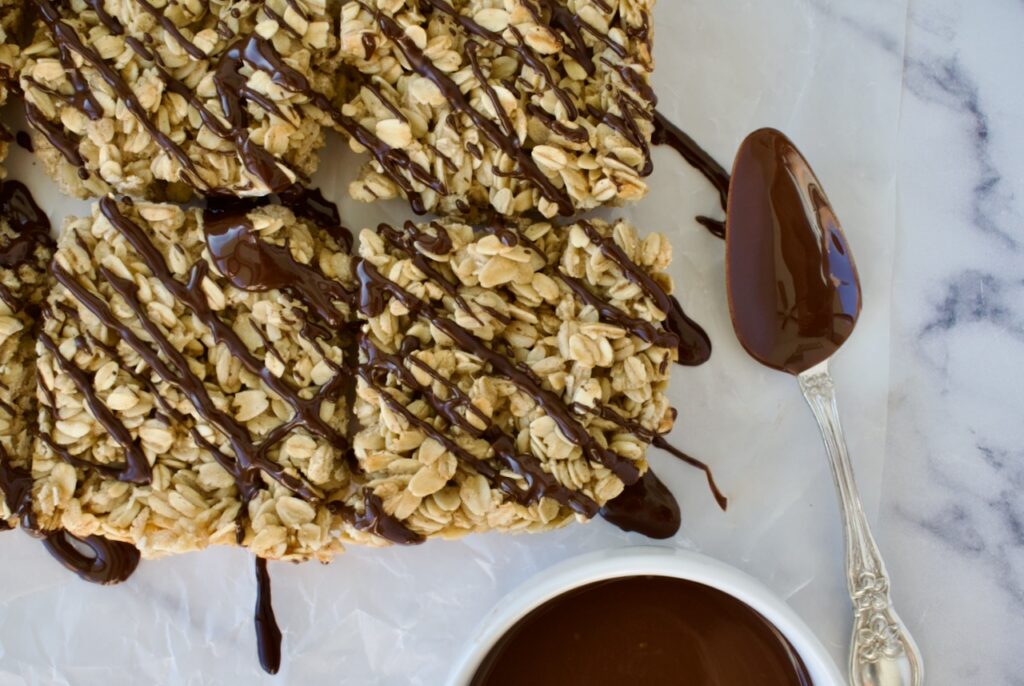
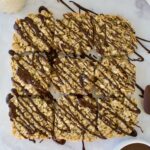
If you’re looking for an easy and healthy snack, then look no further than these gluten free protein oat bars. Made from real ingredients and whole proteins, these oat bars are far cleaner than anything you’d find in the store.
gluten free oat bars
Snacks are my love language and I always have something in my purse for emergencies, but a lot of pre-packaged snacks and bars are filled with fake sugars, weird flavors, and gut-disrupting ingredients. Having an easy, healthy, and high protein snack on hand for that afternoon slump is a must. That’s where these gluten free protein oat bars come in!
These oat bars are easy to whip up, made from real, whole food ingredients, and will last you the week.
protein oat bars
Ingredient Notes
Oats: To keep this recipe gluten free, make sure to use certified gluten free oats.
Protein: These homemade protein bars get their protein content from oats, egg whites, and protein powder. This recipe calls for pea protein as it acts like a flour. My favorite pea protein is from Sprout Living as it has no other added ingredients, flavorings, or sugar alcohols. Use code LEMONSNLYME20 for 20% off your order!
Wet ingredients: A combination of butter, maple syrup, and egg whites is used to hold these bars together. You can use real or vegan butter. I use vegan to keep it dairy free, but either works and adds to the flavor of these oat squares. This recipe uses real maple syrup as it’s better for your gut than a fake sugar substitute. Lastly, we’re keeping that protein content boosted with a few egg whites.
protein oat bars
To top off these homemade oat bars and make them perfect, you can’t skip out on the chocolate drizzle! I mean is it really an enjoyable snack or protein bar if there isn’t some chocolate involved?! You can use whatever your favorite chocolate is, just melt it down with a little coconut oil and then drizzle it over the top of the baked oats.
An easy and healthy snack, these protein oat bars are allergy friendly and made with whole food ingredients. High in protein and topped off with a chocolate drizzle, you can't go wrong with a batch of these for the week!
Add cooled melted butter, maple syrup, egg whites, and vanilla to a large bowl and whisk to combine.
Add the oats, protein powder, and cinnamon to the bowl and mix everything together.
Line a 9×9 inch baking dish with parchment paper.
Pour your oat mixture into the prepared baking dish and spread evenly.
Bake oat bars for 30-35 minutes, until slightly golden. Let cool completely before cutting into 9 squares.
When bars are cooled, melt your chocolate chips and coconut oil together until smooth. Drizzle over the oat bars (or dip them into the chocolate). Place in the fridge until chocolate has set.
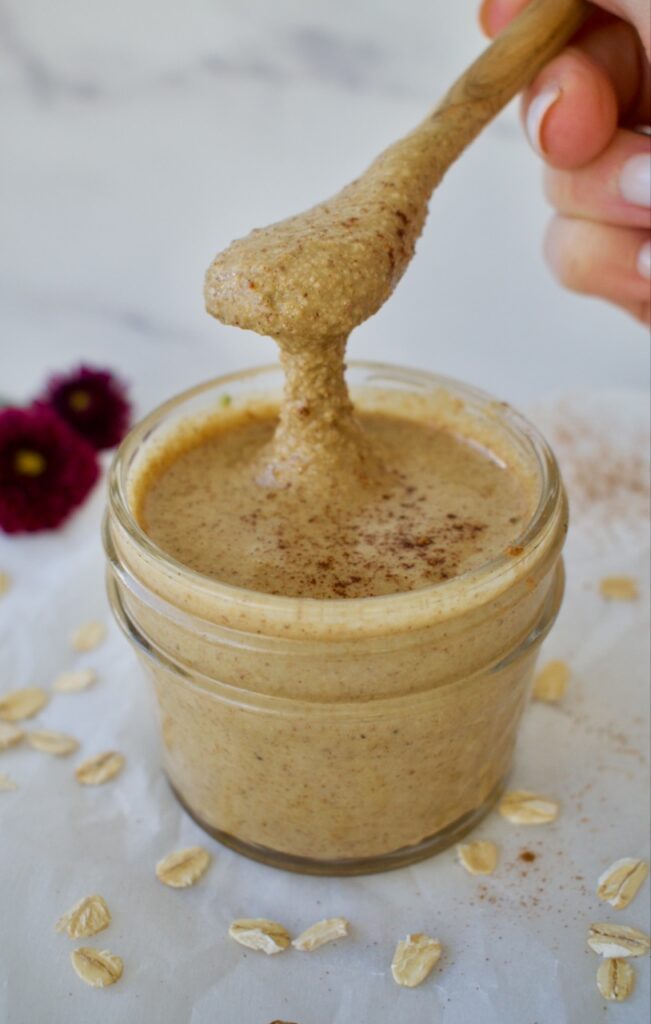
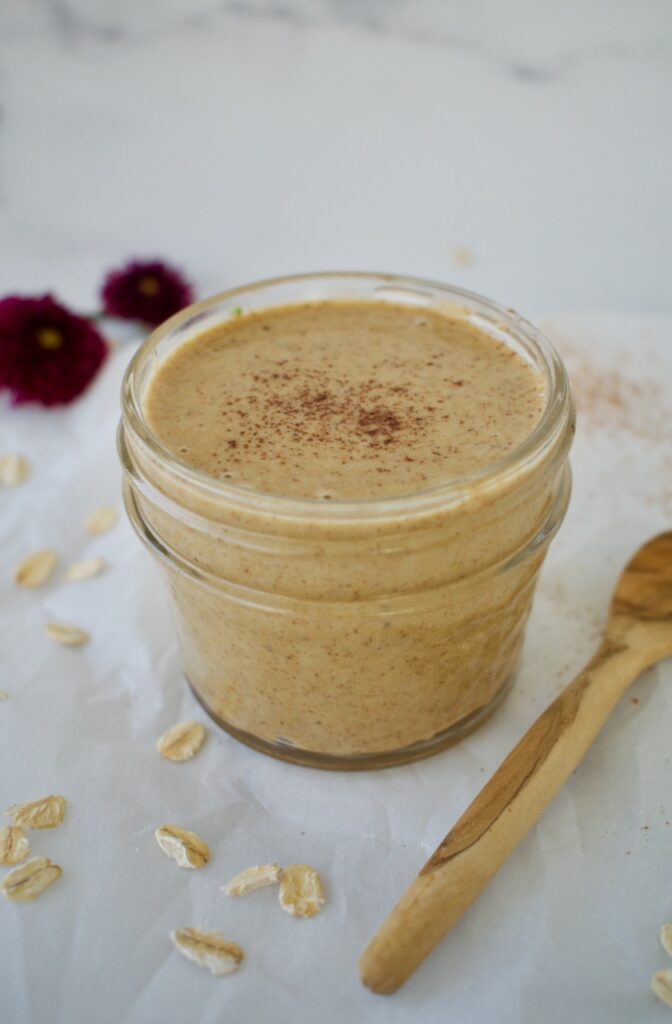
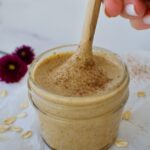
Granola butter is a nut and seed free spread alternative for those with allergies. It’s absolutely delicious and can be used just like peanut butter or almond butter. It’s perfect for baking or on toast!
gluten free granola butter
Have you ever heard of granola butter? It’s like peanut butter or almond butter, but nut and seed free. It’s made completely out of oats! I like to make mine with tigernut flour too (which is a tuber, not a nut) for added flavor, but in the recipe below, I share how to make it both ways.
allergy friendly granola butter
So, what’s in granola butter?
Homemade granola butter is made simply with oats, cinnamon, salt, coconut oil, maple syrup, and vanilla extract.
You’ll start by roasting the oats to add some richer flavor and then blend them with the remaining ingredients for a delicious nut-free spread!
Make sure to use certified gluten free oats to keep this recipe completely gluten free and Celiac safe. Since the recipe utilizes maple syrup as the sweetener, this granola butter is also completely vegan! Allergy friendly spreads are possible and now you don’t have to miss on out a PB&J any longer- just make it a GB&J!
Granola butter is a nut and seed free alternative for those with allergies. This is the perfect allergy friendly spread so you don't have to miss out. Use granola butter in place of things like peanut butter, almond butter, and sunflower seed butter.
2cupsgluten free oatsmake sure they are certified gluten free
1cup Tigernut flour*you can use almond flour or another cup of oats
1tspcinnamon
1/4tspsalt
3/4-1cupmelted coconut oil
1-4Tbspmaple syrup
1tsp vanilla extract
Instructions
Preheat the oven to 350F.
Spread your oats evenly over a large baking pan and roast them for 10 minutes, until just beginning to golden and becoming fragrant.
Let oats cool for 10 minutes before adding to a high speed blender (like a Vitamix) or food processor. Blend oats into a flour.
If using tigernut flour, add the flour, cinnamon, and salt and blend again to combine.
Combine all the wet ingredients together in a measuring cup, starting with 3/4 cup of oil. If using tigernut flour, you will only need 1-2 Tbsp of maple syrup, but if using all oats, you will need 3-4. With the blender or food processor running on low, slowly pour the wet ingredients into the running blender/food processor.
Let the blender/food processor run for 5-10 minutes, stopping occasionally to scrape down the sides, until you have a smooth butter. Taste and adjust as necessary, adding more maple syrup as needed. If you find that the mixture is too dry or thick, add more oil until the desired consistency is reached.
Let the butter cool slightly before transferring to a glass jar. Granola butter can be stored at room temperature and does not need to be refrigerated.
Notes
*I love using tigernut flour in this recipe as it adds some natural sweetness and nutty flavor without nuts!
Hi! I'm Victoria. I was diagnosed with Lyme in 2012 and have been on a healing journey ever since. I love helping others on their road to healing through allergy friendly recipes, exercise, and overall well-being.