Me: “I could eat curry forever! It is soooo good!”
Mom: “You mean you could eat it for the next two weeks straight until you become completely sick of it.”
Me: “No, there are so many options. Green curry, red curry, yellow curry…”
Mom: “Mhm…”
I have a bad habit of becoming obsessed with a food/meal and only eating that until I never want to see that food ever again in my life. But curry? How can you get sick of it? I’m not even a spicy person yet I can’t get enough of it lately. I’ve been on a green curry kick as of late, but every variety of curry is a star in my book.
This recipe calls for coconut milk and I used my Homemade Coconut Mylk. I recently posted my very first video on YouTube and it’s a quick and easy tutorial on how to make your own, chemical/additive/stabilizer-free coconut mylk. First of all, it would mean the world to me if you could head on over and and watch it, like it, and subscribe to my channel. And please let me know what types of videos you would like to see (more recipe tutorials, what I eat videos, anything!). Second of all, I highly recommend giving the recipe a shot because 1) it’s delicious, 2) it’s chemical free unlike the store-bought varieties, and 3) it’s perfect in this recipe!
Vegan Green Curry
Serves 4
Ingredients:
1-2 tbs. fresh grated ginger (depending on how much you like that ginger kick)
2 tbs. green curry paste (will be spicy, reduce if not a huge spicy fan)
1 tbs. coconut aminos
3 large carrots (I used a mix of purple and orange)
2 stalks of broccoli florets, chopped
2 yellow squash, cut into rounds and then cut in half
2 small baby bok choy, chopped into bite sized pieces
1 cup vegetable broth
1 cup homemade coconut milk or canned coconut milk (low fat or full fat, whichever you prefer)
1/4 tsp. turmeric powder
4 green onions, chopped
salt to taste
First things first, prep all your ingredients. Have everything chopped, grated, and ready to go.
Heat 1 tbs. of water over medium-high heat in a large saucepan with high sides. Add the grated ginger and cook for about 1 minute until it becomes fragrant.
Reduce heat to medium and add the green curry paste. Cook for another 1-2 minutes to warm curry and allow it to become fragrant, as well.
Add the carrots and cook for 3 minutes, covered. Add a couple tablespoons of water if the carrots begin to stick. Then add the broccoli, 1/4 cup of vegetable broth, and coconut aminos. Cook for about 3 more minutes, covered, until broccoli and carrots begin to soften. Add yellow squash and cook for another 3-5 minutes until squash begins to soften.
Add the bok choy, remaining veggie broth, coconut milk, turmeric powder, and salt to taste (add about 1/4 tsp at this point).
Stir well. Bring to a slight boil then reduce to simmer, stirring occasionally, and let cook until bok choy softens and all veggies are cooked through (another 5-7 minutes).
Stir in the the green onions and allow them to absorb the flavors before serving. Add more salt if desired.
I hope you all had a wonderful holiday season. I’m not really a holiday person, not since getting sick anyway. I’m glad it’s all over and I can move on with my life.
Like to crackers. Mmm crackers.
If you know me at all, you know that I make green vegetable juice every day. Holy crap, that is a lot of leftover pulp! I was tired of wasting all of that pulp and when I got a dehydrator for Christmas (eeeeeek so much excitement!!!!), I knew exactly what to do. MAKE GREEN JUICE PULP CRACKERS!
If you juice as often as me (or even at all) then this is the perfect recipe so you can recycle that pulp. These babies are crunchy, earthy, and a little salty (which is exactly how I like ’em). They are super easy to make and you can really use any vegetable juice pulp you have (beets, carrots, greens, a mixture).
Green Juice Pulp Crackers
Ingredients:
2 cups green juice pulp, slightly packed
1/2 cup chia seeds
1/4 cup coconut aminos
1 tsp. salt
1/2 tsp. dried basil
1/2 tsp. dried oregano
3/4 cup water
Blend everything together in a blender or food processor. I used my Vitamix. You’ll need to use the tamper to keep everything down and blending. Stop halfway through blending to scrape down sides and make sure everything gets blended.
Mixture should be sticky-wet and don’t worry if it’s not PERFECTlY blended and you still have some stringy bits from the pulp.
Line your dehydrator trays with parchment paper. Spread mixture on sheets evenly, to about 1/4 inch thick (unless you want thicker or thinner crackers… remember, the dough will thin more as it dehydrates). Score crackers to size you want.
Dehydrate at 115 F overnight for about 12 hours. Break apart along scored lines and store in airtight container for up to a week.
Yummy on their own or dipped in hummus or guacamole.
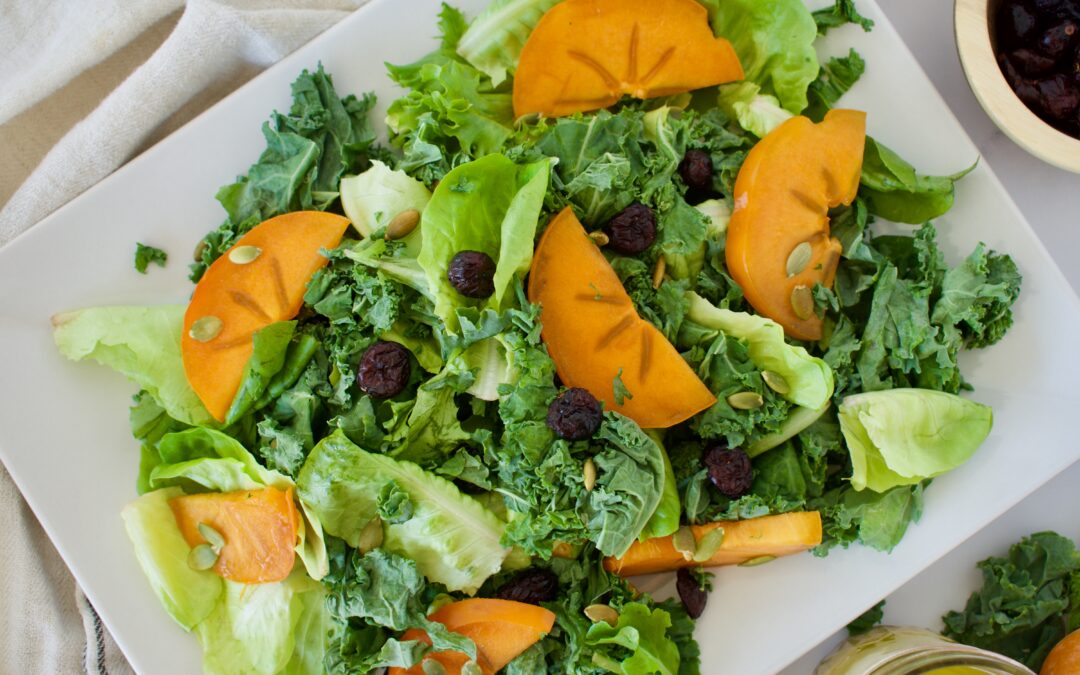
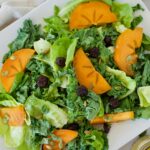
This Kale and Persimmon Salad is a simple, but delicious holiday salad. It highlights one of my favorite seasonal fruits and is a fully gluten free and dairy free recipe.
healthy kale and persimmon salad
This Kale and Persimmon Salad is a family favorite for Thanksgiving. If you’ve never had a persimmon, you need to try one! They are absolutely delicious, but you can only find them a few months out of the year. Persimmons are sweet with just a little tang.
This salad is very easy to make. You combine everything in a bowl, mix the dressing, and serve. The dressing is a simple honey-mustard type dressing with a little bit of tang from apple cider vinegar.
What kind of persimmons to use?
I recommend Fuyu persimmons in general and for this recipe. You want to use ripe persimmons, so they don’t leave your tongue feeling fuzzy.
What to add to this kale and persimmon salad
This is a simple salad, so the added cranberries and pumpkin seeds are important for making this salad less boring. If you can’t have pumpkin seeds, you could try another nut or seed, but I can’t speak to the flavor. The pumpkin seeds pair perfectly with the other flavors in this recipe. If you do try something different, leave a comment and let me know how it went!
If you don’t like cranberries, dried cherries would also be a lovely option in this kale salad.
This simple salad is a Thanksgiving favorite in our American household. It’s a lovely fall salad that takes advantage of the short persimmon season. The sweetness of the persimmons is complimented by the more acidic dressing.
Course Side Dish
Cuisine American
Keyword Easy, fall, Simple, thanksgiving
Servings 6people
Ingredients
Salad
1/2bunch of green kale
1/2bunch of red kale
1/2head of butter lettuce
2-3persimmons, thinly sliced
1small red onion, diced
1/4cupdried cranberriesfruit juice sweetened
1/4cuppumpkin seeds
Dressing
2Tbspapple cider vinegar
1/4cupolive oil
2tspdijon mustard
2Tbspfull fat coconut milk
1Tbsphoney
Instructions
Wash and dry your lettuce. Pull the kale off the stems and chop/tear into bite size pieces. Place your kale in your salad bowl and sprinkle with salt. Massage your kale until the greens begin to darken and soften.
Tear/chop your butter lettuce into bite size pieces and add to the kale. Add the remaining salad ingredients to the bowl.
Combine all your dressing ingredients in a small bowl and whisk until thoroughly combined.
Taste and adjust, sometimes you need a little more mustard or honey
Well, I had planned on getting a few recipes posted BEFORE Thanksgiving. Then I got the flu. And we all know how that goes. So I apologize. But today I’ll be sharing the delicious meal my family ate on Thanksgiving and the recipe for the delicious dessert we had.
I hope you all had a wonderful Thanksgiving… well, to all my American followers. Otherwise, I hope you had a great Thursday ;).
I realize there is a giant turkey in the middle of this table. I might be vegan, but my family is not. Don’t worry, I didn’t touch it.
Roasted Beets with an Orange-Anise Glaze (from Thrive magazine)
Raw Vegan Caramel Apple Cheesecake (recipe below) (Also to die for!)
Now let’s get on to the best part of the meal, DESSERT!
Raw Vegan Caramel Apple Cheesecake
Serves 6-8
*Be sure to read full recipe before beginning to make this cake as it does need to be made ahead. It’s very easy but requires some setting.
Crust:
1/2 cup sprouted and dehydrated buckwheat*
1/4 cup sprouted almonds
1/4 cup sprouted walnuts
1/2 cup shredded coconut
1/2 cup dates, soaked
3 tbs. dried chopped apple
1/2 tsp. cinnamon
1 tsp. vanilla extract
Pinch of salt
*You can just buy buckwheat groats from the store, soak overnight and then dehydrate in your dehydrator or in the oven at a low temperature for several hours. If you don’t care about being fully raw, you can soak them and then dry them in the oven at 250F for about 30-45 minutes.
Combine the first 4 ingredients in the food processor and process until beginning to break down. Add the remaining ingredients and process until a dough-like consistency forms.
Press the dough into the bottom of a springform pan and up the side by 1/2 inch. I line the pan with parchment paper, but that is optional.
Place crust in the freezer while you make the filling.
Filling:
2 cups of cashews, soaked for at least 4 hours
1/2 cup coconut cream from the top of a can of full fat coconut milk that has been refrigerated
2 gala apples, peeled
1 tbs. lemon juice
1 vanilla bean
1/4 cup maple syrup
4 tbs. coconut oil
1 tsp. cinnamon
Process your cashews first (in food processor or high speed blender) until the break down and begin to smooth out. Add the remaining ingredients and process until completely smooth and creamy. Taste test. Of course.
Remove crust from freezer and pour the filling on top. Smooth out. Return to freezer for at least 2 hours. You can make this ahead and keep in the freezer until the day of. Let thaw in refrigerator for 2-4 hours before making the topping and serving.
Topping:
1 fresh apple (gala, honey crisp, or pink lady)
1/4 cup dried apple (if freeze dried, soak in warm water first to soften)
Chop all apple into bite size pieces.
If you don’t mind it being not 100% raw, you can sauté the apples in a little coconut oil until soft.
Caramel:
1/2 cup dates, soaked
1 tbs. maple syrup
1 heaping tbs. almond butter
1 tsp. vanilla extract
Pinch of salt
2-4 tbs. coconut cream from the top of the coconut milk can
1/4 cup water
Combine all caramel ingredients in food processor using only 2 tbs of the coconut cream to start and NONE of the water. Process until smooth and silky. You’ll want to taste at this point and see if it is the caramel flavor you desire. Adding more coconut milk increases silkiness.
You want your caramel to be a pourable consistency (not thick), add water slowly as necessary to reach desired consistency.
GET YOUR CHEESECAKE OUT! Remove the springform bottom from the edges and place cake on a serving dish (with bottom still attached). Decorate the top with your apple pieces and then using a spoon, pastry bag, or plastic bag with a hole cut out, drizzle the caramel over the top.
I apologize for my messy presentation, we all just wanted to eat it last night! 🙂
Again, I hope you all have had a wonderful holiday and are enjoying your post T-day bellies ;). The holiday season has officially begun!
I never liked salt and vinegar chips… I thought they were disgusting, I hated vinegar. And the vinegar flavor in those chips was way too strong. I was always the odd ball out because my friends were obsessed with them. Actually, I still hate salt and vinegar chips. But for some reason these coconut chips taste awesome to me. Perhaps it is because I use apple cider vinegar rather then white vinegar. And you can adjust the amount of vinegar you use to your vinegar-loving likeness.
These are vegan and can easily be made raw vegan by using a dehydrator instead of the oven. Basically, they can fit every diet unless you are allergic to coconut. If you are, I’m so so sorry. These are also the simplest and easiest “chips” ever and now you have no excuse for eating the crap chips from the grocery store when these are 3 ingredients (yes, you read that right) and take 10 minutes total!
Salt & Vinegar Coconut Chips
Makes 3 cups
Ingredients
3 cups of coconut chips/flakes (not the finely shredded variety, the thicker cut version)
3-5 tablespoons apple cider vinegar (depending on how strong you want the flavor)
1/4 teaspoon salt
Preheat oven to 350 F.
Combine everything in bowl, making sure all coconut chips are thoroughly covered with ACV. Spread mixture out onto a baking sheet in one even layer.
Bake for about 7 minutes, until flakes are slightly browned and crunchy. Check on chips regularly to ensure they don’t burn (every oven is different and coconut can go from white to burnt black reallll quick) and stir mixture half way through.
Let cool and then get your snack on!
I know there are a lot of cashew milk recipes out there but there isn’t one on my blog :). I recently posted the picture below on my Instagram “> and had some feedback for the recipe. So, I decided to post the recipe on my blog as easy access for you all. I’ve recently become obsessed with making homemade nut milks because 1) It’s super easy 2) They are so delicious and creamy 3) There aren’t all those nasty, unhealthy additives like in store bought varieties 4) You can make all sorts of flavors!
So let’s get to it. Homemade milks allow you to adjust flavoring and sweetness to your liking so take all the flavoring ingredients I post below with a grain of salt, adjust according to your lovely taste buds!
Homemade Cashew Milk
Makes about 6-8 cups
Ingredients
2 cups organic, raw cashews
4-6 cups of water (less for thicker and creamier milk, more for a thinner milk)
1 teaspoon vanilla extract
1/4-1/2 teaspoon ground cinnamon
3 dates
Soak your cashews for at least four hours or up to overnight in filtered water (store soaking cashews in fridge). Drain and rinse thoroughly.
Place cashews and all remaining ingredients in a high speed blender (I use a Vitamix). Blend on high for 1-2 minutes until everything is well blended, smooth, and creamy.
Strain milk through a fine mesh strainer or nut milk bag (I’ve found that cashew milk doesn’t create much pulp compared to, say, almond).
Store in glass mason jars in the fridge for up to 1 week.
Hi! I'm Victoria. I was diagnosed with Lyme in 2012 and have been on a healing journey ever since. I love helping others on their road to healing through allergy friendly recipes, exercise, and overall well-being.