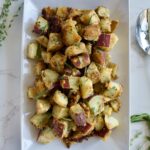
This is the best way to cook Japanese sweet potatoes! These crispy sweet and salty, herby and buttery Japanese sweet potatoes will become a staple recipe in your household.
skillet rosemary japanese sweet potatoes
Japanese sweet potatoes are by far my favorite sweet potato variety. I use them in so many ways and for so many dishes. Did you know that you can even mash them and mix them with flour to create a dough for baking?! This recipe, though, is my favorite savory way to make Japanese sweet potatoes.
This sweet potato side dish is completely gluten free, Paleo, vegan, and autoimmune paleo making it the perfect allergy friendly side dish that everyone can enjoy! It’s the perfect dish to feed the family, make for a dinner party, or bring to a get together.
skillet herbed japanese sweet potatoes
How to make skillet herbed Japanese sweet potatoes
Ingredients
Japanese sweet potatoes
Garlic infused olive oil
Butter, vegan butter, or coconut oil
Fresh rosemary
Fresh thyme
Salt preferably
Coconut aminos
Instructions
First, chop your sweet potatoes into cubes.
Steam sweet potatoes for ~10 minutes until almost done, but not fully cooked through.
Add your oil and butter to a large skillet over medium high heat until butter/coconut oil is melted. Add the sweet potatoes in an even layer. Cook for 5-7 minutes until one side is golden, then mix and cook 5-7 minutes more per side until potatoes are getting golden and crispy on all sides.
skillet japanese sweet potatoes
Do I have to use Japanese sweet potatoes?
This recipe tastes best with Japanese sweet potatoes and is designed around the flavor profile of them, but you can use white sweet potatoes, golden potatoes, or fingerling potatoes. I do not suggest using orange sweet potatoes or yams.
Where can I get garlic infused olive oil? Do I have to use that?
Most olive oil stores carry garlic infused olive oil. It’s a great low FODMAP option to still add flavor to recipes. I don’t tolerate eating garlic, so I use this olive oil instead. If you can’t access it or can eat garlic, you can just use regular olive oil and add a few minced cloves of garlic.
Fresh or dried herbs?
This recipe calls for fresh thyme and rosemary which provide a lot of flavor. I have made this recipe with dried herbs and it still tastes great. You may just want to increase the amount to 2 tsp of each!
These herbed Japanese sweet potatoes are salty and sweet, buttery and crispy. Completely paleo, vegan, and gluten free, this easy side dish is super addicting and the best way to make savory Japanese sweet potatoes.
Steam sweet potatoes for ~10 minutes until almost done, but not fully cooked through.
Add your oil and butter to a large skillet over medium high heat until butter/coconut oil is melted. Add the sweet potatoes in an even layer. Cook for 5-7 minutes until one side is golden, then mix and cook 5-7 minutes more per side until potatoes are getting golden and crispy on all sides.
Add the herbs, salt, and aminos. Mix and cook another 5 minutes.
Serve immediately.
Notes
*or 2 tbsp olive oil and maybe 1-2 garlic cloves minced.**I have made this with dried herbs before too and it works!
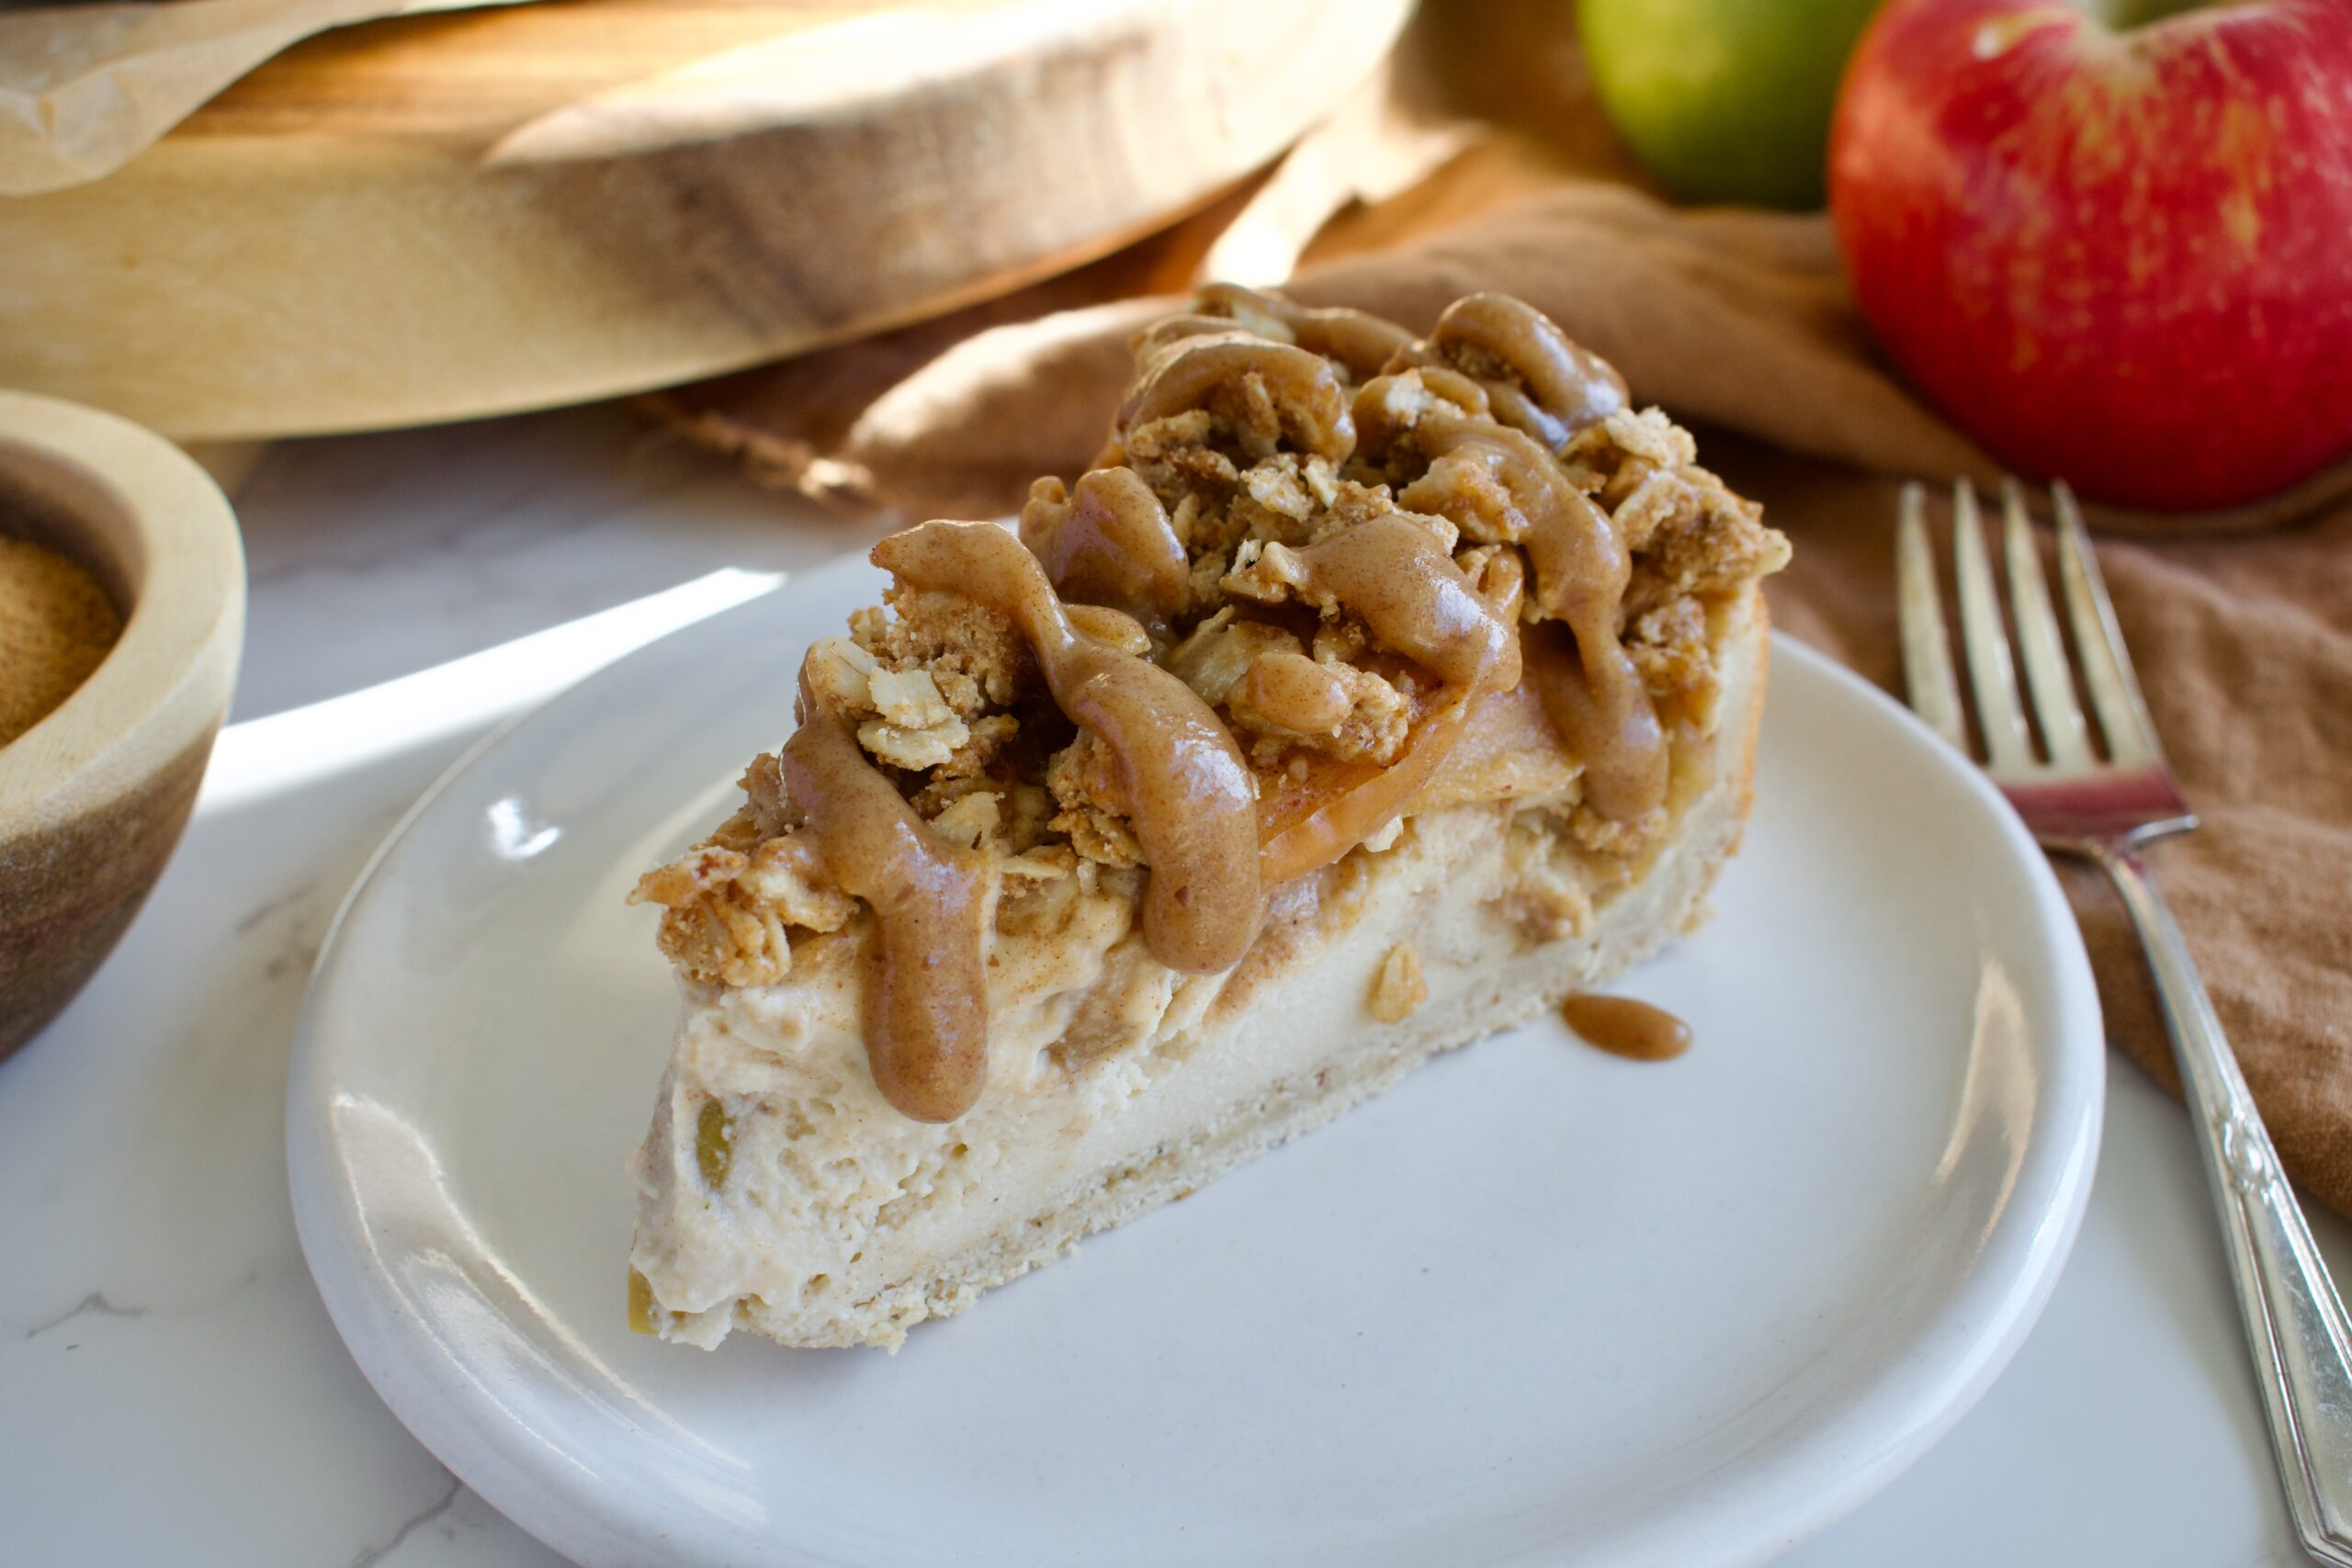
You’ll never guess that this decadent Apple Crumble Cheesecake is a fraction of the sugar and completely gluten free and dairy free!
gluten free and dairy free caramel apple crumble cheesecake
I’ve been on a cheesecake kick this year and a crumble cheesecake cake at that. I knew I had to make a fall variation with some of my favorite flavors- crumble, caramel, and apples! What is more fall than that?! The best part about this apple crumble cheesecake is that it is completely gluten free, dairy free, and refined sugar free. PLUS it is half the sugar a traditional cheesecake of this type would be (and a fraction of the fat!).
Although this healthier dairy free cheesecake does have a number of components and takes some time to make, it’s not super complicated and is a beautiful (and delicious) center piece for a dinner party or holiday dinner. This cheesecake would make an excellent Thanksgiving dessert!
gluten free and dairy free caramel apple crumble cheesecake
Can I make this apple crumble cheesecake ahead of time?
You will need to make this cheesecake 24 hours before you are ready to serve as it does need to set in the fridge overnight. I don’t suggest making it much farther out than that. The crumble will get soggy if it sits for too long. This certainly the type of dessert that is served best fresh.
You’ll want to add the caramel when ready to serve and not earlier as that will contribute to softening the crumble topping.
Can I make this gluten free cheesecake vegan?
This cheesecake can be made dairy free by using vegan cream cheese and yogurt, but I have not tested a vegan version. The eggs are pretty paramount to this cheesecake recipe.
Where can I get apple butter?
Apple butter is commonly found at farmer’s markets in the fall, but you should also be able to get it at a health food store. If are in Colorado, I highly suggest Not Bad Cooks. My friend Ash makes incredible sauces, including apple butter.
What Caramel should I use?
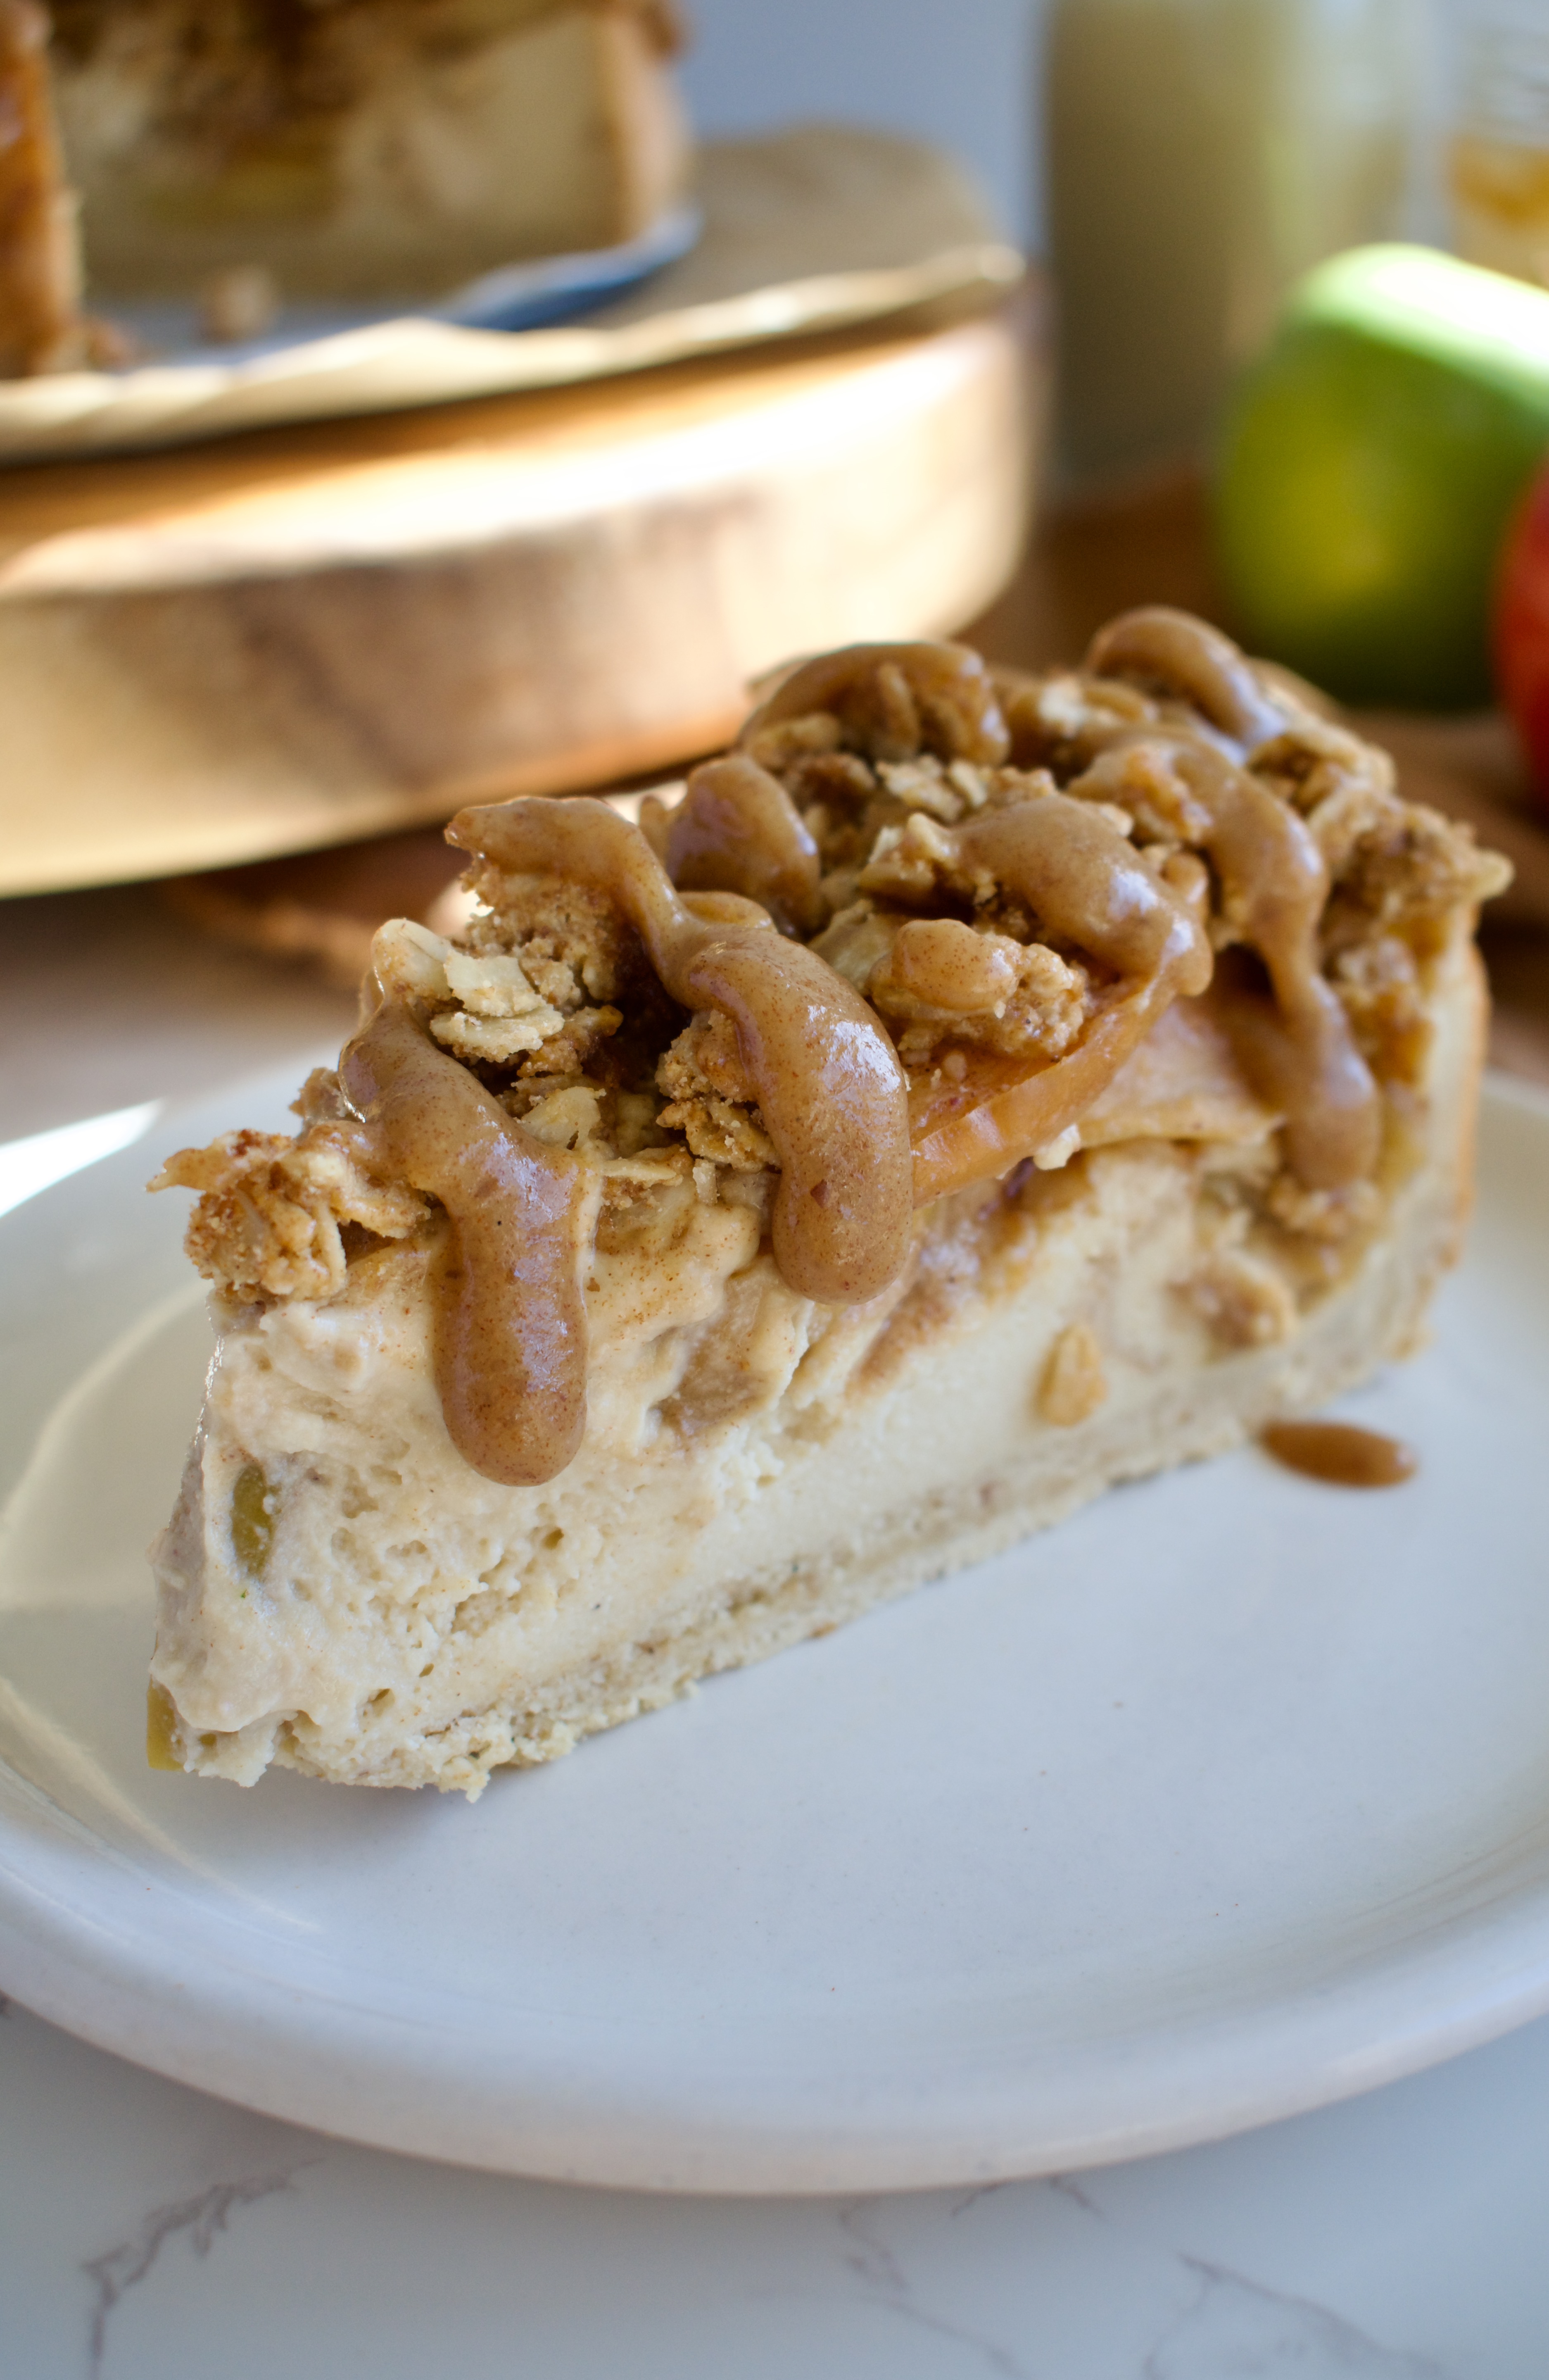
The top of this apple crumble cheesecake is drizzled in caramel. I make a homemade date caramel that is super easy! That is my favorite and can be made up to 3 days in advance. But you can also use your favorite caramel recipe or a store-bought, jarred variety for convenience.
gluten free and dairy free caramel apple crumble cheesecake
A decadent fall cheesecake that is completely gluten free, dairy free, and refined sugar free. Made with healthier ingredients, this Caramel Apple Crumble Cheesecake is an explosion of fall flavors in your mouth!
Peel, core, and thinly slice the apples (1/8-1/4 inch thick). Combine the apples and remaining ingredients in a pot and cook on medium-low for about 10 minutes until they have softened. Set aside to cool while you make the rest of the cheesecake.
Crust
Preheat oven to 350F.
Line a springform pan with parchment paper.
Whisk together the gluten free flour and tigernut flour then add the oil and maple syrup and mix to combine until you have a crumbly dough that holds together.
Press the crust evenly into the bottom of the springform pan and up the sides slightly to cover the crease.
Bake crust for 10 minutes.
Crumble
While crust is baking, make the crumble topping.
Combine the oats, flour, cinnamon, and coconut sugar together in a bowl.
Add the oil and syrup and mix until you have a crumble that holds together when pinched. Set aside.
Cheesecake
Beat together the cream cheese and yogurt until smooth.
Add the flours, maple syrup, and vanilla and beat on medium speed to combine.
Add your eggs one at a time, beating to incorporate after each addition.
When the crust is ready, pour half the filling over the crust then take half of the apple butter and dollop teaspoon sized amounts around the filling. Pour the rest of the filling evenly over the cheesecake and repeat the dollop process with the remaining apple butter. Use a chopstick or knife to swirl the apple butter into the cheesecake.
Evenly lay the cooked apples over the top of the cheesecake.
Crumble the oat topping evenly over the apples.
When ready to bake, boil 2 cups of water and pour into a glass baking dish or onto a baking sheet on the bottom rack of the oven.
Place the cheesecake on a baking sheet on the middle rack and bake for 70-80 minutes, until edges are set and middle is still slightly jiggly (it will seem not quite done, but don't over bake it!).
Turn the oven off and crack the door slightly, letting the cheesecake sit for another 30 minutes in the oven. Then remove it and let it cool to room temperature before placing it in the fridge to set overnight.
When ready to serve, remove the springform pan and drizzle the caramel over top. Enjoy!
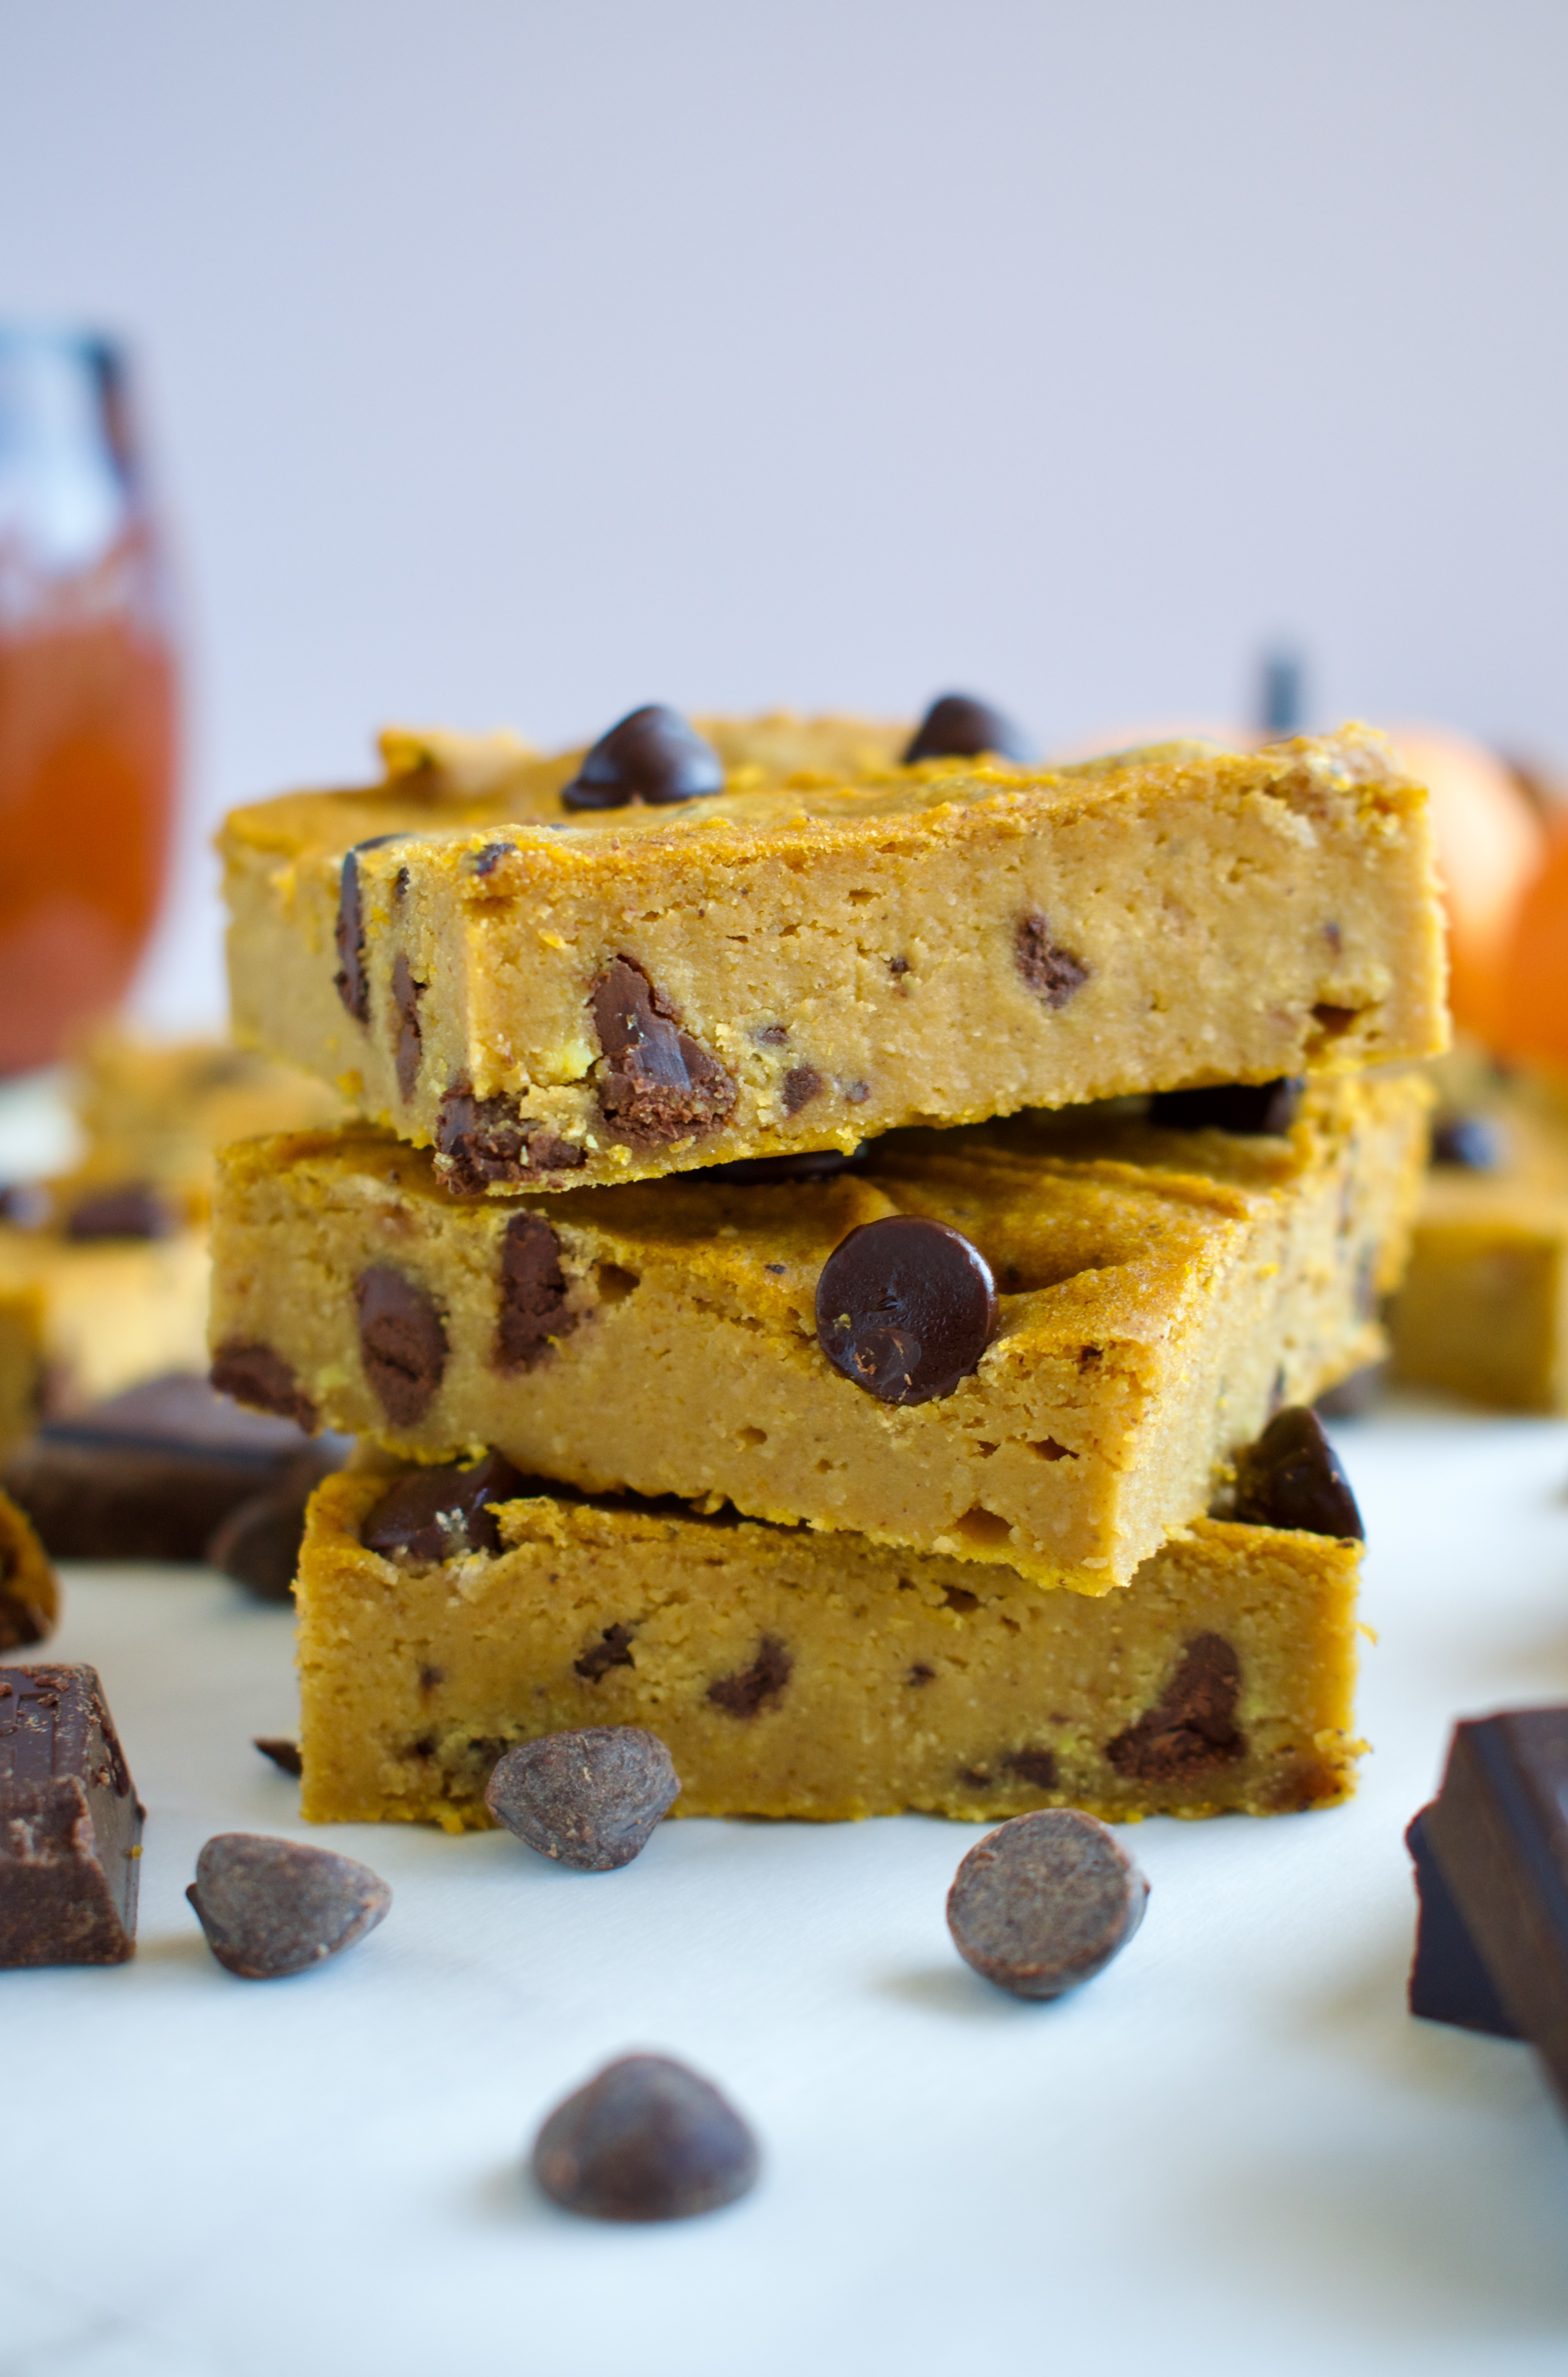
This healthy fall dessert is packed with fiber and protein! Chickpeas are the star ingredient in these Chocolate Chip Pumpkin Blondies that are also gluten free, dairy free, and refined sugar free.
healthy gluten free pumpkin blondies
As we head into the holiday season, some of you might already be dreading all the sugar and heavy foods that await us. That’s why I love this recipe! Let me show you that you can still eat and enjoy delicious treats while staying healthier. These gluten free pumpkin blondies are made with chickpeas and oat flour to keep them high fiber & higher protein. They are combined with maple syrup to keep them refined sugar free.
These healthy chocolate chip pumpkin blondies are not only completely gluten free, but also dairy free, nut free, and lower sugar than the traditional blondie. Plus, they are made in the blender, so they are super easy and quick to make. You’ll be amazed how good they taste and you can reach for more, guilt free!
How to Make Gluten Free Chocolate Chip Pumpkin Blondies
Pumpkin Blondie Ingredients
-Chickpeas: we are adding fiber and protein to this recipe by utilizing chickpeas as the base of these blondies. You can’t even taste them!
-Pumpkin: duh
-Maple syrup: no refined sugar in the base of these blondies
-Oil: coconut oil, olive oil, or melted butter will work in this recipe
-Egg
-Oat flour: we are all about the healthier ingredients here! Be sure to use certified gluten free oats/oat flour to keep this recipe gluten allergy safe
-Cinnamon
-Baking powder
-Baking soda
-Salt
-Chocolate: I like to use a combination of chopped HU chocolate (use code LEMONSNLYME for 15% off your order) and chocolate chips (you can use HU gems or another variety of your choice. I also like Enjoy Life, but they are not refined sugar free)
Pumpkin Blondie Instructions
This is one of the easiest desserts you’ll ever make! All you have to do is blend all of the ingredients, except the chocolate, in a blender, then fold in the chocolate chips. Add to a baking dish, bake, cool, and eat up!
Don’t worry, you can’t taste the chickpeas at all! This recipe doesn’t taste like beans. Just make sure to rinse your chickpeas before using them to wash off some of the starch.
Can I Make These Pumpkin Blondies Vegan?
I haven’t tested a vegan version of this recipe, but I’m sure an egg substitute would work just fine. If you try it, leave a comment and let us know how it went!
Can I Substitute the Oat Flour?
I have not tested this recipe with any other flour. I can’t promise the results of using 1:1 gluten free flour or tigernut or almond flour, but if you try it, let us know how it went.
More Pumpkin Recipes
Looking for more delicious, fall inspired pumpkin recipes? Try these!
These gluten free chocolate chip pumpkin blondies are the perfect healthy treat this holiday season. Made with chickpeas, oat flour, and maple syrup, they are dairy free and refined sugar free. This allergy friendly fall dessert is easy to make and sure to please!
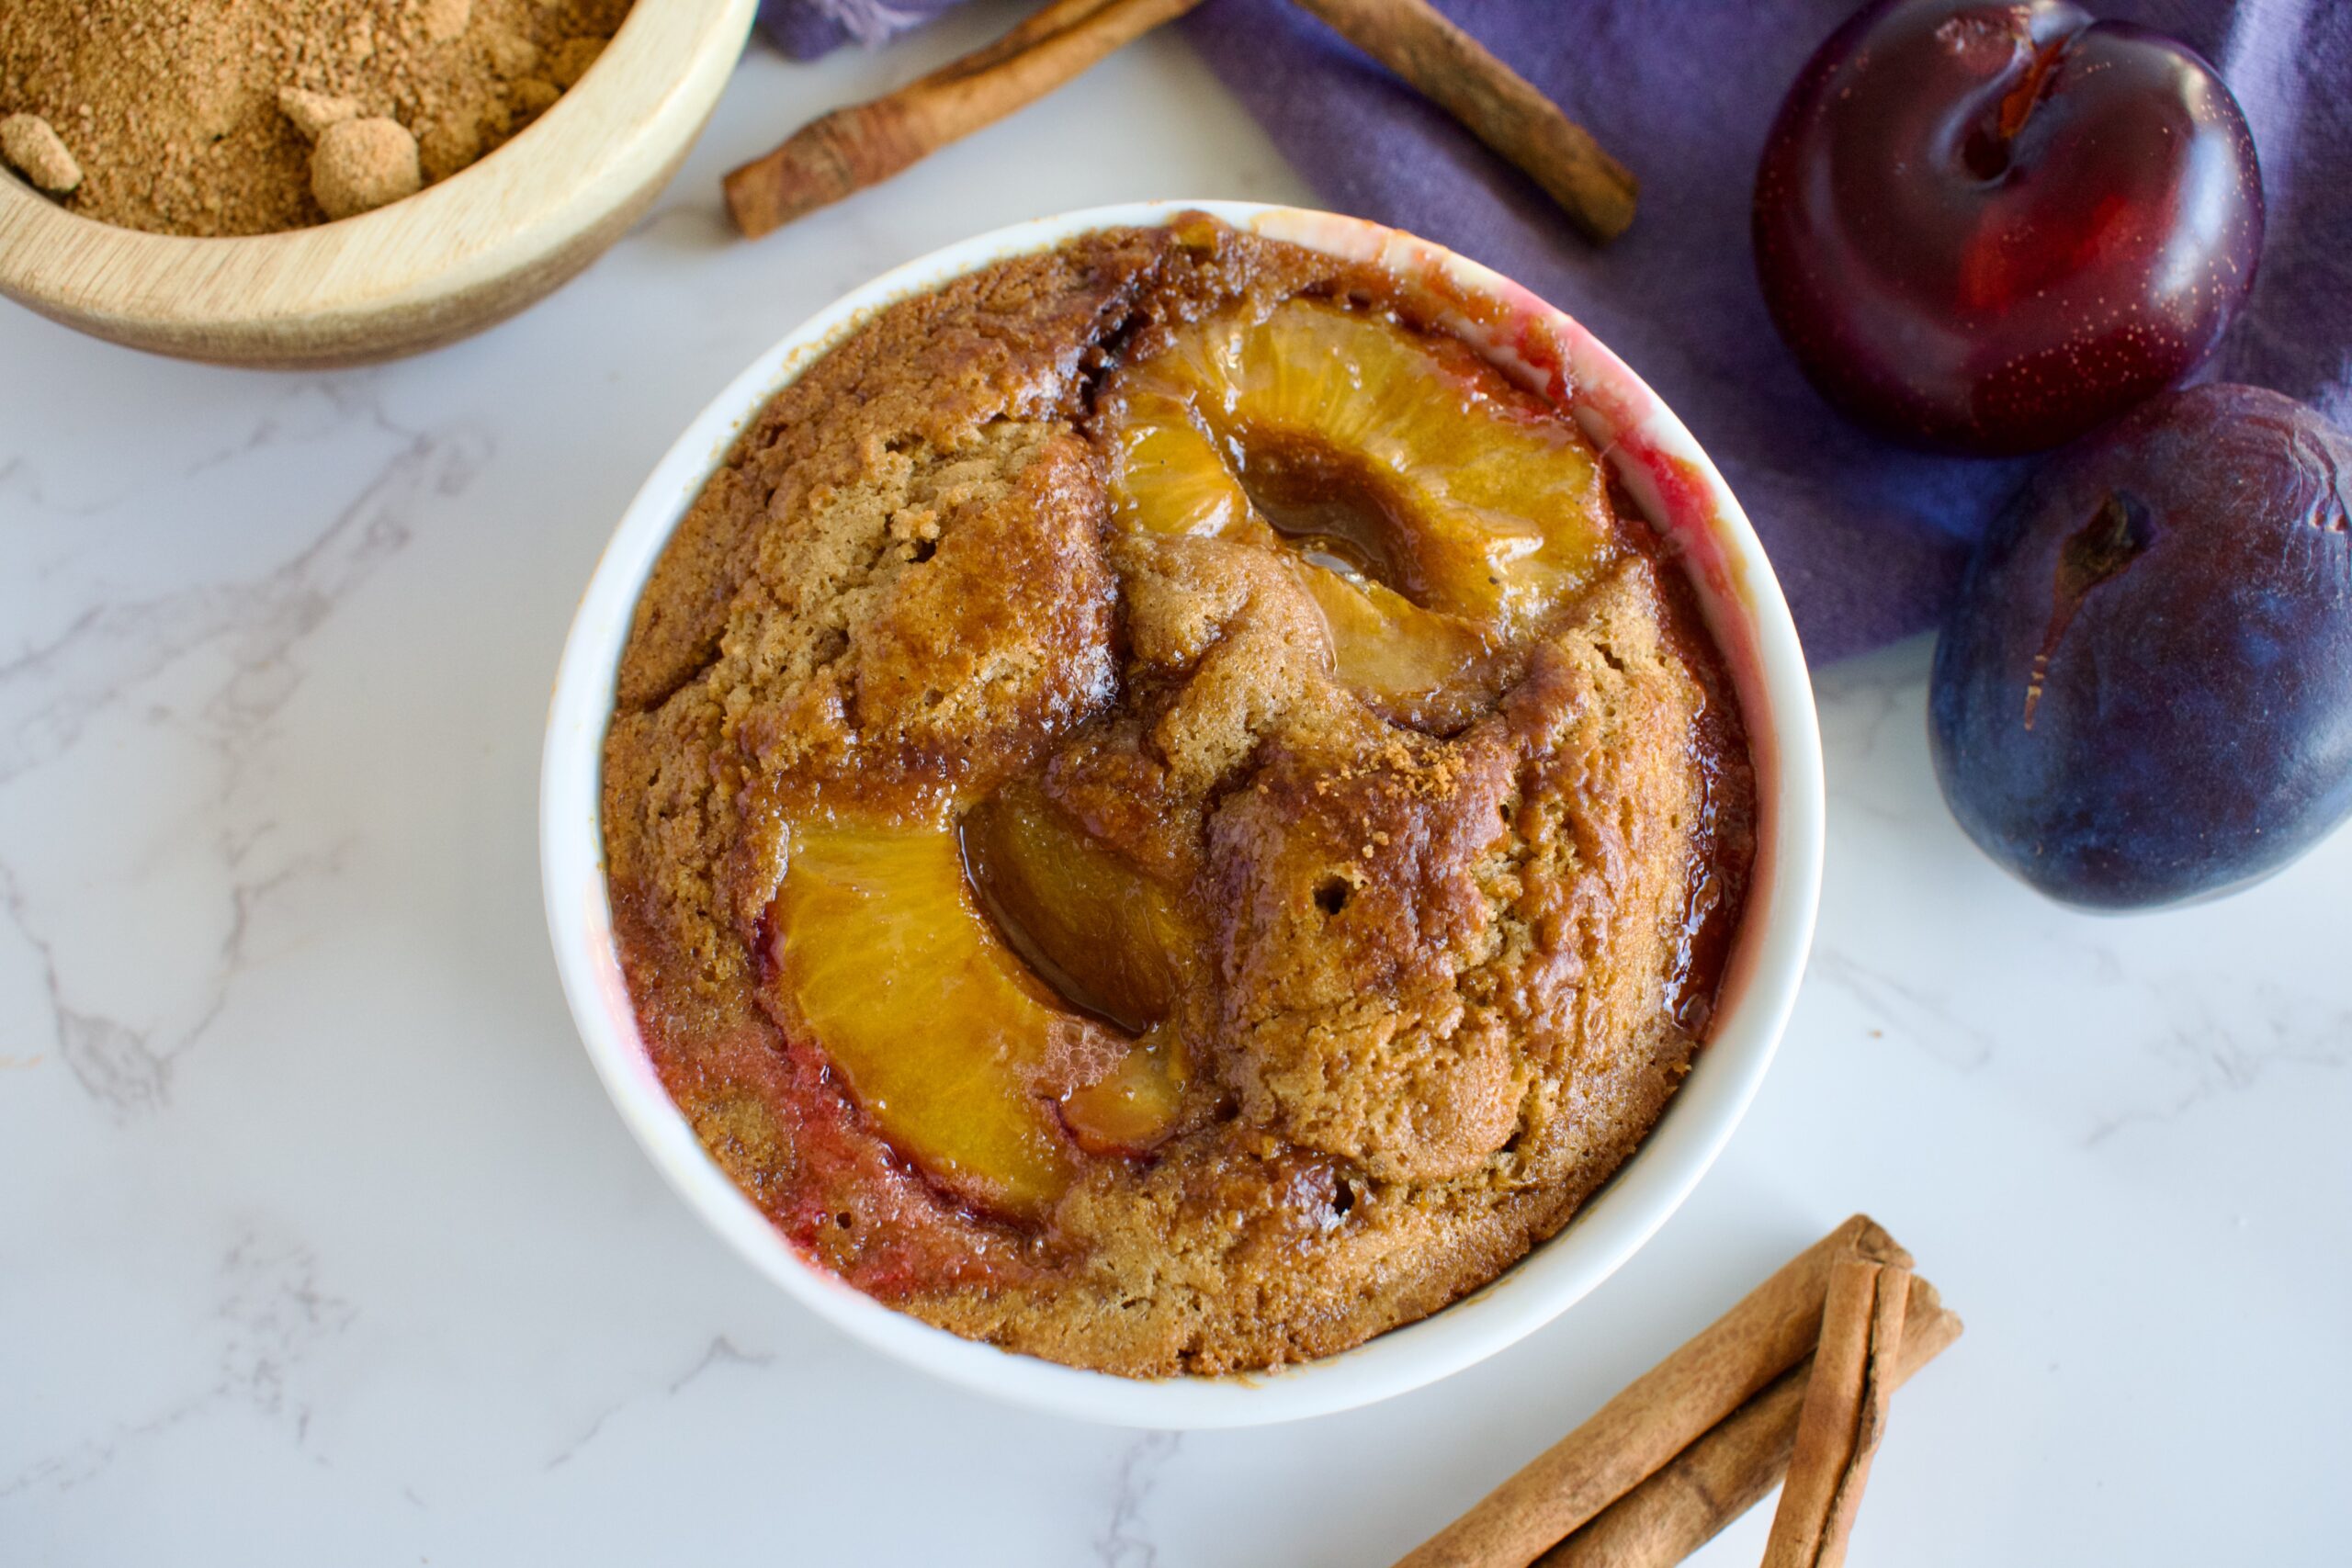
This single serve Gluten Free Plum Cake is the perfect fall dessert when you need a little treat, but don’t want to bake a whole cake. Use seasonal plums and enjoy this mug cake!
single serving gluten free plum cake
I picked up a few plums at the Farmer’s Market and wasn’t sure what to do with them. I didn’t have enough to bake a a crisp or whole cake, so I thought it would be fun to try and make a single serving plum cake. It came out delicious and the entire dessert is completely gluten free, dairy free, and refined sugar free.
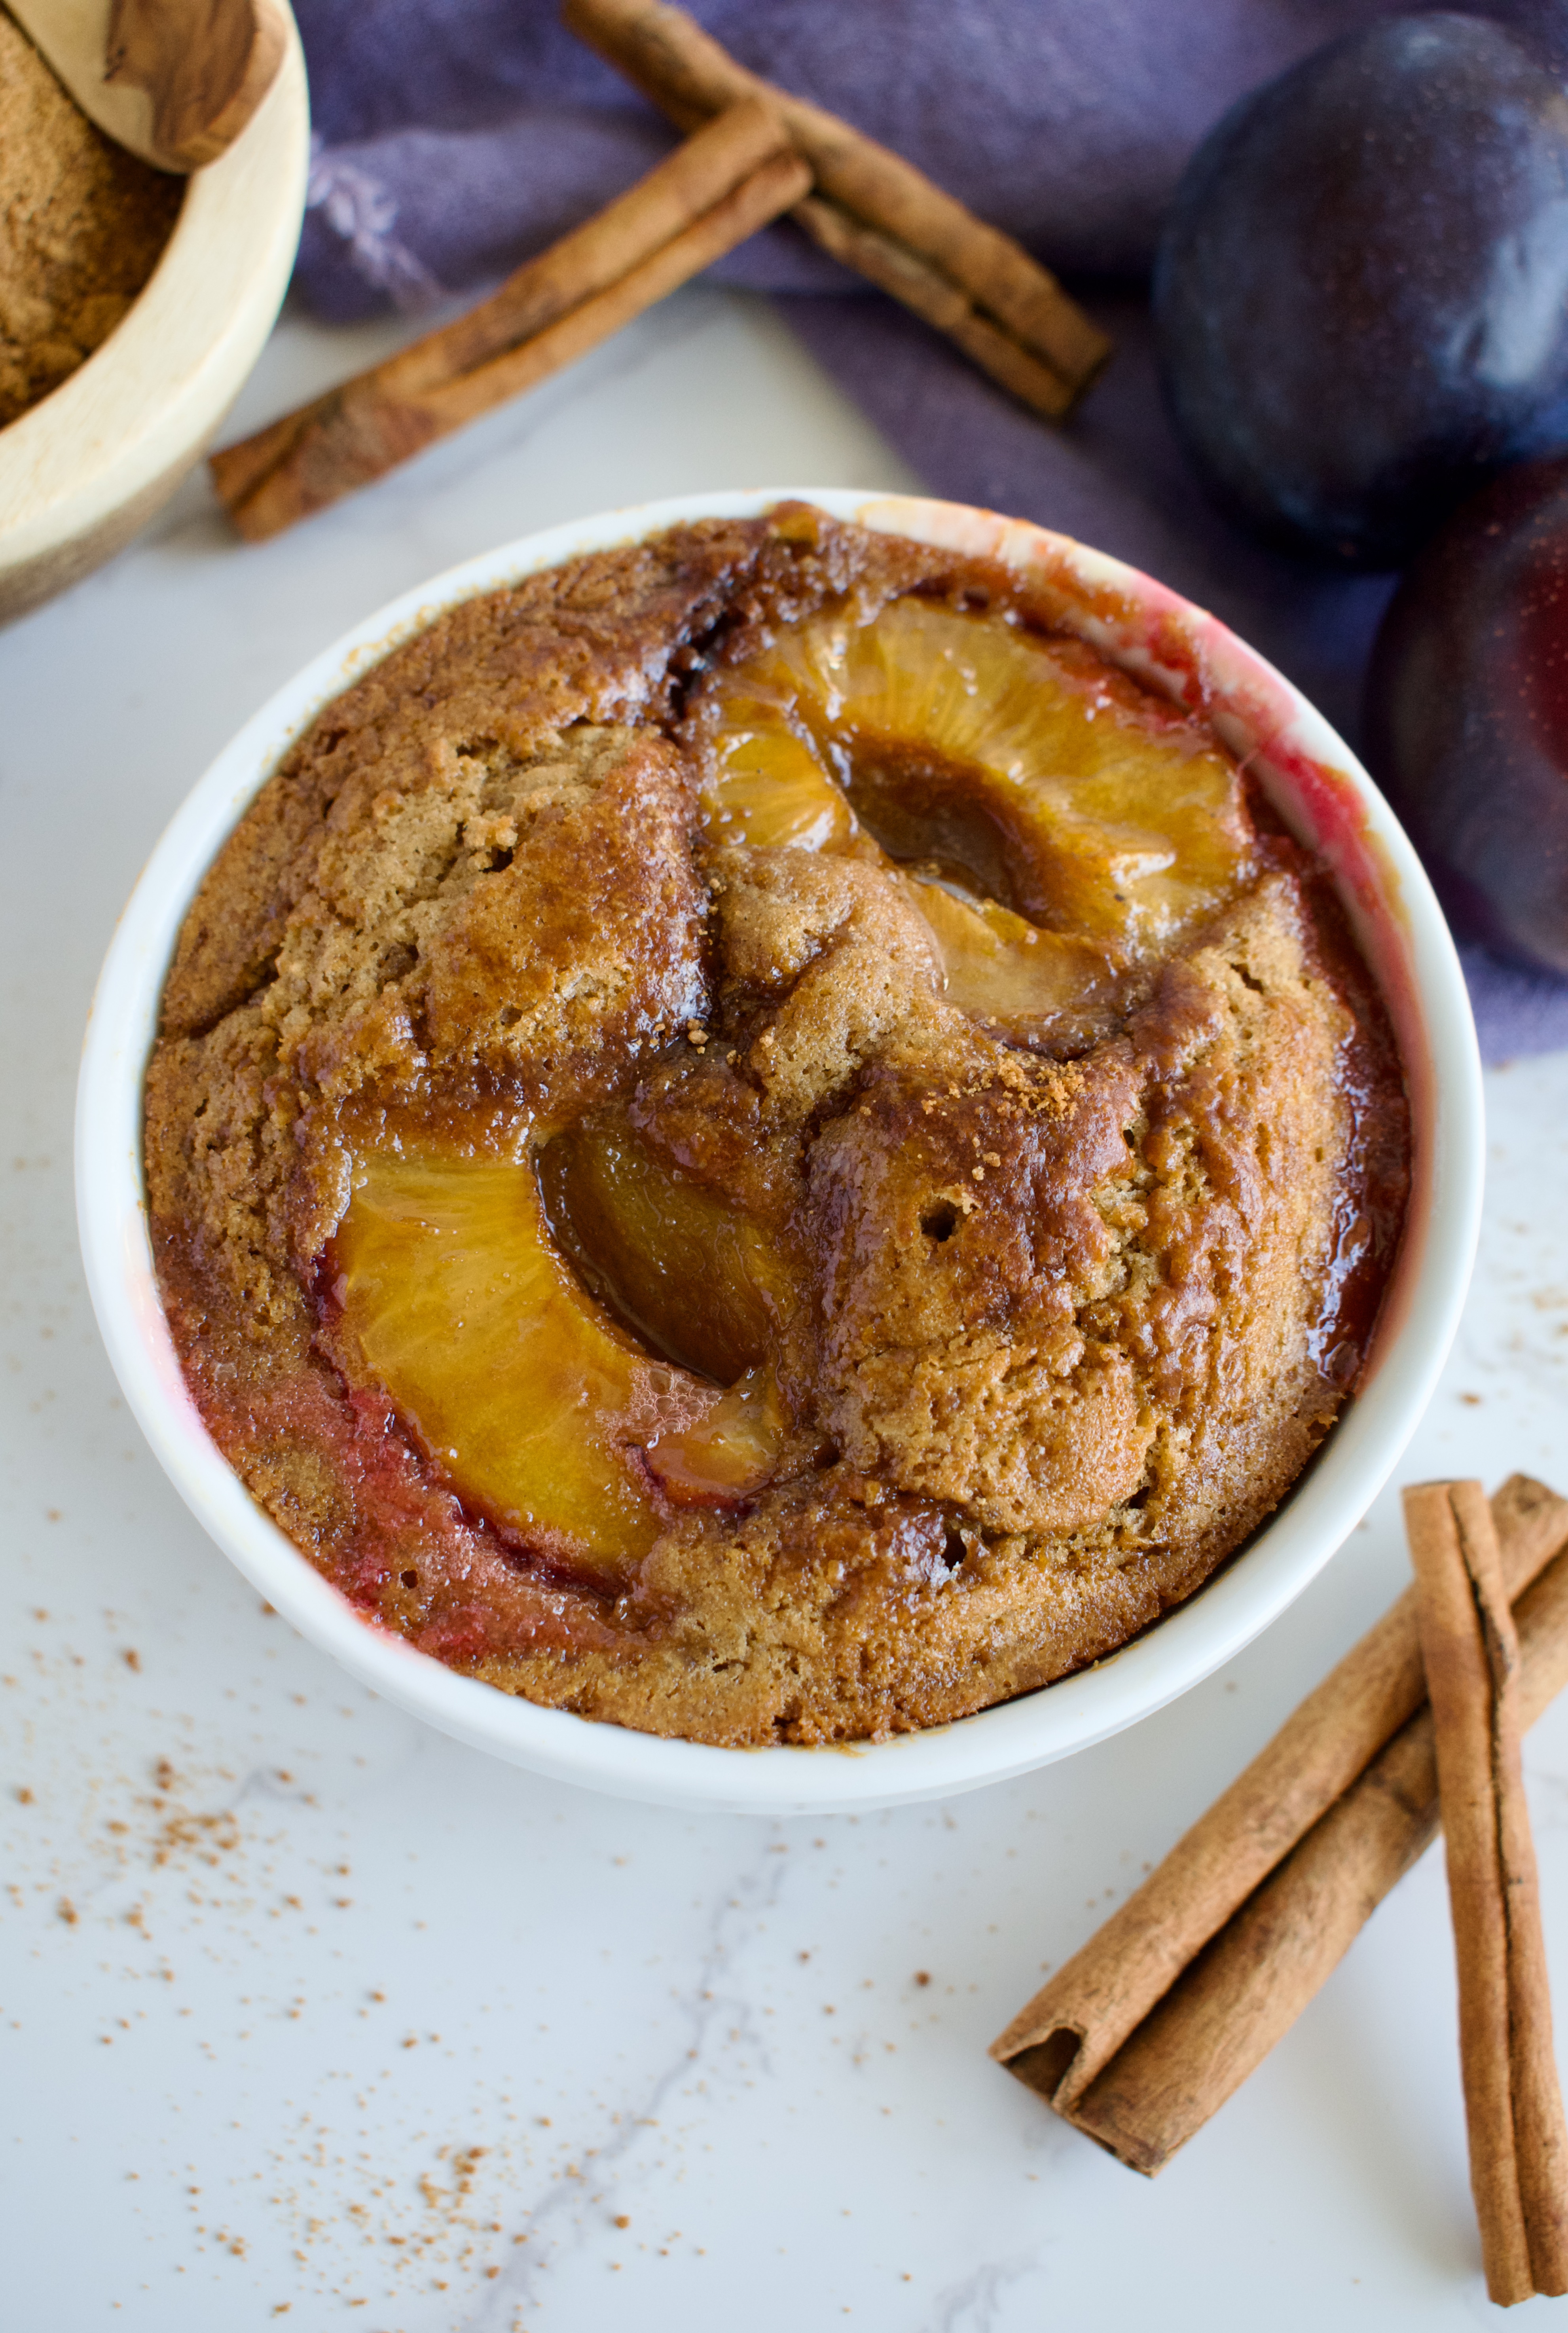
single serving gluten free and dairy free plum cake
To make this single serve plum cake, you just mix all the ingredients together in a bowl.
Pour batter into a greased ramekin and press 2 halves of your plum, cut side up, into the batter.
Sprinkle with coconut sugar and bake on a baking sheet for 20-25 minutes at 350F until a toothpick comes out clean.
Let cool and enjoy!
Can I Make This Plum Cake in the Microwave?
I’m not sure as I haven’t tested this method. You could certainly try making it in the microwave. I’d suggest cooking it for 1 minute and checking it, then cooking at 30 second intervals after that if needed. If you try it out, leave a comment and let us know how it went!
This gluten free single serving plum cake is the perfect fall dessert when you need a little sweet treat without the fuss of baking a whole cake. Dairy free and refined sugar free, this is the healthiest cake you'll eat!
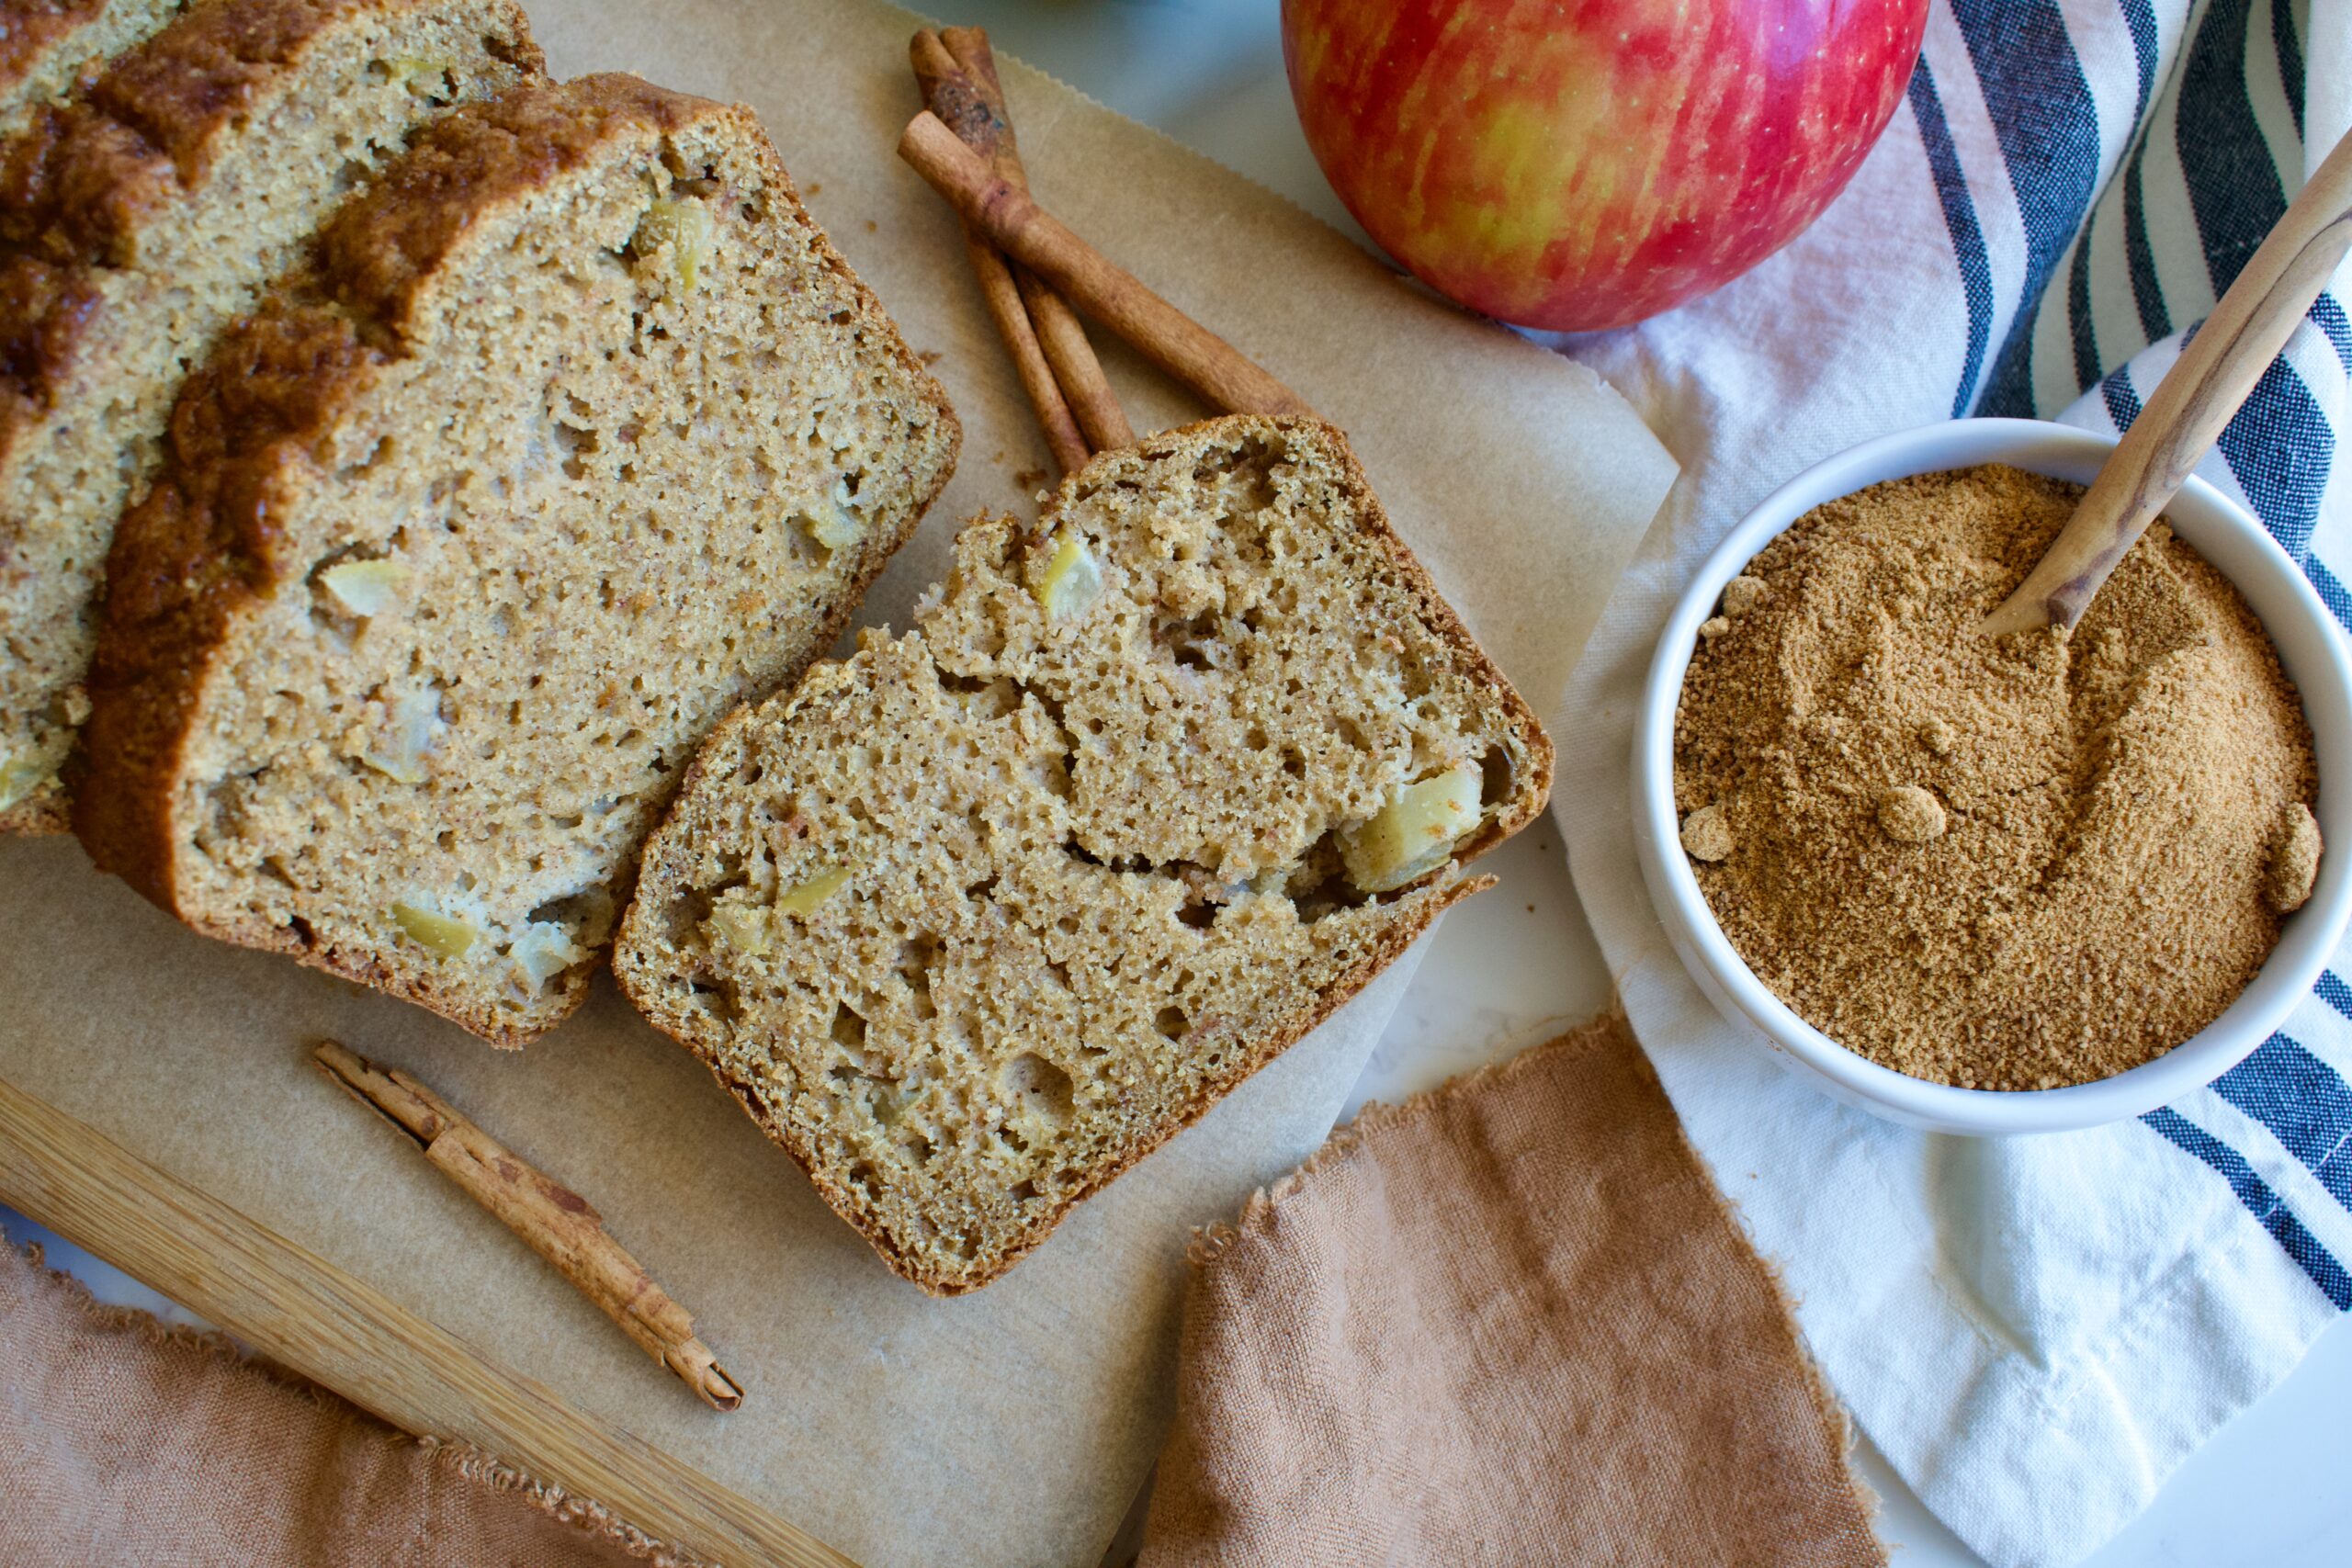
This warming Gluten Free Apple Cinnamon Bread is a delicious way to use apples this fall season. Dairy free and refined sugar free, this loaf is just the right amount of sweetness and spice!
gluten free apple cinnamon bread
If you are looking for the perfect, easy apple cinnamon bread, then look no further! This delicious gluten free bread isn’t too sweet and has just the right amount of cinnamon flavor. It’s the perfect fall dessert. This apple bread is sweetened with maple syrup and applesauce to keep it refined sugar free and amp up the apple flavor.
Sift all the dry ingredients together in a medium bowl and set aside.
In a large bowl or in a stand mixer, beat together all the wet ingredients until combined.
Add the dry ingredients to the wet and mix on low until just combined.
Mix your chopped apple with cinnamon and flour then fold into the batter.
Pour batter into a lined loaf pan and bake for 45-50 minutes, until a toothpick comes out clean.
gluten free and dairy free apple cinnamon bread
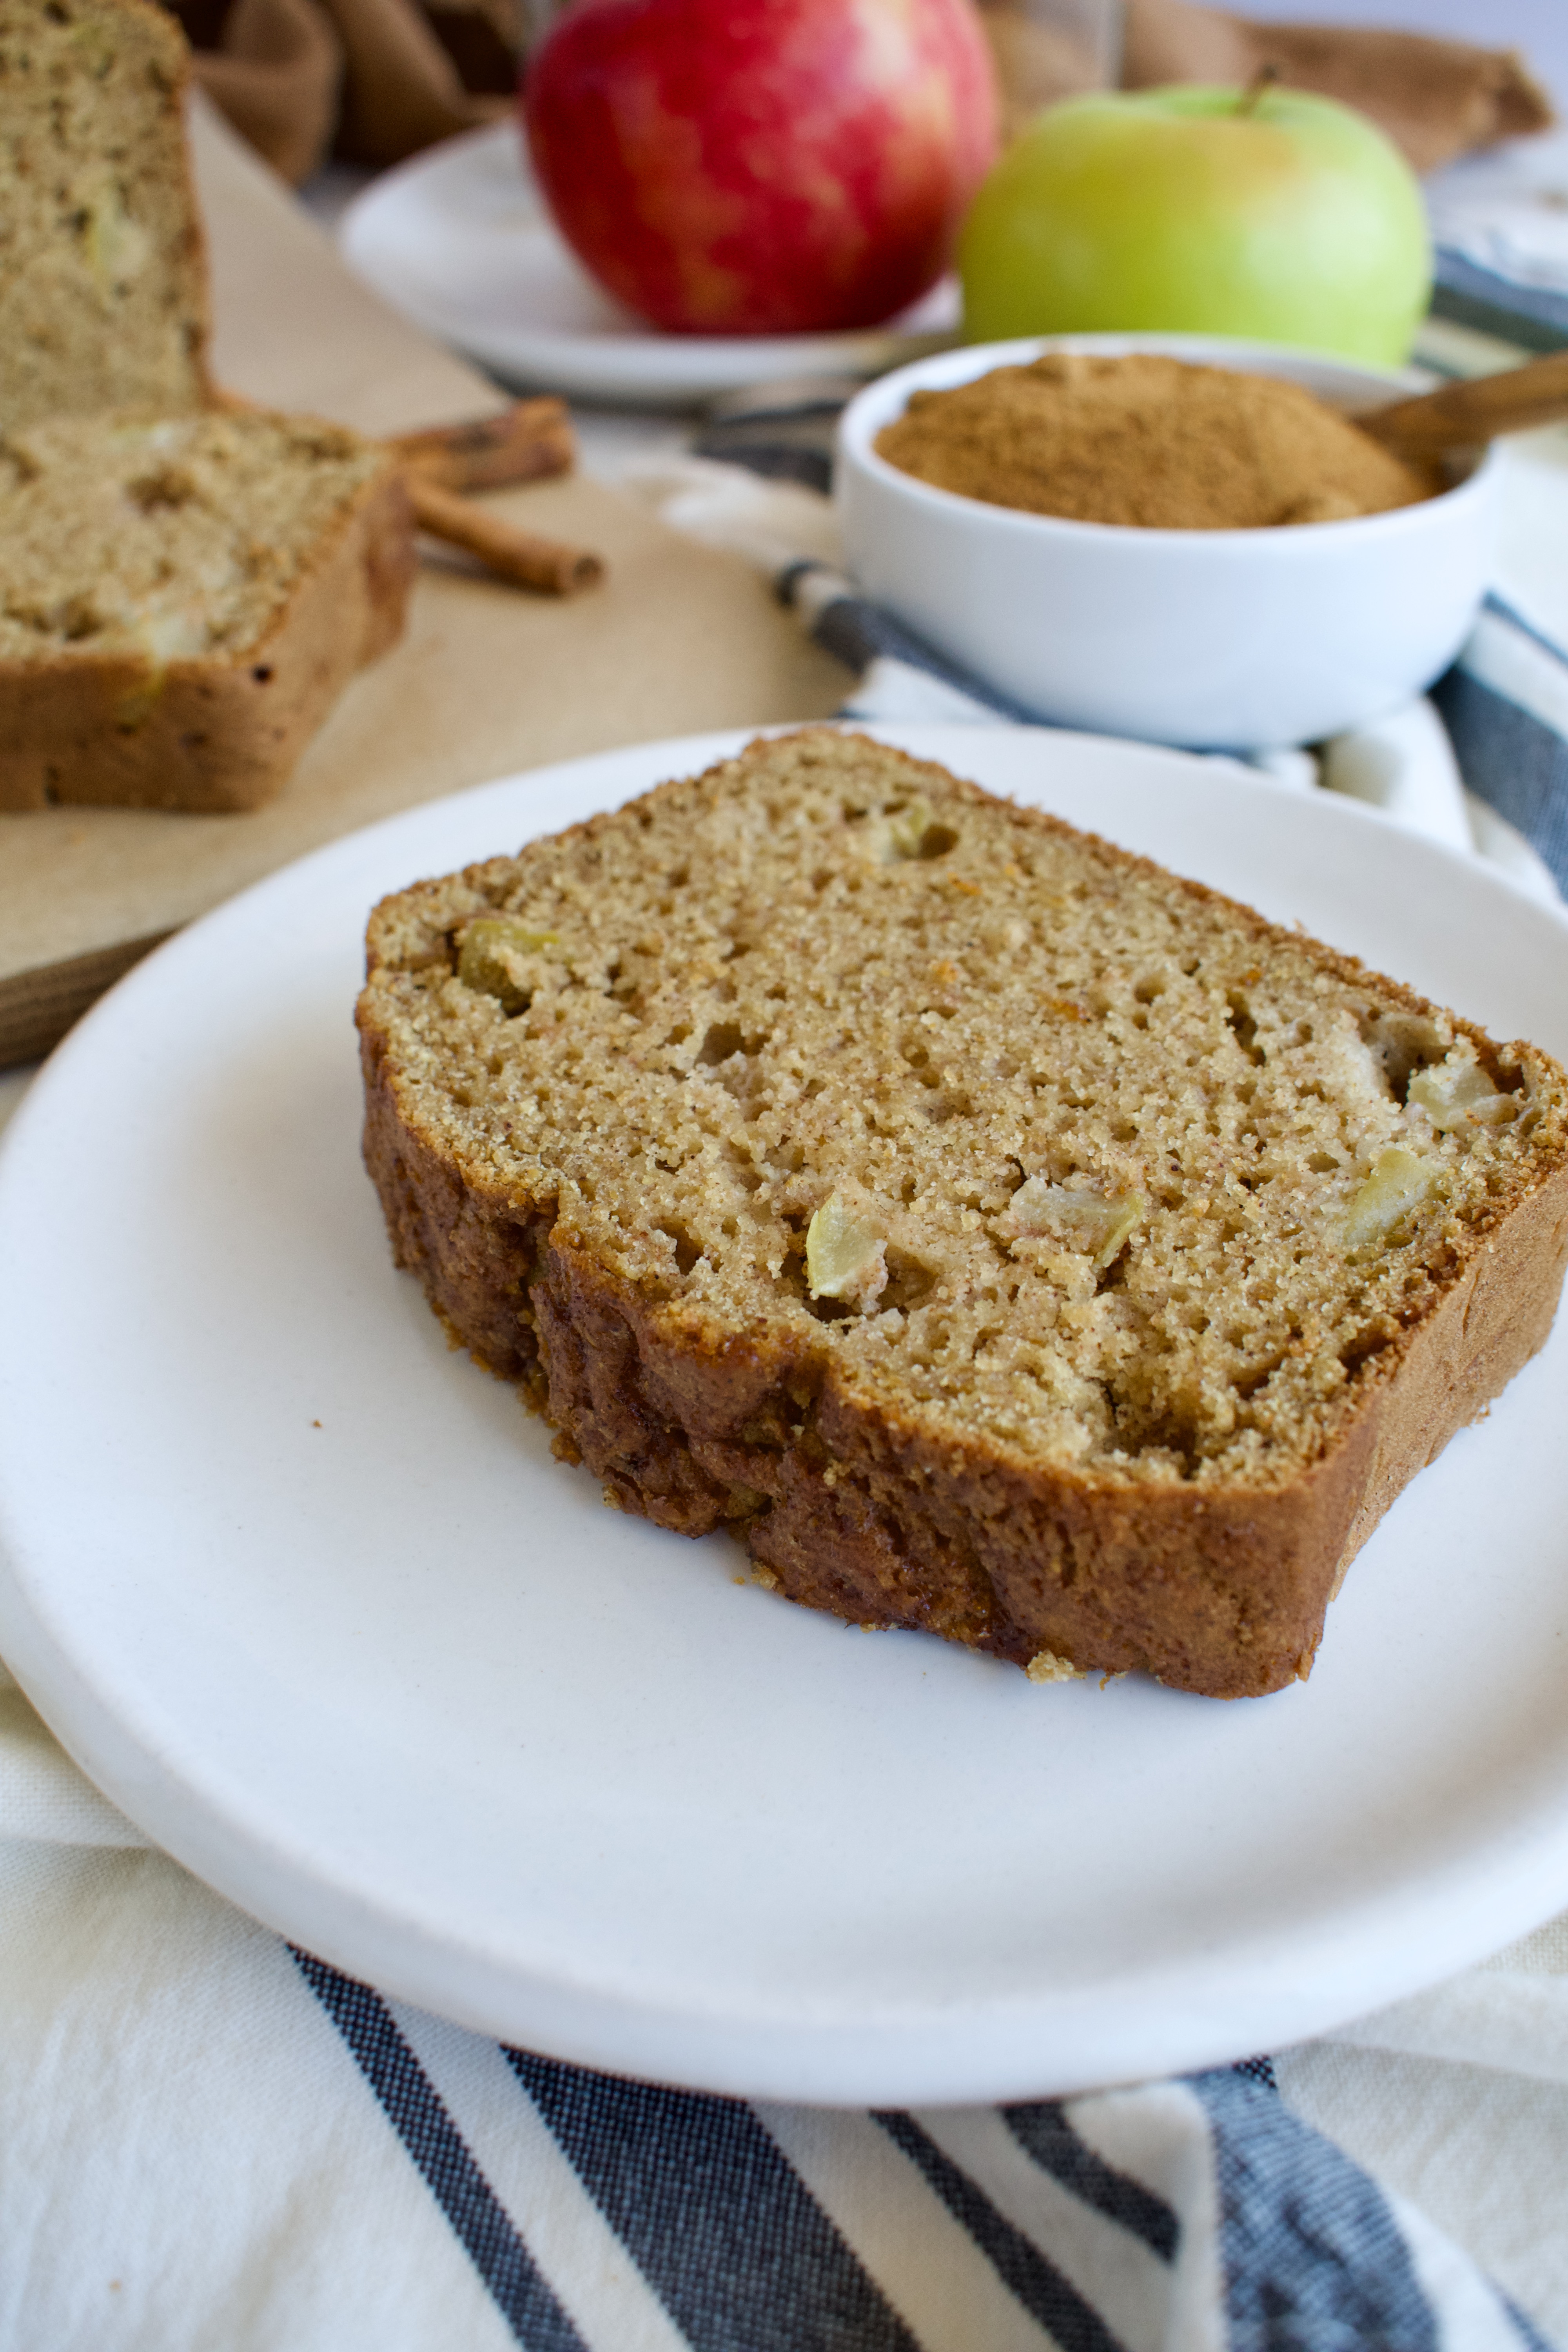
How to Serve This Apple Cinnamon Bread
Slice and enjoy this bread as is as a snack or for dessert, but it tastes fantastic with a scoop of vanilla ice cream. I highly suggest warming a slice up (either in the oven for 15-30 seconds in the microwave). Warming it up really brings out the flavor and if you add ice cream, it melts perfectly on top.
How to Store This Apple Bread
Slice and store in an airtight container for up to 3 days or in the fridge for up to 5. You can wrap individual slices in plastic wrap and place in a freezer bag then freeze slices to last longer! Just thaw and warm up before eating.
gluten free and refined sugar free apple cinnamon bread
This warming Gluten Free Apple Cinnamon Bread is a delicious way to use apples this fall season. Dairy free and refined sugar free, this loaf is just the right amount of sweetness and spice!
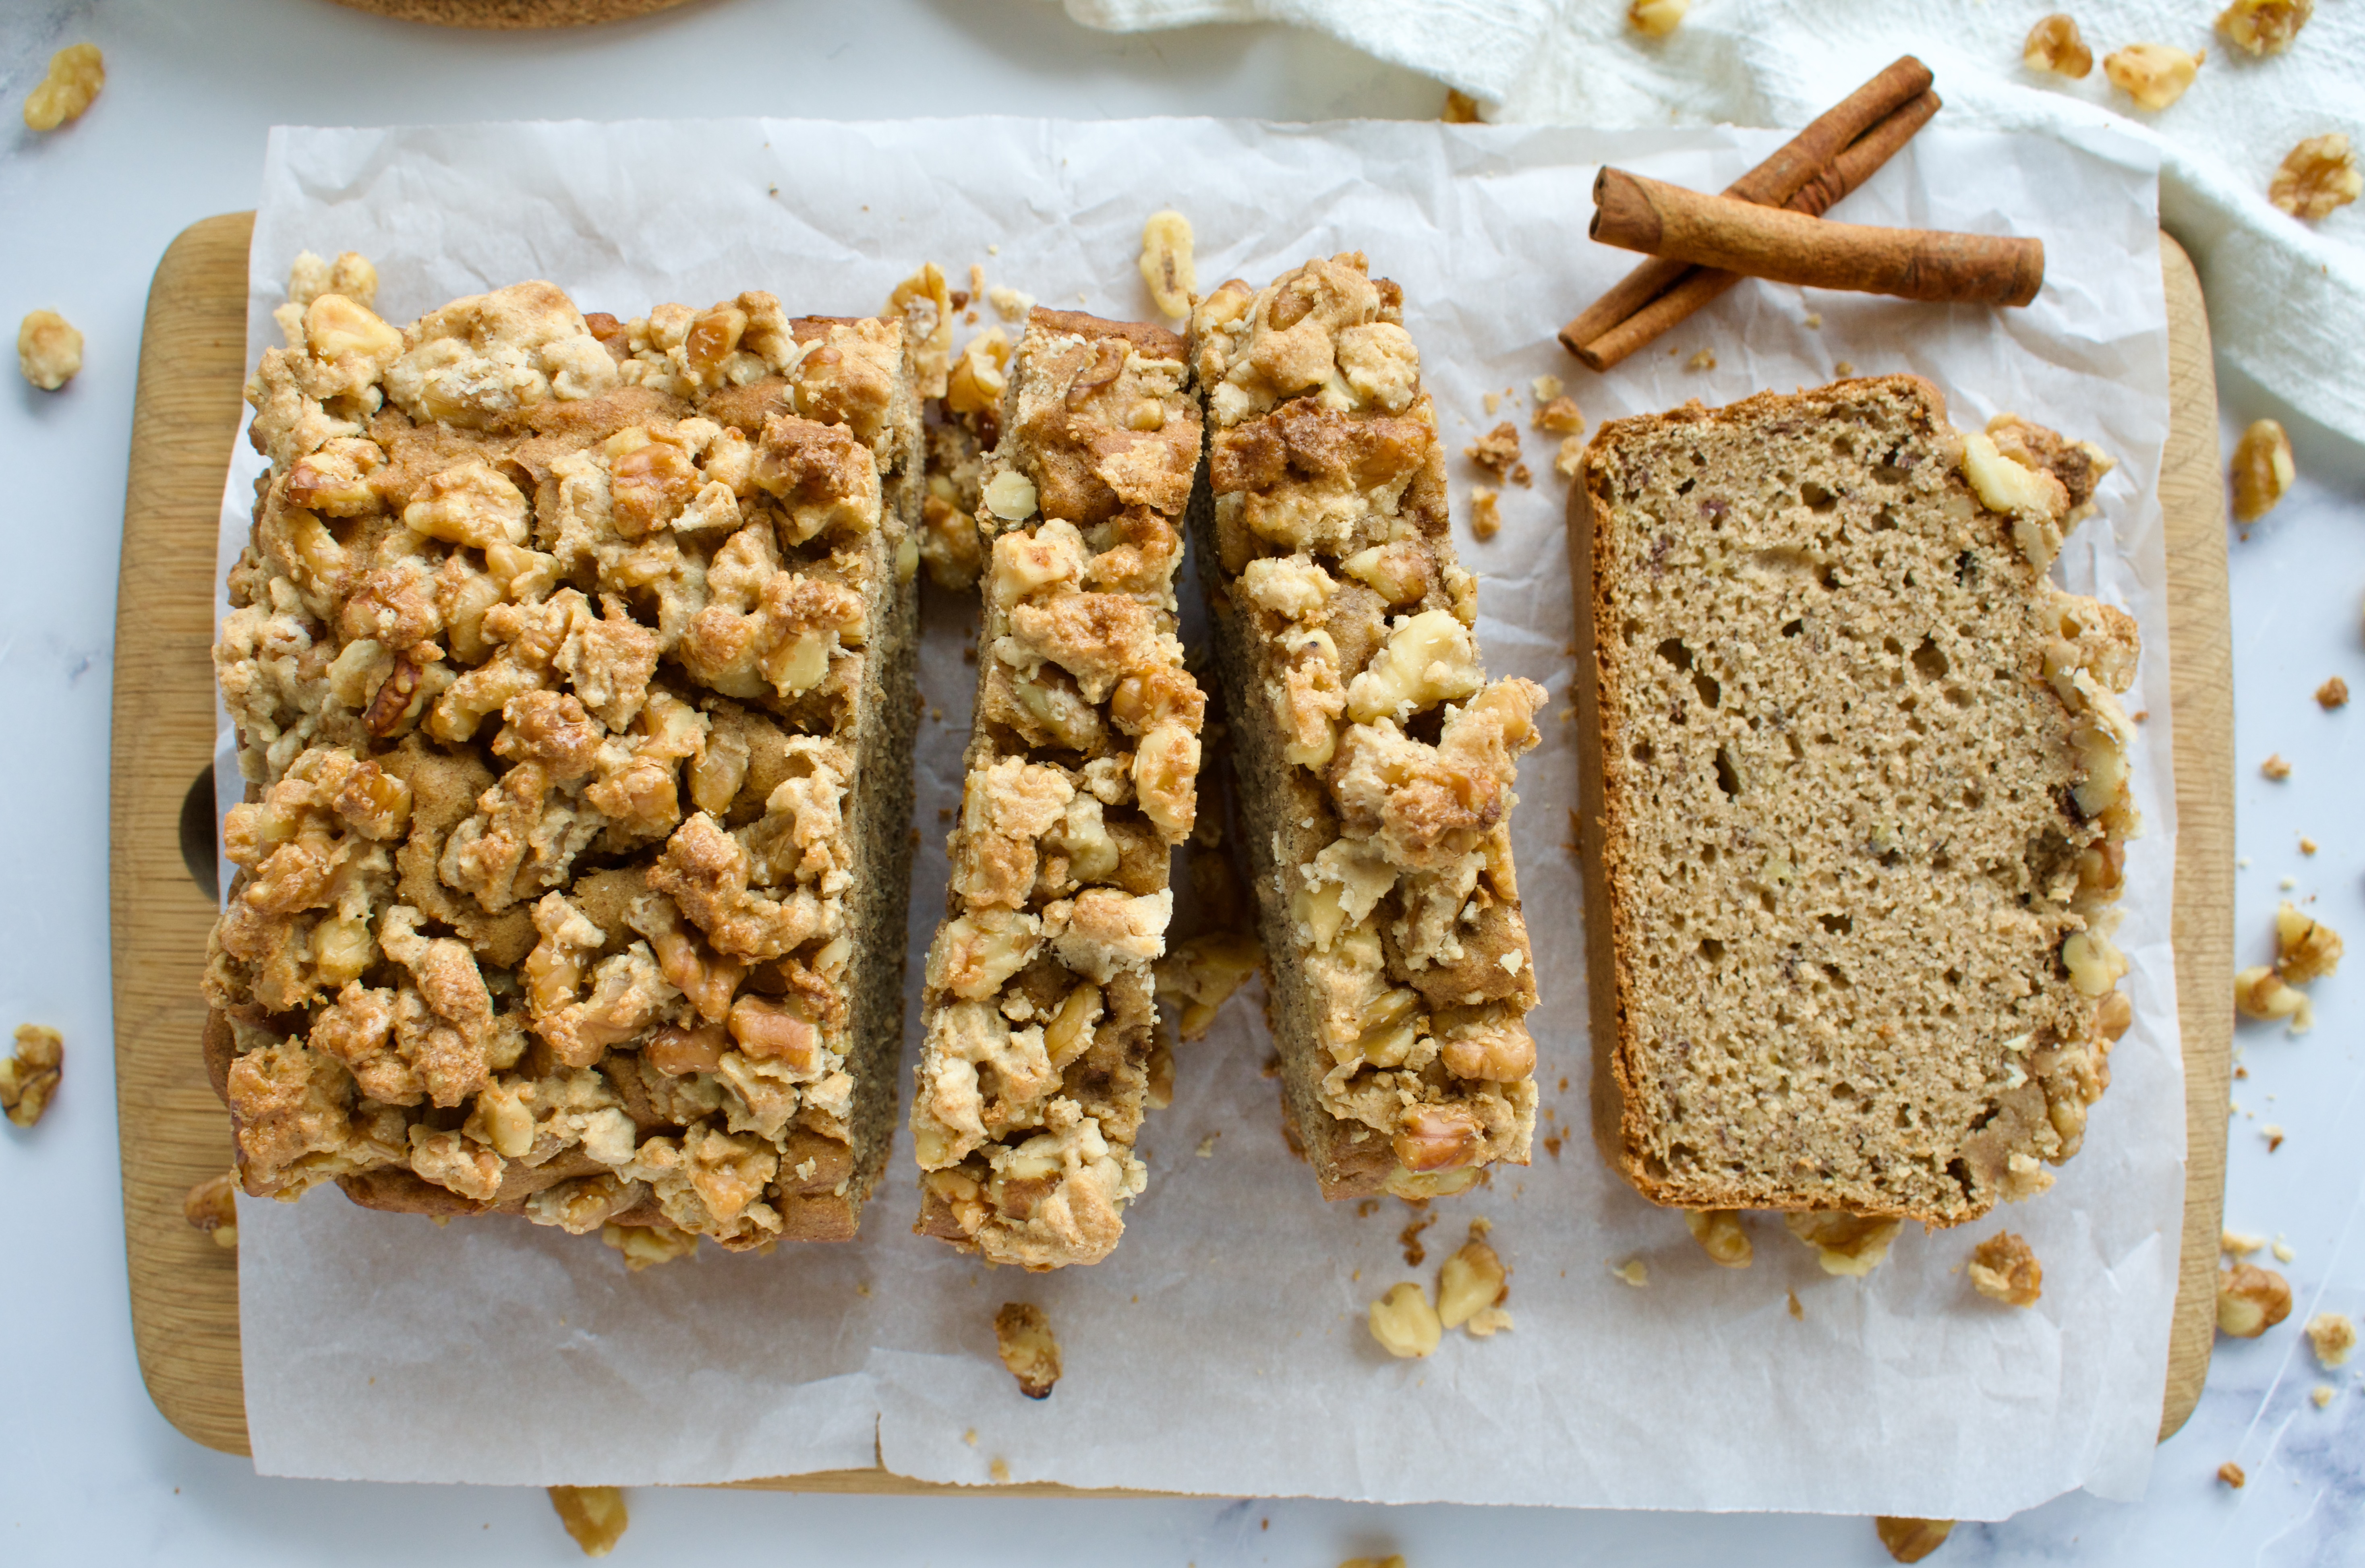
Soft and moist gluten free banana bread is topped with a sweet and crunchy walnut crumble to make this delicious Gluten Free Walnut Crumble Banana Bread.
gluten free walnut crumble banana bread
This gluten free banana bread is also dairy free and refined sugar free! She truly is a masterpiece. I love making banana bread with ripe bananas and if you’ve got some laying around, you definitely need to try this recipe.
Ingredients for Gluten Free Walnut Crumble Banana Bread
Gluten Free Banana Bread
Bananas
Eggs
Olive oil: melted coconut oil or butter should also work!
Applesauce or yogurt: either one will work in this recipe.
Maple syrup: we’re keep this banana bread refined sugar free by using maple syrup as the sweetener. There’s not too much, just enough to compliment the natural sweetness of the bananas. Low sugar, healthy, and tasty banana bread? Yes please!
gluten free and dairy free walnut crumble banana bread
How to Store This Gluten Free Banana Bread
You can store this walnut crumble banana bread in an airtight container at room temperature for 3 days or pop it in the fridge for up to 5. This bread also freezes nicely. Just slice and wrap each slice individually with plastic wrap. Place in a freezer safe bag and freeze! This bread tastes amazing warmed up, so de-thaw a slice then warm in the oven or microwave.
gluten free and dairy free walnut crumble banana bread
Soft and moist gluten free banana bread is topped with a sweet and crunchy walnut crumble to make this delicious Gluten Free Walnut Crumble Banana Bread. This bread is also completely dairy free and refined sugar free.
Hi! I'm Victoria. I was diagnosed with Lyme in 2012 and have been on a healing journey ever since. I love helping others on their road to healing through allergy friendly recipes, exercise, and overall well-being.