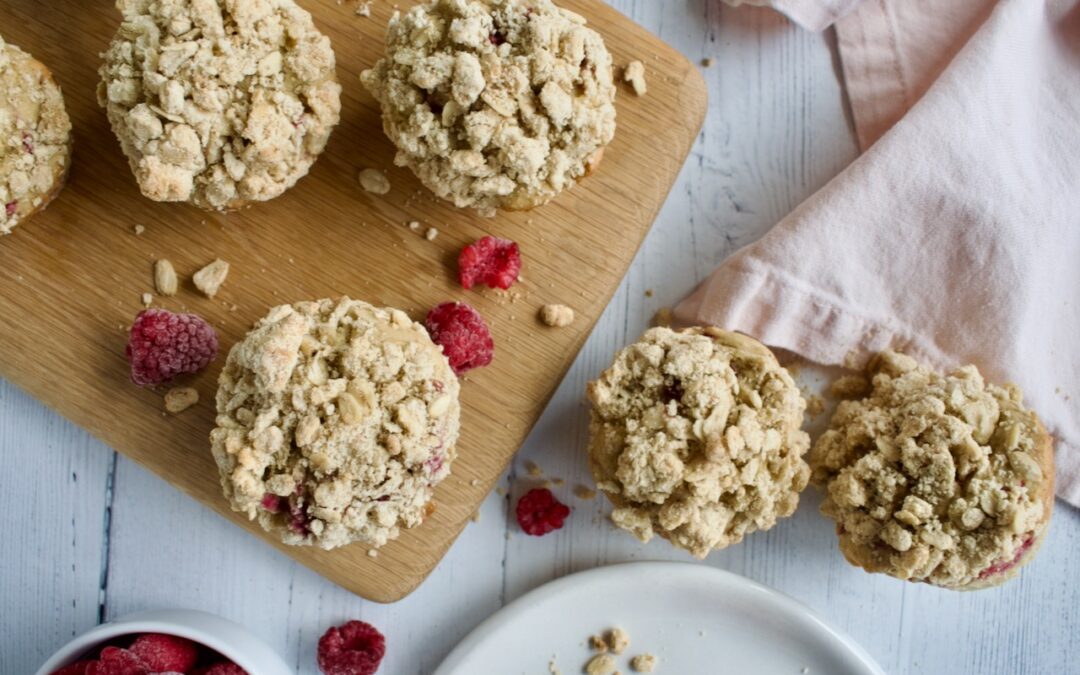
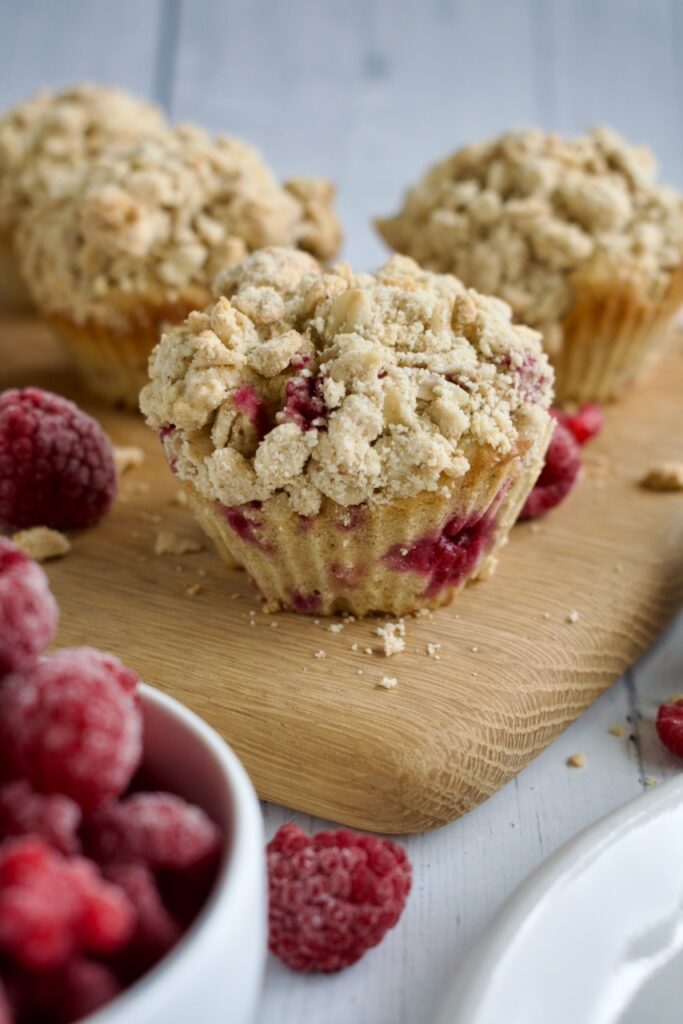
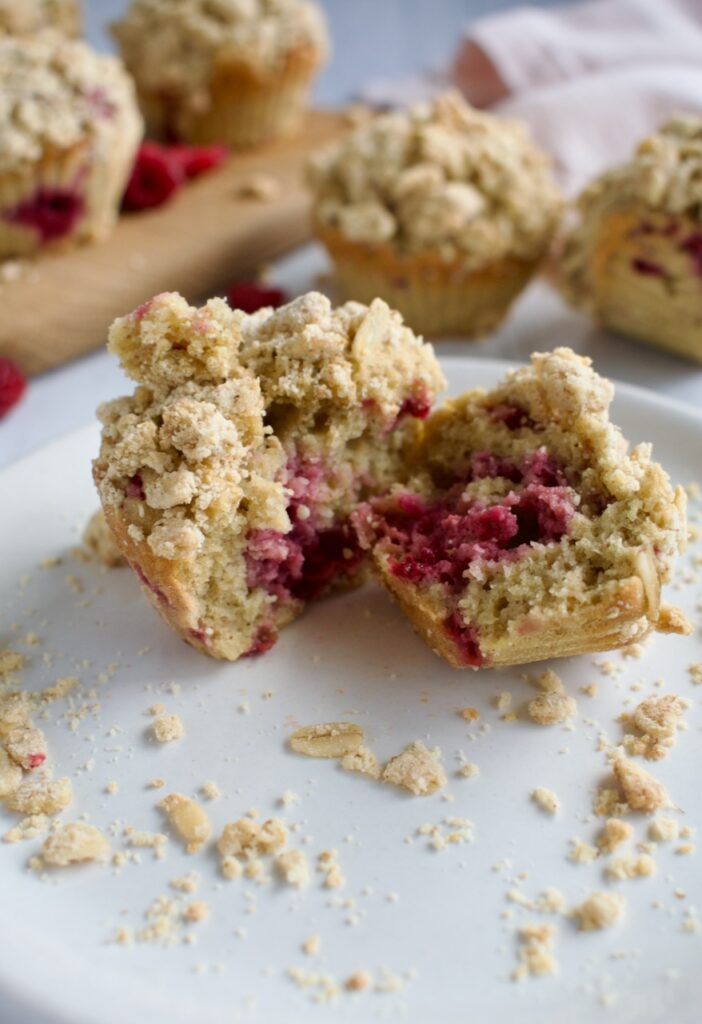
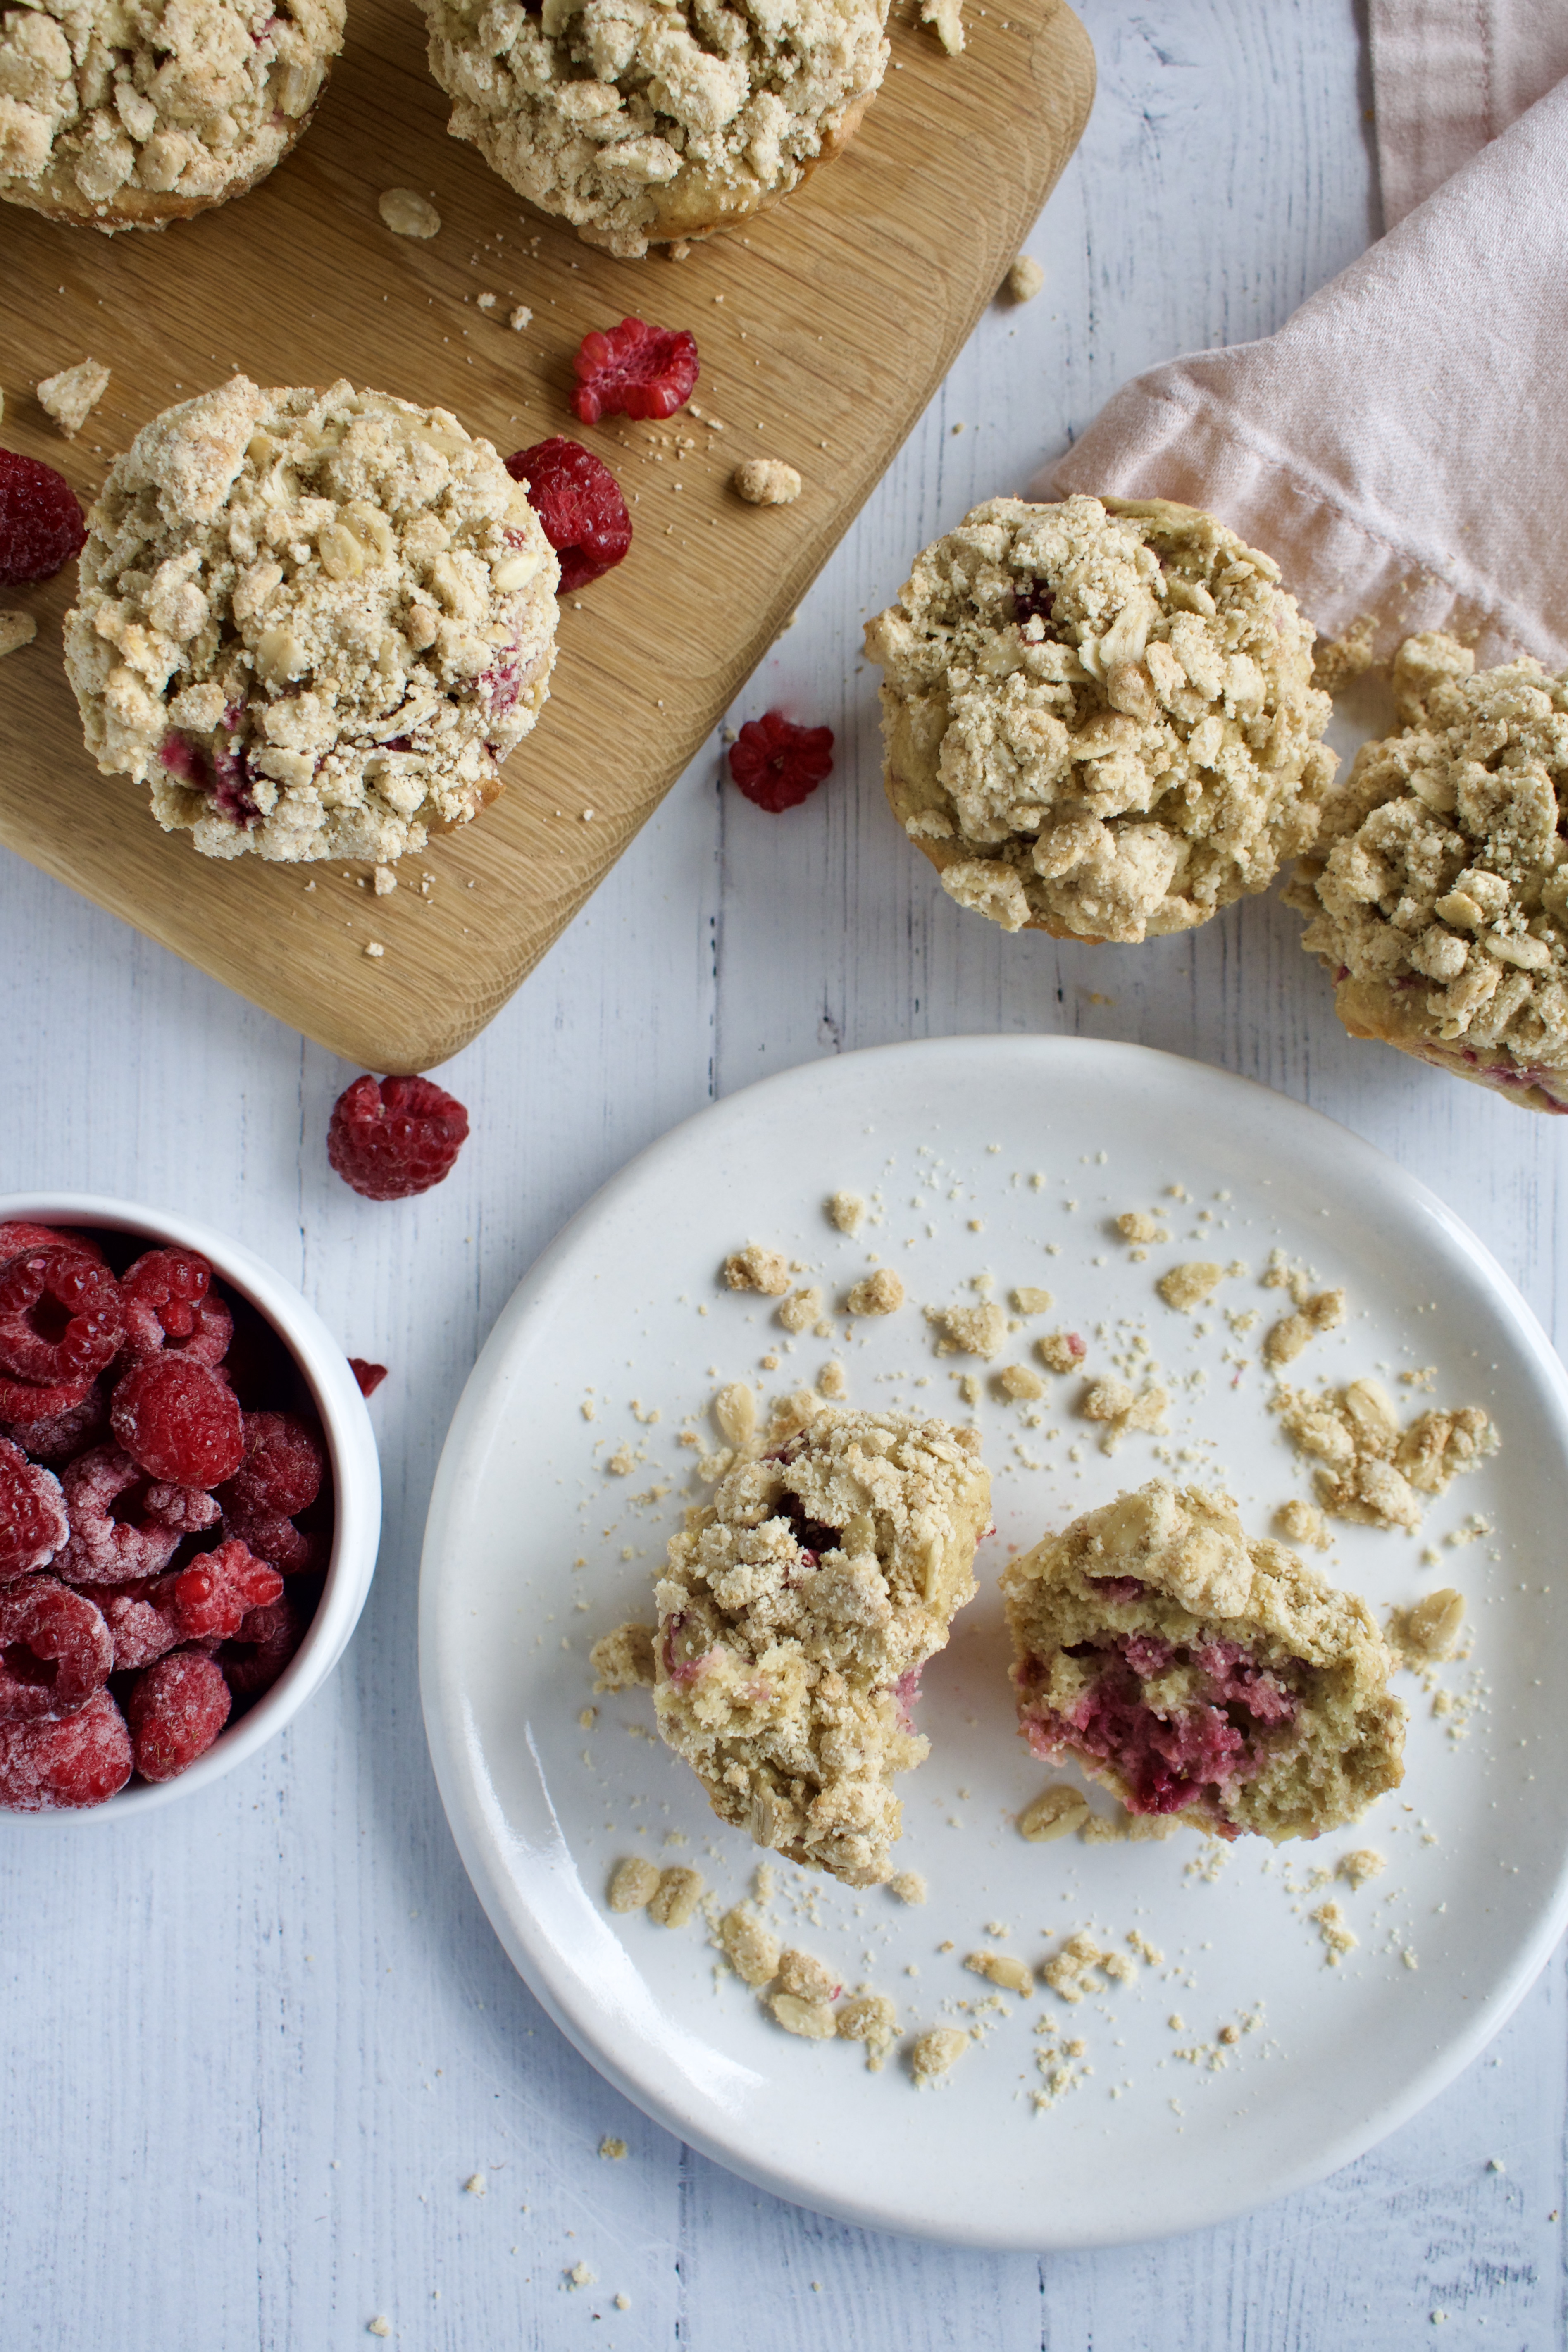
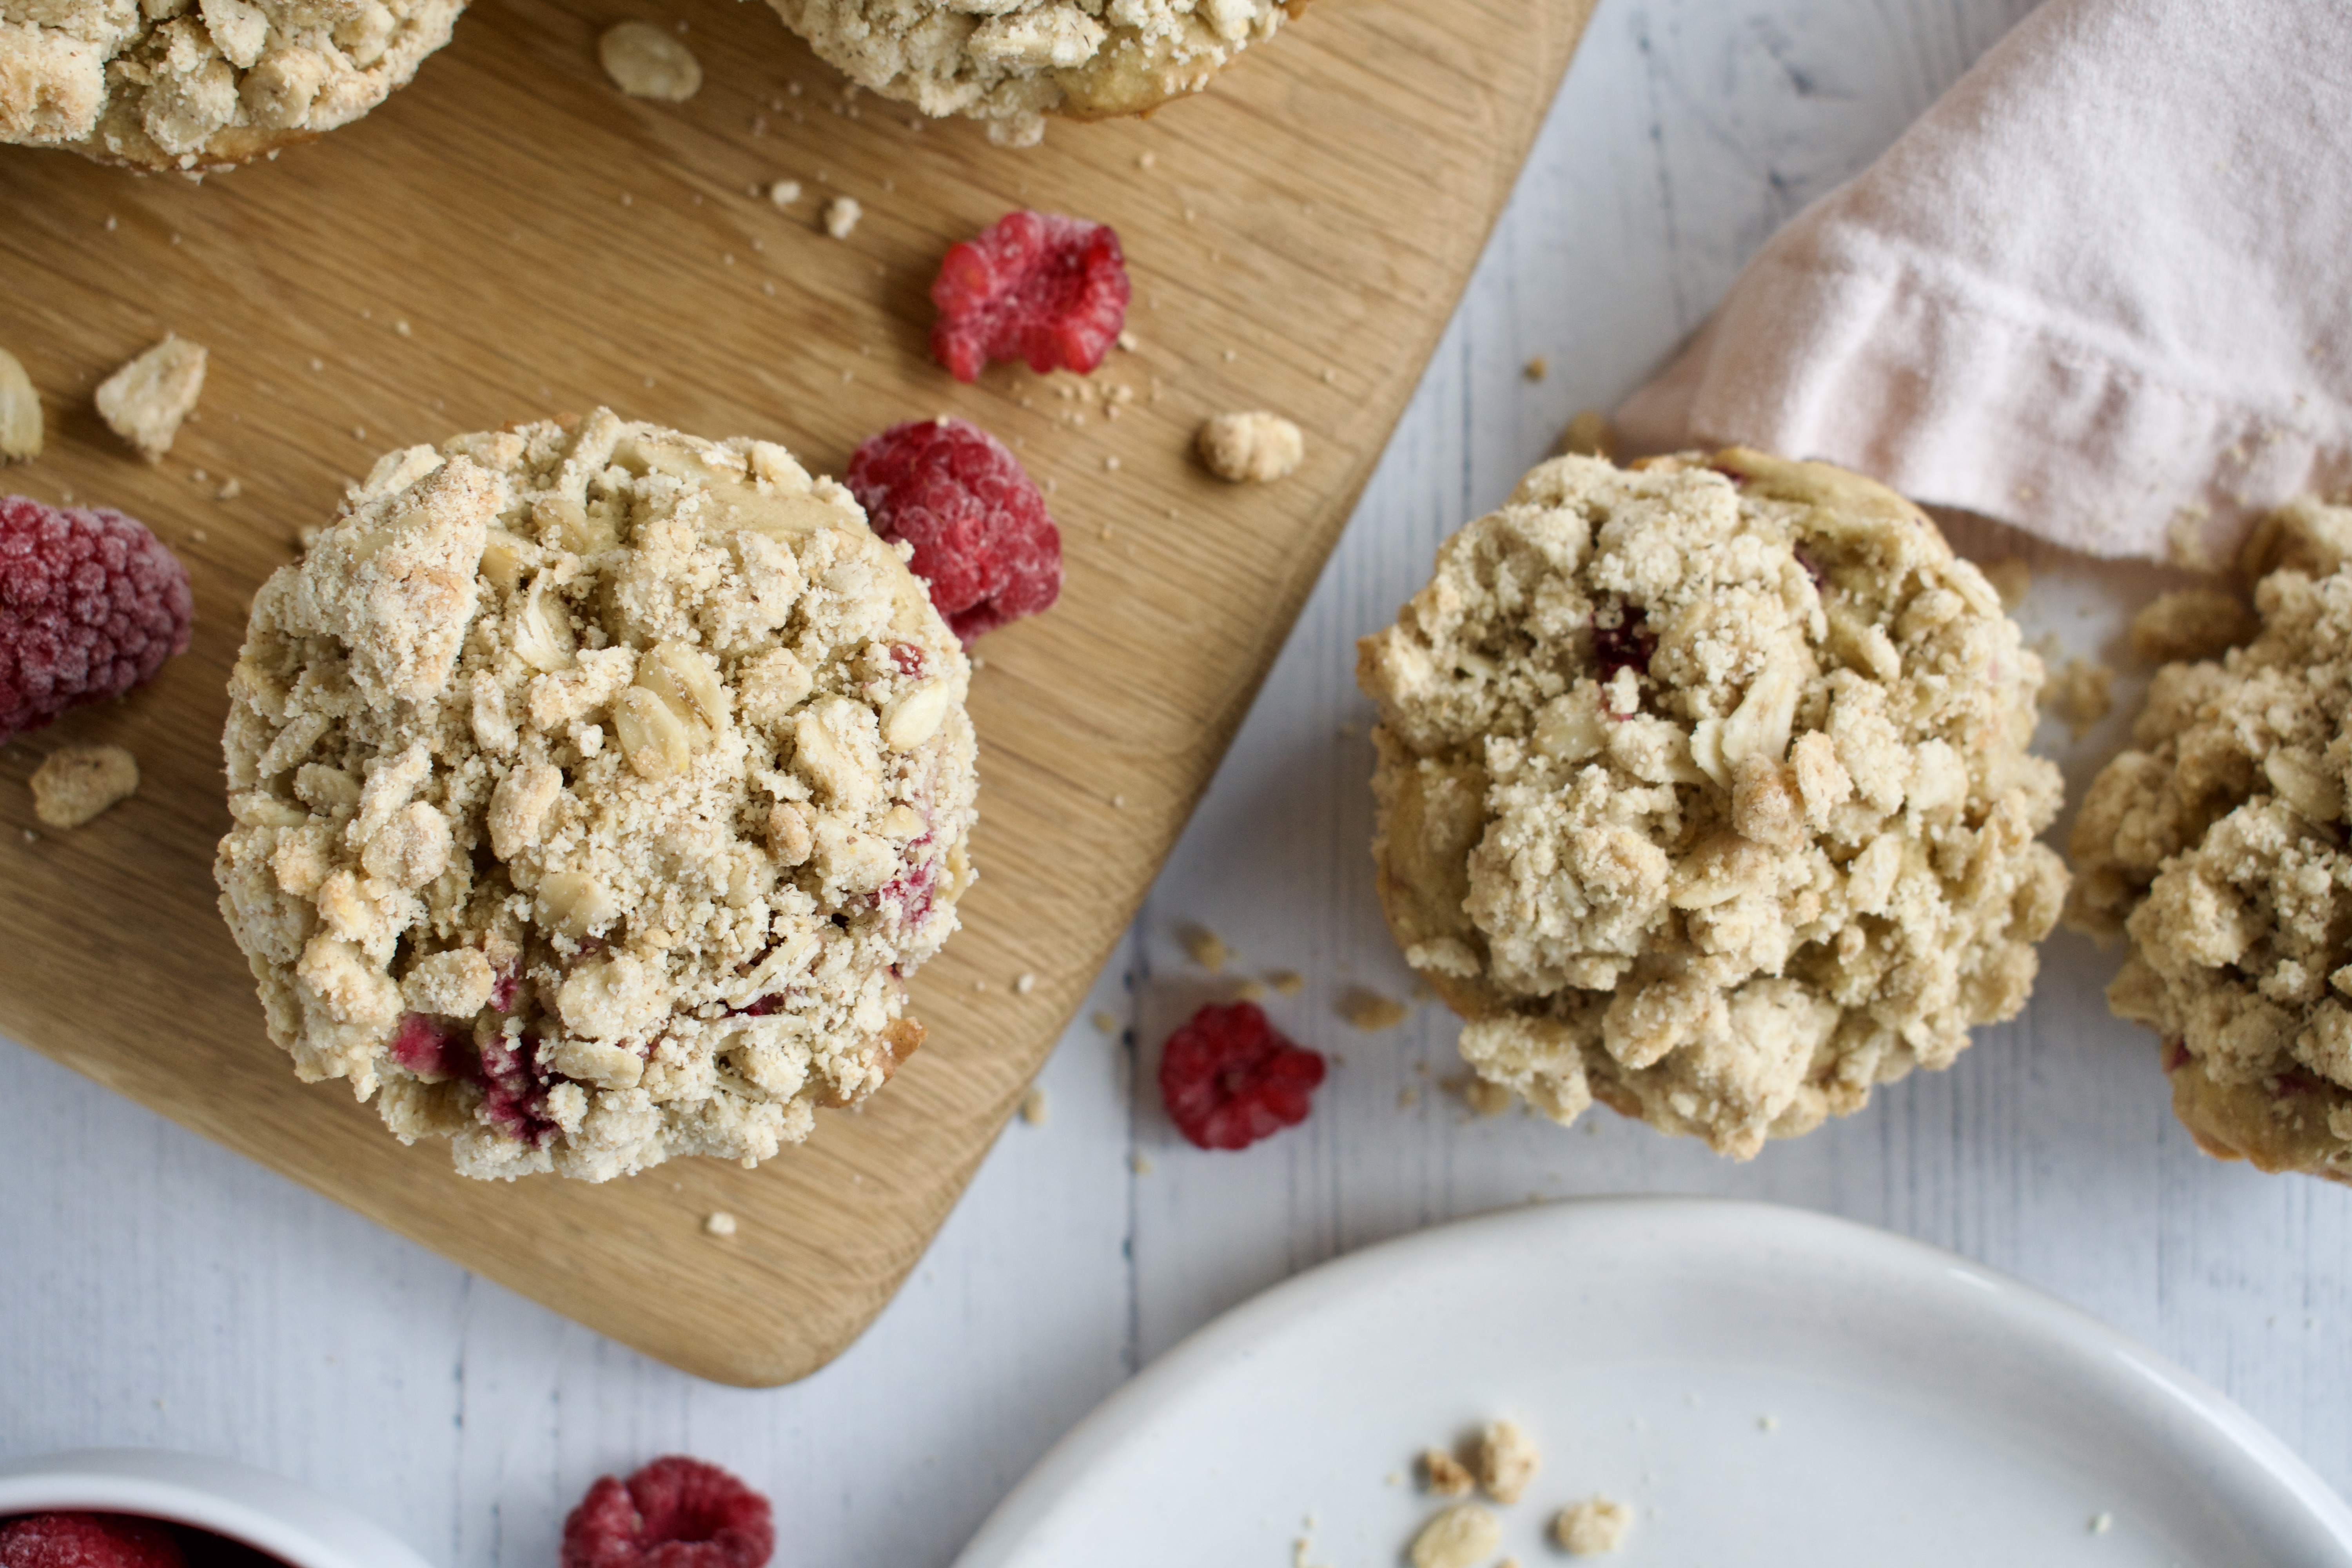
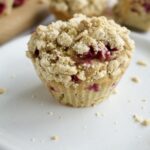
These gluten free raspberry crumble muffins are also dairy free and low sugar, with a completely Paleo option. Packed with fresh raspberries and topped with the perfect crumble, they are a must make!
gluten free raspberry muffins
You honestly can’t beat a good muffin, but I find gluten free muffins are often dry. I’m always disappointed when I purchase a gluten free muffin from the bakery, take a bite, and realize I wasted $10. I always think to myself “I can make a way better version at home!” So, I did with these raspberry crumble muffins! These delicious raspberry muffins are moist AND allergy free.
gluten free raspberry muffins
Bakery muffins are also often filled with processed sugar. I love re-creating healthier versions at home to show you that it’s possible to eat healthy, lower sugar baked goods that still taste amazing. These gluten free muffins are refined sugar free and a fraction of the sugar of a store bought version. They can even be made completely grain free for my Paleo friends!
These healthy muffins are super easy to make! You whisk together the dry ingredients in one bowl and the wet ingredients in another. Combine the two bowls, fold in your raspberries, and you’ve got your batter. Then you mix all the crumble ingredients together, top off the muffins, and bake. It’s that simple.
These gluten free raspberry muffins have a delicious crumble topping and are also completely dairy free with a paleo option. They're a fraction of the sugar of a bakery muffin, making them the perfect allergy friendly muffin to enjoy any time of day!
Combine crumble topping ingredients together and set aside. Start with 1 Tbsp of coconut oil and add more if mixture is too dry and not holding together at all.
Sift all the dry ingredients for muffins together in a bowl (flours, baking powder, salt).
Beat the wet ingredients for muffins together, except for raspberries.
Add the dry muffin ingredients to the wet and mix to combine.
Toss raspberries with 1 Tbsp of gluten free or cassava flour, then fold raspberries into the batter.
Divide batter into lined muffin tin. Top each muffin with some of the crumble topping and press down gently.
Bake for 22-25 minutes until a toothpick comes out clean. Let cool for 10 minutes then transfer to a wire wrack to finish cooling.
Notes
*For all paleo version, substitute the gluten free flour for 1/2 cup cassava and 1/4 cup arrowroot or tapioca starch
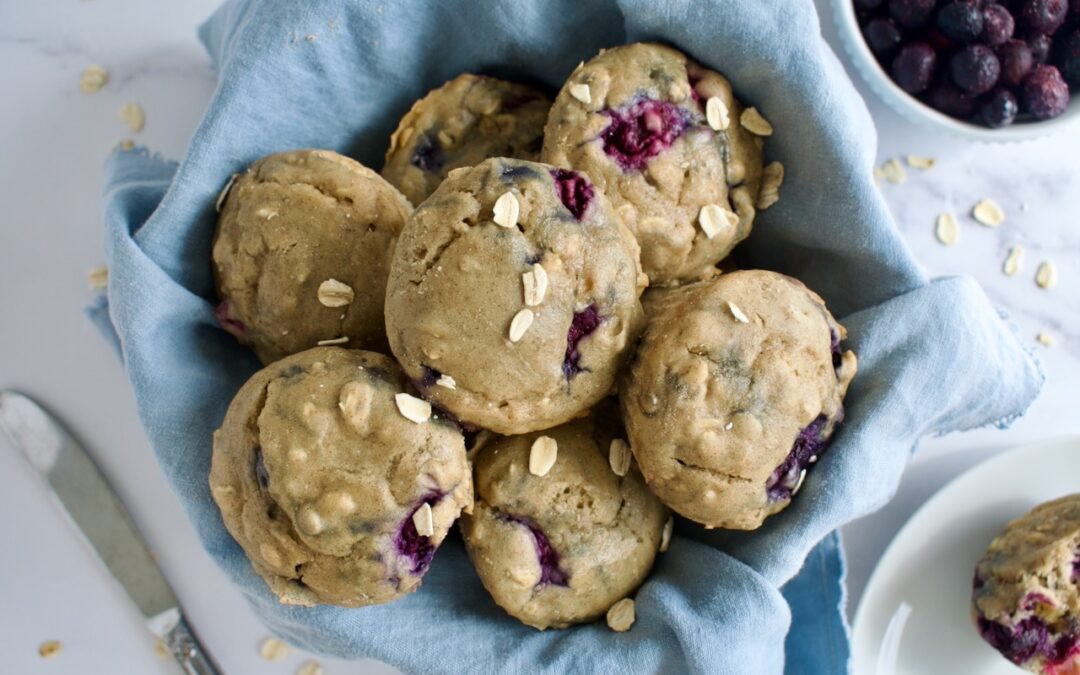
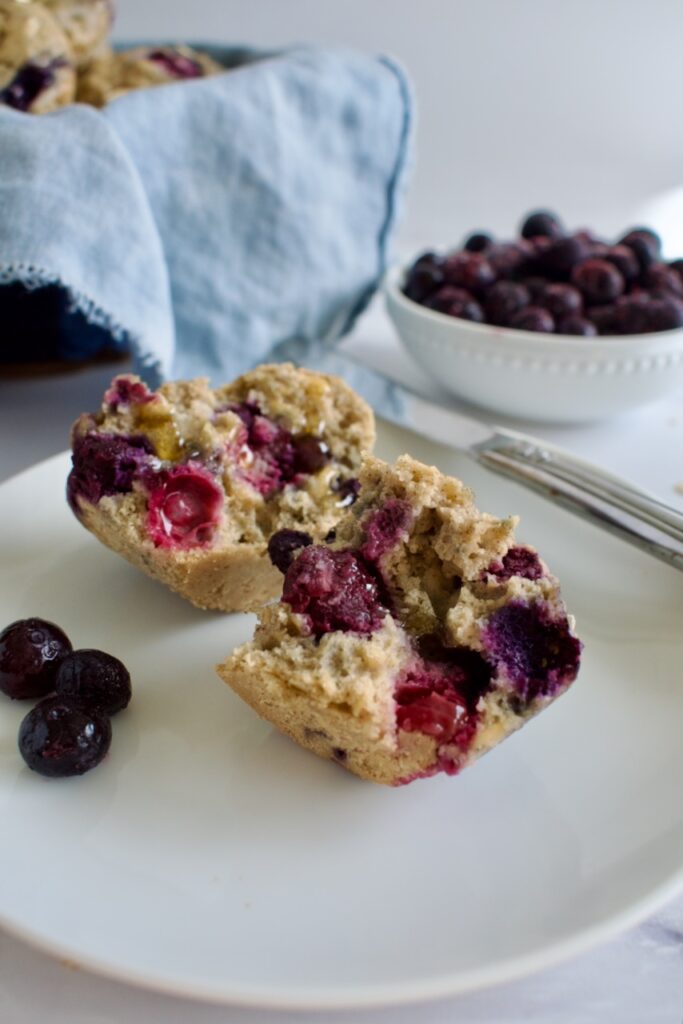
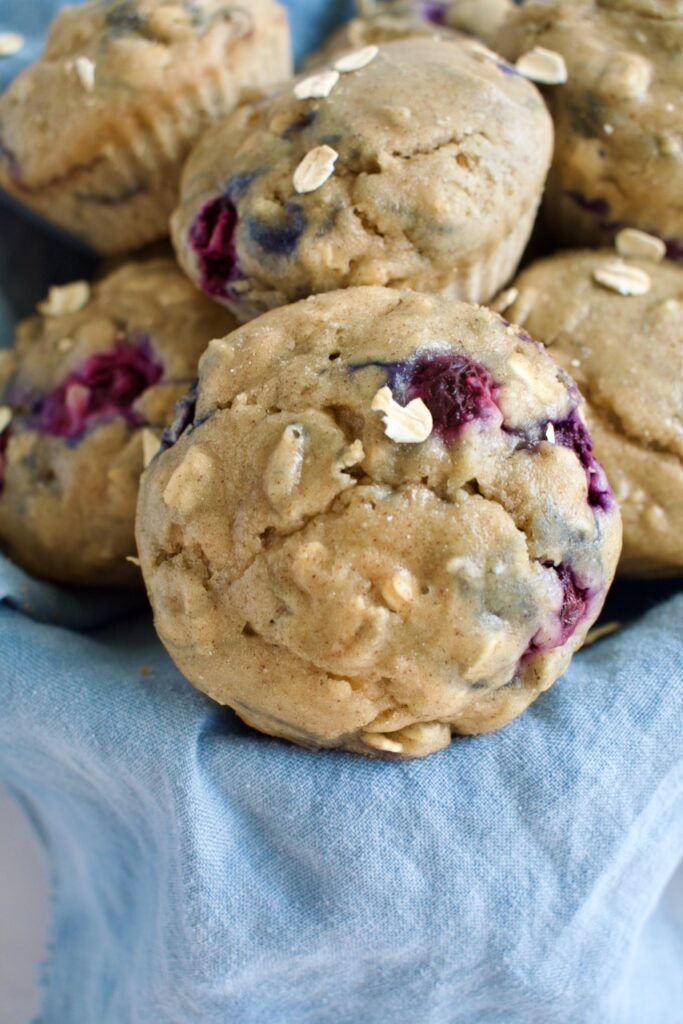
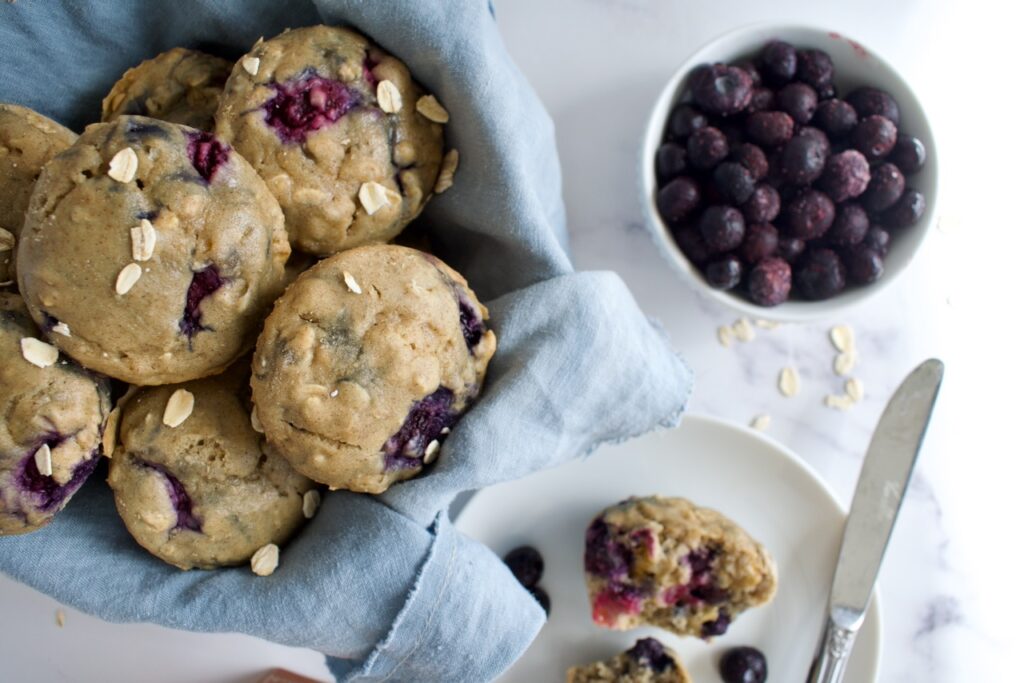
These gluten free blueberry oat muffins are the perfect breakfast muffin- filled with fiber, low sugar, and allergy friendly! These muffins are easy to make and ideal for meal prep.
gluten free blueberry oat muffins
Over this last year, I developed a new found love for oats in all forms (granola, cookies, muffins, etc), so I had to give some oat muffins a try. I don’t like when muffins have too many oats though. It can’t be overbearing! I love these gluten free oat muffins because there is only a 1/2 cup of oats in this recipe and plenty of blueberries.
gluten free blueberry oat muffins
These blueberry muffins are also completely refined sugar free. They are made with maple syrup and only a touch of it. These are the perfect, healthy breakfast muffin as they aren’t sugar loaded, but are packed with fiber from the oats and blueberries, and contain a good heaping of cinnamon. If you want your muffins to be a little sweeter, I suggest sprinkling the tops with coconut or brown sugar before baking or just drizzling your muffin with honey when ready to eat.
gluten free blueberry muffins
How to make gluten free blueberry oat muffins
First, you’ll whisk together all the dry ingredients. This includes a mix of 1:1 gluten free flour, tigernut or almond flour, gluten free oats, baking powder, and cinnamon
Second, you’ll beat all the wet ingredients together. This includes eggs, yogurt, maple syrup, oil or butter, and milk. You can use vegan butter and milk to keep this recipe completely dairy free.
Third, you’ll combine the dry with the wet and fold in the blueberries. It’s that simple! Just pop the batter in a muffin tin, bake, cool, eat.
These allergy friendly blueberry muffins are filled with fiber and flavor all while being gluten free, dairy free, and low sugar. These are the perfect, healthy breakfast muffin!
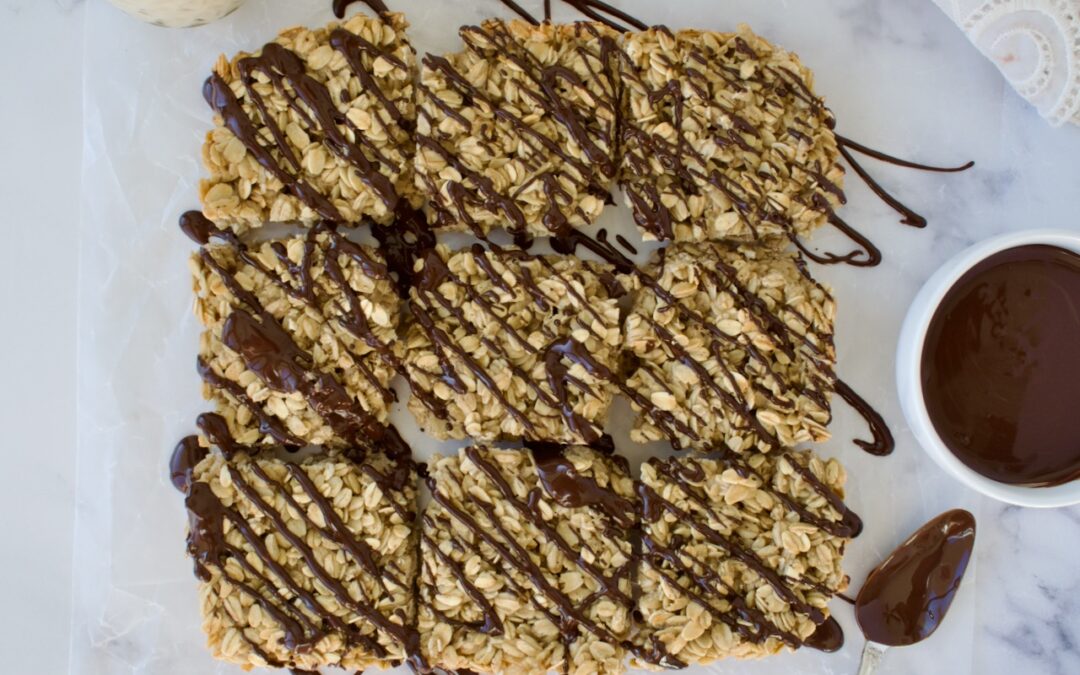
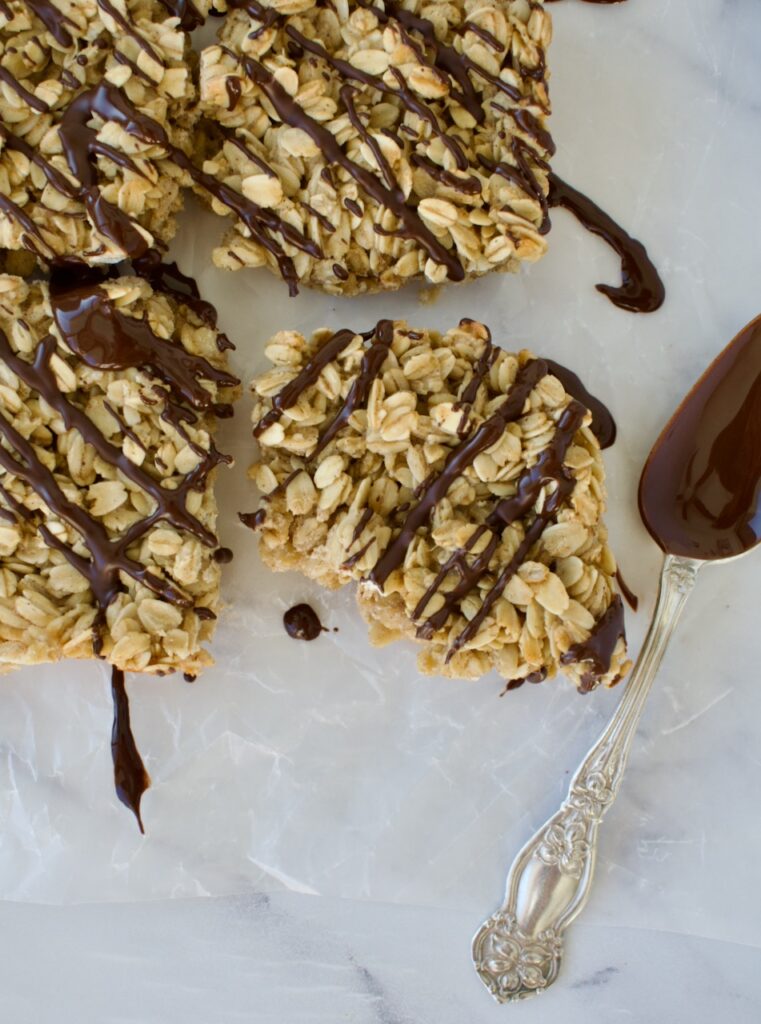
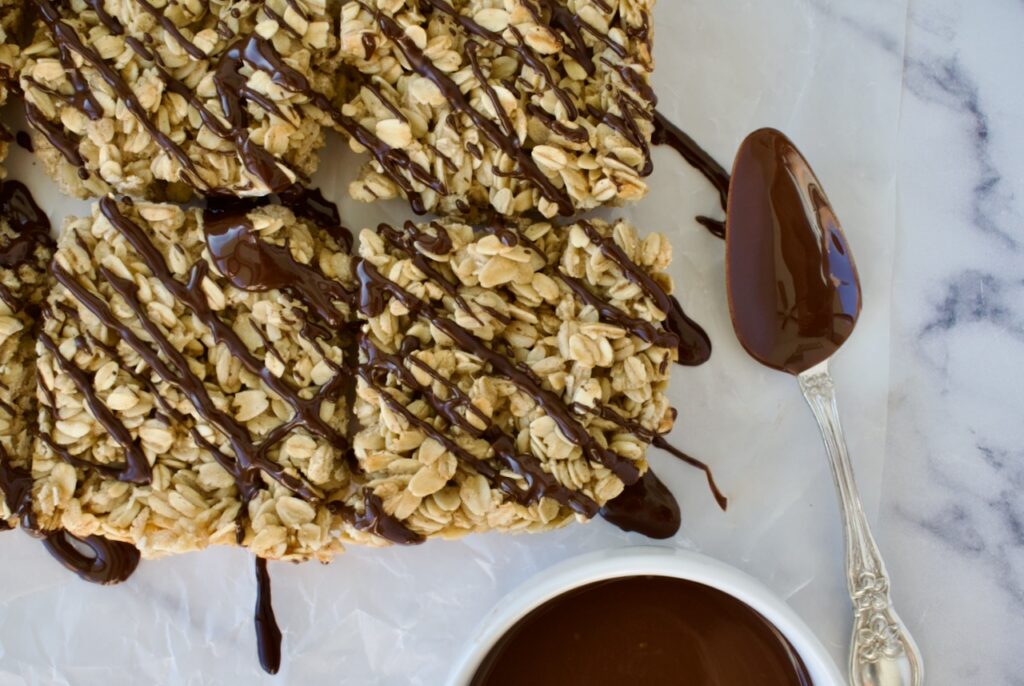
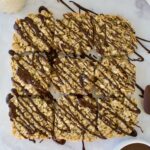
If you’re looking for an easy and healthy snack, then look no further than these gluten free protein oat bars. Made from real ingredients and whole proteins, these oat bars are far cleaner than anything you’d find in the store.
gluten free oat bars
Snacks are my love language and I always have something in my purse for emergencies, but a lot of pre-packaged snacks and bars are filled with fake sugars, weird flavors, and gut-disrupting ingredients. Having an easy, healthy, and high protein snack on hand for that afternoon slump is a must. That’s where these gluten free protein oat bars come in!
These oat bars are easy to whip up, made from real, whole food ingredients, and will last you the week.
protein oat bars
Ingredient Notes
Oats: To keep this recipe gluten free, make sure to use certified gluten free oats.
Protein: These homemade protein bars get their protein content from oats, egg whites, and protein powder. This recipe calls for pea protein as it acts like a flour. My favorite pea protein is from Sprout Living as it has no other added ingredients, flavorings, or sugar alcohols. Use code LEMONSNLYME20 for 20% off your order!
Wet ingredients: A combination of butter, maple syrup, and egg whites is used to hold these bars together. You can use real or vegan butter. I use vegan to keep it dairy free, but either works and adds to the flavor of these oat squares. This recipe uses real maple syrup as it’s better for your gut than a fake sugar substitute. Lastly, we’re keeping that protein content boosted with a few egg whites.
protein oat bars
To top off these homemade oat bars and make them perfect, you can’t skip out on the chocolate drizzle! I mean is it really an enjoyable snack or protein bar if there isn’t some chocolate involved?! You can use whatever your favorite chocolate is, just melt it down with a little coconut oil and then drizzle it over the top of the baked oats.
An easy and healthy snack, these protein oat bars are allergy friendly and made with whole food ingredients. High in protein and topped off with a chocolate drizzle, you can't go wrong with a batch of these for the week!
Add cooled melted butter, maple syrup, egg whites, and vanilla to a large bowl and whisk to combine.
Add the oats, protein powder, and cinnamon to the bowl and mix everything together.
Line a 9×9 inch baking dish with parchment paper.
Pour your oat mixture into the prepared baking dish and spread evenly.
Bake oat bars for 30-35 minutes, until slightly golden. Let cool completely before cutting into 9 squares.
When bars are cooled, melt your chocolate chips and coconut oil together until smooth. Drizzle over the oat bars (or dip them into the chocolate). Place in the fridge until chocolate has set.
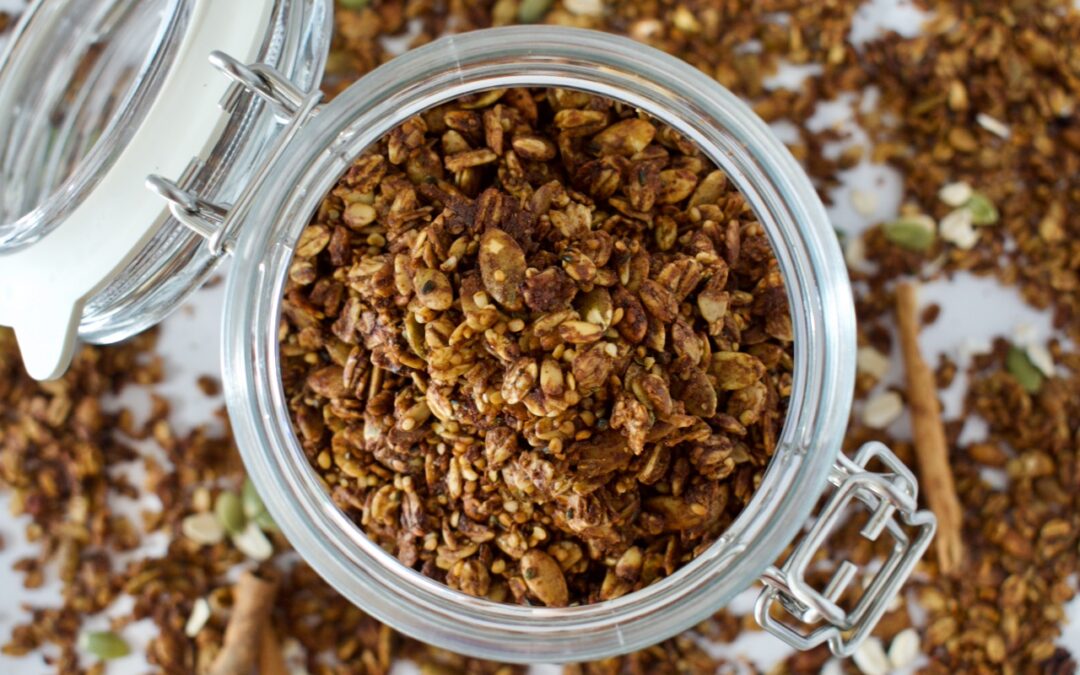
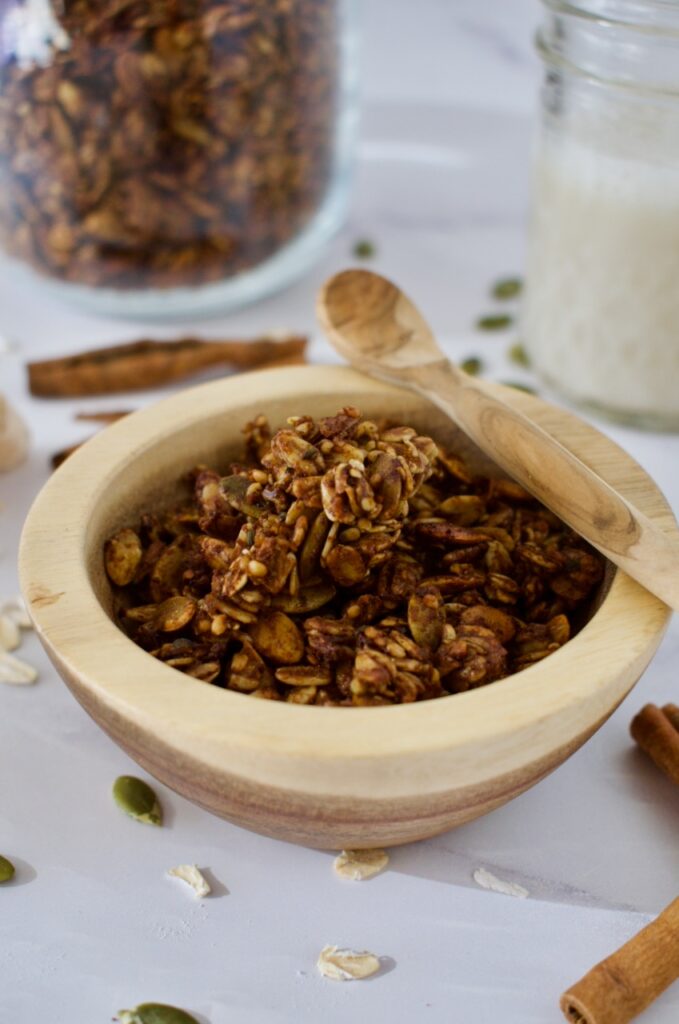
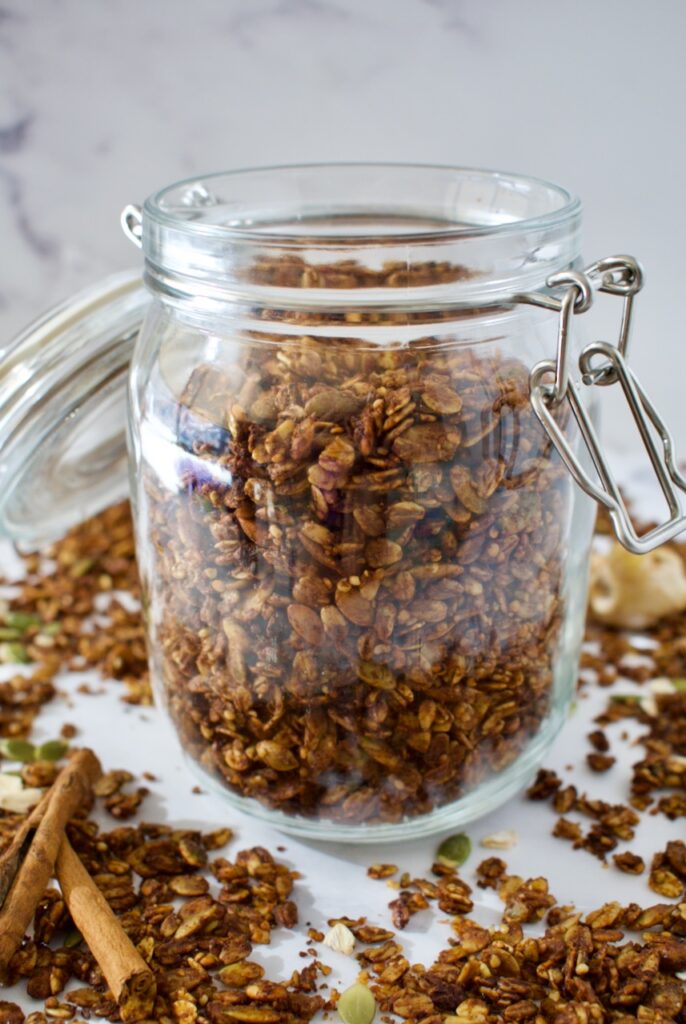
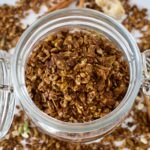
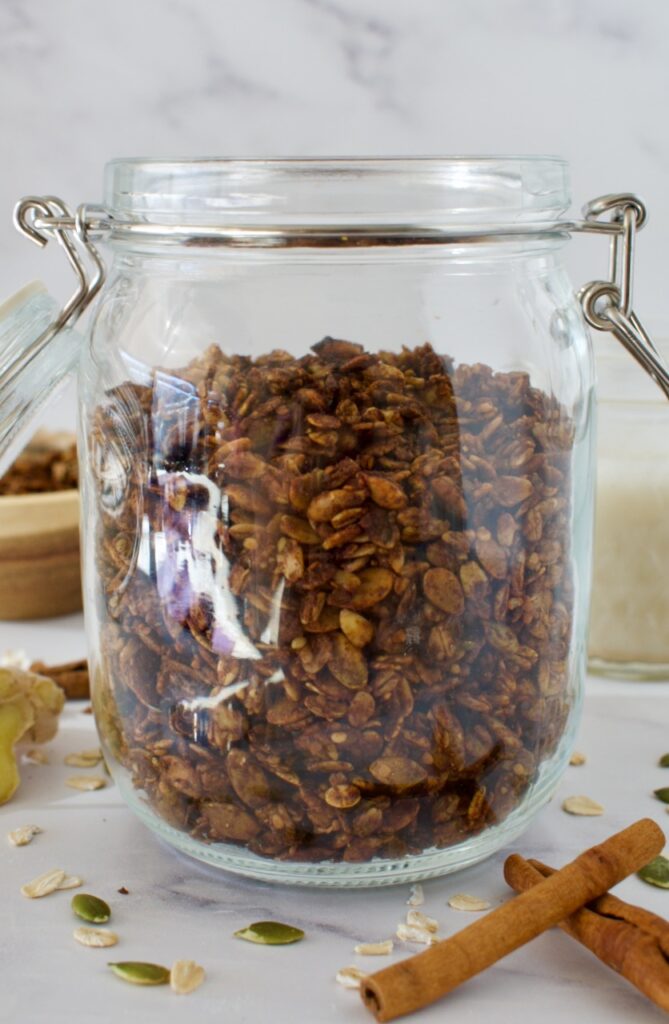
I’m so excited to be sharing this delicious and healthy version of gluten free cereal. This gingerbread gluten free granola is so good and one of my favorite winter recipes with the warming spices, rich molasses flavor, and touch of sweetness. This granola recipe is allergy friendly, vegan, and nut free.
gluten free granola
Ingredient Notes
Dry Ingredients: One thing I love about homemade granola is how versatile it is. You truly can add whatever you have in the pantry to oats and it will taste good. I provide specifics that I think taste good in this recipe to keep it a nut free granola, but you can sub out the seeds for your favorite nuts, like walnuts or almonds.
One thing to note is that, although oats are naturally gluten free, they often encounter cross contamination during the processing and packaging of them. This is why it is important to use certified gluten free oats if you have a gluten allergy or celiac disease.
This granola recipe also calls for a combination of gingerbread spices, including cinnamon, ginger, and nutmeg. They really pull this recipe together!
Wet Ingredients: The wet ingredients in this recipe are a combination of pumpkin puree, maple syrup, oil, and molasses to keep it a completely vegan granola. The pumpkin and molasses are important for that rich, grounding gingerbread flavor. The molasses and maple syrup add the perfect amount of sweetness without being overbearing like some store bought cereals can be. We’re keeping this a low sugar granola and healthy granola!
nut free granola
How do you make granola? It’s super easy! All you do is mix everything together in a big bowl and bake it. One key to getting evenly crunchy homemade granola is to spread your mixture evenly over a baking sheet. Then you want to mix it regularly during the baking process so that all of the granola bakes evenly. You also want to make sure not to over bake it. Granola can burn quickly, so you want to keep an eye on it and take it out before you think it’s done. Homemade granola hardens as it cools and that is where the crunch will come from.
This delicious and warming allergy friendly granola is gluten free, vegan, and nut free. It incorporates warming spices and a touch of sweetness for the perfect healthy, homemade granola recipe!
1tspflaky sea saltuse 1/2 tsp regular salt if you don't have flaky
1/4cuppumpkin puree
1/3cup maple syrup
1/4cupolive oilmelted coconut oil also works or another neutral oil
1/4cupmolasses
Instructions
Preheat oven to 350F.
Mix the oats, pumpkin seeds, hemp seeds, spices, and salt together in a large bowl.
Combine the pumpkin, maple syrup, oil, and molasses together in a small bowl.
Add the wet ingredients to the dry and mix to combine well so all the dry ingredients are coated.
Spread the granola mixture over a large, parchment lined baking sheet in an even layer.
Bake for 15 minutes then mix the granola and bake for another 15 minutes. The granola is done when it starts smelling fragrant and the granola around the edges of the pan are starting to really brown. Let the granola cool at room temperature, it will harden up and get nice and crunchy!
I like to store my granola in the freezer. It keeps it crunchy and fresh! Either way, be sure to keep granola stored in an airtight container.
Notes
*You can sub the nuts for 1.5 cups of your favorite nut or seed blend!
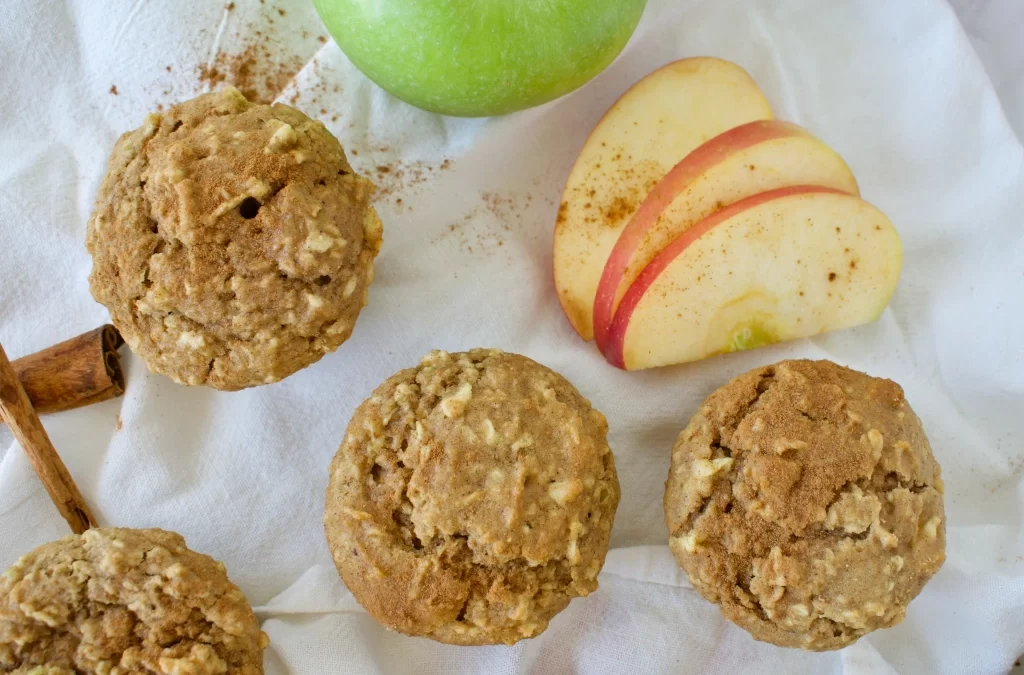
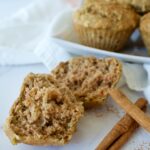
I was in the mood for a simple cinnamon-apple muffin and these delivered. These muffins aren’t anything fancy, but they’ll satisfy your cravings for all the fall flavors. If you’re not usually a fan of apple muffins or bread because of the chunks of apple, these muffins are your new best friend because we’re using shredded apple to disperse that apple flavor and moisture throughout the muffin.
These gluten-free and dairy-free muffins are also filled with delicious cinnamon, making them perfect alongside your cup of coffee or tea. If you are a huge cinnamon fan, you can amp up the cinnamon flavor by using cinnamon applesauce or even a cinnamon infused maple syrup if you want to get really fancy.
The hardest part of this recipe is chopping and shredding the apples. I suggest using a food processor to make it easy, but you can always do it by hand if you desire. Once the apples are shredded, the recipe comes together quickly. You’ll just beat together your wet ingredients, add the dry, then fold in the apples and bake!
These gluten free and dairy free Cinnamon Apple Muffins are a great way to embrace fall flavors! They are lightly sweetened, keeping them low sugar & perfect for everyone
1/2cupapplesauce*if you are a huge cinnamon fan, you can use cinnamon applesauce
1/3 cupmaple syrup
Instructions
Preheat oven to 350F
Chop and grate your apple. Place shredded apple in a paper towel or cheesecloth and gently squeeze once to remove just a little bit of the moisture. Don’t overdo it and don’t squeeze all the liquid out. Set aside.
Sift all dry ingredients together in a bowl (flours, baking soda, salt, cinnamon).
Combine all wet ingredients together in a separate bowl (eggs, oil, applesauce, maple syrup) and beat until smooth.
Add dry ingredients to the wet ingredients and combine on low (with paddle attachment if available).
Fold in the shredded apple.
Divide batter evenly among a lined muffin tin. you should get 12 muffins.
Bake for 23-27 minutes, until a toothpick just comes out clean. Start checking at 23 minutes and don’t over bake!
Let cool for 10 minutes in the pan then remove muffins to a wire rack to finish cooling.
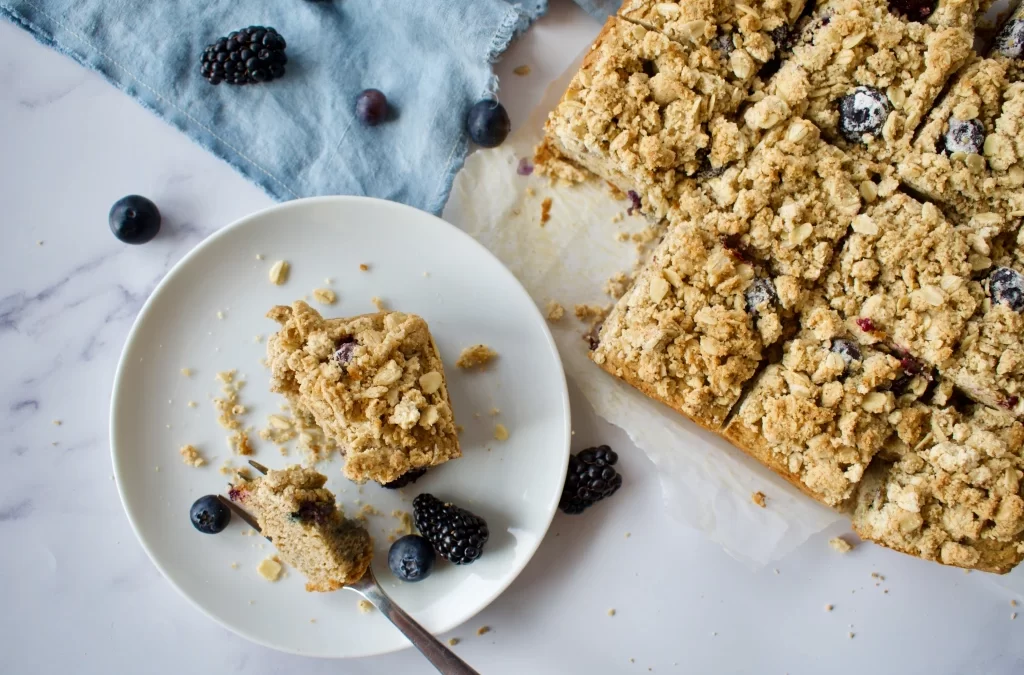
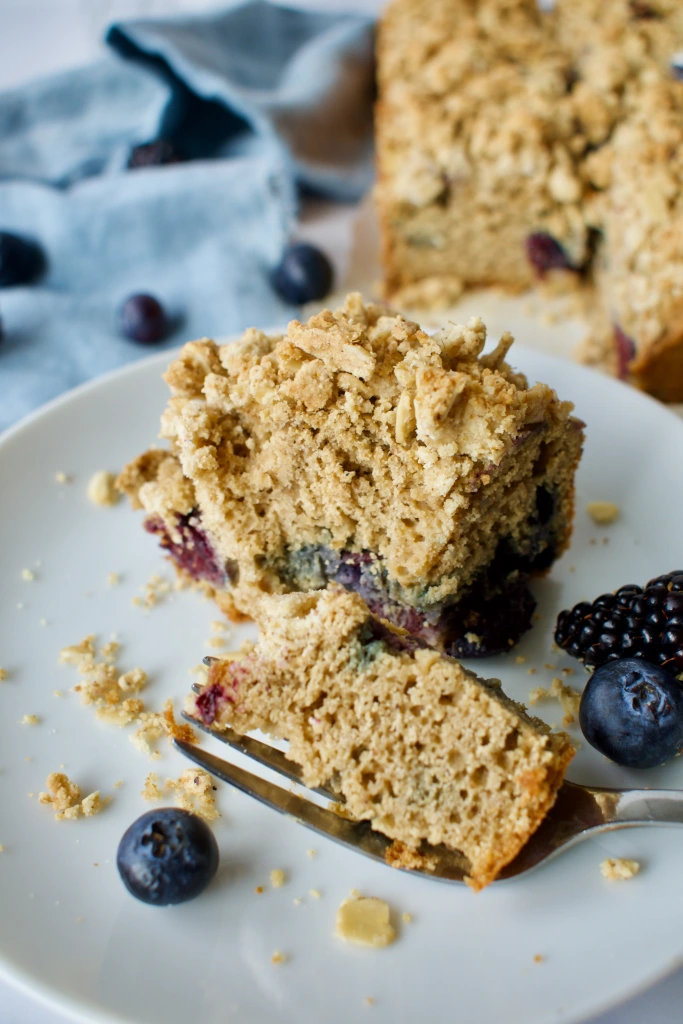
Enjoy berries this summer in this delicious Berry Crumble Cake that is made completely gluten free and dairy free. Packed with fresh blueberries and blackberries, it’s topped off with a crunchy crumble!
gluten free and dairy free berry yogurt crumble cake
This is a delicious summer dessert filled with some of my favorite flavors and textures! We’ve got the berries for summer, a delicious crumble topping for that crunch, and the moist yogurt cake to bring it all together. I like using a combo of blueberries and blackberries for this recipe, but you can use what you have.
gluten free blueberry crumble cake
Gluten Free Berry Crumble Cake
Ingredients and Substitutions:
Flour: this cake is made with a combination of gluten free flour and tigernut or almond flour. I have not tested a Paleo version.
Yogurt: I use a vegan yogurt as I am dairy free, but Greek yogurt would also work!
Berries: this recipe calls for fresh berries. I have not tested it with frozen berries, but I think that would work just fine.
Crumble topping: the crumble topping is made with oats. You can eliminate the oats and use more flour or nuts if desired.
Sweetener: this cake is made completely refined sugar free by using coconut sugar and maple syrup.
More Berry Recipes
If you love berries as much as me and are looking for more delicious berry recipes, check these out:
This delicious gluten and dairy free crumble cake is the perfect summer dessert. A soft cake is sweetened by delicious, fresh berries and then finished off with the perfect crunchy crumble on top!
Hi! I'm Victoria. I was diagnosed with Lyme in 2012 and have been on a healing journey ever since. I love helping others on their road to healing through allergy friendly recipes, exercise, and overall well-being.