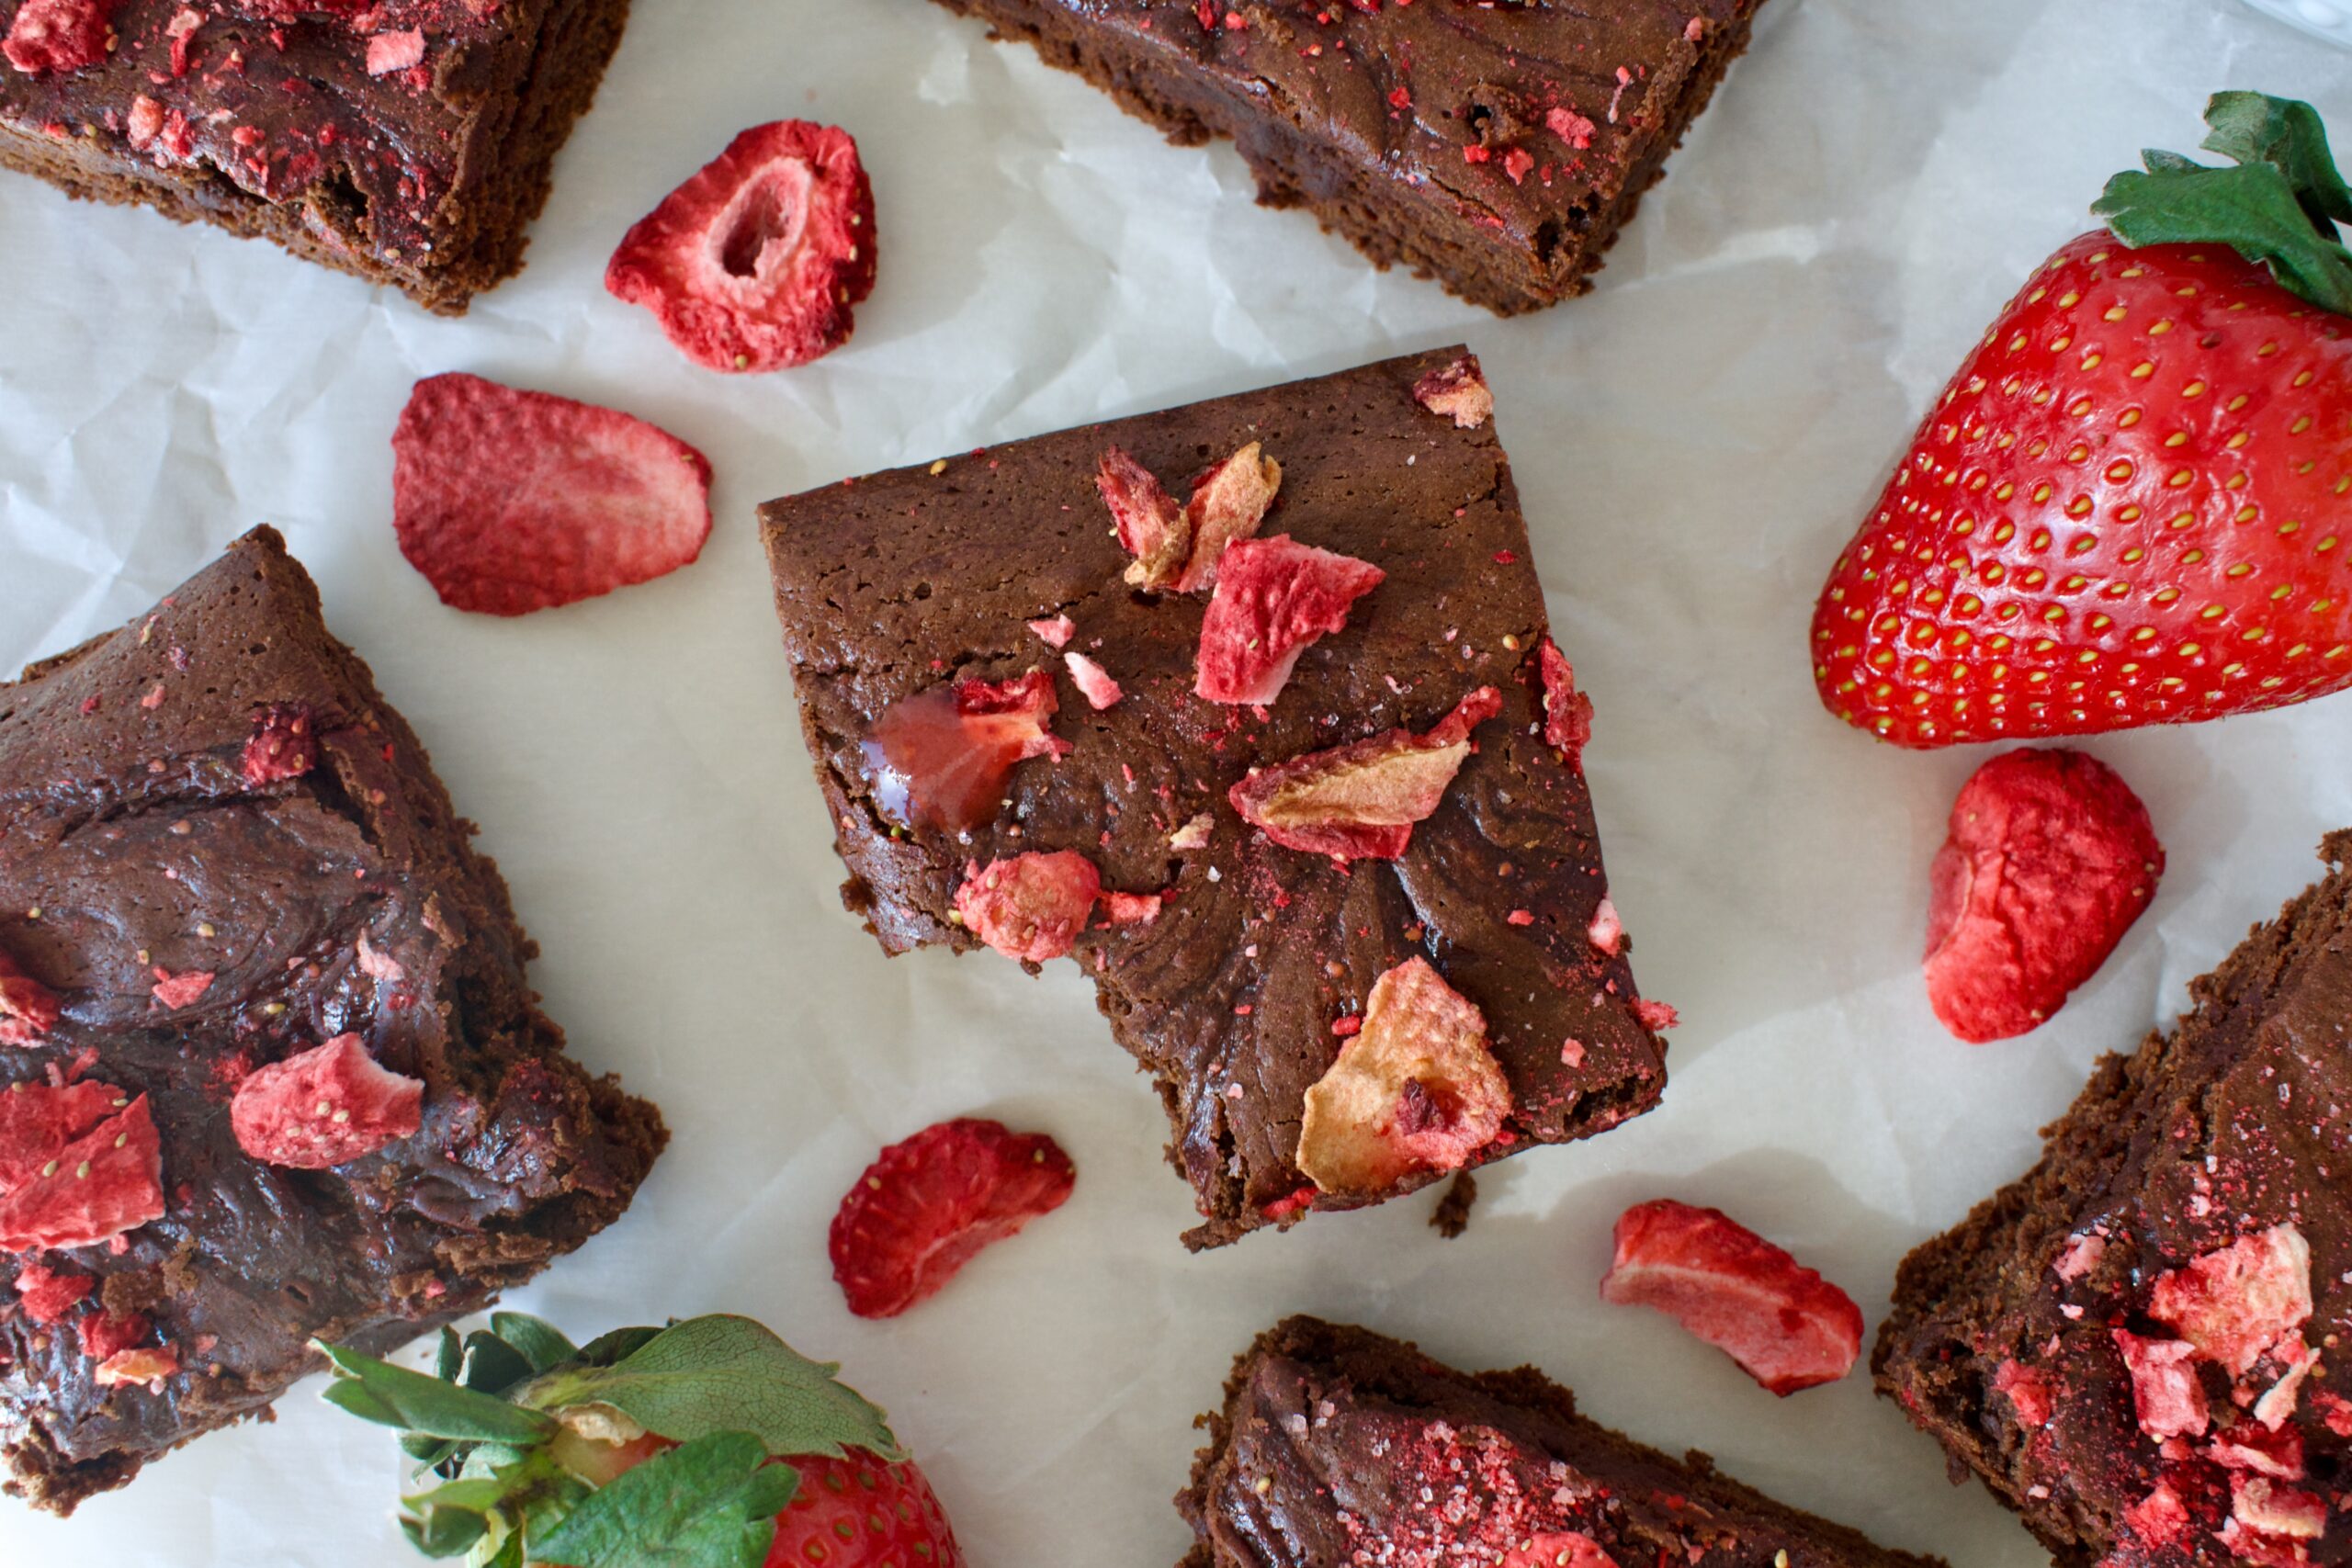
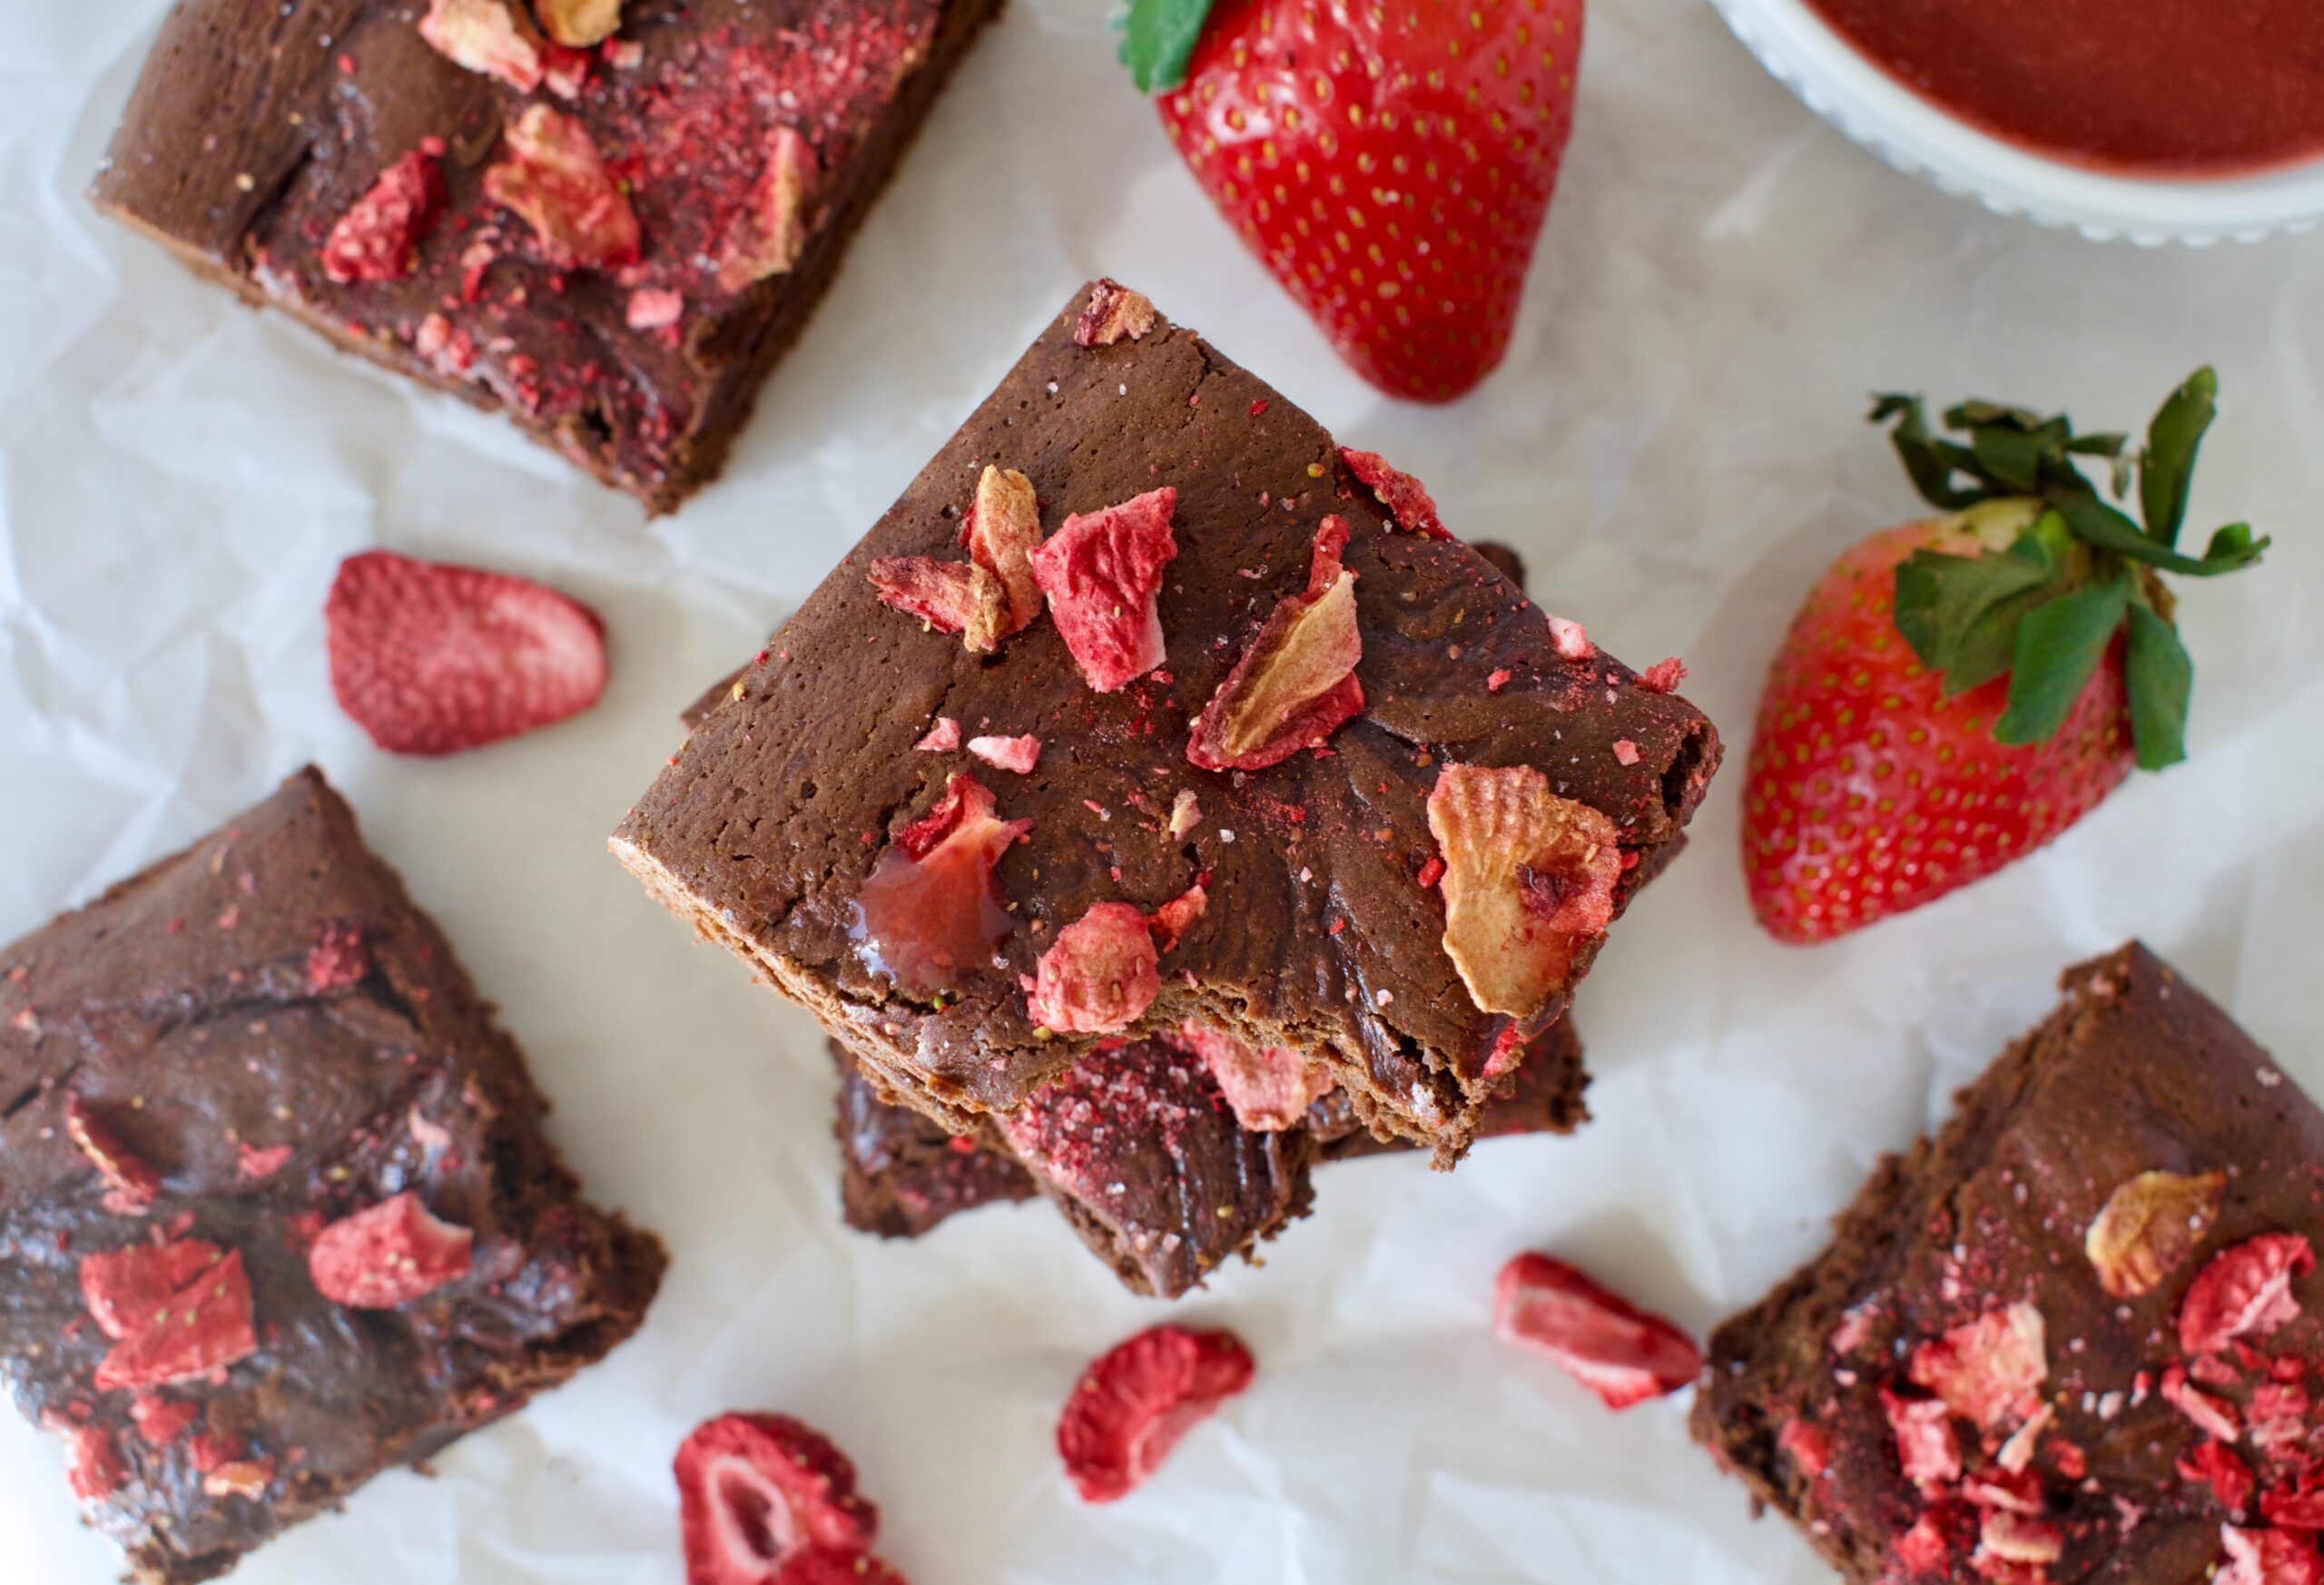
These Gluten Free Fudgy Strawberry Brownies are a rich and delicious, yet healthier, take on traditional brownies. They are also gluten free and refined sugar free, topped with strawberry jam and freeze dried strawberries.
gluten free fudgy strawberry brownies
I love making these gluten free strawberry brownies for Valentine’s Day! They are such a fun Valentine’s Day dessert. Strawberry and chocolate is not only a classic combo, but a classic Valentine’s combo, so these gluten free brownies are the ultimate holiday treat.
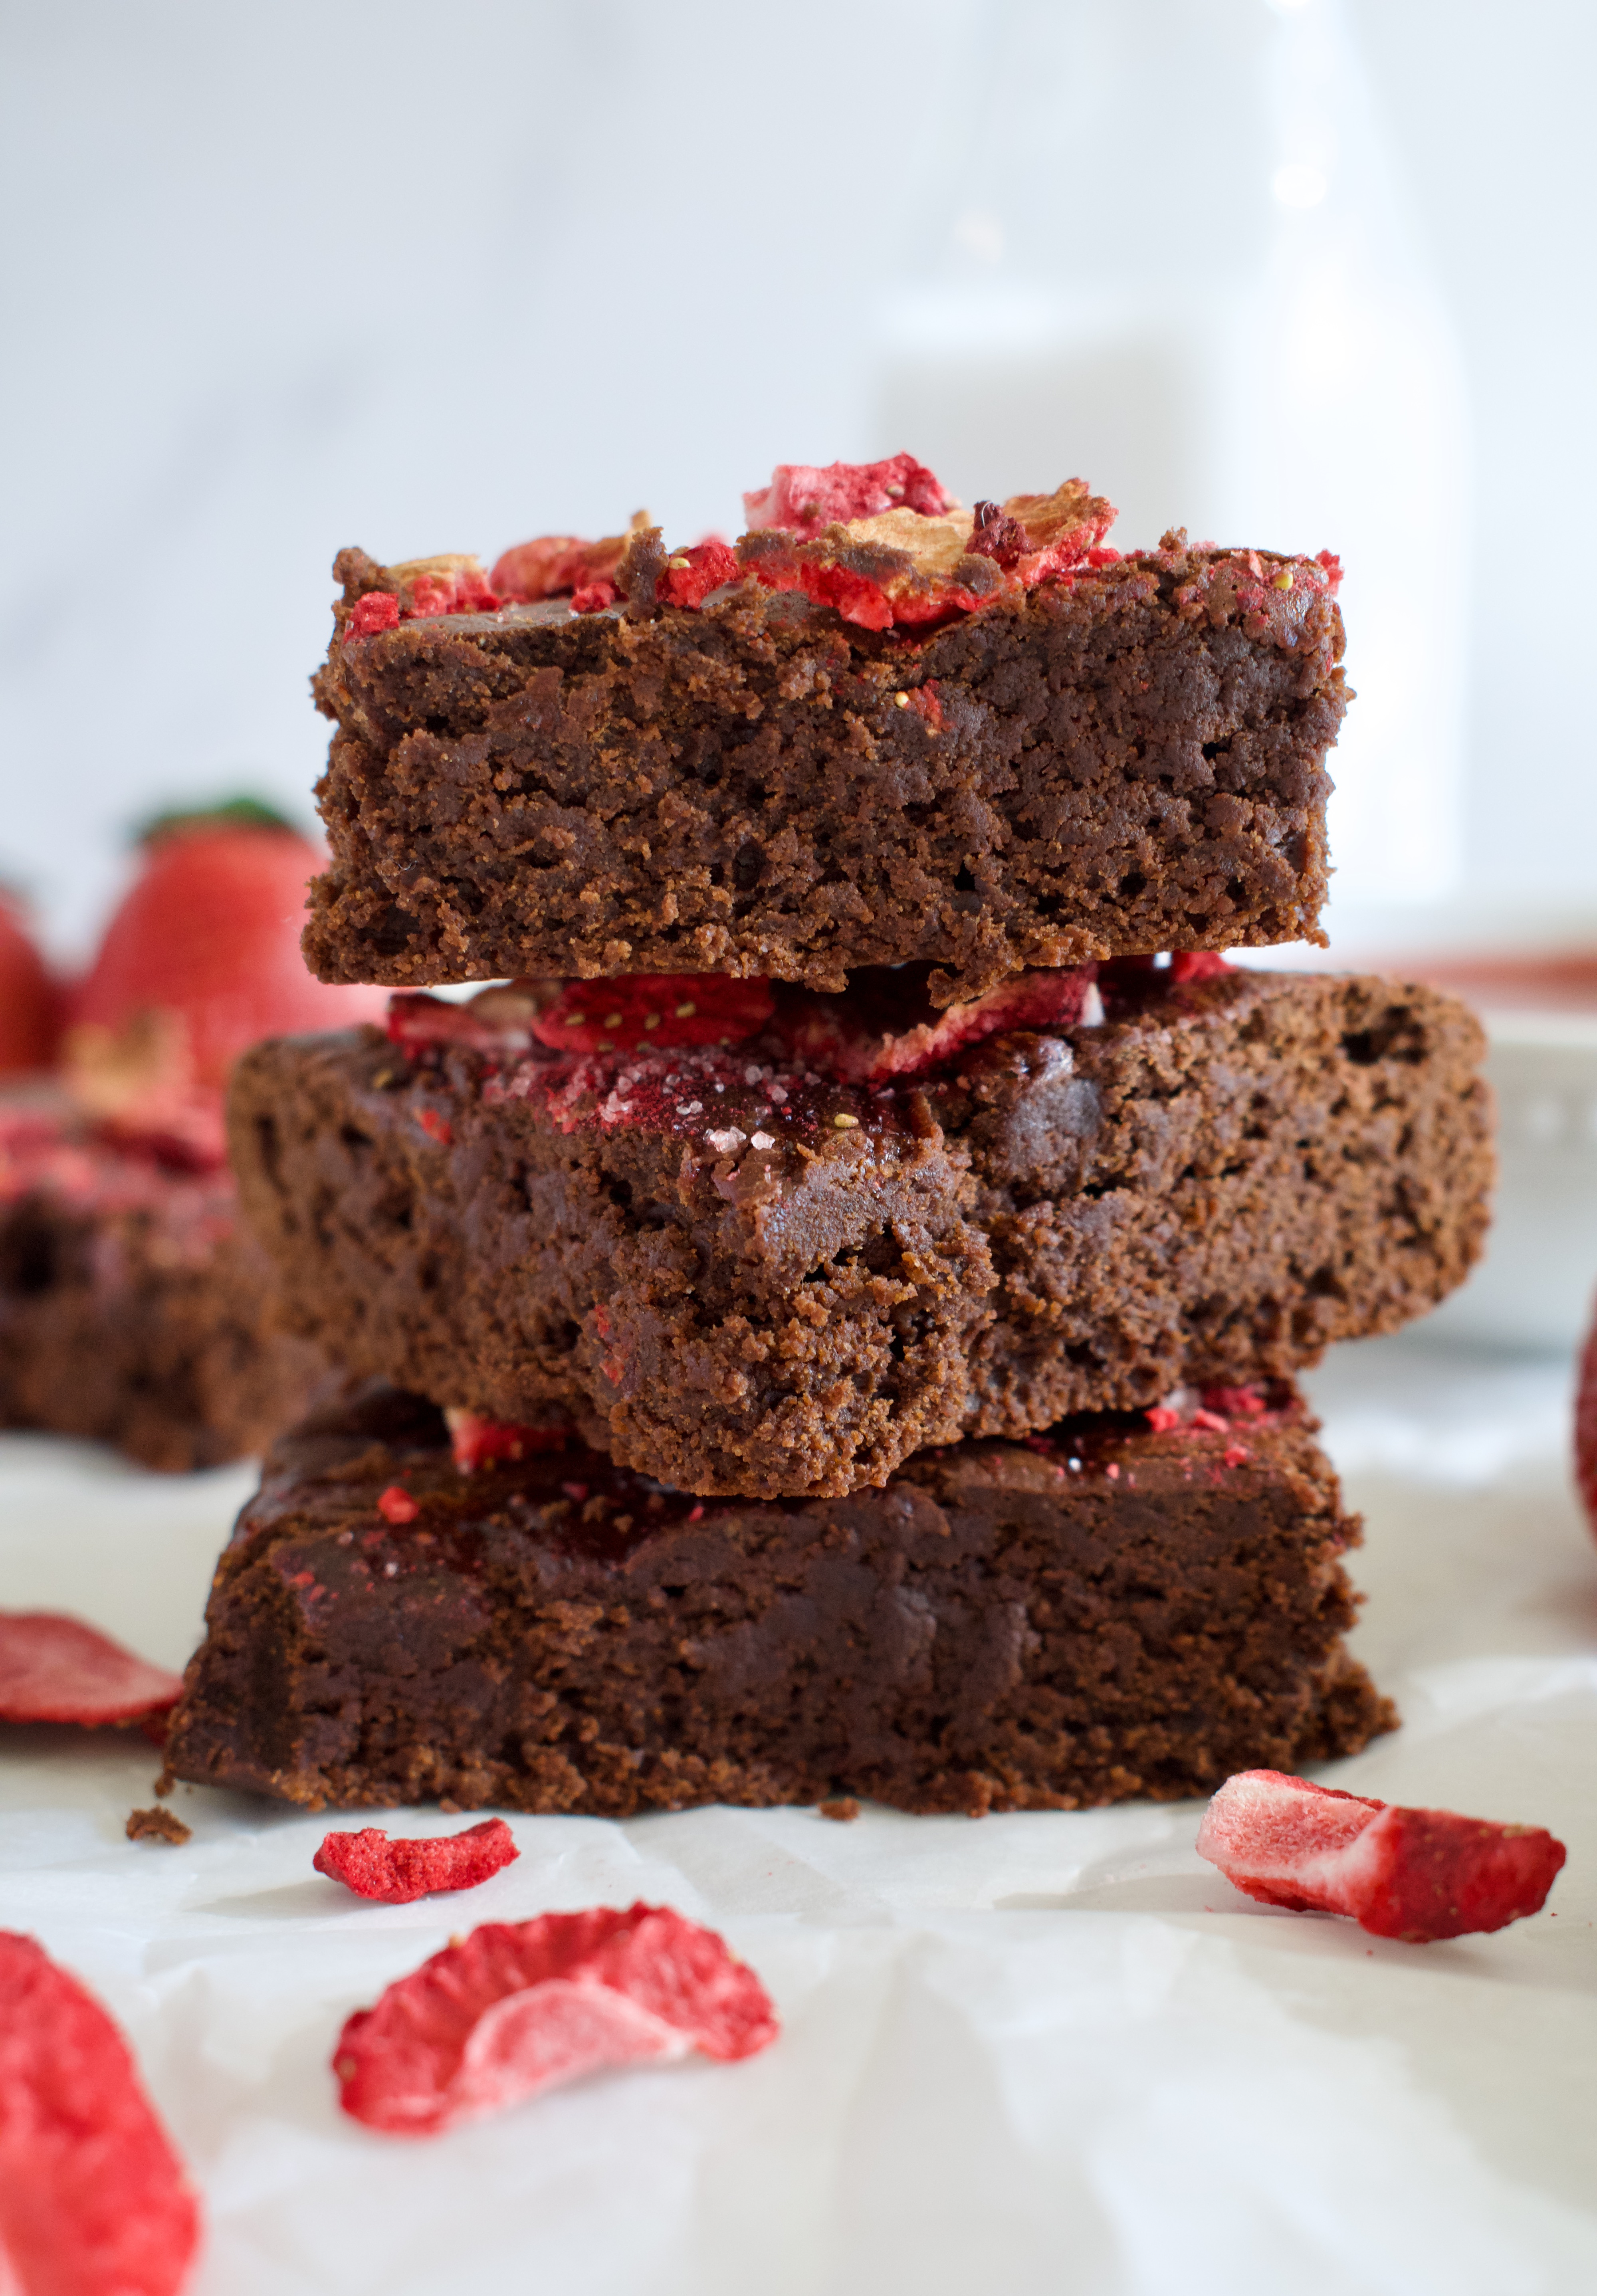
These strawberry brownies are very rich and super fudgy, so if that is your jam, you’ll love this brownie recipe. I use dark chocolate to make them extra rich, but you can always use a different variety of chocolate so they aren’t so intense. This recipe also calls for coconut sugar and no dairy, because I’m all about making healthier versions of recipes here. So, I hope you love this healthy brownie recipe!
gluten free fudgy strawberry brownies
Fudgy Strawberry Brownie Ingredients
Coconut oil: the base fat in this recipe is coconut oil to keep these brownies dairy free and healthier.
Chocolate chips: be sure to pick a refined sugar free variety (like HU Chocolate brand) to keep this recipe refined sugar free.
Coconut sugar: this brownie recipe calls for coconut sugar to keep it refined sugar free and lower glycemic.
Vanilla extract
1:1 gluten free flour: keep this recipe gluten free by using a 1:1 gluten free baking flour
Tapioca starch: adding a couple tablespoons of tapioca starch to gluten free baked goods helps with texture and crumb.
Salt
Baking powder: we only use a small amount of baking powder in this recipe to keep the brownies fudgy vs cakey.
Strawberry jam: we’re using jam and freeze dried strawberries to get the strawberry flavor in these brownies. The jam infuses strawberry flavor and increases the dense, fudginess of these gluten free brownies
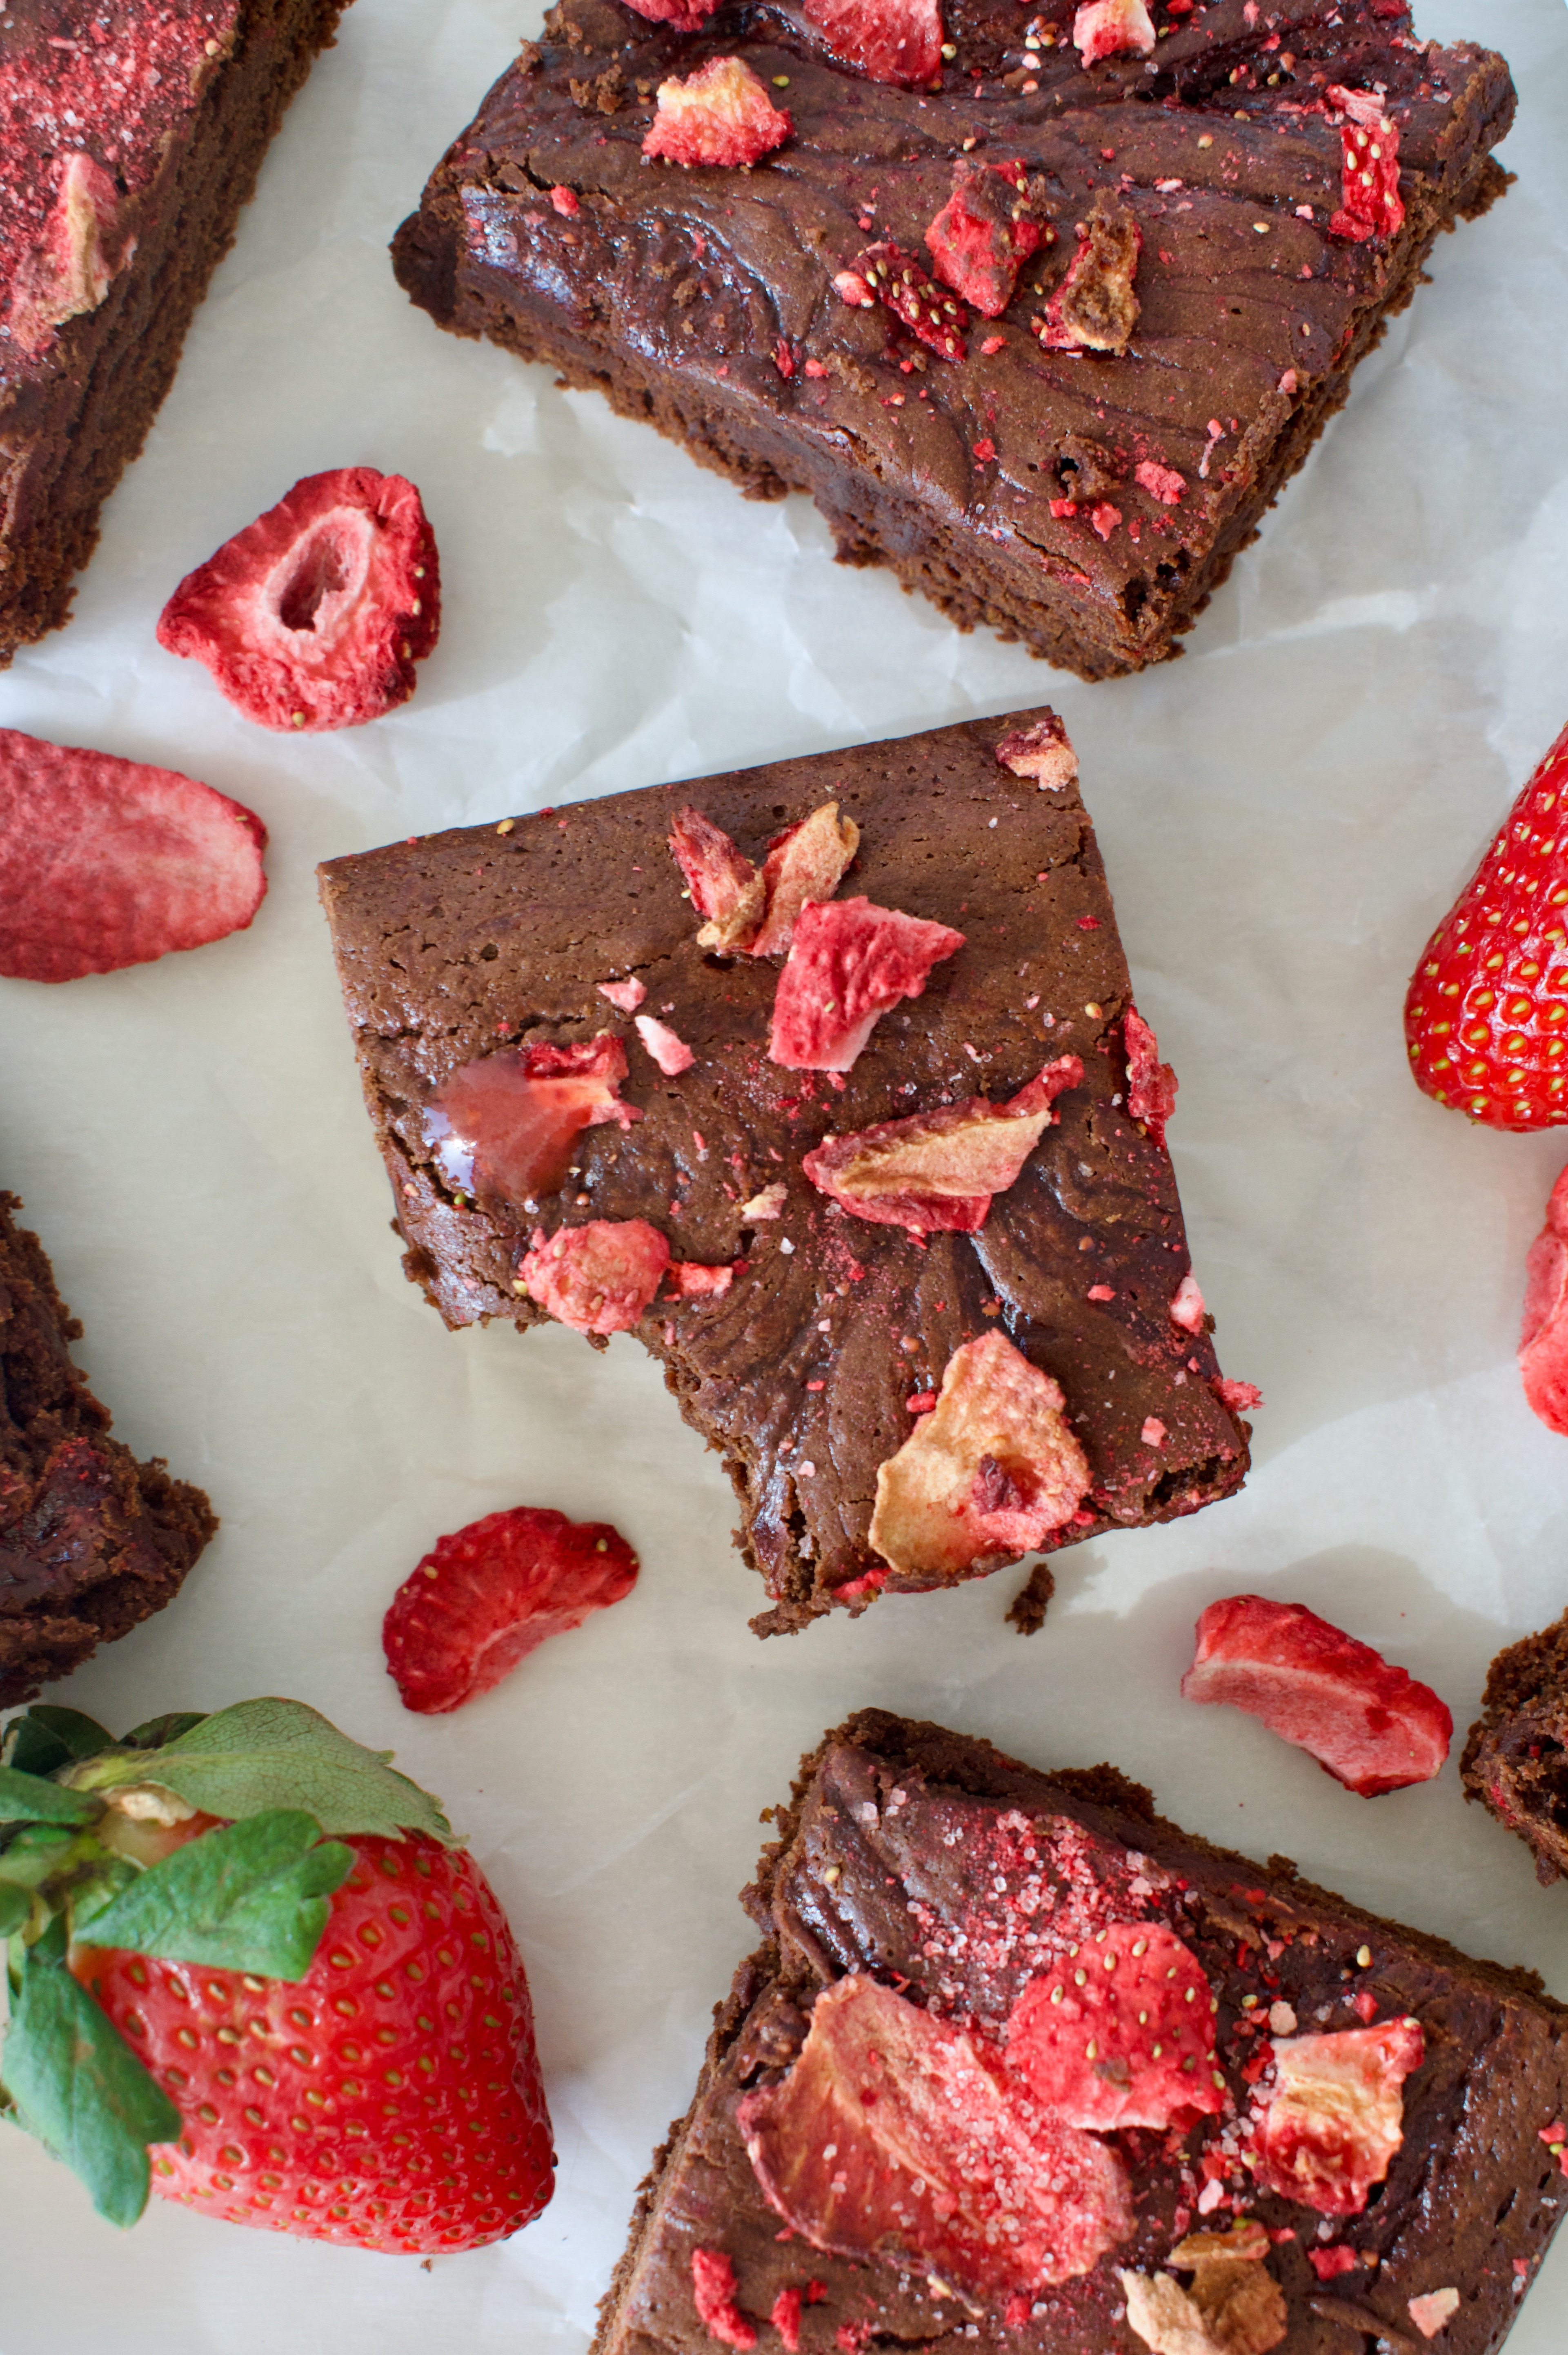
Freeze-dried strawberries: sprinkled on top for extra strawberry flavor and look!
How to Make Gluten Free Fudgy Strawberry Brownies
The first step is to melt together the coconut oil and chocolate chips, then whisk in the cocoa powder and set aside.
Next, you’ll beat the eggs and coconut sugar together for several minutes until the mixture is lighter in color. This helps with the glossy top!
Add the chocolate mixture to combine.
Fold in the dry ingredients.
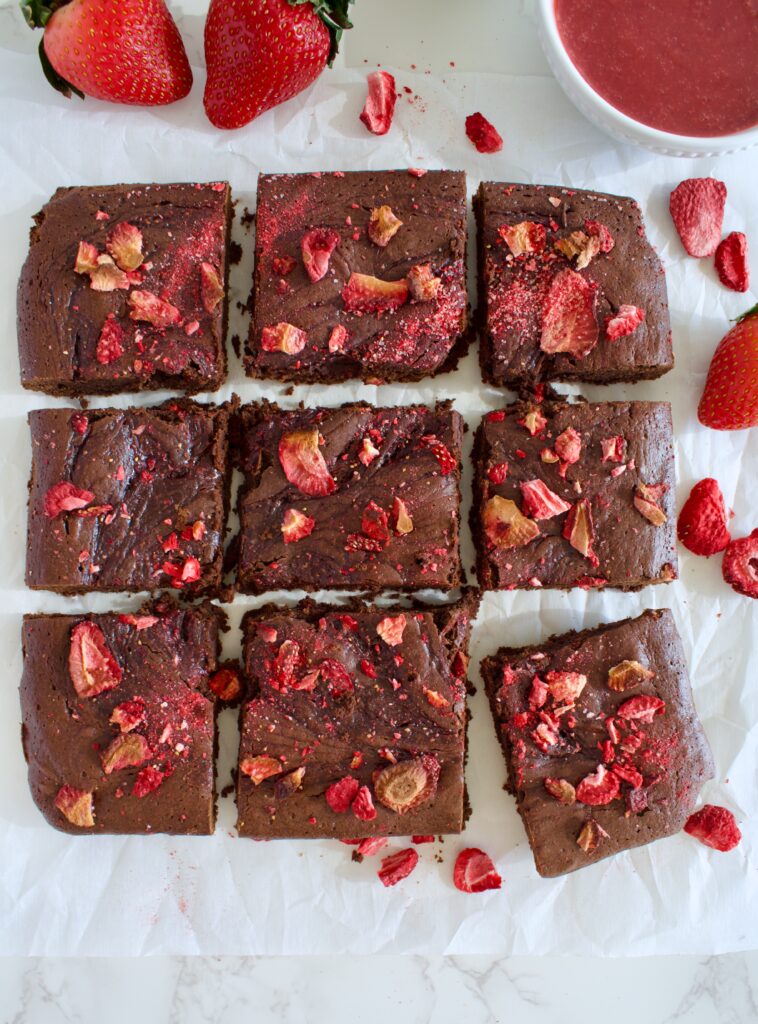
Swirl in the strawberry jam and top with freeze dried strawberries before baking.
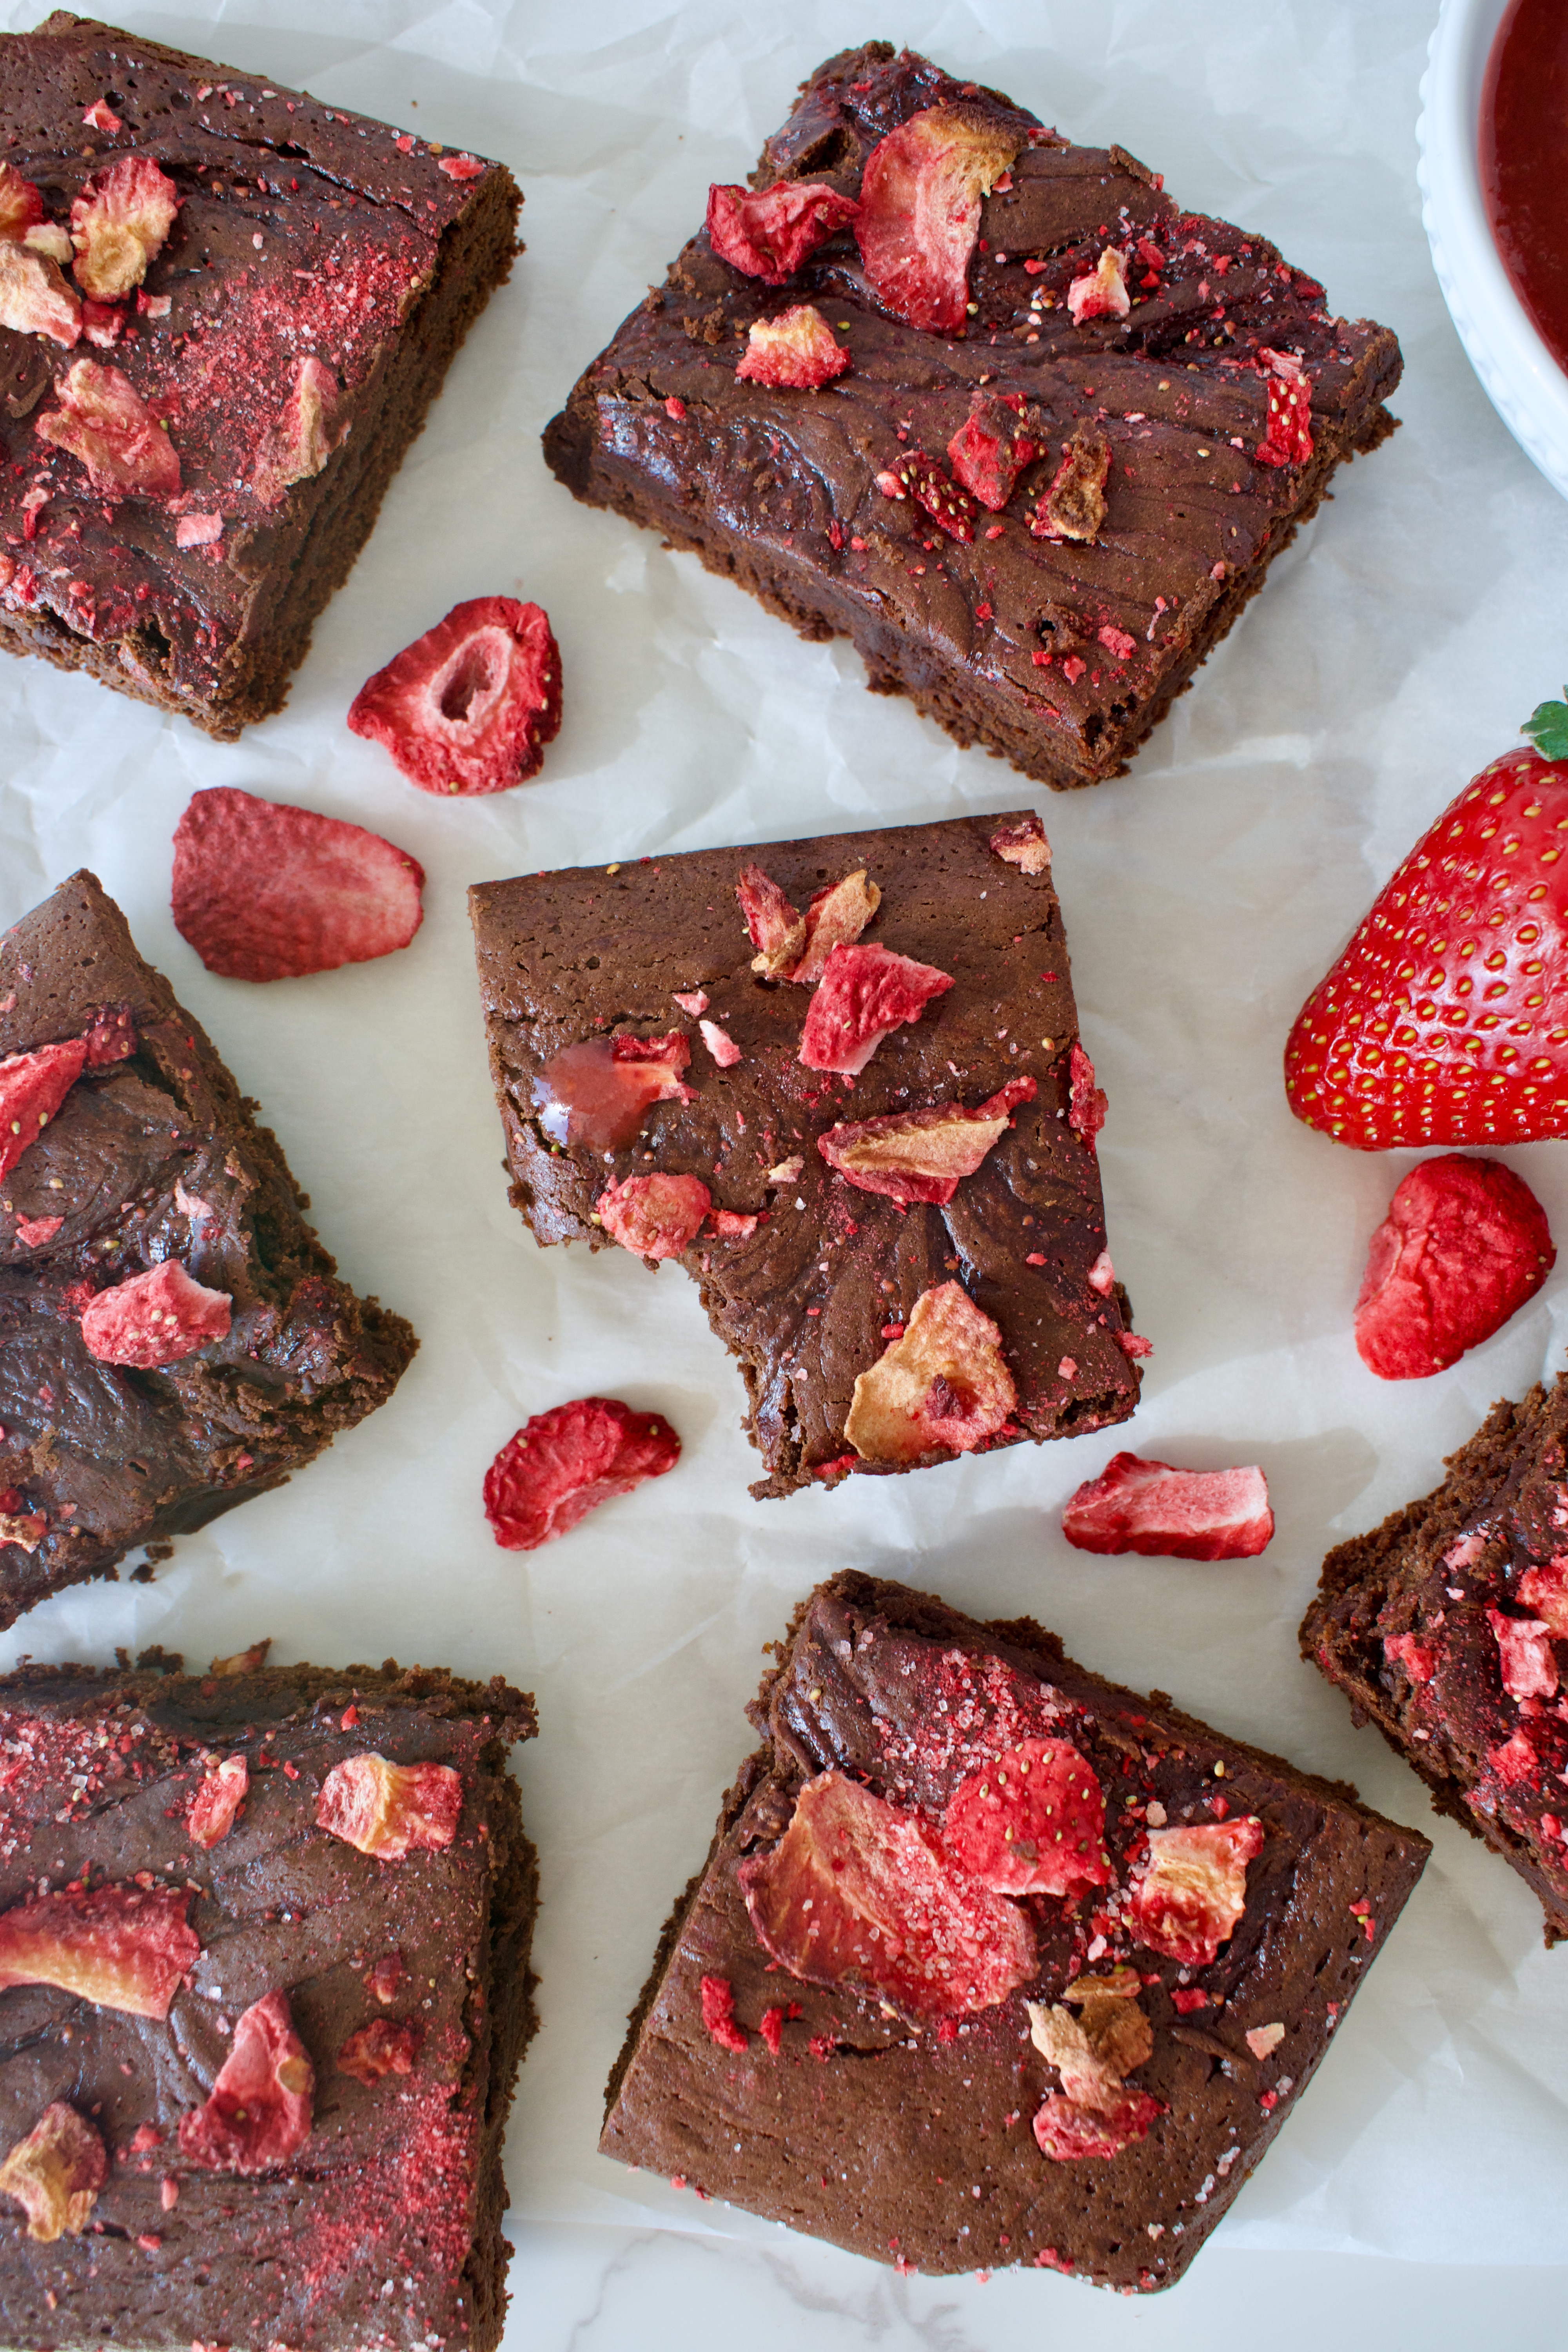
healthy gluten free strawberry brownies
Substitutions and Variations
Coconut oil: you can use butter or dairy free butter instead of the coconut oil if desired.
Chocolate chips: I use dark chocolate because I love a rich chocolate flavor. If that is too intense, you can use semi-sweet chocolate chips instead. Feel free to fold in extra chocolate chips too!
Coconut sugar: I have not tested this recipe with any other sugar, but I think white sugar would work fine. It will raise the glycemic index and make these brownies taste even sweeter.
Strawberries: Raspberry jam and freeze dried raspberries would be a great alternative in this fudgy gluten free brownie recipe!
How to Store Gluten Free Brownies
Keep leftover strawberry fudge brownies stored in an airtight container at room temperature or in the fridge for up to 5 days.
These strawberry swirl brownies also freeze well! Slice and freeze in a freezer safe bag or container for up to 3 months. They taste great straight from the freezer, thawed, or even warmed in the microwave.
Brownie Shortcuts
You can use your favorite gluten free brownie box mix to make these strawberry brownies. Just follow the box directions and add the strawberry jam and freeze dried strawberries before baking
These Gluten Free Fudgy Strawberry Brownies are a rich and delicious take on traditional brownies. They are also gluten free and refined sugar free, topped with strawberry jam and freeze dried strawberries. I love making these for Valentine's Day!
Preheat oven to 350F and line a 9×9 or 8×8 baking dish with parchment paper.
Melt the coconut oil and chocolate chips together. You can do this over the stove or in 30 second increments in the microwave, mixing regularly.
Once chocolate mixture is smooth, whisk in the cocoa powder. Set aside to cool slightly.
In a stand mixer (or with a hand mixer, although this will be a little more labor intensive), beat together the eggs and coconut sugar for 3-5 minutes until the mixture is lighter in color and fluffier.
Add the chocolate mixture and vanilla extract and beat on low until just combined.
Fold in the dry ingredients until just mixed. You can fold in some extra chocolate chips at this stage if you would like, as well.
Pour the batter into your baking dish and smooth out the top.
Add dollops of the jam on top of the brownie batter. Use a toothpick or chopstick to swirl the jam evenly all over the top of the brownies. Next, sprinkle on your crushed freeze dried strawberries. You can use less/more as desired.
Bake for 18-22 minutes until a toothpick just comes out clean. Check it at 18 minutes and watch the brownies closely from then. You don't want to over bake brownies.
Remove and let cool for 10-15 minutes before removing from the baking dish by using the parchment paper.
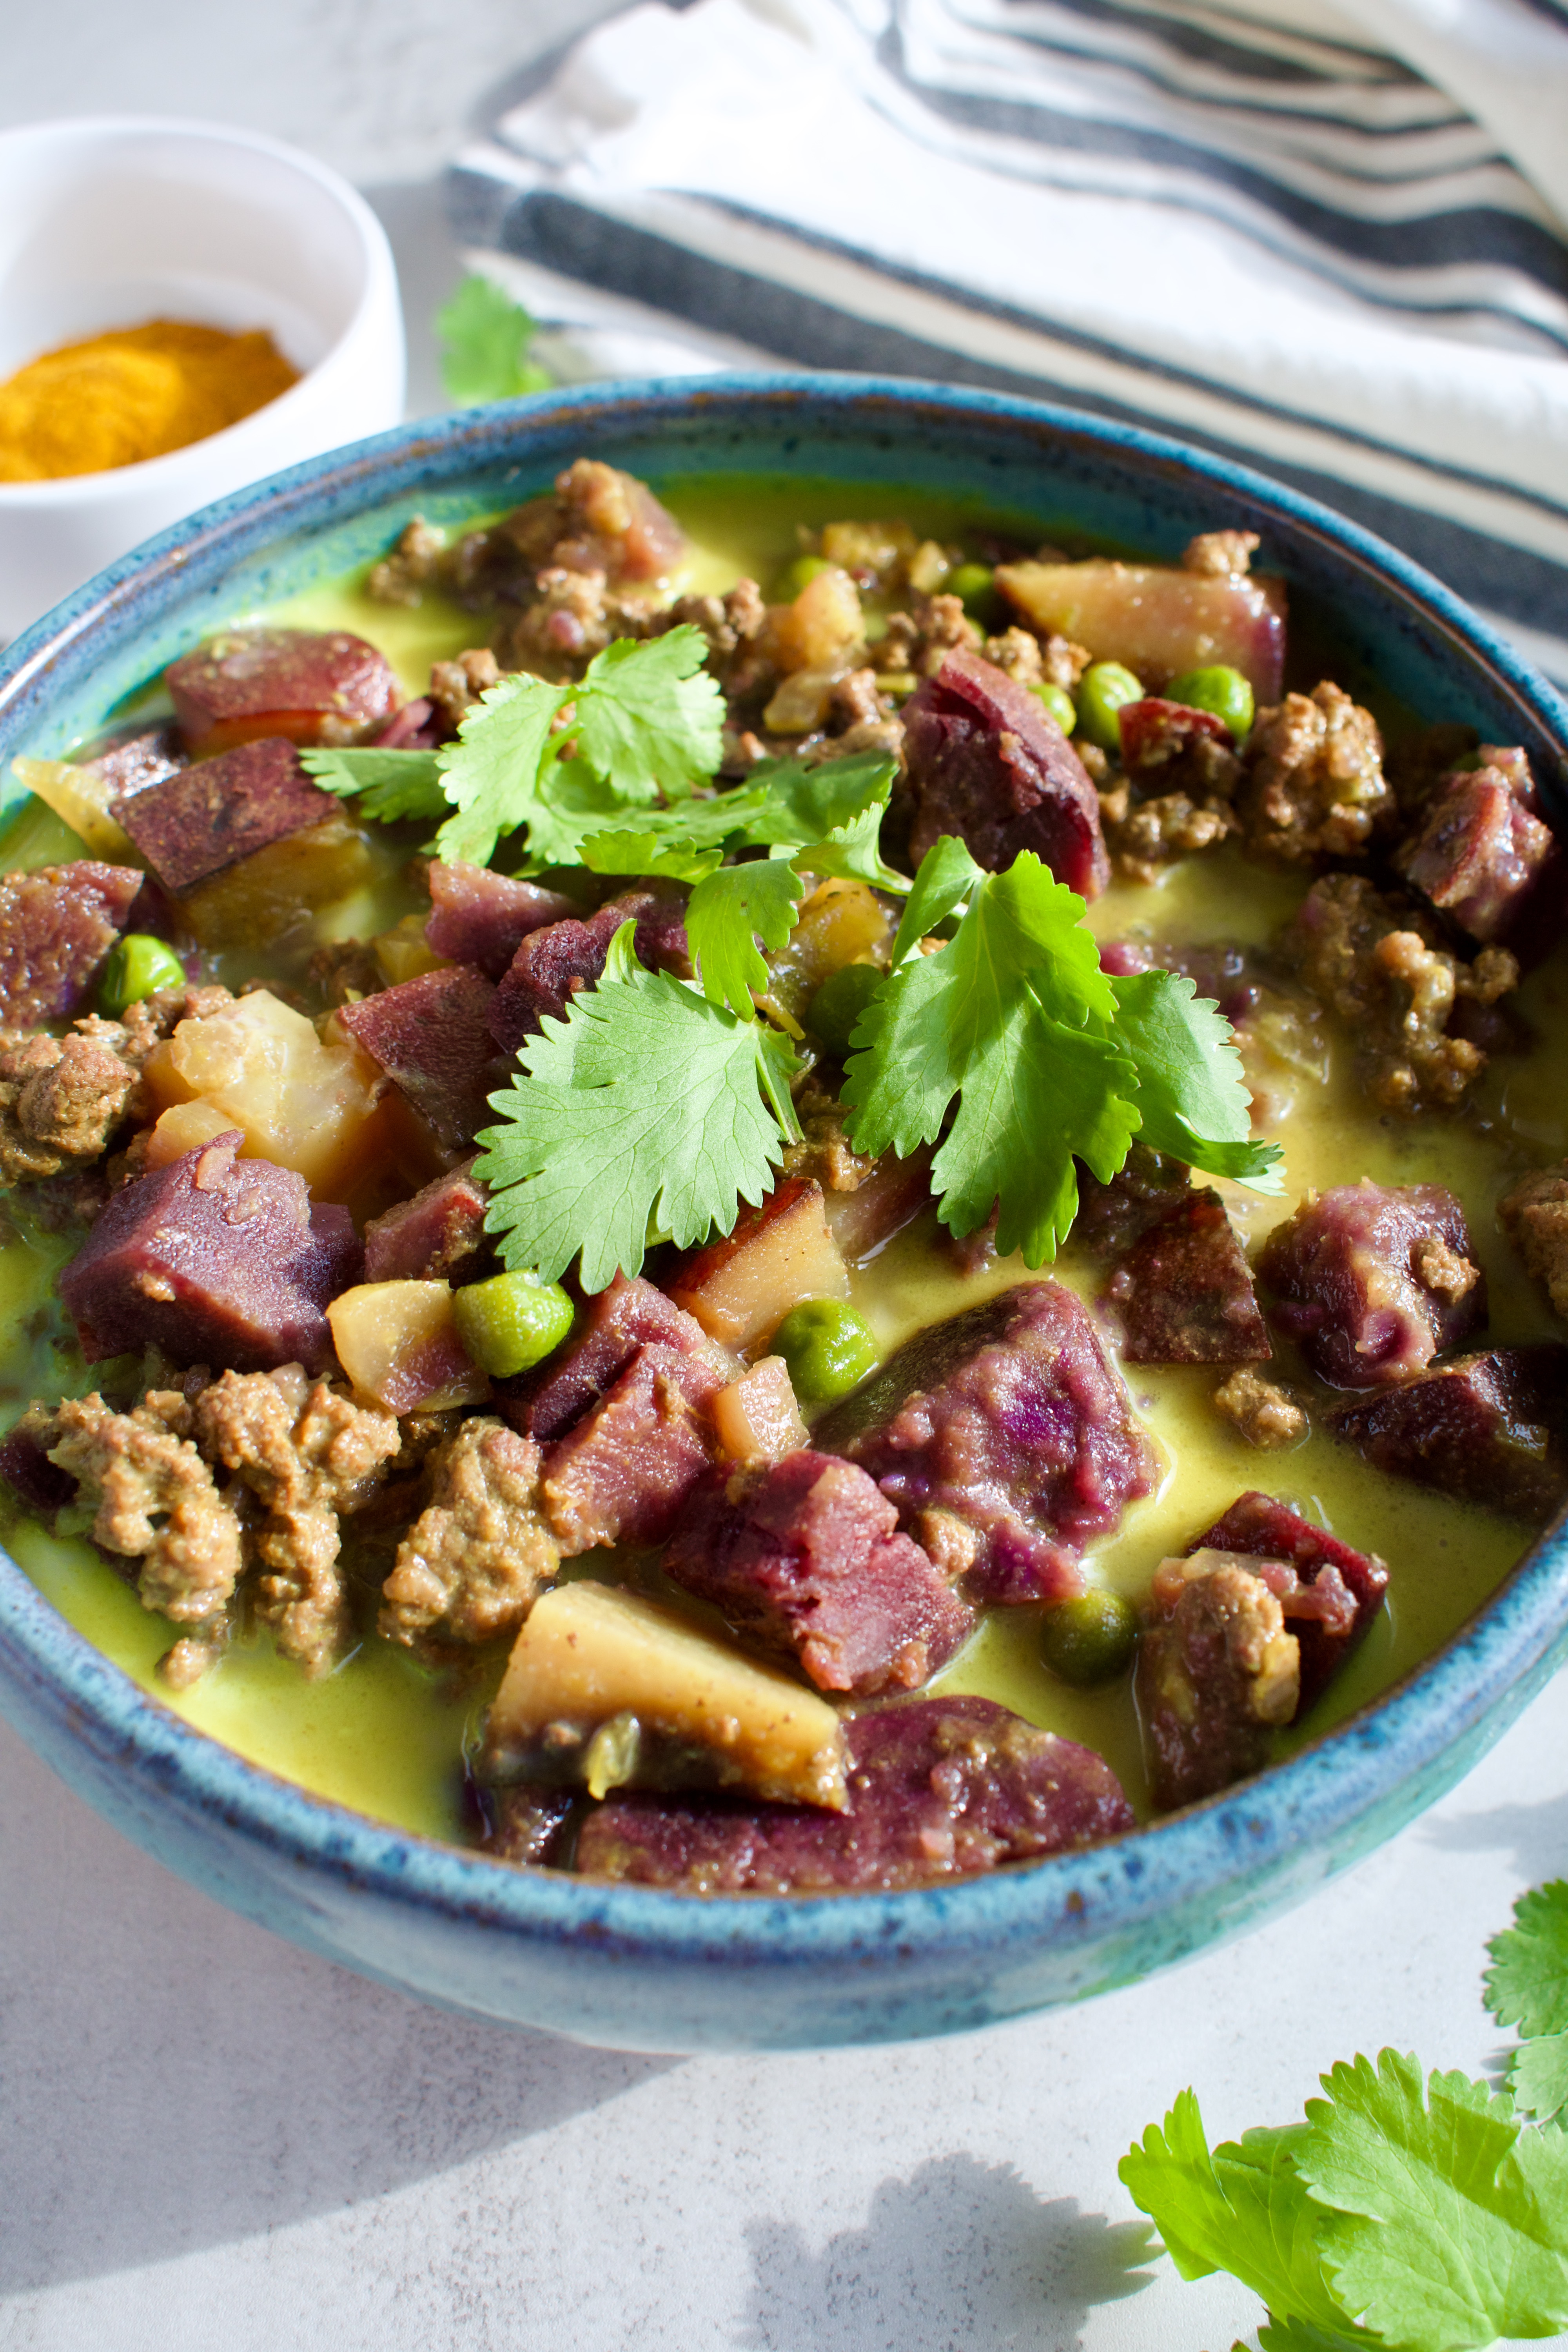
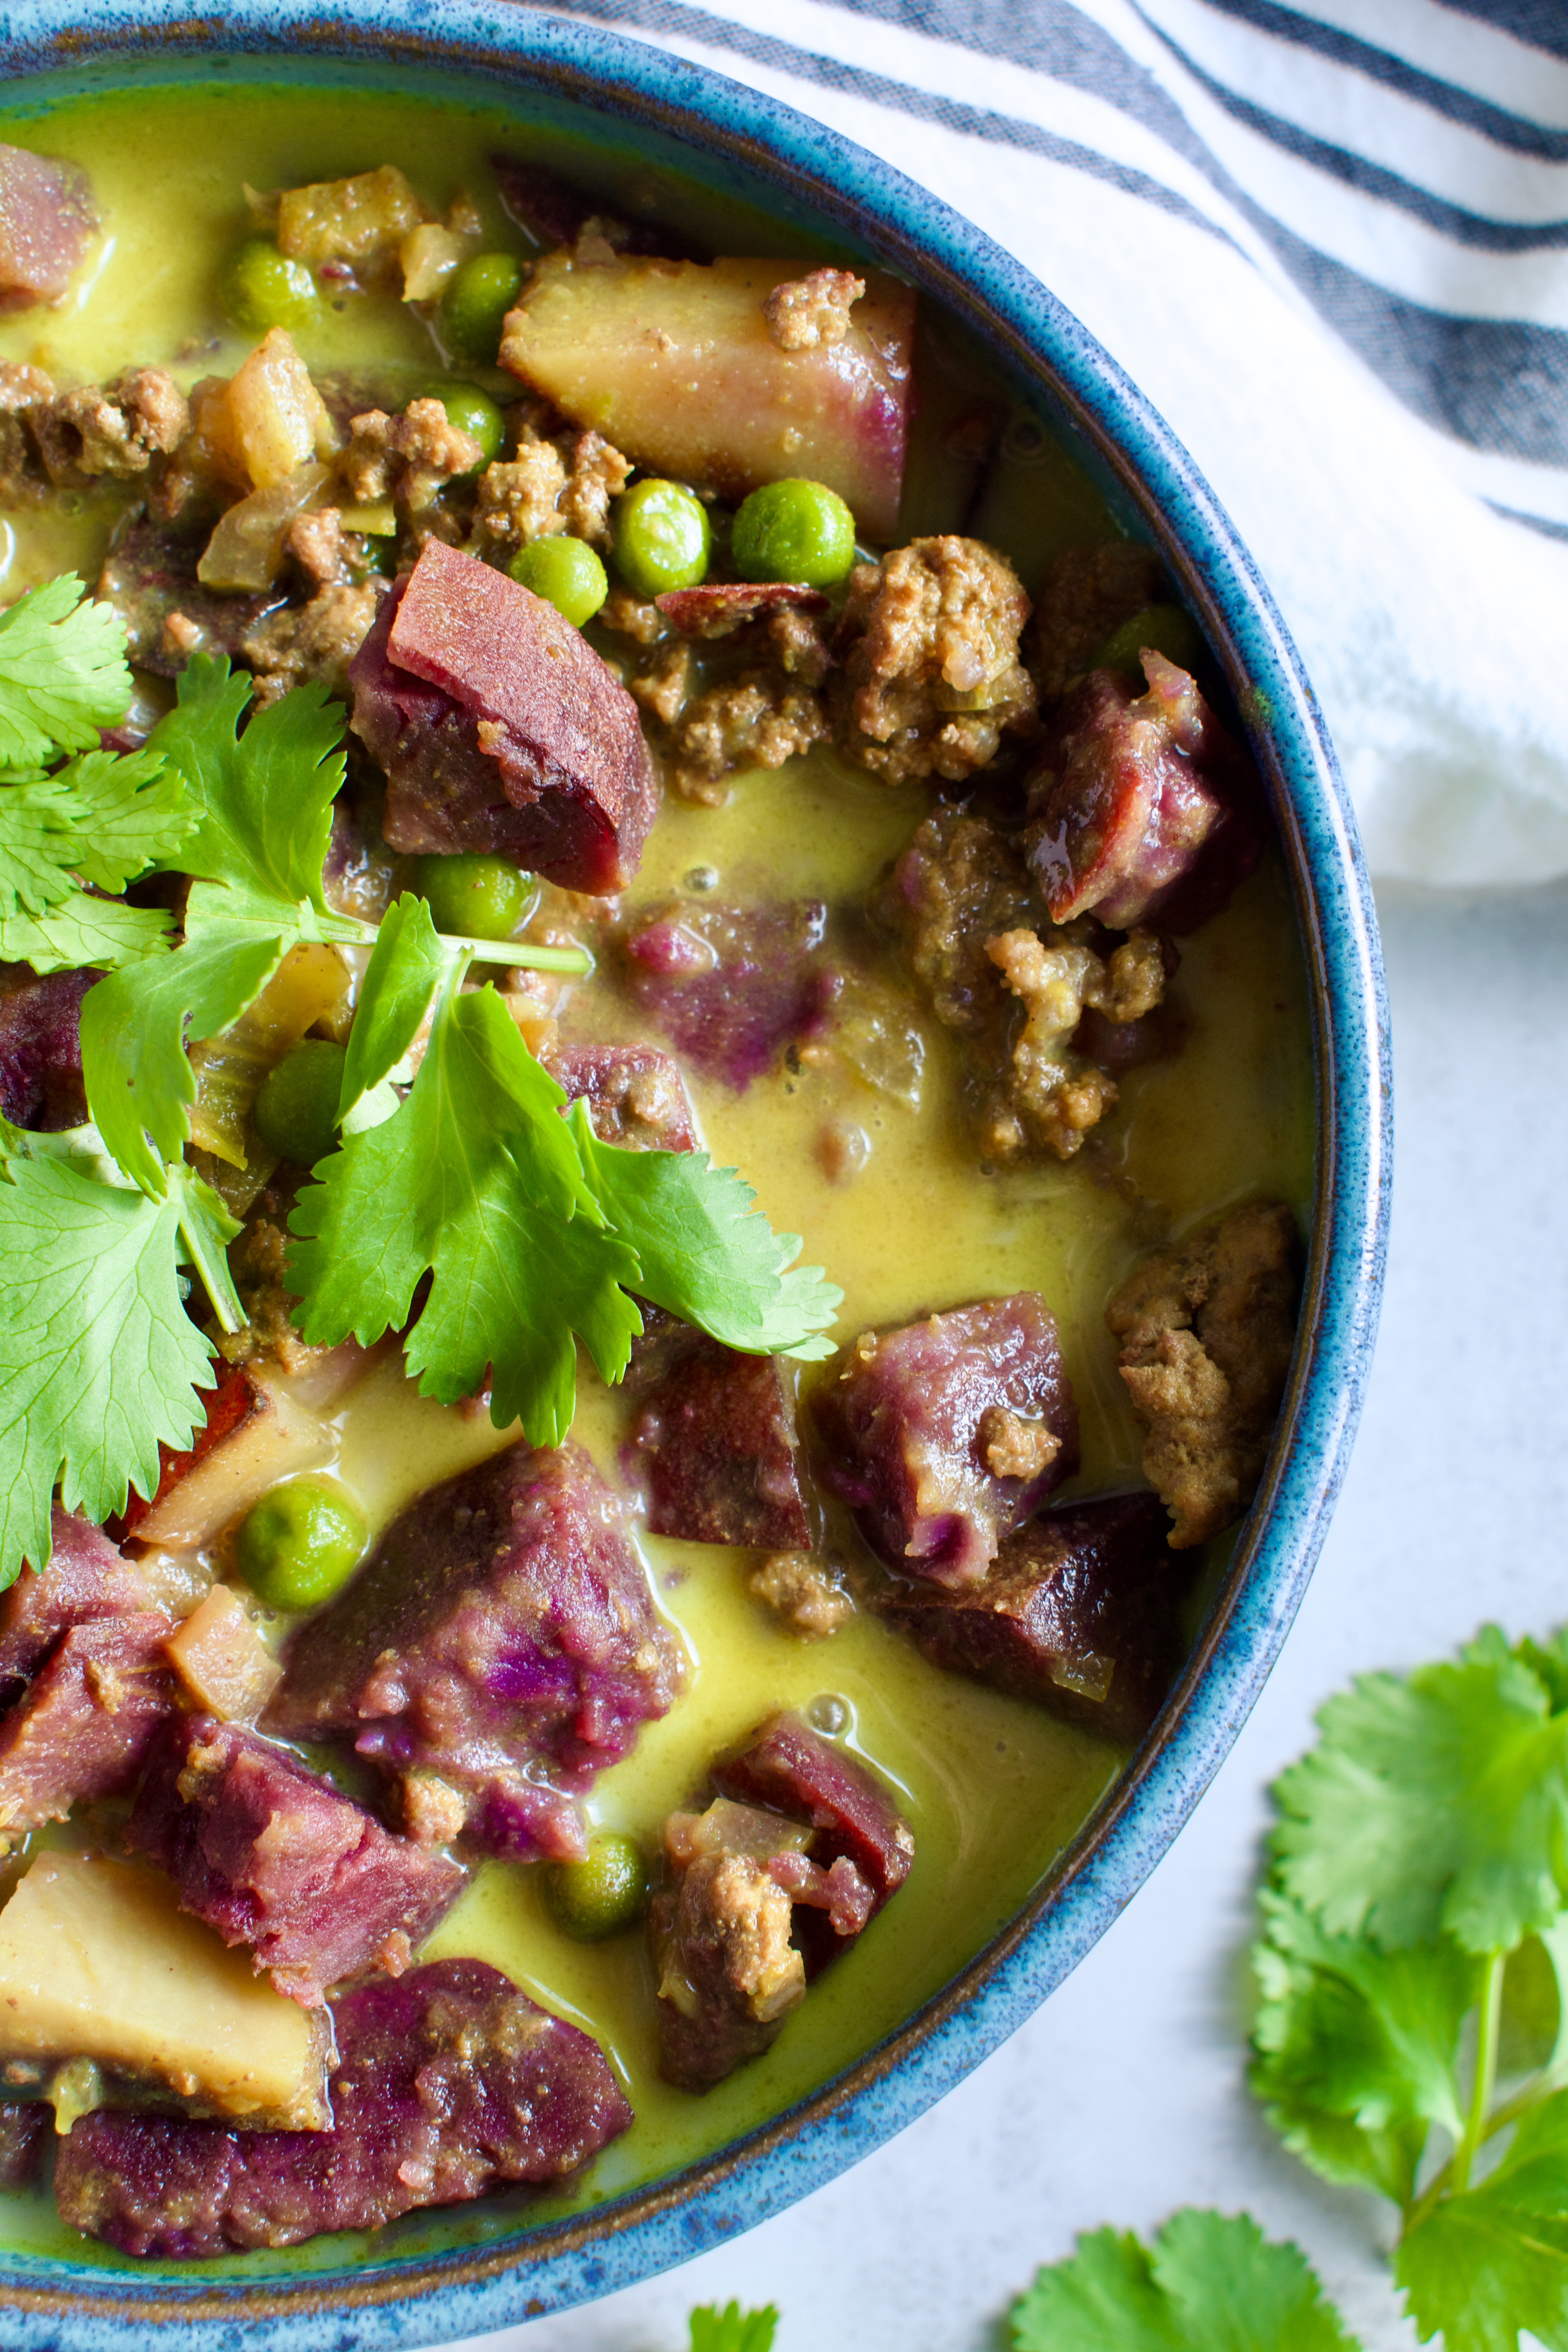
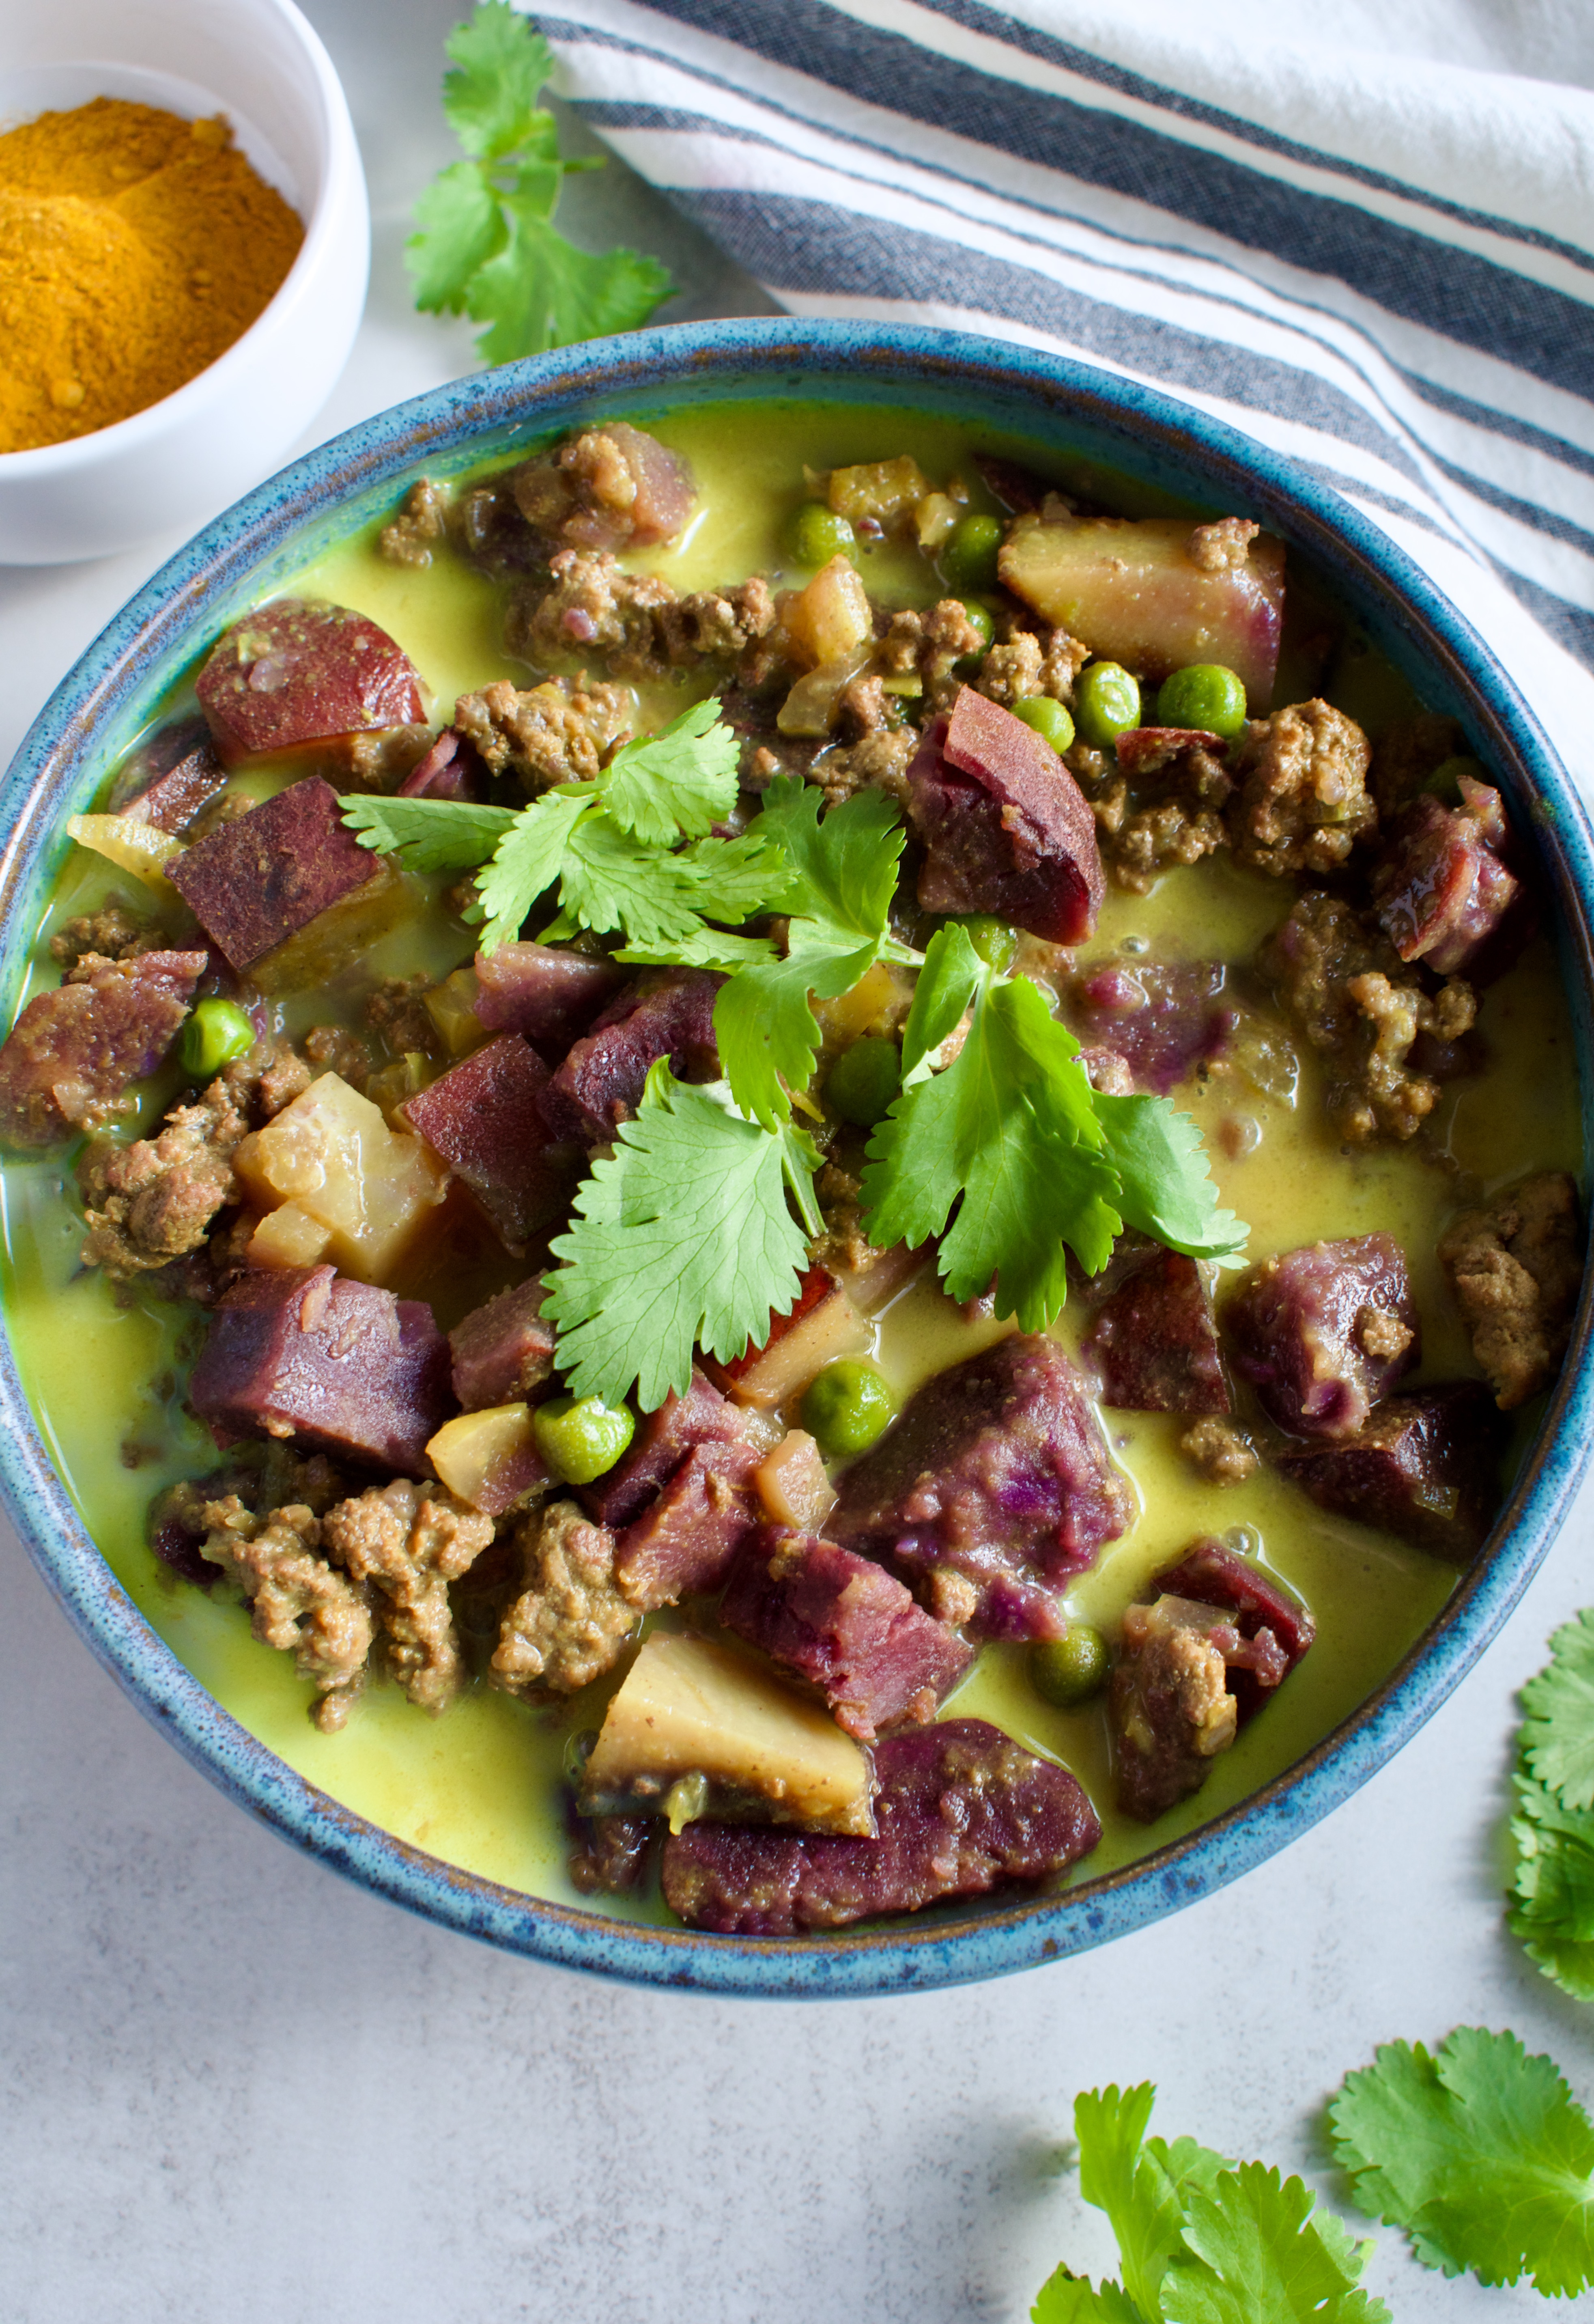
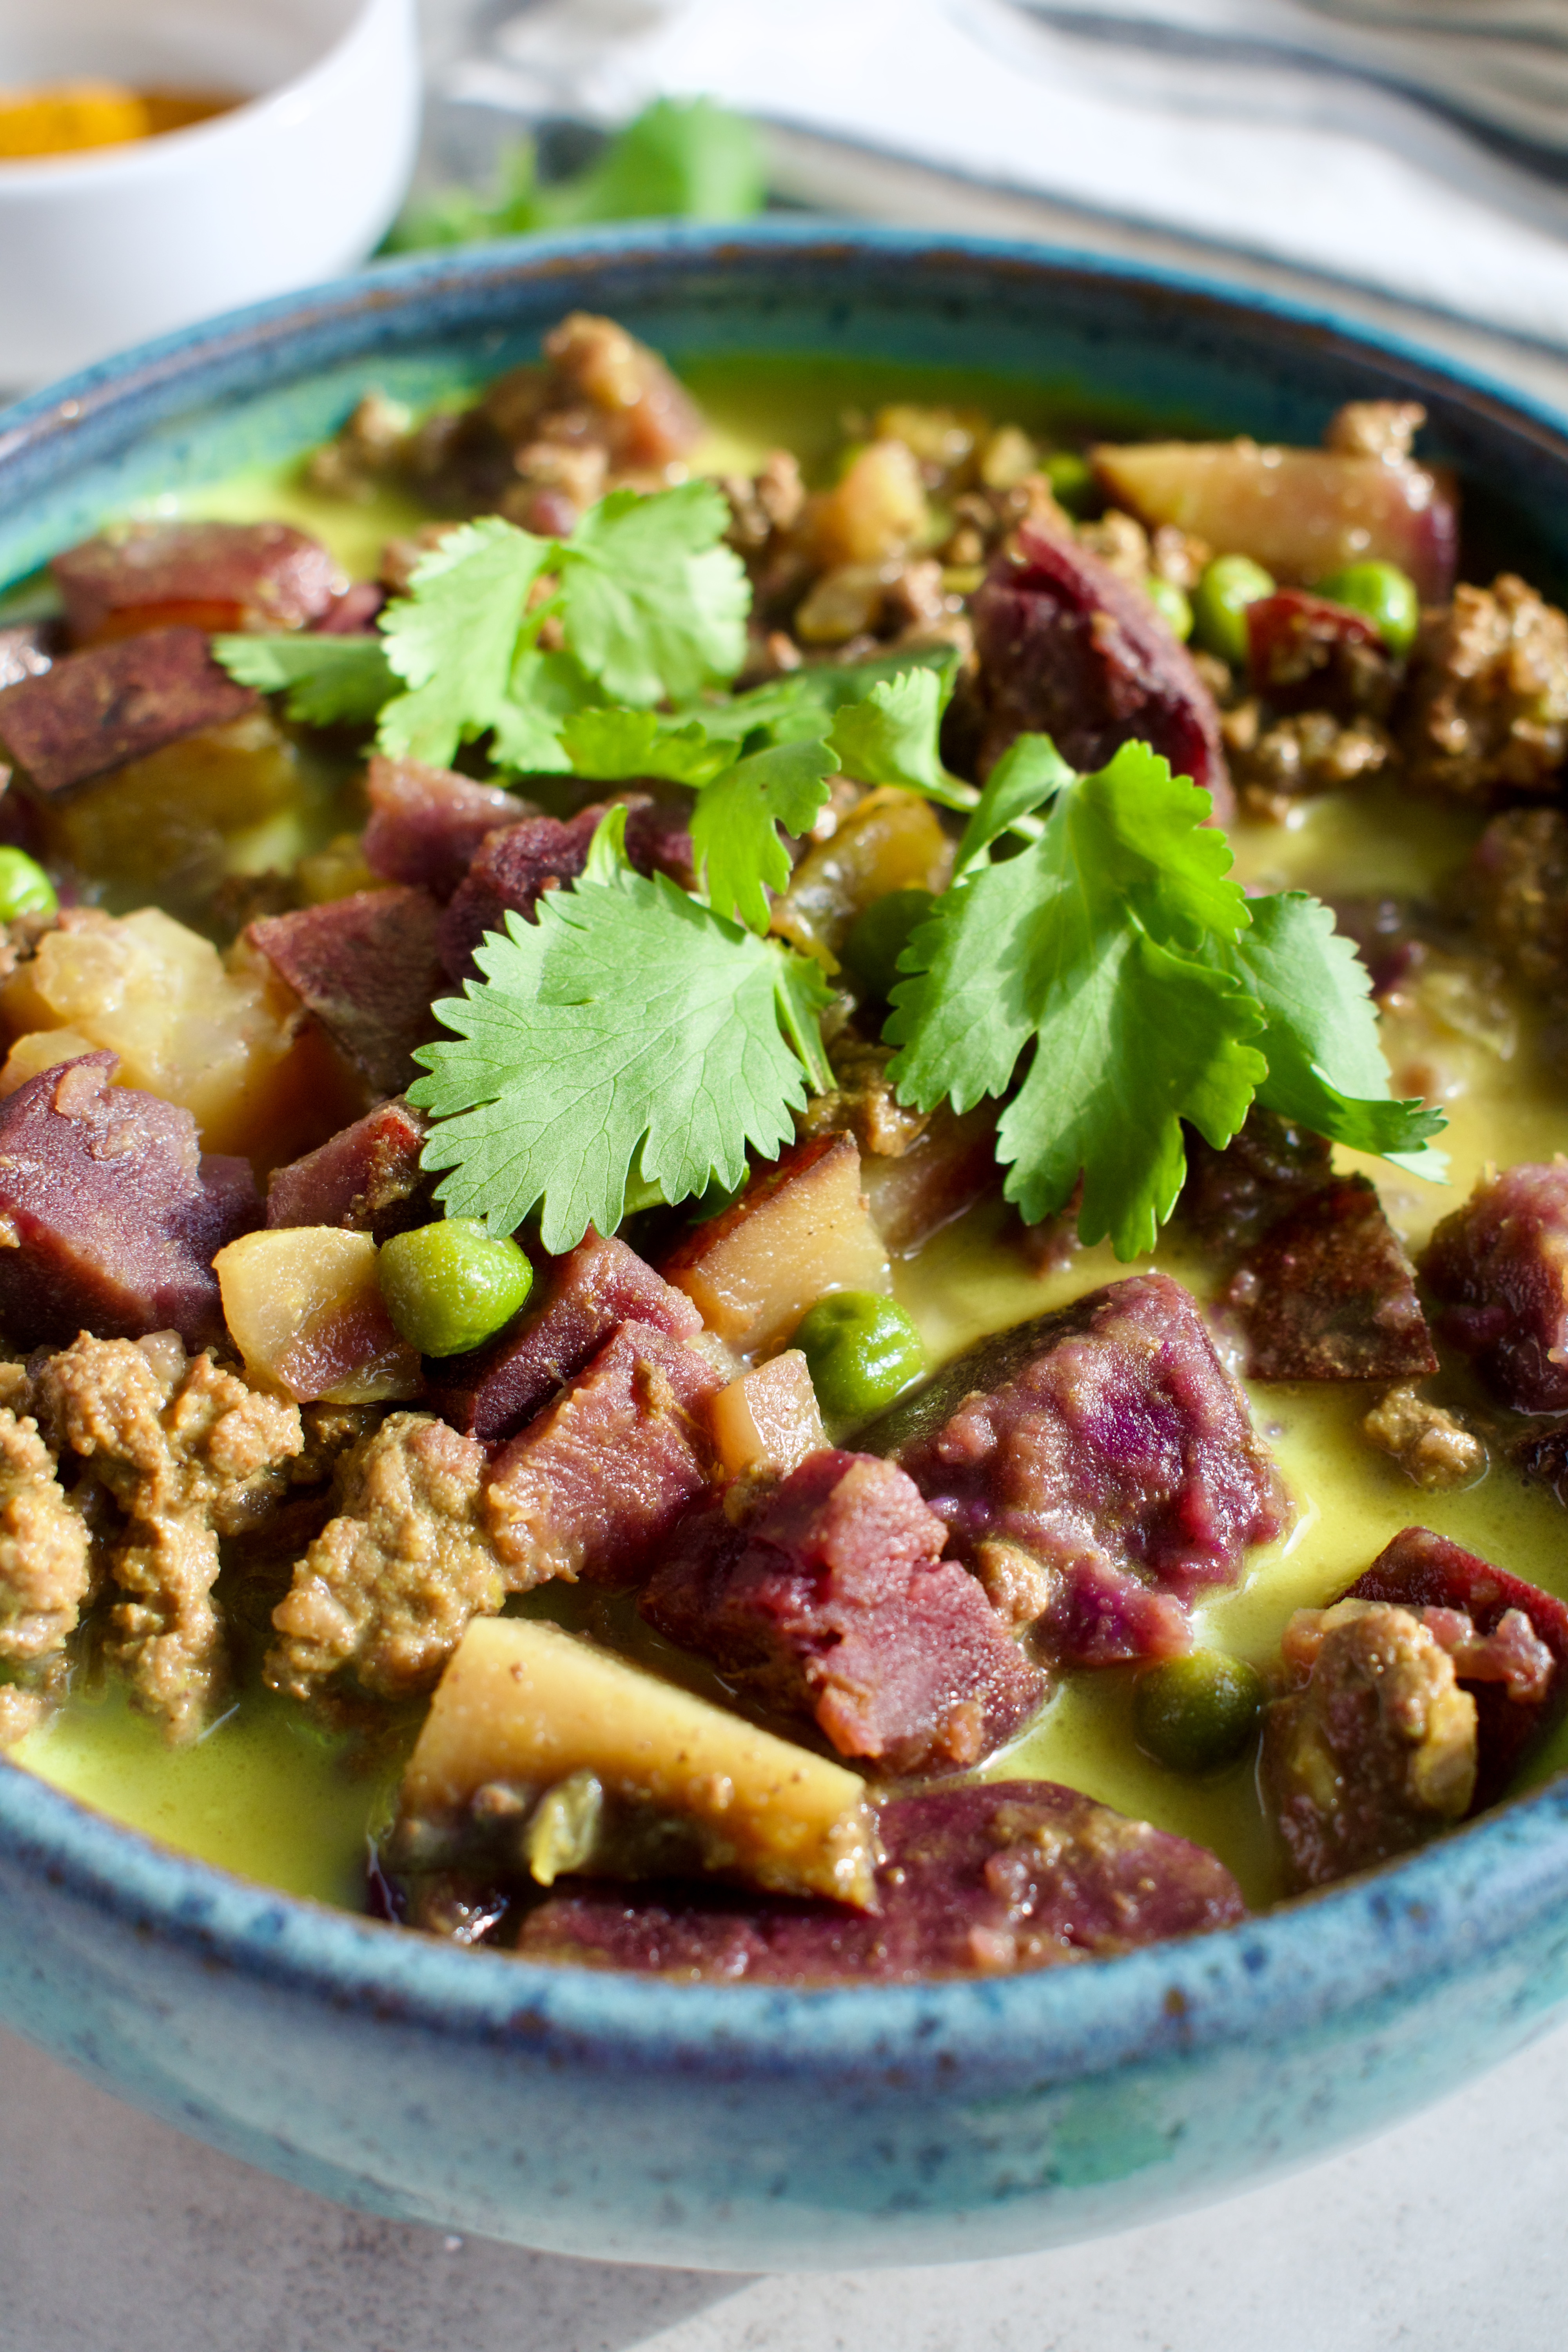
This hearty Paleo Lamb and Sweet Potato Curry is nutrient packed and gut healthy. Ground lamb, purple sweet potato, and dairy free coconut milk make up the base of this delicious homemade curry.
healthy lamb and sweet potato curry
This is one of my favorite curry recipes. I make it at least once or twice every winter. This delicious paleo ground lamb curry is the perfect gut healthy dinner. Grass fed lamb is filled with omega-3 fatty acids which are great for inflammation. It’s also packed with protein, iron, and healthy fats which can support cardiovascular health.
This coconut lamb curry also contains purple sweet potato, which is a great source of vitamins, fiber, and antioxidants. Purple sweet potato in particular is packed with anthocyanins, giving them their color. Anthocyanins are a fantastic source of antioxidants.
ground lamb and sweet potato curry
Lamb and Sweet Potato Curry Ingredients
Ground lamb: the main protein used in this curry recipe.
Purple sweet potato: a delicious root veggie that compliments the lamb perfectly.
Fennel: a gut friendly alternative to onion for flavor.
Peas: to add some extra veggies and nutrients to this curry.
Garlic infused olive oil: a gut friendly oil for sautéing the ingredients.
Ginger root: what is curry without plenty of ginger?!
Coconut milk: the base of this lamb curry is creamy coconut milk for a dairy free curry.
Broth: used with the coconut milk.
Curry spice: we can’t make curry without curry spice now can we?
Salt
Substitutions and Variations
Lamb: you can also use ground beef in this recipe to make it a beef and sweet potato curry. I do suggest sticking to red meat as I think it compliments the flavors best.
Sweet potato: you can use any other variety of sweet potato, but I really do think purple sweet potato tastes best and compliments the lamb well!
Fennel: I use fennel instead of onion in all my recipes as onion is high FODMAP and can be extremely irritating on the gut if you have any GI issues. If you tolerate onion fine, feel free to use that!
Garlic olive oil: Like onion, garlic is high FODMAP and gut irritating for my IBS friends. I stick to a garlic infused olive oil to get flavor without GI distress. If you tolerate garlic or can’t find garlic olive oil (usually at your local olive oil store), feel free to sauté about 2 cloves of minced garlic in olive oil at the start of this recipe instead.
Peas: I suppose some would argue peas aren’t paleo, but I’m not here to debate that topic today. They taste great in this curry, but if you want to leave them, feel free to sub them for something like kale or spinach.
lamb and purple sweet potato curry
How to Store Leftover Coconut Lamb Curry
Keep this lamb and sweet potato curry stored in an airtight container in the fridge for up to 4 days.
You can also portion and freeze leftover curry in a freezer safe container for up to 3 months. This recipe is a great meal prep option. Make a double or triple batch, individually portion leftovers, and freeze. Thaw leftover lamb curry in the fridge overnight and reheat on the stove over low heat.
Where to Find Purple Sweet Potatoes?
Also known as Japanese sweet potatoes, purple sweet potatoes are carried in most grocery stores these days. If you’re not finding them at your local grocery, speciality grocers like Whole Foods or Asian markets often carry them.
This hearty Paleo Lamb and Sweet Potato Curry is nutrient packed and gut healthy. Ground lamb, purple sweet potato, and dairy free coconut milk make up the base of this delicious homemade curry.
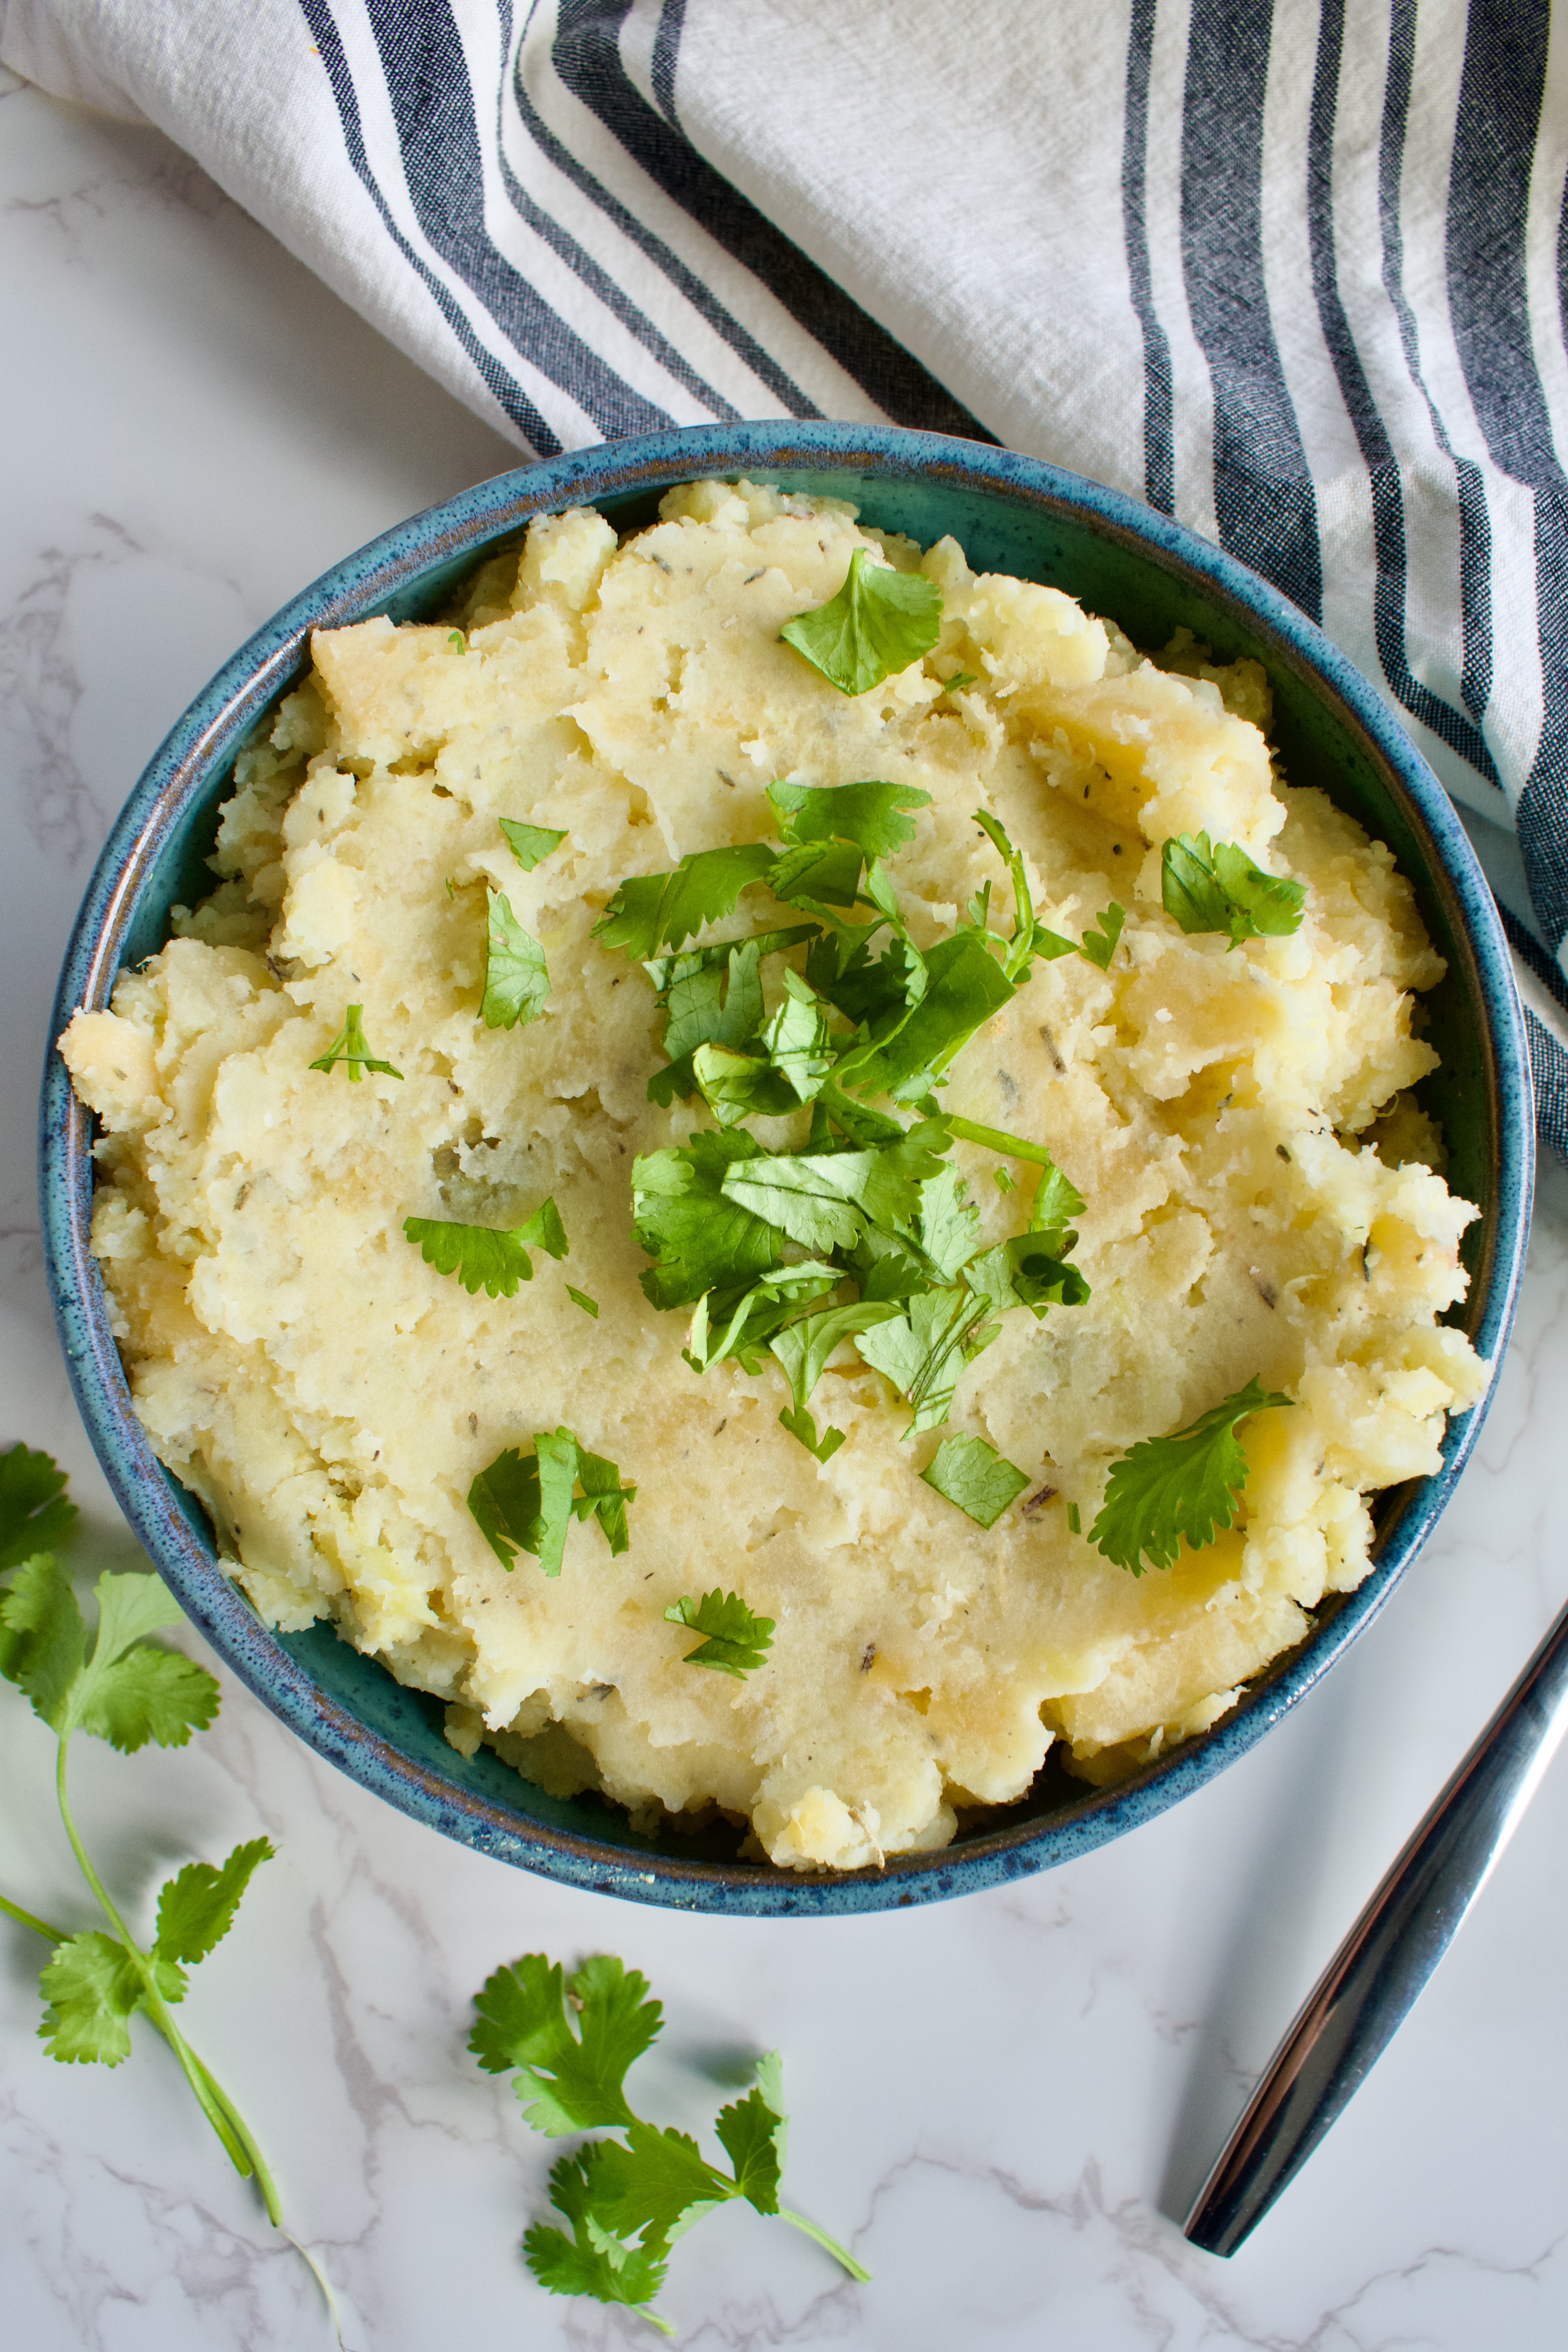
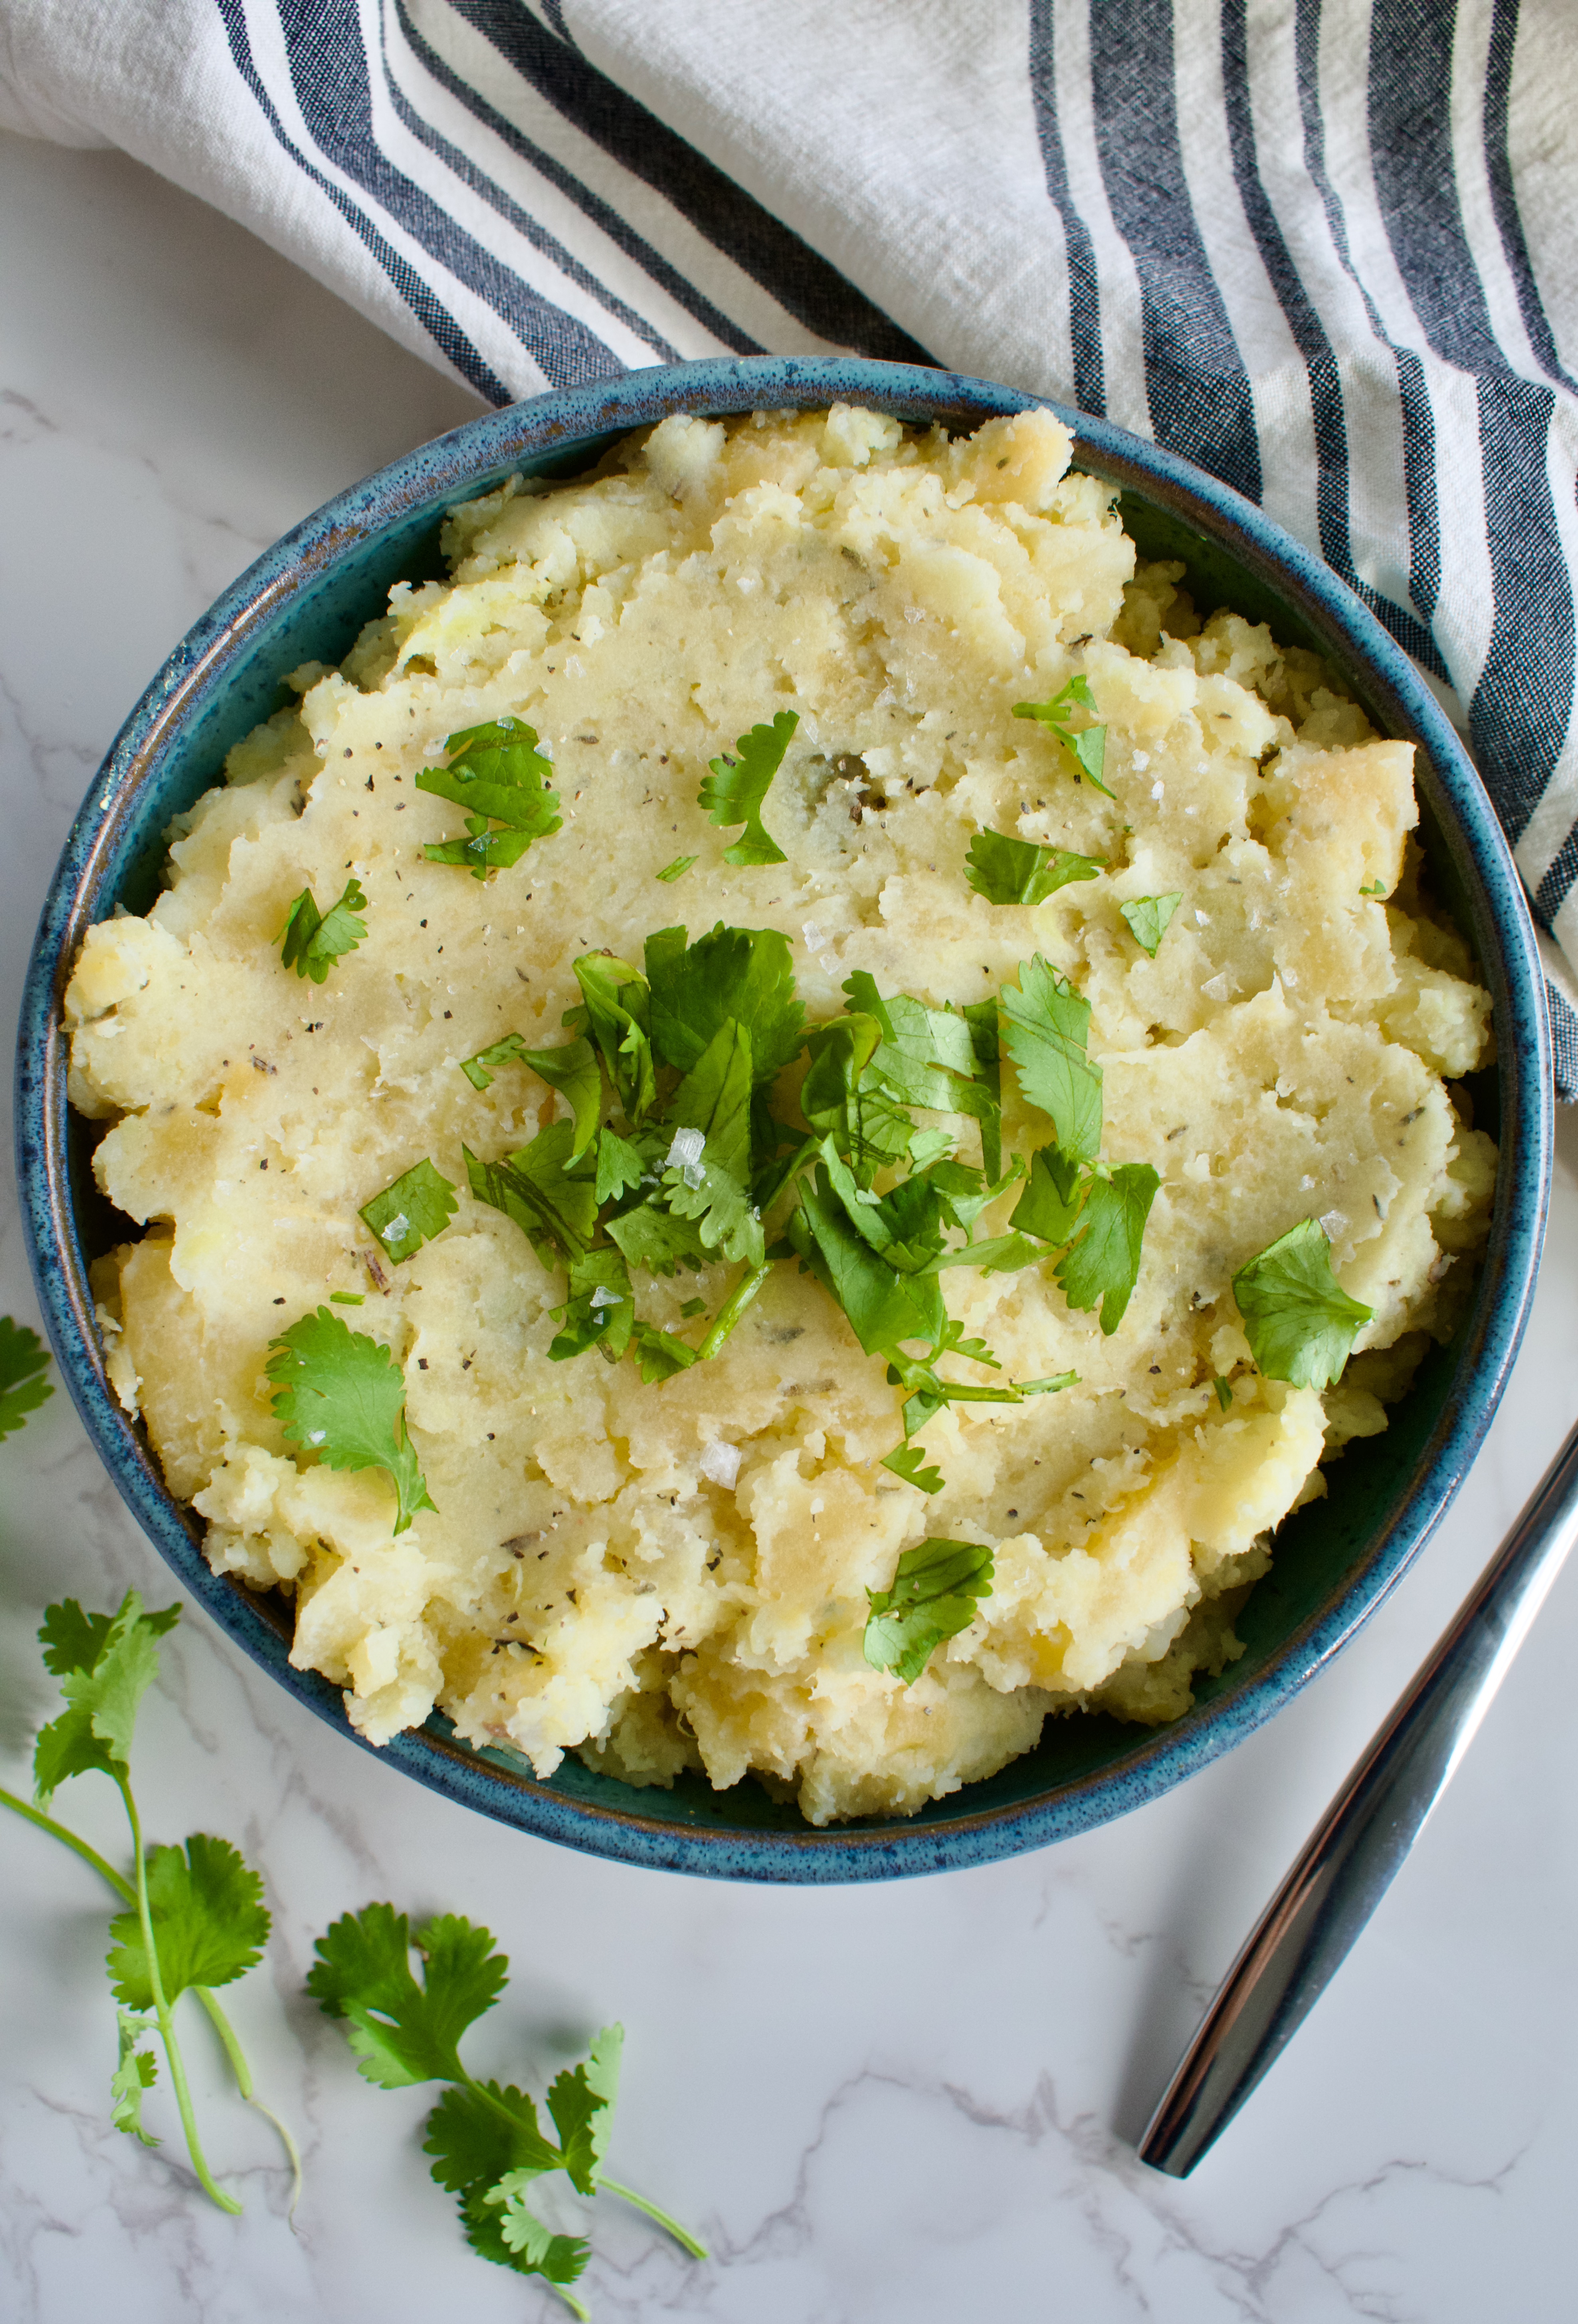
This dairy free Mashed Rutabaga and White Sweet Potato is the perfect healthy and delicious nightshade free side dish. This easy recipe is packed with nutrients and flavor.
dairy free mashed rutabaga and white sweet potato
Mashed Rutabaga and White Sweet Potato is such a comforting winter side dish. Utilizing root veggies is always so warm and cozy in the colder months. I love making a batch of this to serve alongside my main protein and some greens for an easy and healthy dinner option. This recipe would also be a great addition to a Thanksgiving or Christmas spread.
This recipe is fully gluten free, dairy free (and vegan!), low FODMAP, and can be made Paleo /AIP. This dish is also great if you are nightshade free as sweet potatoes are not a nightshade. Filled with gut friendly ingredients and hearty root vegetables, this dish is a great option for those of you following gut healing and elimination protocols.
paleo mashed rutabaga and white sweet potato
Mashed Rutabaga and White Sweet Potato Ingredients
Rutabaga: also known as a Swedish turnip. These are really delicious and a great addition to your veggie rotation for a healthy microbiome. They taste like a cross between a sweet potato and turnip, so they aren’t quite as bitter as turnips.
White sweet potato: white sweet potatoes compliment rutabaga great in this recipe. This also keeps the recipe nightshade free.
Dairy free butter: for flavor. Feel free to use regular butter if you can have it. See below for AIP subs.
Olive oil: for mashing. I love the combo of butter and oil for ideal flavor and texture.
Garlic infused olive oil: for flavor.
Thyme: we add a little bit of herbs to this recipe for some flavor.
Rosemary: we add a little bit of herbs to this recipe for some flavor.
Salt
How to Make Mashed Rutabaga and White Sweet Potato Ingredients
This recipe is very easy!
First, boil the veggies until tender.
Next, mash them with the remaining ingredients and serve.
Substitutions and Variations
Sweet Potato: Although I like white sweet potato best in this recipe, you can try using orange. It will alter the flavor slightly, but should still be delicious. You could also use regular potatoes, but sweet potatoes add a little sweetness that balances out the rutabaga.
Butter: to keep this recipe AIP, use coconut oil.
Olive oil: You can also use coconut oil or avocado oil. I love using garlic olive oil for flavor without the FODMAP’s and GI distress. You can find infused olive oils at your local olive oil store or online. If you don’t want to buy a bottle and tolerate garlic okay, feel free to use some fresh minced garlic or garlic powder instead.
If you tolerate garlic, adding extra garlic to this recipe could be delicious.
Thyme and rosemary: although i’m partial to my recipe, subbing these herbs for a few tablespoons of freshly chopped sage leaves would also be delicious. Martha Stewart has a great recipe.
paleo mashed rutabaga and white sweet potato
Storage
Keep leftovers stored in an airtight container in the fridge for up to 3 days. You can also portion leftovers into individual containers and freeze up to 3 months.
Dairy free Mashed Rutabaga and White Sweet Potato is the perfect healthy and delicious side dish. This easy recipe is gluten free, Paleo & AIP, and low FODMAP.
These Orange Ginger Scones are grain free, gluten free, and dairy free. They are a healthy paleo scone recipe perfect for orange season!
gluten free orange scones with candied ginger
These delicious gluten free scones are a wonderful addition to breakfast, for a snack, or even for dessert. I love to make these in the winter months of November-March when navel oranges are in season. You can utilize fresh orange juice in this recipe and it amps up the flavor when the oranges are seasonal!
This recipe is grain free, making these grain free scones almost fully paleo. They do contain candied ginger which is hard to find without refined sugars, but a little bit here and there doesn’t bother me. I find candied ginger so delicious, so I had to include it in this scone recipe.
gluten free orange ginger scones
Ingredients for Gluten Free Orange Ginger Scones
Cassava flour: a great grain free alternative flour in baking.
Tigernut flour or almond flour: using a mix of grain free flours helps achieve the best texture in paleo baking. Tigernut flour is a nut free alternative to almond flour, but it can be harder to find so almond flour should work fine as a substitute!
Coconut flour: this helps achieve the drier texture scones are known for!
These scones are pretty straight forward and easy to make. You do want to make sure to keep the butter/oil cold and the dough cold as much as possible.
The only place you may have an issue is with bringing the dough together. If it is too crumbly for any reason, just add an extra tablespoon of yogurt, as needed, until the dough holds together.
grain free orange ginger scones
Substitutions and Variations
Flours: You can make these scones gluten free vs. grain free by using 1 3/4 cup of 1:1 gluten free flour instead of the the cassava, tiger nut, and coconut flour.
For variations, you could add dried cranberries to take these scones to another level! Or even some chocolate chips. The orange-ginger-chocolate combo is divine. Just add about 1/4 cup of whatever add-ins you desire.
How to Store These Orange Scones
Keep these orange ginger scones stored in an airtight container in the fridge so that the icing doesn’t melt and run off the scones. They will keep in the fridge for up to 5 days.
You can also freeze these gluten free scones for up to 3 months. I suggest freezing them without the icing and just whipping up a quick batch when ready to eat. Thaw the scones in the fridge or warm them in the oven slowly at no higher than 300F.
These delicious gluten free orange scones contain a little kick with the candied ginger, in the best way! They are also fully grain free and dairy free, making these healthy scones perfect for breakfast, snack, or dessert.
Whisk together the flour, baking powder, sugar and salt for the scones and place in the fridge.
Whisk together the egg, vanilla extract, and yogurt/coconut cream and set aside.
Cut coconut oil or butter into cubes and add it to the flour mixture. Use a pastry cutter or fork to cut in the oil/butter until you have a sand like texture (the oil/butter should be mostly broken down, but not melted).
Add the remaining wet ingredients and use a fork to combine the dough until it holds together.
Fold in the candied ginger then form the dough into a disk on a parchment lined baking sheet. The disk should be about 8-9 inches in diameter and about 1 inch thick. Place the dough in the fridge for 30 minutes.
When ready to bake, preheat the oven to 350F.
Slice the dough into 8 scones and separate them on the baking sheet. They will expand during baking.
Bake for ~30 minutes until golden. Let cool for 10 minutes on the baking sheet before transferring to a wire rack to finish cooling.
Icing
Once scones have cooled, make the icing.
Mix together the yogurt and orange juice, then add in the powdered sugar and ginger. Start with 1/2 cup of powdered sugar and add until you reach your desired consistency. If you want a thicker icing, keep adding sugar. Mix until combined.
Don't ice the scones until they are completely cooled! When ready, ice and add a little extra orange zest on top and more candied ginger if desired.
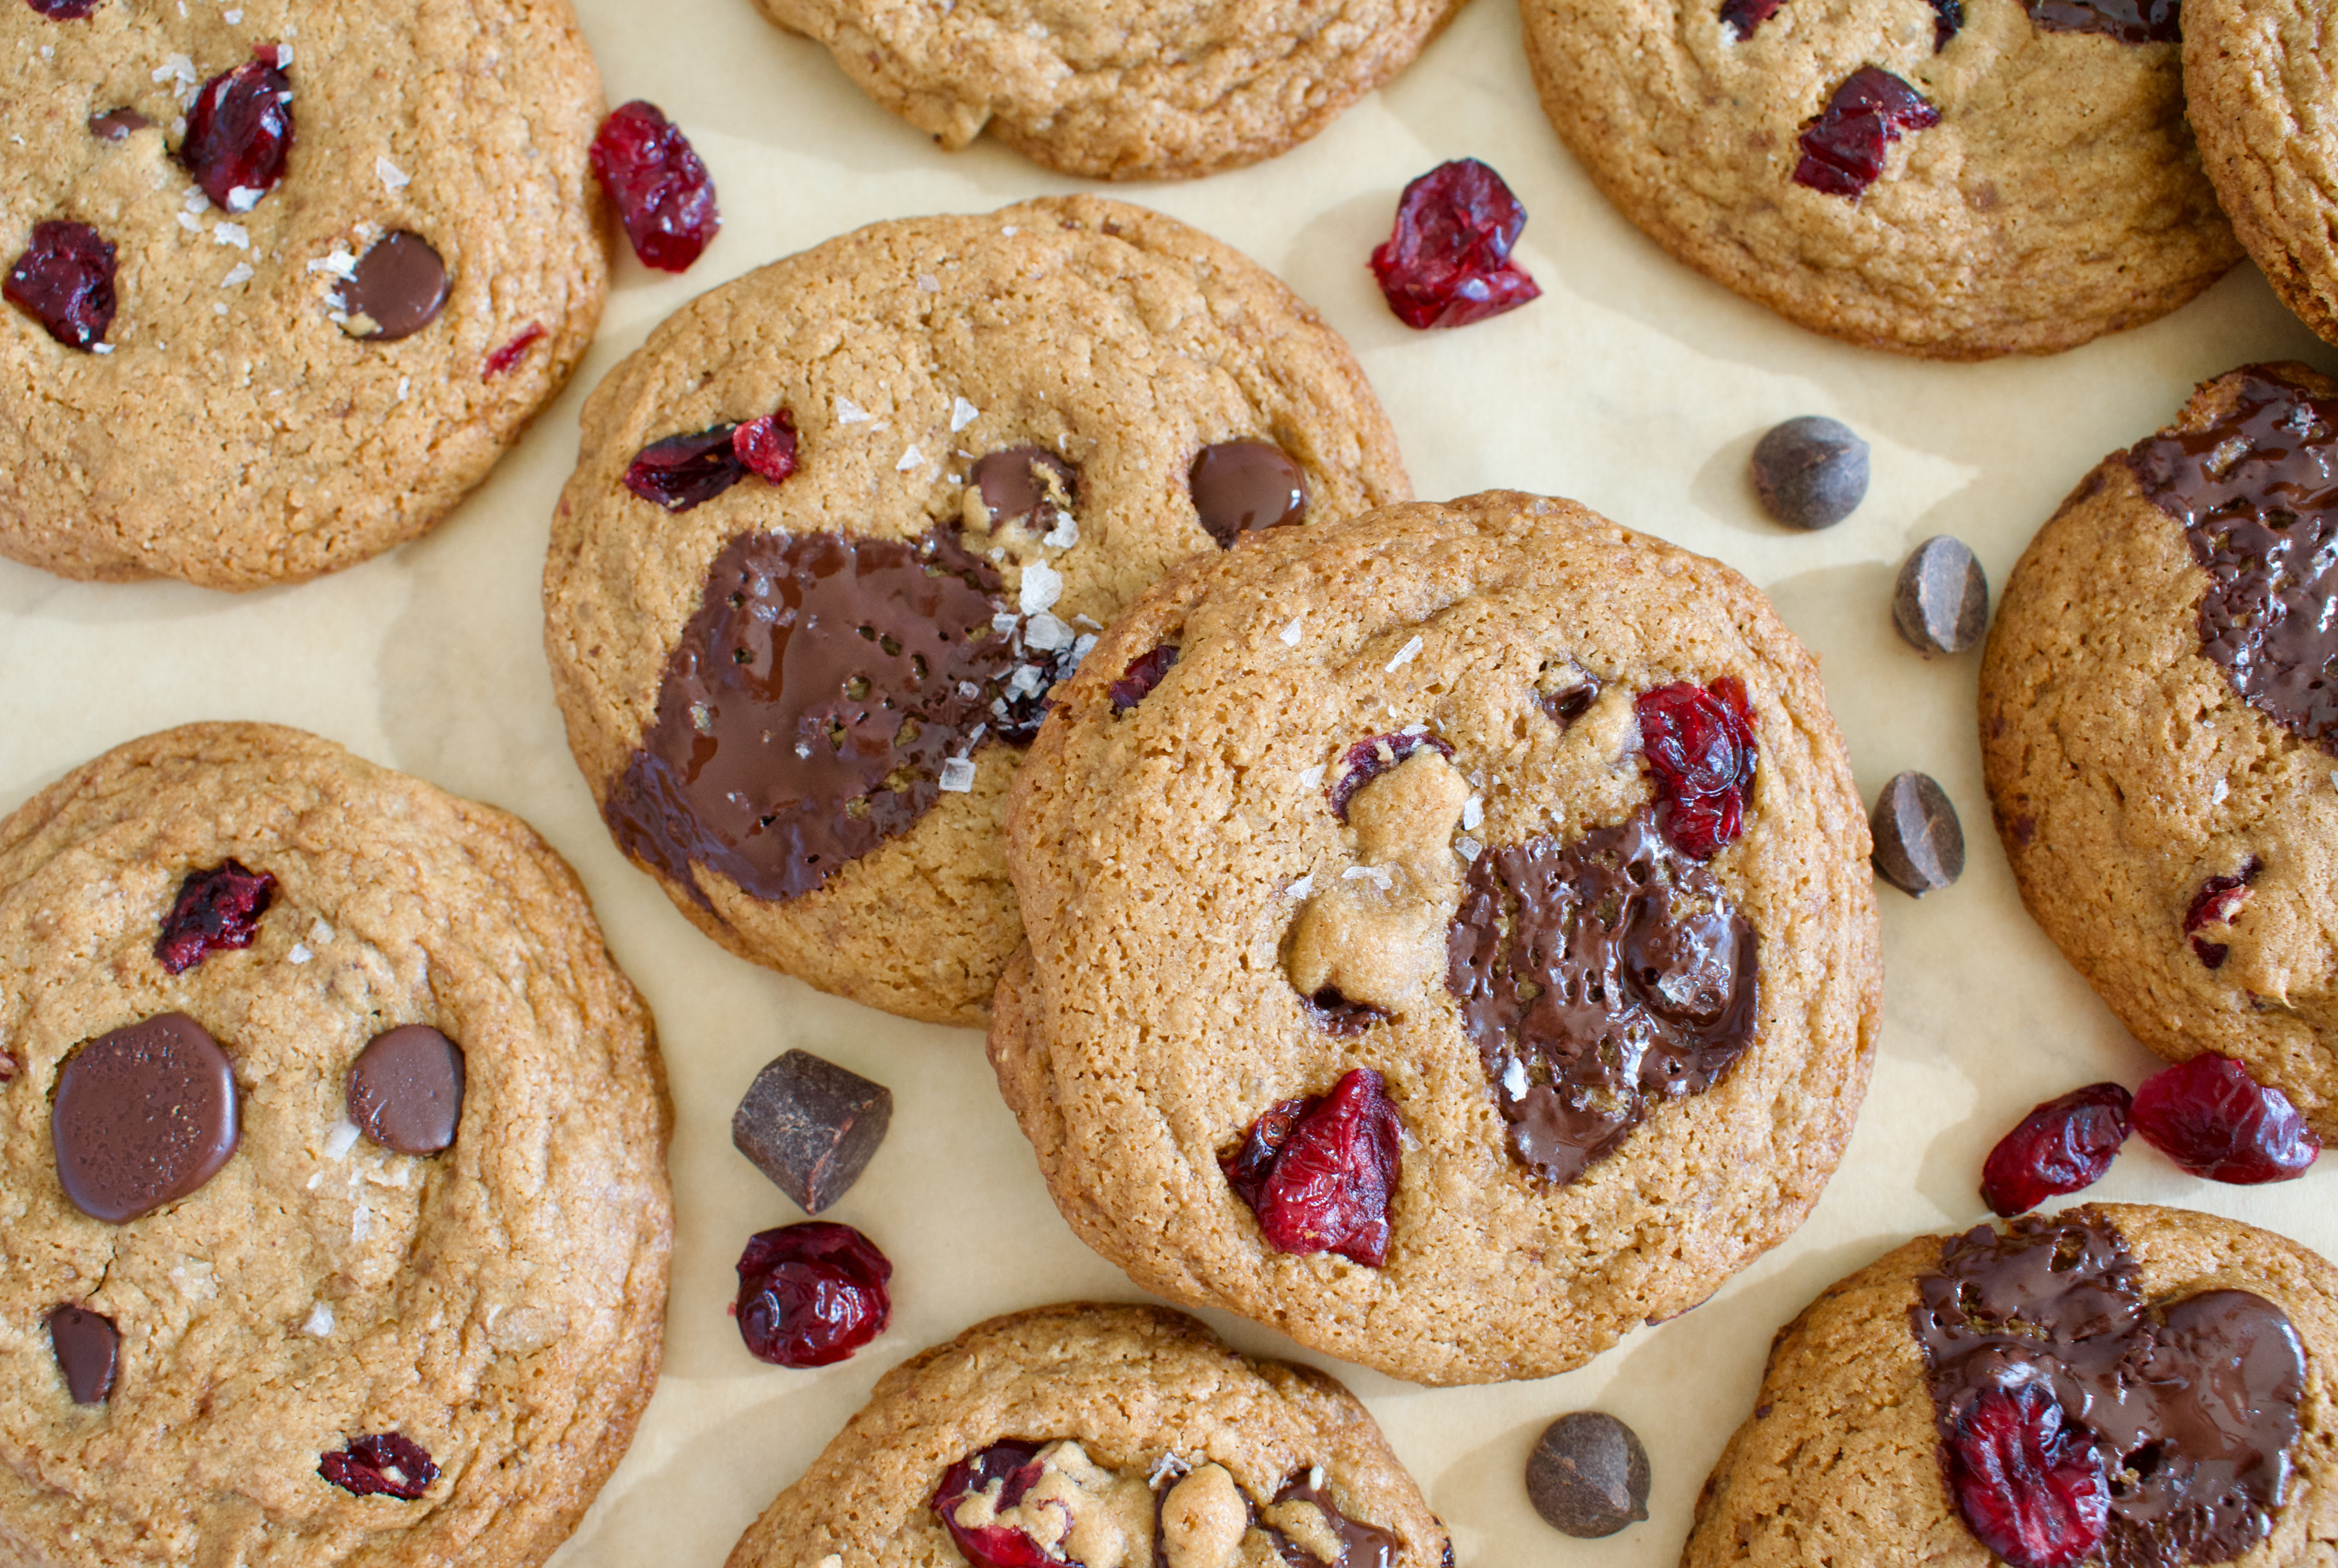
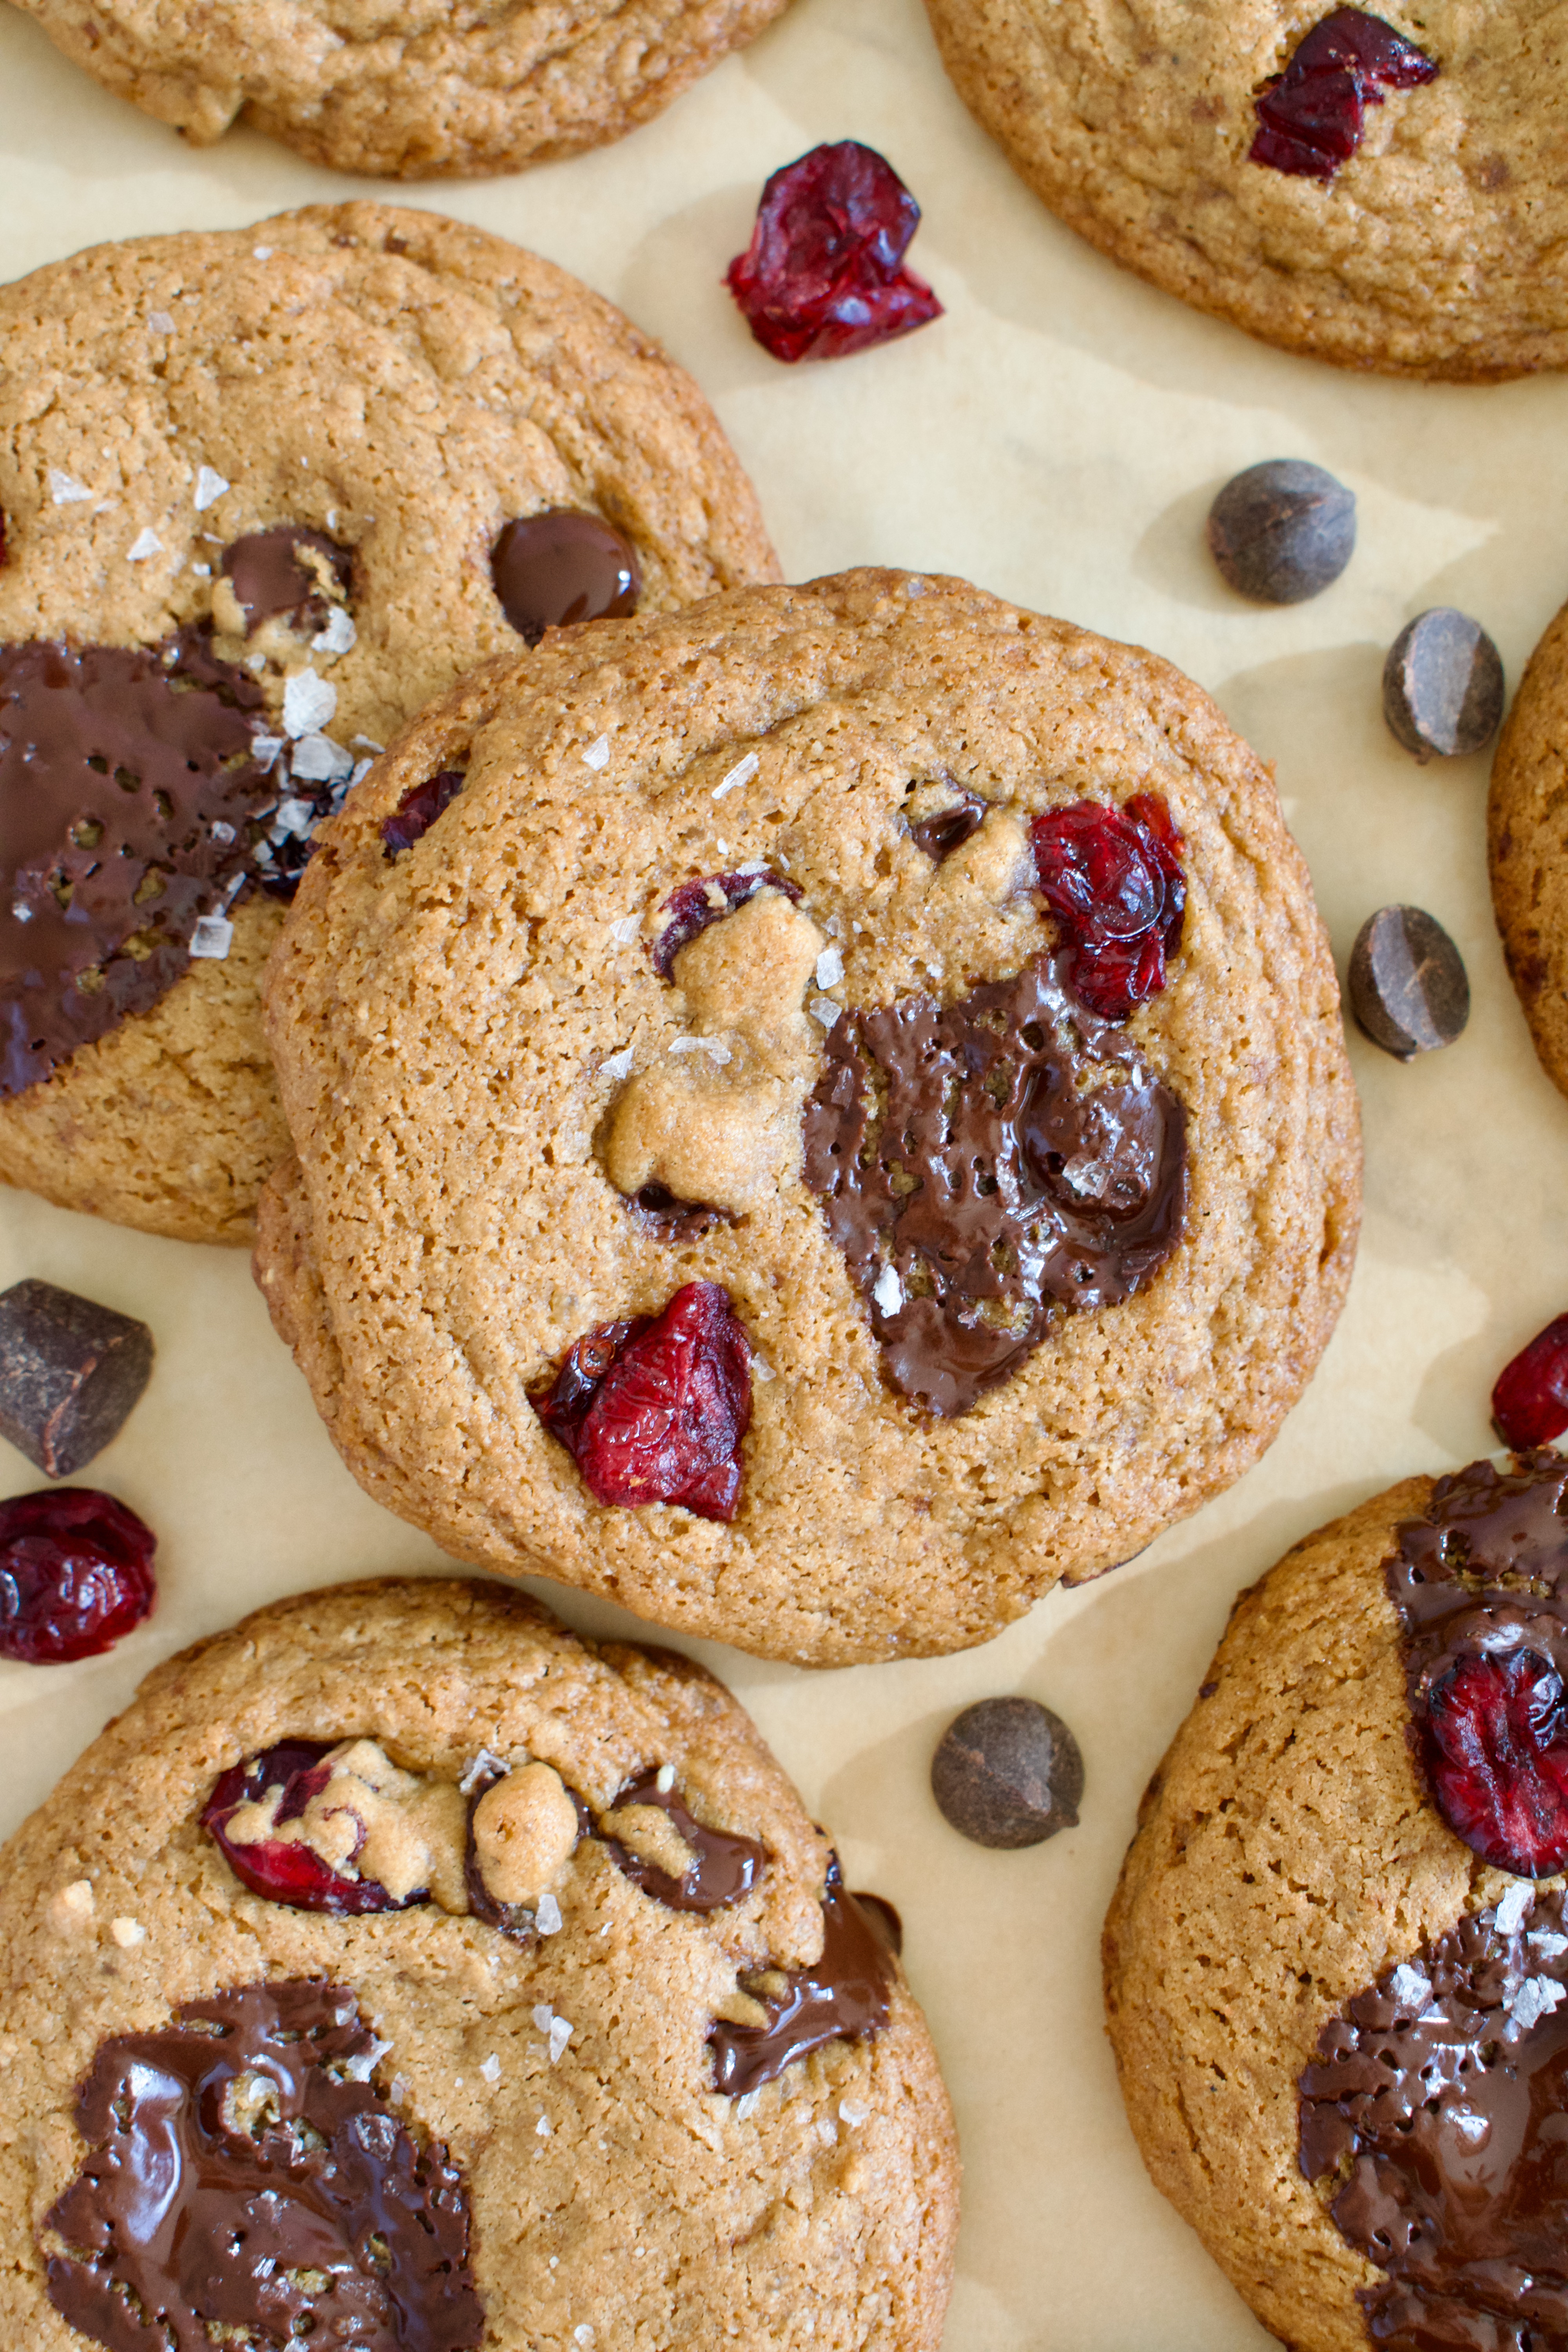
These Gluten Free Cranberry Chocolate Chip Cookies are the perfect way to upgrade a classic this holiday season. Gluten free, dairy free, and refined sugar free, these cookies have a hint of tang with the cranberries to balance out the sweetness!
gluten free cranberry chocolate chip cookies
As someone with a chronic illness who loves holiday treats, I don’t want to make myself sick from all the sugar, but I also don’t want to have to miss out! This is why I bake. Learning how to make healthier, allergy friendly desserts has helped support my healing journey AND mental health by not feeling restricted. My goal is to help you feel the same and show you how you can still eat delicious food while supporting your health,
These gluten free holiday cookies are a prime example of that! These cookies are gluten free, dairy free, and refined sugar free, all while still being delicious. This recipe calls for half the sugar of a traditional recipe, but you’ll never know the difference because they are still sweet and flavorful. So, let me teach you about how I adjusted the ingredients to be healthier, allergy friendly, and still delicious.
gluten free and dairy free cranberry chocolate chip cookies
Gluten Free Cranberry Chocolate Chip Cookies Ingredients:
Flours: This recipe calls for a combination of 1:1 gluten free flour, tigernut or almond flour, and tapioca starch. I find that using a combination of gluten free flours in gluten free baked goods tastes best and provides the best texture. You don’t end up with something too gummy or dry. Tigernut flour and almond flour are interchangeable, tigernut flour is just nut free if you have an allergy. Adding a little bit of tapioca starch helps with the soft texture we want in baked goods.
Fat: You can use butter, vegan butter, or coconut oil in this recipe. I love using the Miyoko’s vegan butter, but it does contain cashews. If you are allergic, just use coconut oil! I’ve tested both.
Sugar: This recipe uses coconut sugar, an unrefined sugar that has a lower glycemic index compared to white sugar. We also use half the amount of sugar in this recipe than a traditional chocolate chip cookie recipe. There’s just no need for the extra sugar. I’ve used just enough in this recipe to provide the right flavor and texture without the sugar overload. I think it tastes better this way anyway, as most cookies are so sickeningly sweet these days!
Add-ins: To keep this recipe refined sugar free, use the appropriate chocolate and cranberries. There are plenty of chocolate options out there this days that don’t contain any refined sugars! Finding refined sugar free cranberries can be hard, you may want to opt for unsweetened cranberries. You can also feel free to add in some chopped walnuts or pecans to add even more depth of flavor to this gluten free cranberry chocolate chip cookie recipe.
gluten free and dairy free cranberry chocolate chip cookies
Substitutions and Variations
Tigernut flour: you can always use almond flour instead, but you cannot sub more gluten free flour. It will change the flavor of these cookies and possibly the texture too.
Tapioca starch: you can try using arrowroot or corn starch instead.
Coconut sugar: I have not tested this recipe using any other sugar, but a 50/50 mix of white sugar and brown sugar should work!
Add-ins: chocolate and cranberry is a delicious combo during the winter holiday season, but you could certainly try another dried fruit or even add chopped walnuts or pecans to this recipe.
How to store these gluten free cookies
Keep these chocolate chip cookies stored in an airtight container at room temperature for up to 5 days. You can also freeze the baked cookies for up to 3 months.
Make your chocolate chip cookies festive with these cranberry chocolate chip cookies. These gluten free cookies are also dairy free and refined sugar free. They are a perfect take on the classic for the holiday season!
1/3cupchocolate chipsor 1/4 cup each of chocolate chips and chopped chocolate bar (this gets the pooled chocolate)
1/3cupdried, sweetened cranberries
extra flaky salt
Instructions
Preheat oven 350F. Line 2 baking sheets with parchment paper.
In a medium bowl, whisk together the dry ingredients (flours, starch, baking soda, baking powder, salt) and set aside.
Whisk the butter/oil and sugar together.
Add the egg and vanilla extract and whisk until smooth, about 1 minute.
Add the dry ingredients to the wet and use a spatula to mix until just combined.
Fold in the chocolate and cranberries.
If you didn't let your butter/oil cool enough and the dough is too runny, just pop it in the fridge for 30 minutes before scooping.
Scoop tablespoon size servings of dough onto the baking sheets, 2 inches apart (these cookies spread, so leave enough space!).
Bake for 10-12 minutes, until edges are just golden. Sprinkle with flaky sea salt upon removal. Let cookies cool on cookie sheet for 5-10 then transfer to a wire rack.
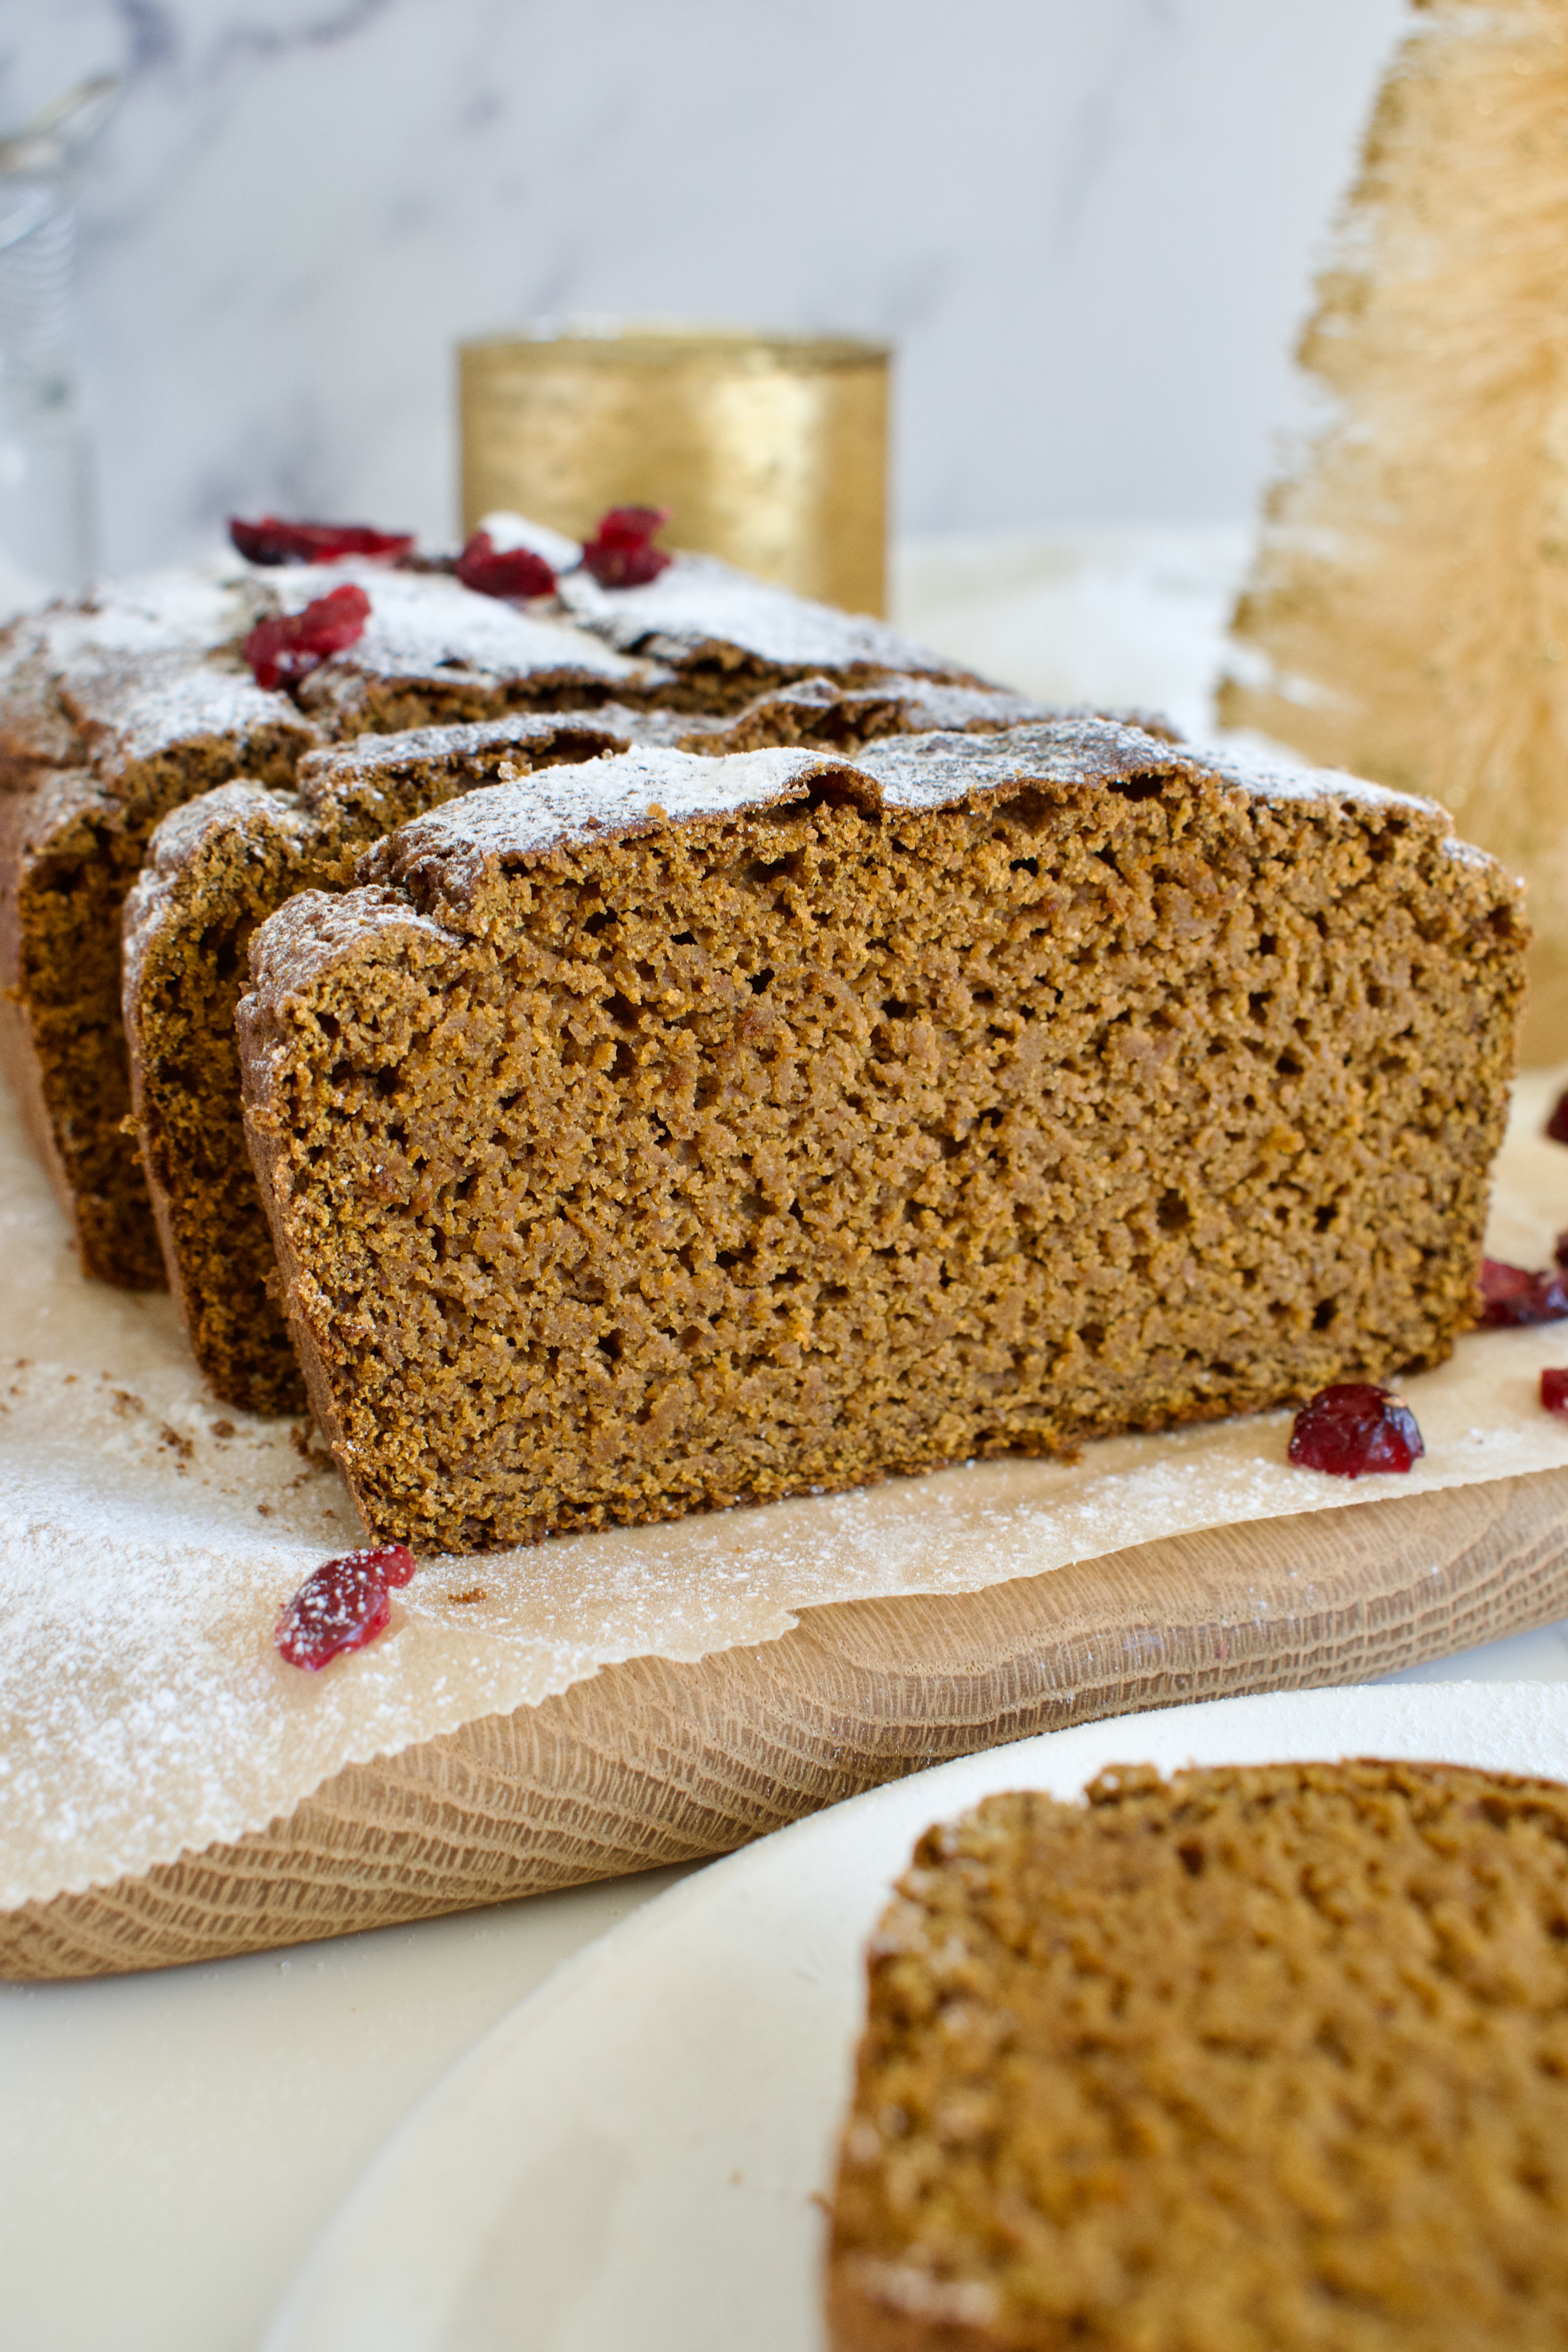
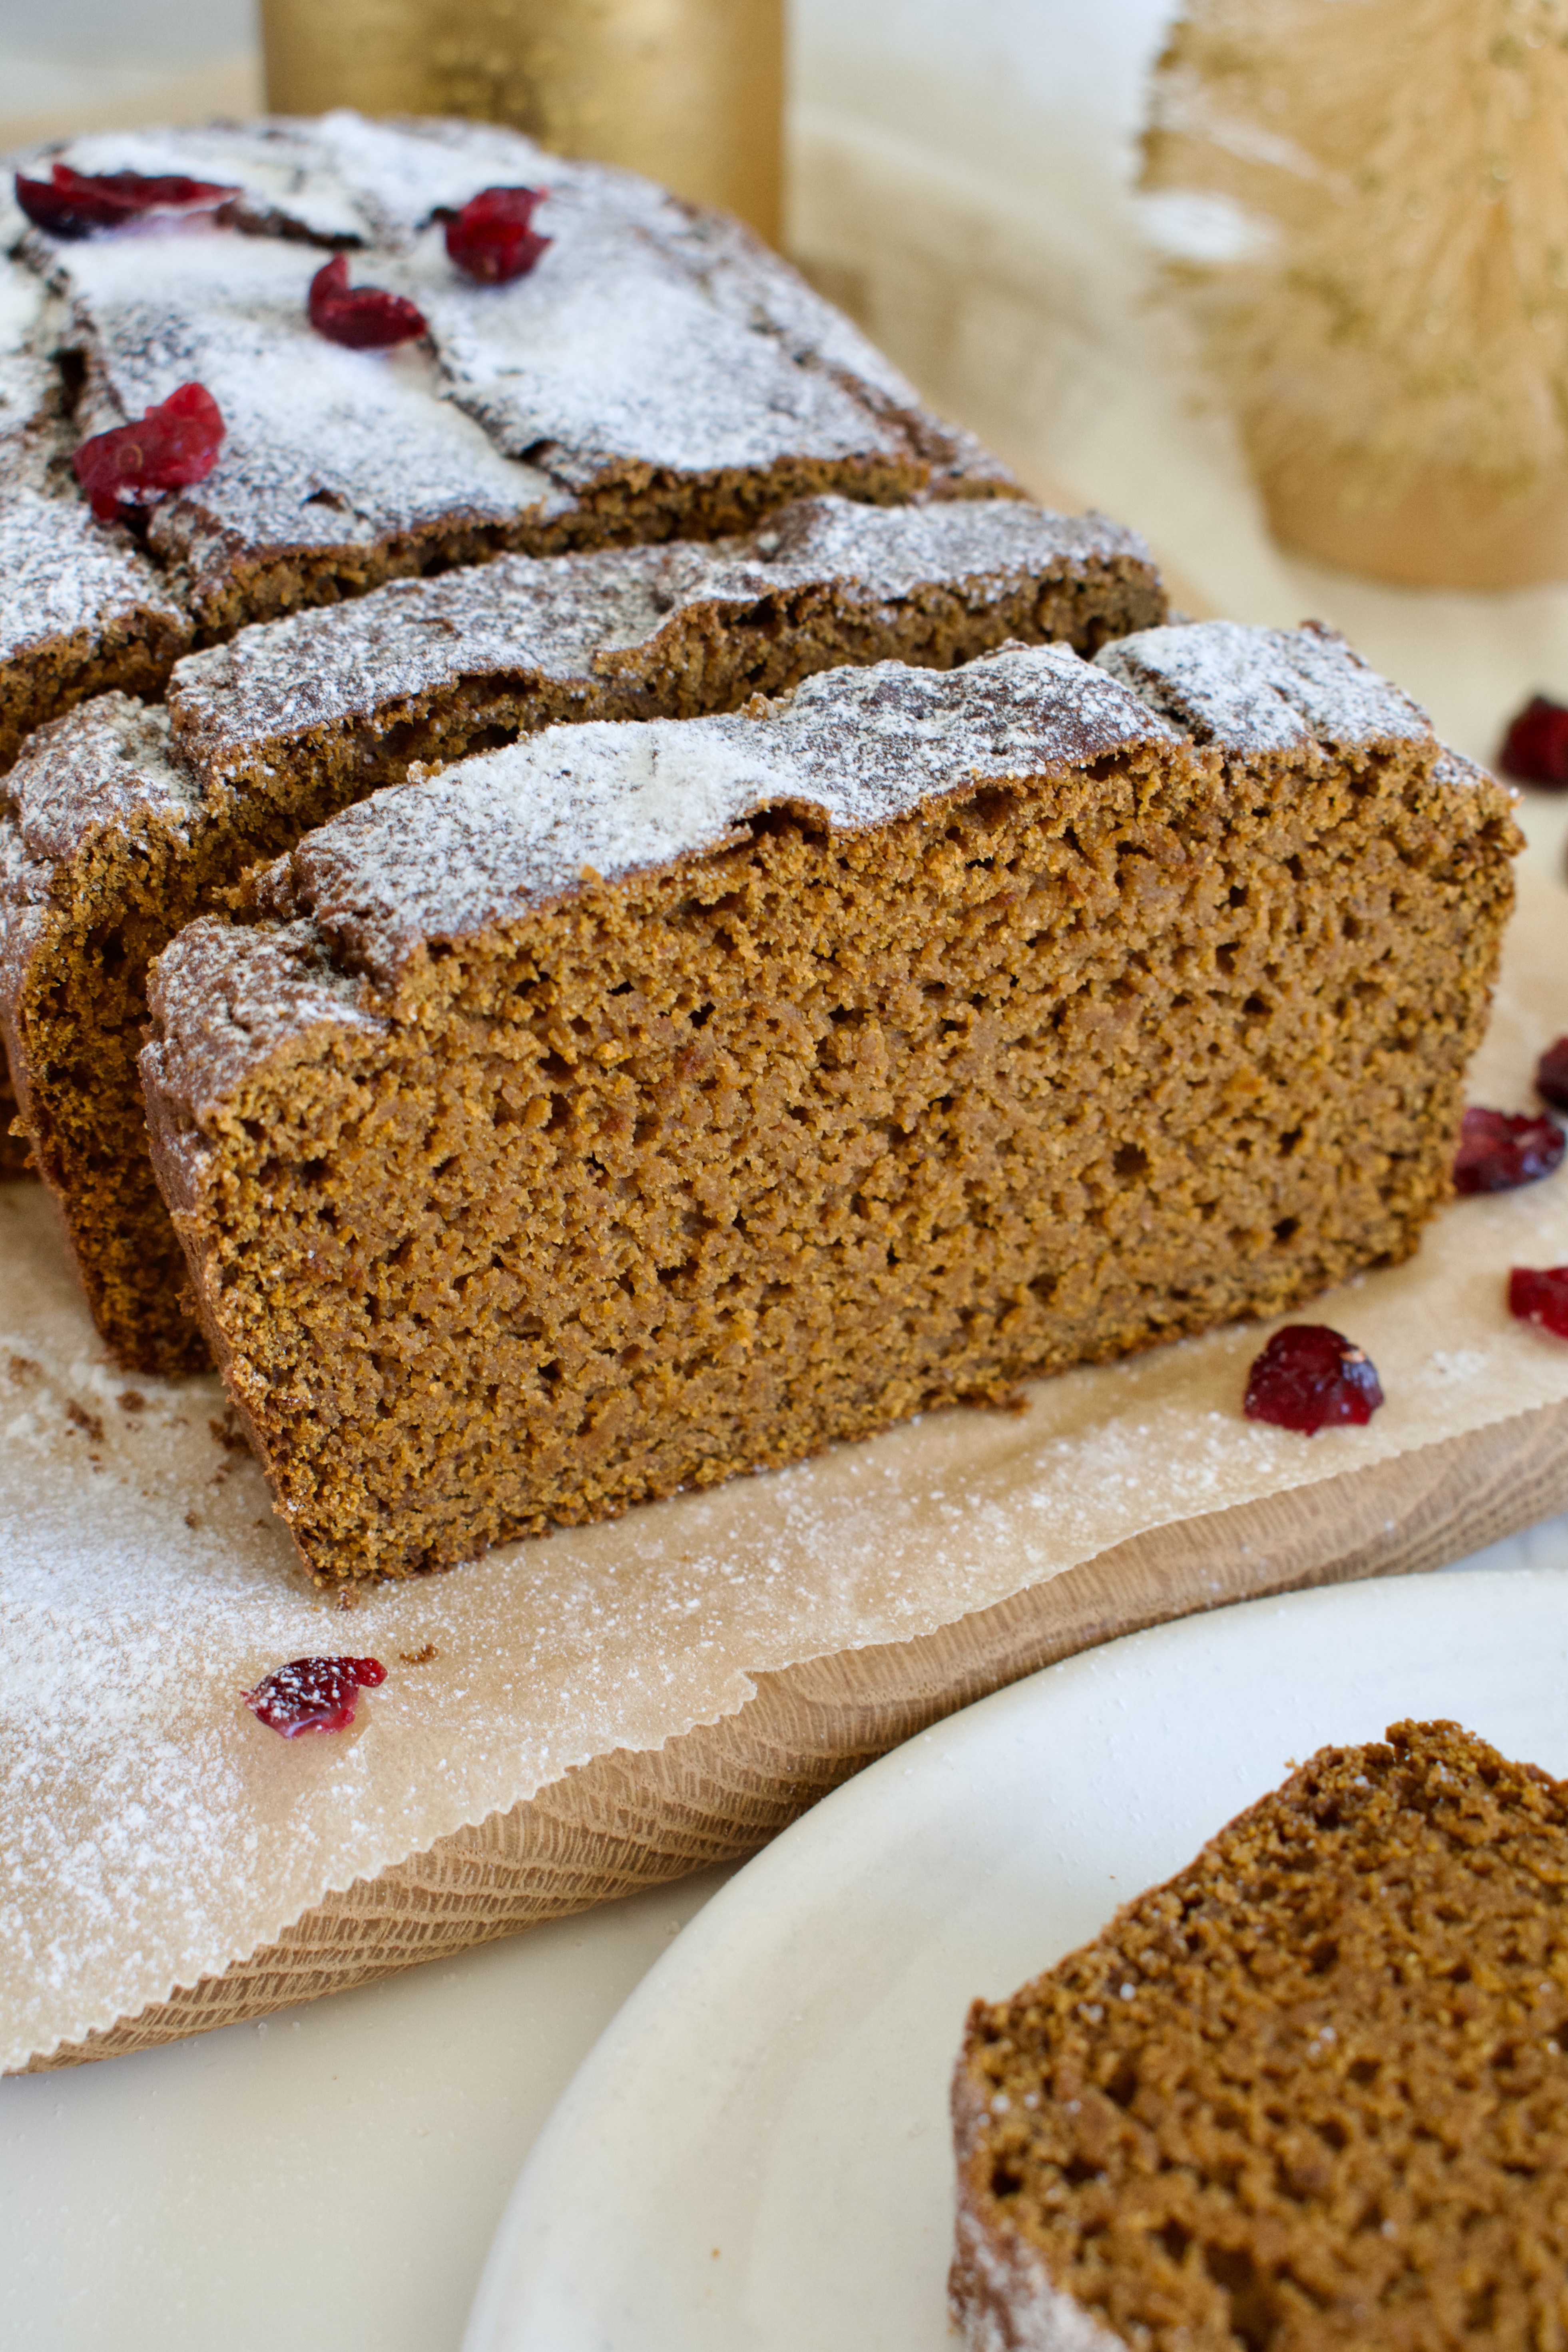
Enjoy the delicious flavors of winter without the gluten, dairy, or refined sugars with this Healthy Gluten Free Pumpkin Gingerbread loaf.
gluten free pumpkin gingerbread loaf
Ginger is one of my favorite winter flavors. Gingersnaps, gingerbread, ginger spice in everything I cook for dinner… I Around Christmas, we are inundated with cookie recipes, so if you also want something a little different, then this pumpkin gingerbread loaf recipe is for you! This healthier gingerbread is completely gluten free, dairy free, and refined sugar free. The gingerbread flavor is complimented with subtle sweetness so it’s not over powering.
This gluten free pumpkin gingerbread is a great option for dessert, Christmas brunch, or just to snack no around the holiday season when you want a healthier sweet treat. The pumpkin keeps this loaf moist and pairs perfectly with the warming spices and molasses in this recipe. Plus, it’s easy to make and bakes up in under an hour.
gluten free and dairy free pumpkin gingerbread loaf
Store this loaf in an airtight container at room temperature for up to 3 days or in the fridge for up to 5 days.
You can also slice and freeze this gingerbread loaf for up to 3 months. I suggest wrapping individual slices in plastic wrap or freezing in a single layer and then transferring to a freezer safe container or bag.
This healthy gluten free pumpkin gingerbread is the perfect winter loaf. Enjoy all the gingerbread flavor without any of the gluten, dairy, or refined sugar.
1/4cupolive oilor melted and cooled butter or coconut oil
1/4cupmolasses
1/3cupmaple syrup
1tspvanilla extract
Instructions
Preheat oven to 350 F. Line a loaf pan with parchment paper and set aside.
Whisk all dry ingredients together in a small bowl and set aside.
Beat the pumpkin and eggs in a large bowl until smooth. Add the remaining wet ingredients and beat until smooth and combined.
Add the dry ingredients to the wet and mix until just combined.
Pour or scoop the batter into the lined loaf pan and use a spatula to smooth out the top.
Bake for ~45 minutes or until a toothpick comes out clean and the top springs to the touch. Let cool for 10 minutes in the loaf pan before removing to finish cooling on a wire rack (grab the edges of the parchment paper to lift the loaf and transfer it).
Hi! I'm Victoria. I was diagnosed with Lyme in 2012 and have been on a healing journey ever since. I love helping others on their road to healing through allergy friendly recipes, exercise, and overall well-being.