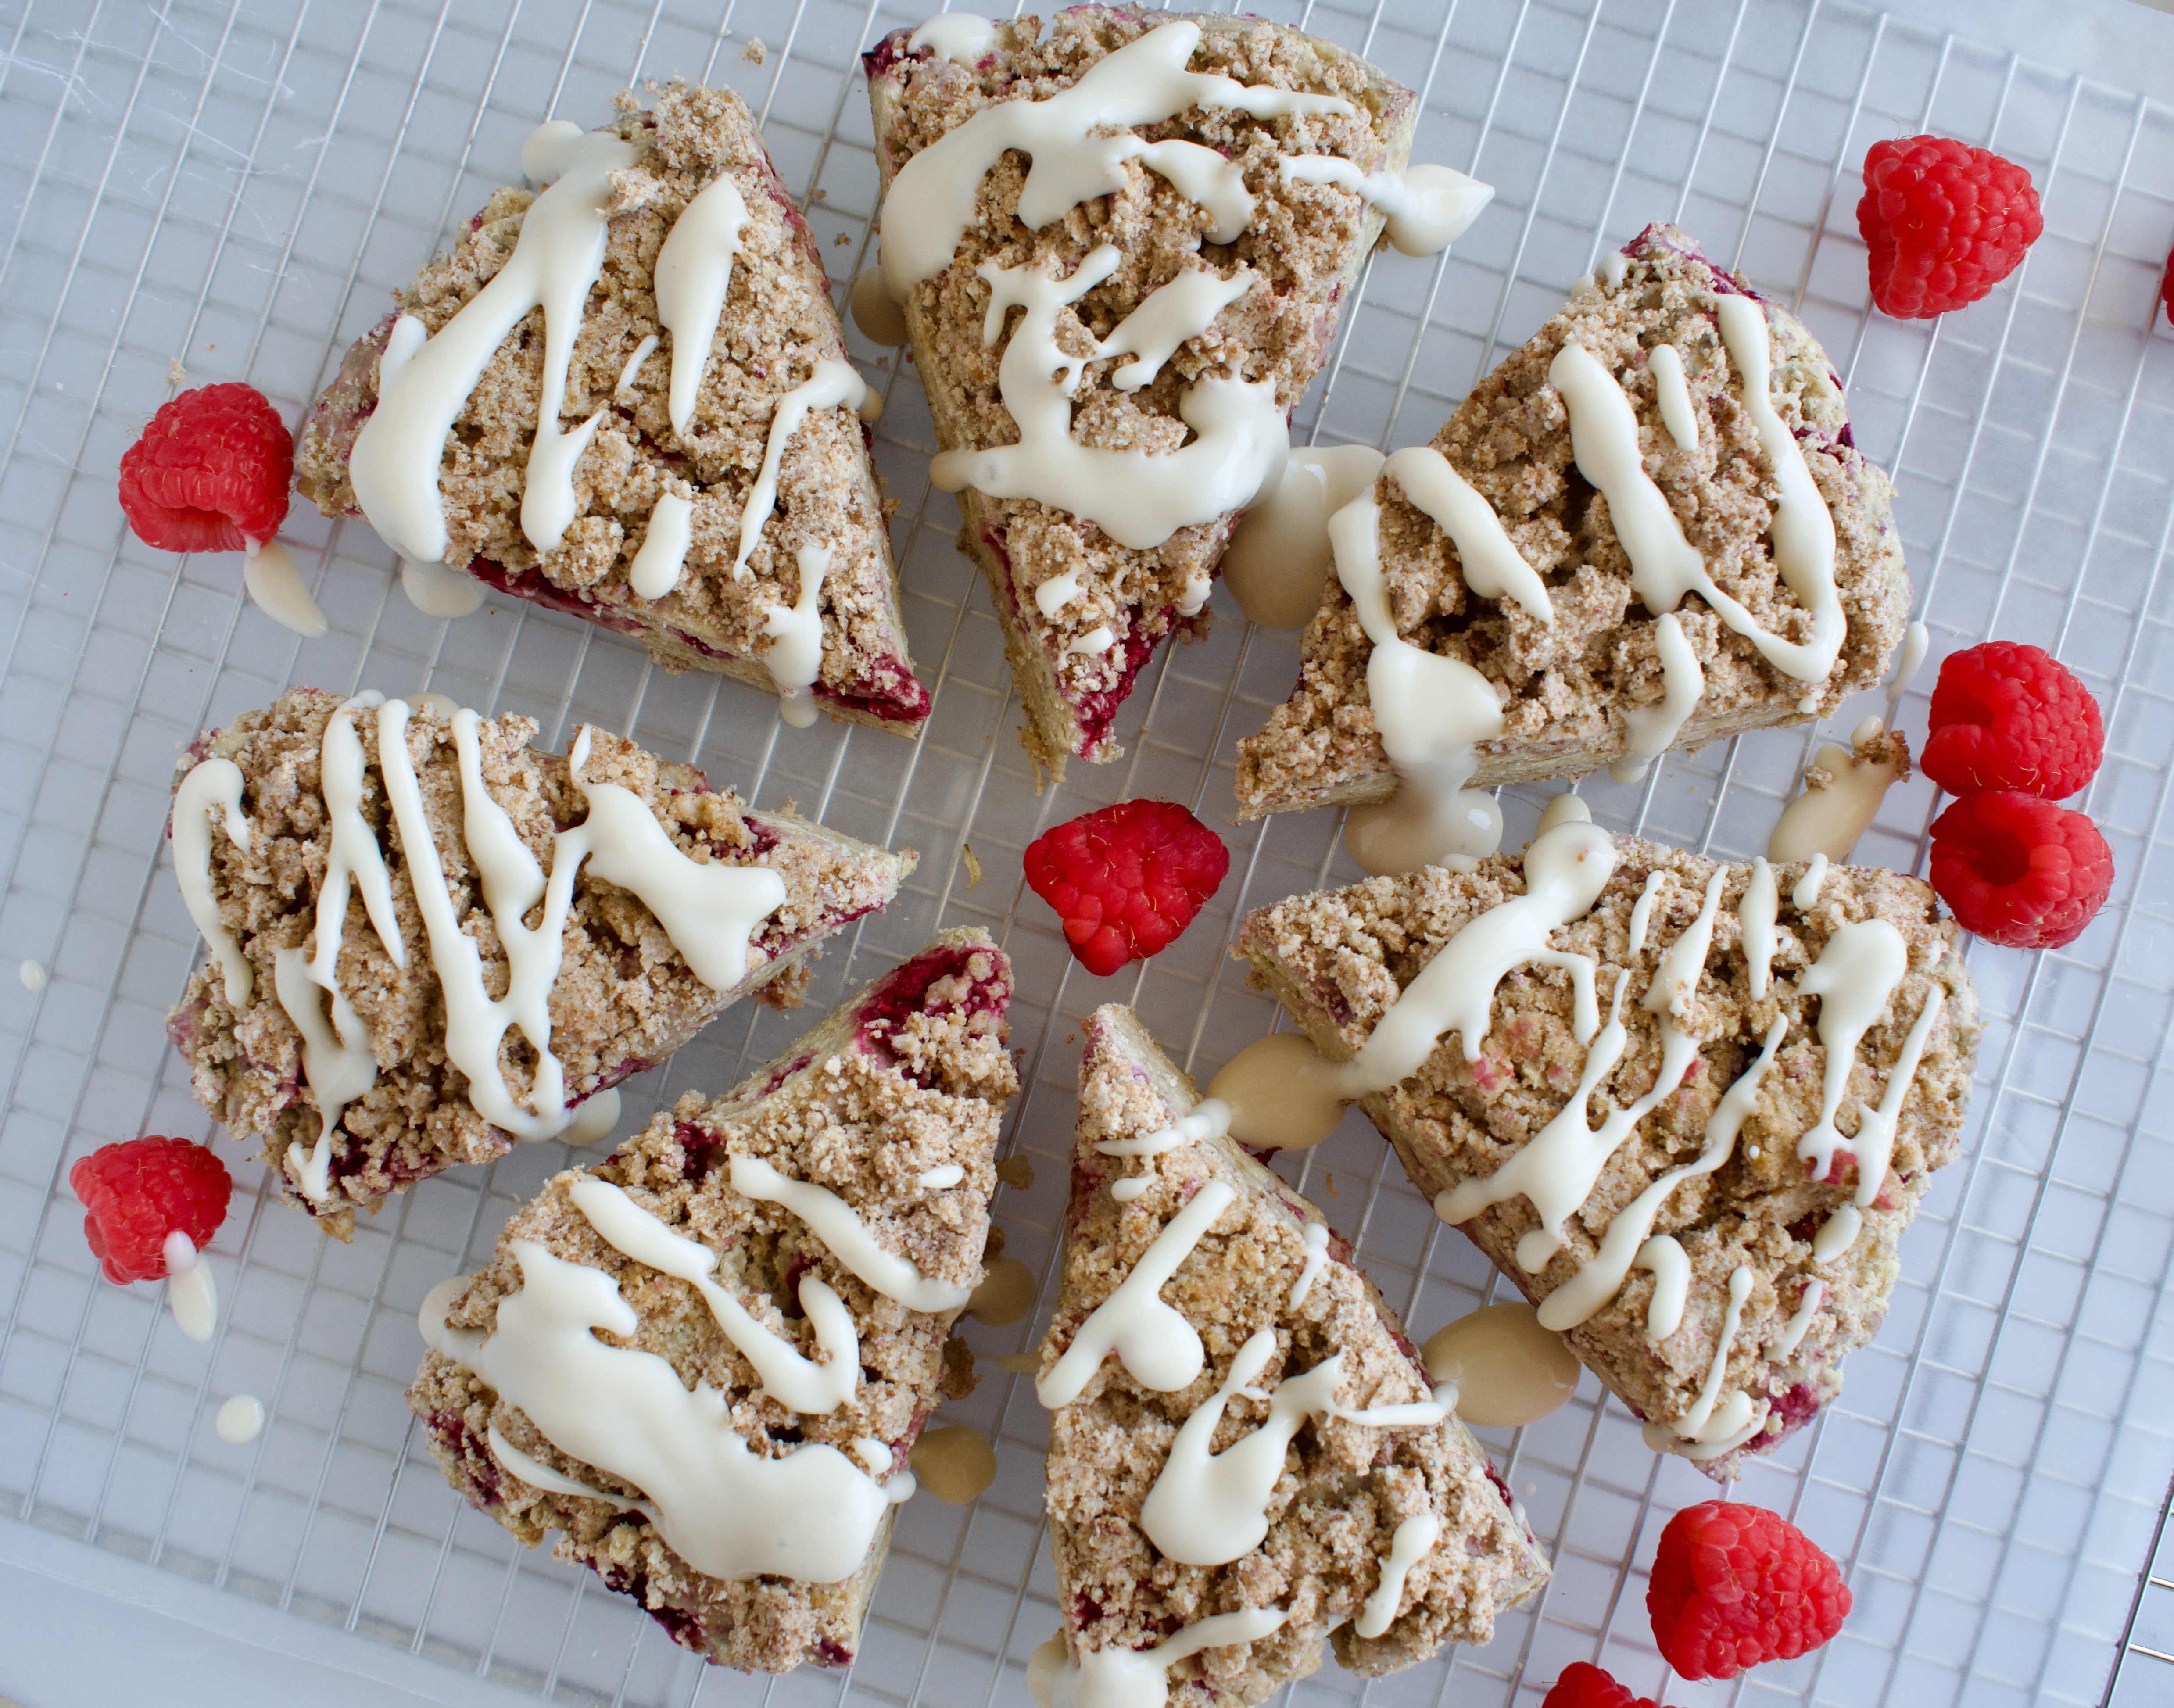
Delicious Gluten Free Raspberry Scones with a crumble topping and sweet cream drizzle. You’ll love this healthier and allergy friendly scone recipe!
gluten free raspberry scones
I think this is my favorite scone recipe I’ve made to date! First of all, I love berries. Second of all, I love a good crumble. Lastly, add a sweet glaze? I’m sold! These healthier scones are perfection with a cup of tea. They are completely gluten free, dairy free, and refined sugar free.
gluten free raspberry and cream scones
Gluten Free Raspberry and Cream Scones
Gluten Free Scone Ingredients:
Scones
1:1 gluten free flour
Baking powder
Salt
Coconut sugar
(Vegan) butter
egg
(Vegan) yogurt or coconut cream
Vanilla extract
Frozen raspberries, tossed in 1 Tbsp of flour
Crumble Topping
1:1 gluten free flour
Coconut sugar or white sugar
Cinnamon
Butter or coconut oil
Sweat Cream Drizzle
Powdered sugar
Yogurt or coconut cream
Instructions:
Whisk together the flour, baking powder, sugar and salt for the scones.
Whisk together the egg, vanilla extract, and yogurt/coconut cream and set aside.
Cut butter into flour mixture until you have a sand-like texture.
Add the remaining wet ingredients and use a fork to combine the dough until it holds together.
Mix in your raspberries then form the dough into a disk on a parchment lined baking sheet. The disk should be about 8-9 inches in diameter and about an inch thick. Place the dough in the fridge for 30 minutes.
While dough rests, make your crumble topping by mixing all crumble ingredients together with a fork.
Preheat the oven to 350F.
When ready to bake, top the scones with the crumble topping, pressing down gently. Slice the dough into 8 scones and separate them on the baking sheet. They will expand during baking.
Bake for ~30 minutes until golden.
Let cool for 10 minutes on the baking sheet before transferring to a wire rack to finish cooling.
When ready to serve, mix together 1/4 cup of powdered sugar with 1 Tbsp of yogurt/coconut cream until you have a thin mixture. Add more yogurt if it is too thin. Drizzle over the scones and enjoy!
gluten free raspberry scones
Gluten Free Scone Recipe Notes
Can I make this recipe Paleo? I have not tested a Paleo version of this recipe. I have a feeling cassava flour would work well as a substitute, but cannot guarantee that. If you try it, leave a comment with how it went!
Can I make this recipe vegan? I have not tested an egg substitute for this recipe, but I do use vegan butter and yogurt to keep these scones dairy free.
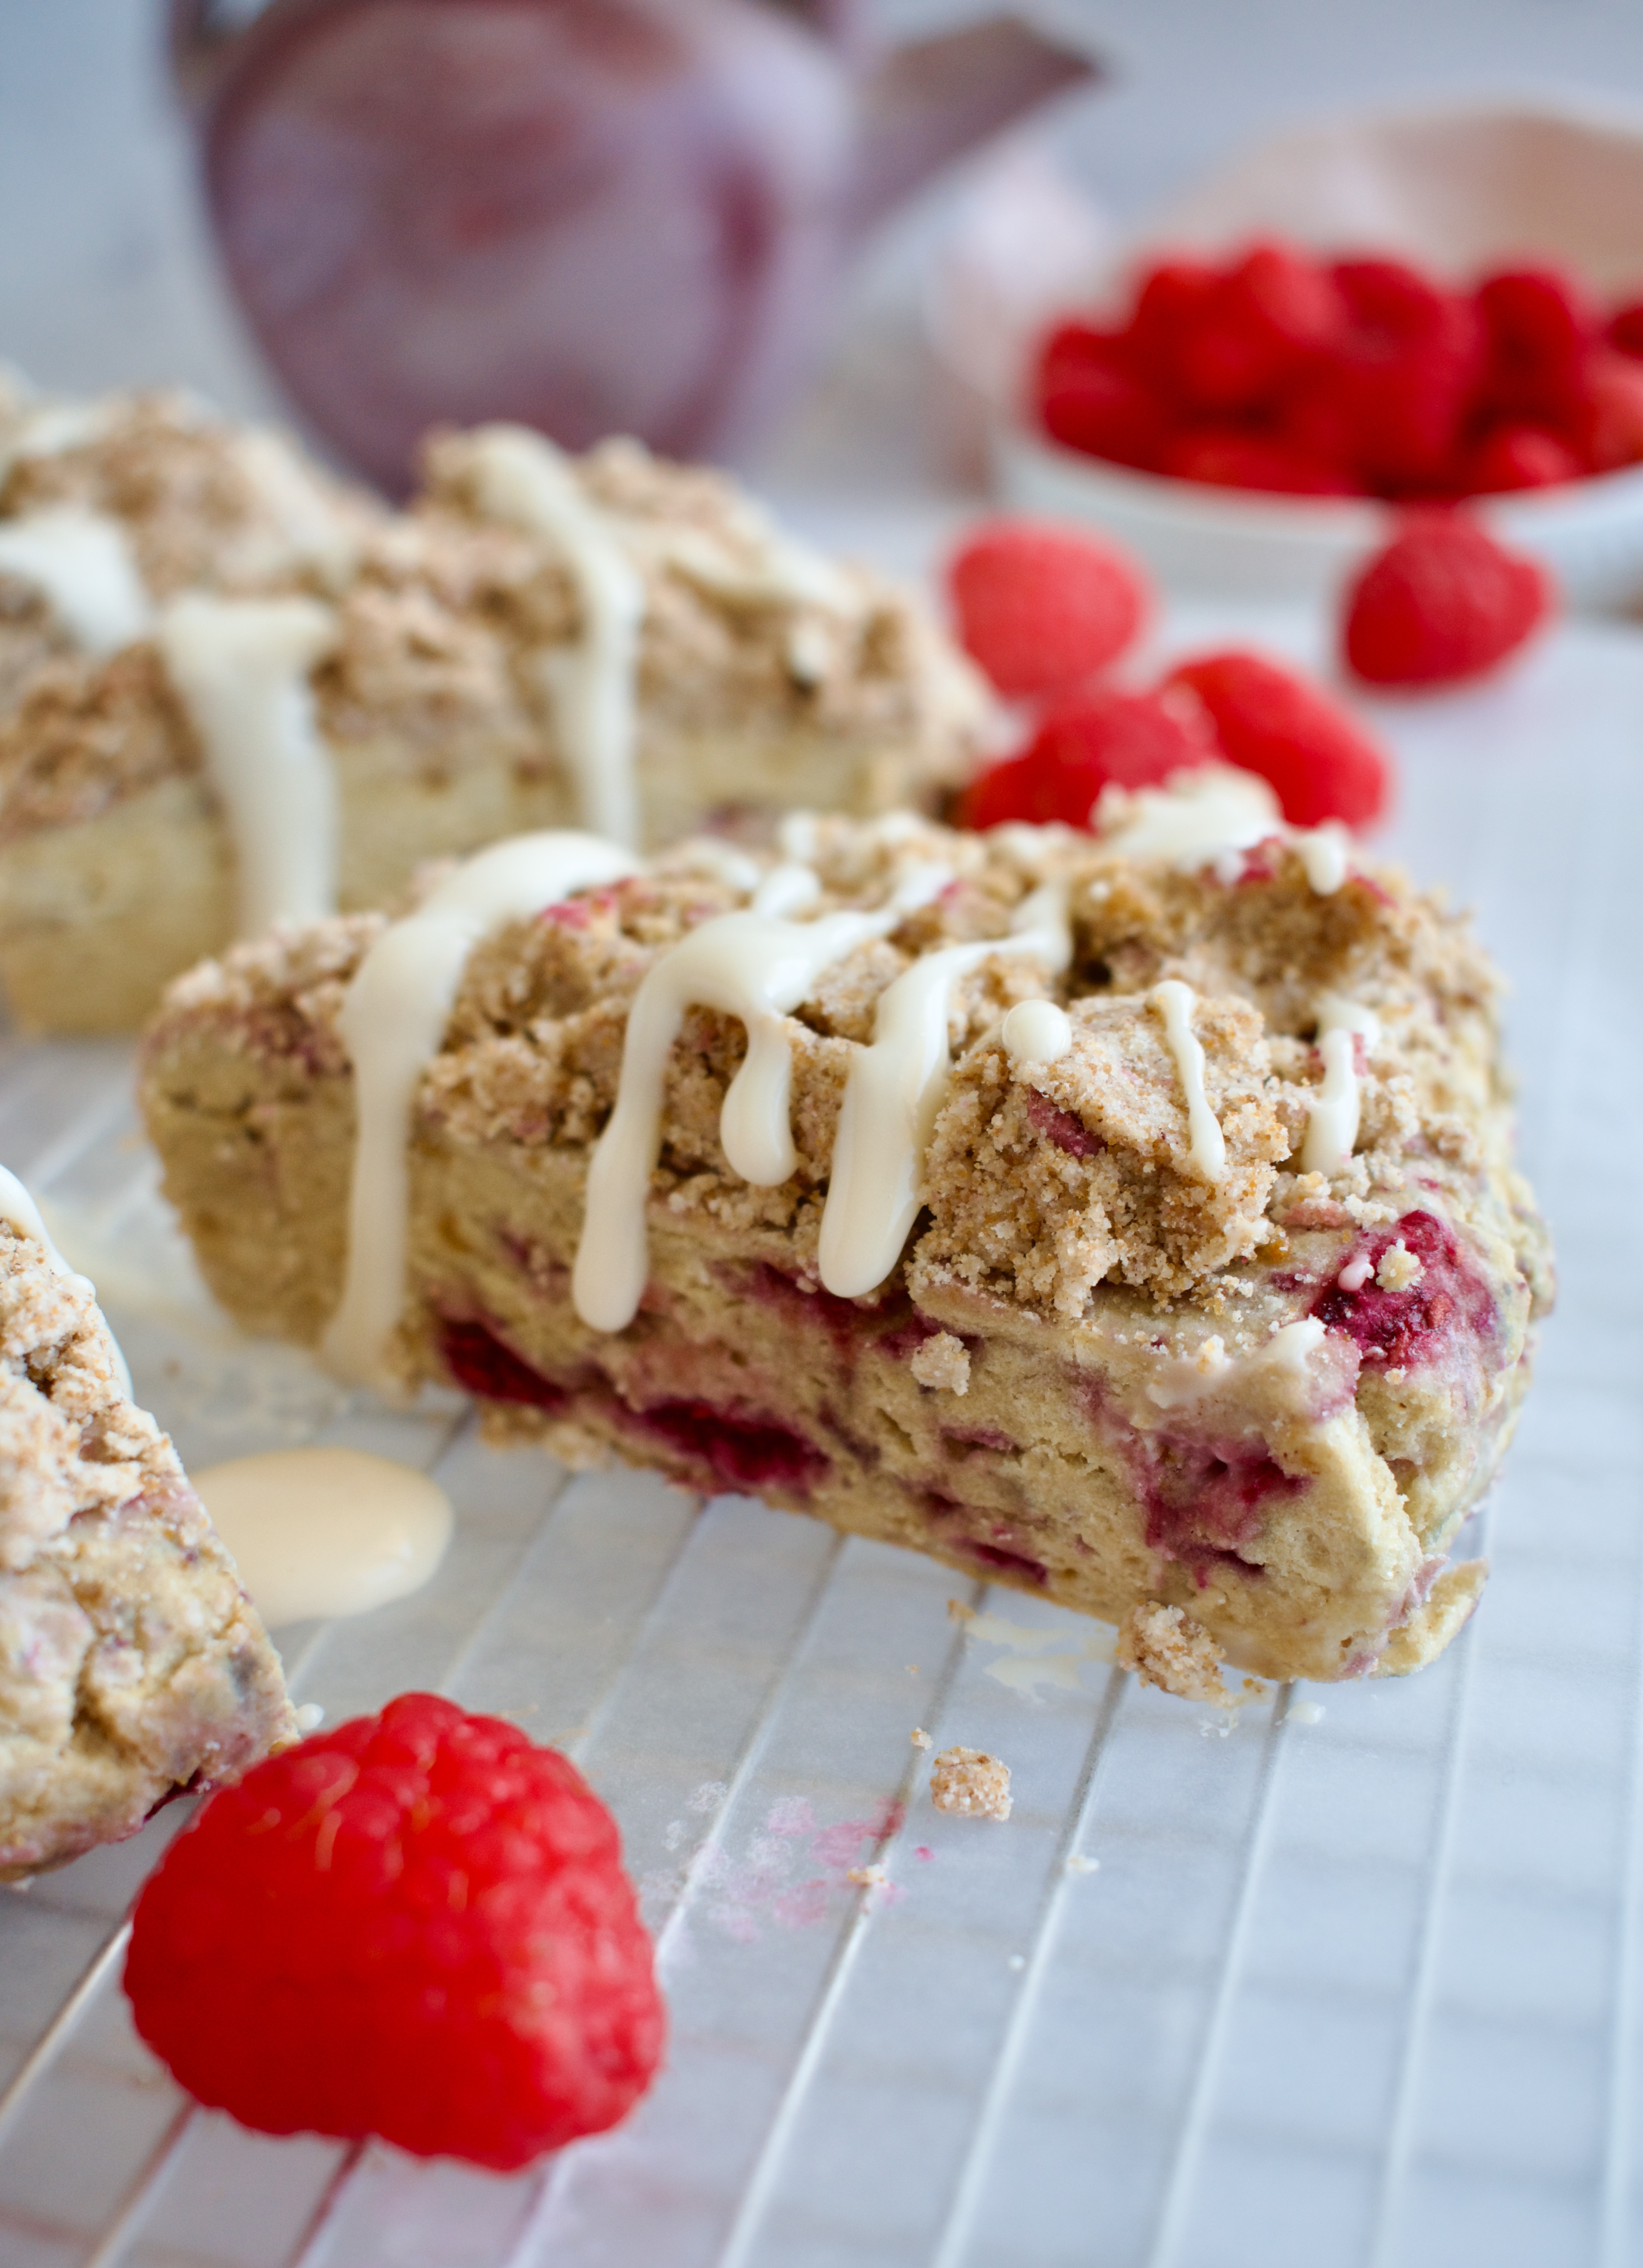
Can I use fresh raspberries? Frozen berries are preferred for this recipe as fresh berries tend to be too fragile and will get squished when mixing the dough,
Can I use other berries? Yes! Diced strawberries would work and any other frozen berry should be fine.
What if I don’t have powdered sugar? You can make your own! Just blend 1 cup of sugar (I use coconut sugar to keep it refined sugar free) and 1 tbsp. of starch (arrowroot, tapioca, corn) until you have a fine powder.
gluten free healthy raspberry and cream scones
More Scone Recipes
If you are looking for more delicious scones, I’ve got a few recipes for you. The first recipe is for my cinnamon lovers. The second is for my autoimmune paleo babes who still need a fully grain free option.
Gluten free raspberry scones are topped with a crumble topping and finished off with a sweat cream drizzle. These delicious scones are also dairy free, nut free, and refined sugar free. They make a delicious snack, breakfast, or dessert!
1/4cuppowdered sugar*see notes above for making your own with coconut sugar
1-2Tbspyogurt or coconut cream
Instructions
Whisk together the flour, baking powder, sugar and salt for the scones and place in the fridge.
Whisk together the egg, vanilla extract, and yogurt/coconut cream and set aside.
Cut your butter into cubes and add it to the flour mixture. Use a pastry cutter or fork to cut in the butter until you have a sand like texture, with little pea-sized bits of butter (the butter should be mostly broken down, but not melted).
Add the remaining wet ingredients and use a fork to combine the dough until it holds together. If it is not coming together, add more yogurt/coconut cream 1 Tbsp at a time.
Mix in your raspberries then form the dough into a disk on a parchment lined baking sheet. The disk should be about 8-9 inches in diameter and about an inch thick. Place the dough in the fridge for 30 minutes.
While dough rests, make your crumble topping by mixing all crumble ingredients together with a fork.
Preheat the oven to 350F.
When ready to bake, top the scones with the crumble topping, pressing down gently. Slice the dough into 8 scones and separate them on the baking sheet. They will expand during baking.
Bake for ~30 minutes until golden.
Let cool for 10 minutes on the baking sheet before transferring to a wire rack to finish cooling.
When ready to serve, mix together 1/4 cup of powdered sugar with 1 Tbsp of yogurt/coconut cream until you have a thin mixture. Add more yogurt if it is too thin. Drizzle over the scones and enjoy!
These gluten free scones are topped off with a delicious cinnamon crumble. They are dairy free, refined sugar free, and nut free. The perfect treat!
gluten free scones
I’ll be honest, scones are not my favorite baked good, but sometimes they hit the spot. I really wanted to make gluten free scones that had more oomph to them. I love anything with a crumble (see below) and thought, why not put that on scones? These scones are packed with cinnamon flavor and loaded with a delicious cinnamon crumble topping.
cinnamon scones
How to Make Gluten Free Cinnamon Crumble Scones
Ingredients:
Scones
tigernut or almond flour
1:1 gluten free flour
tapioca starch
baking powder
salt
coconut sugar
cinnamon
cold (vegan) butter
egg
vanilla extract
coconut yogurt or coconut cream
Crumble topping
1:1 gluten free flour
coconut sugar
cinnamon
(vegan) butter or coconut oil
Process:
Scones are pretty easy to make, the biggest thing is just keeping the dough cold so the butter doesn’t melt before it hits the oven.
You will start by mixing your dry ingredients and sticking them in the freezer for a few minutes so that everything stays cold.
Then you cut in the cold butter and add the remaining wet ingredients, mixing the dough until it comes together.
Form the dough into a disk and pop in the fridge (remember, cold butter!).
While the dough chills, you’ll make the crumble topping and preheat the oven.
When ready, add the topping, cut the scones, and bake!
gluten free and dairy free scones
Gluten Free Scone Substitutions
Gluten free flour: I have not tested a paleo option for these, but cassava flour might work well!
Tigernut flour: I love using tigernut flour because it is nut free and adds a lovely sweet nuttiness that compliments the cinnamon perfectly in this recipe. Almond flour is a great alternative, just make sure it is finely ground.
Butter: I use a vegan butter to keep these scones dairy free, but regular butter is also fine if you tolerate dairy. I have not tried this recipe with coconut oil, but I think it would work fine!
Coconut yogurt: you can use coconut cream instead or Greek yogurt.
If you love scones or crumble recipes, check these out!
As mentioned above, I love a crumble recipe, as evidenced by all of these recipes I’ve created. If you love a crunchy, crumble topping too, you’ll also love these
These gluten free scones are also completely dairy free, refined sugar free, and nut free. A not-to-sweet scone base is topped off with a delicious cinnamon crumble. You'll love one of these with your coffee or tea!
Mix together the flours, baking powder, salt, and cinnamon and place in the fridge for 10 minutes.
Cut the butter into cubes when ready to use, then add to the flour mixture and cut in with a fork or pastry cutter until you have a sand-like mixture and butter is evenly distributed.
In a small bowl, whisk together the egg, yogurt, and vanilla extract. Add to the flour-butter mixture and use a fork to combine everything into an even dough. If it's too dry and not coming together, add in more yogurt/cream 1 Tbsp at a time.
Shape the dough into a disk about 8-9inch in diameter on a parchment lined baking sheet and place the dough in the fridge for 30 minutes.
While the dough is chilling, preheat the oven to 350F.
Mix together the crumble ingredients in a small bowl and set aside.
When ready to bake the scones, gently press the crumble on top of the scones then cut your scones into 8 and spread them out on the baking sheet. They need some room to expand!
Bake for 25-30 minutes. Let cool on the baking sheet before serving!
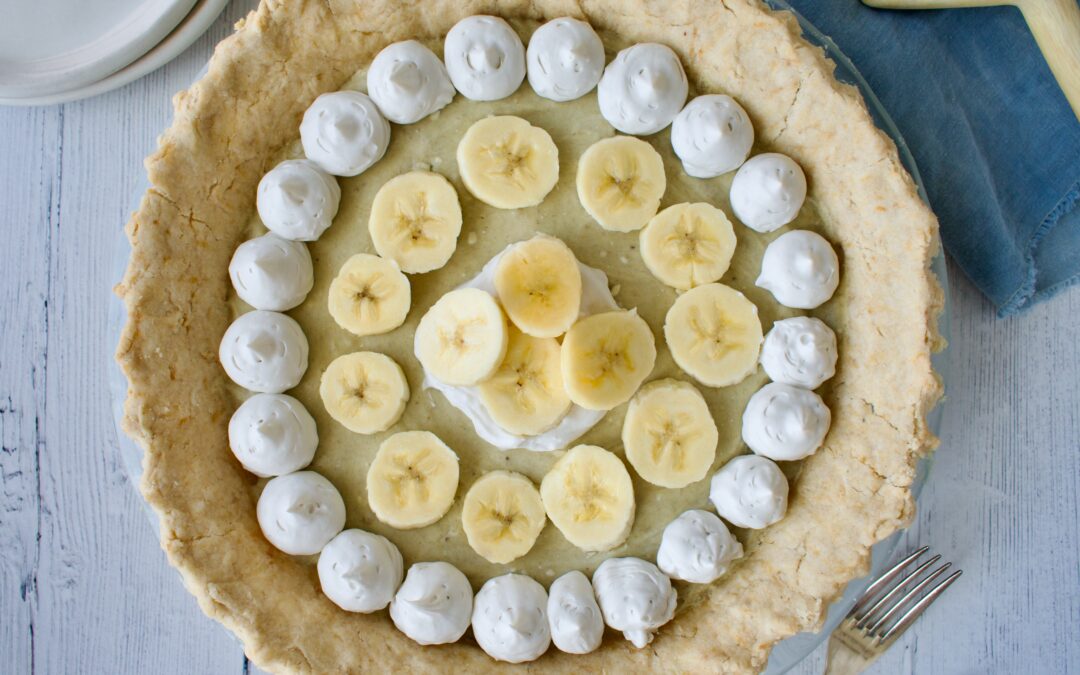
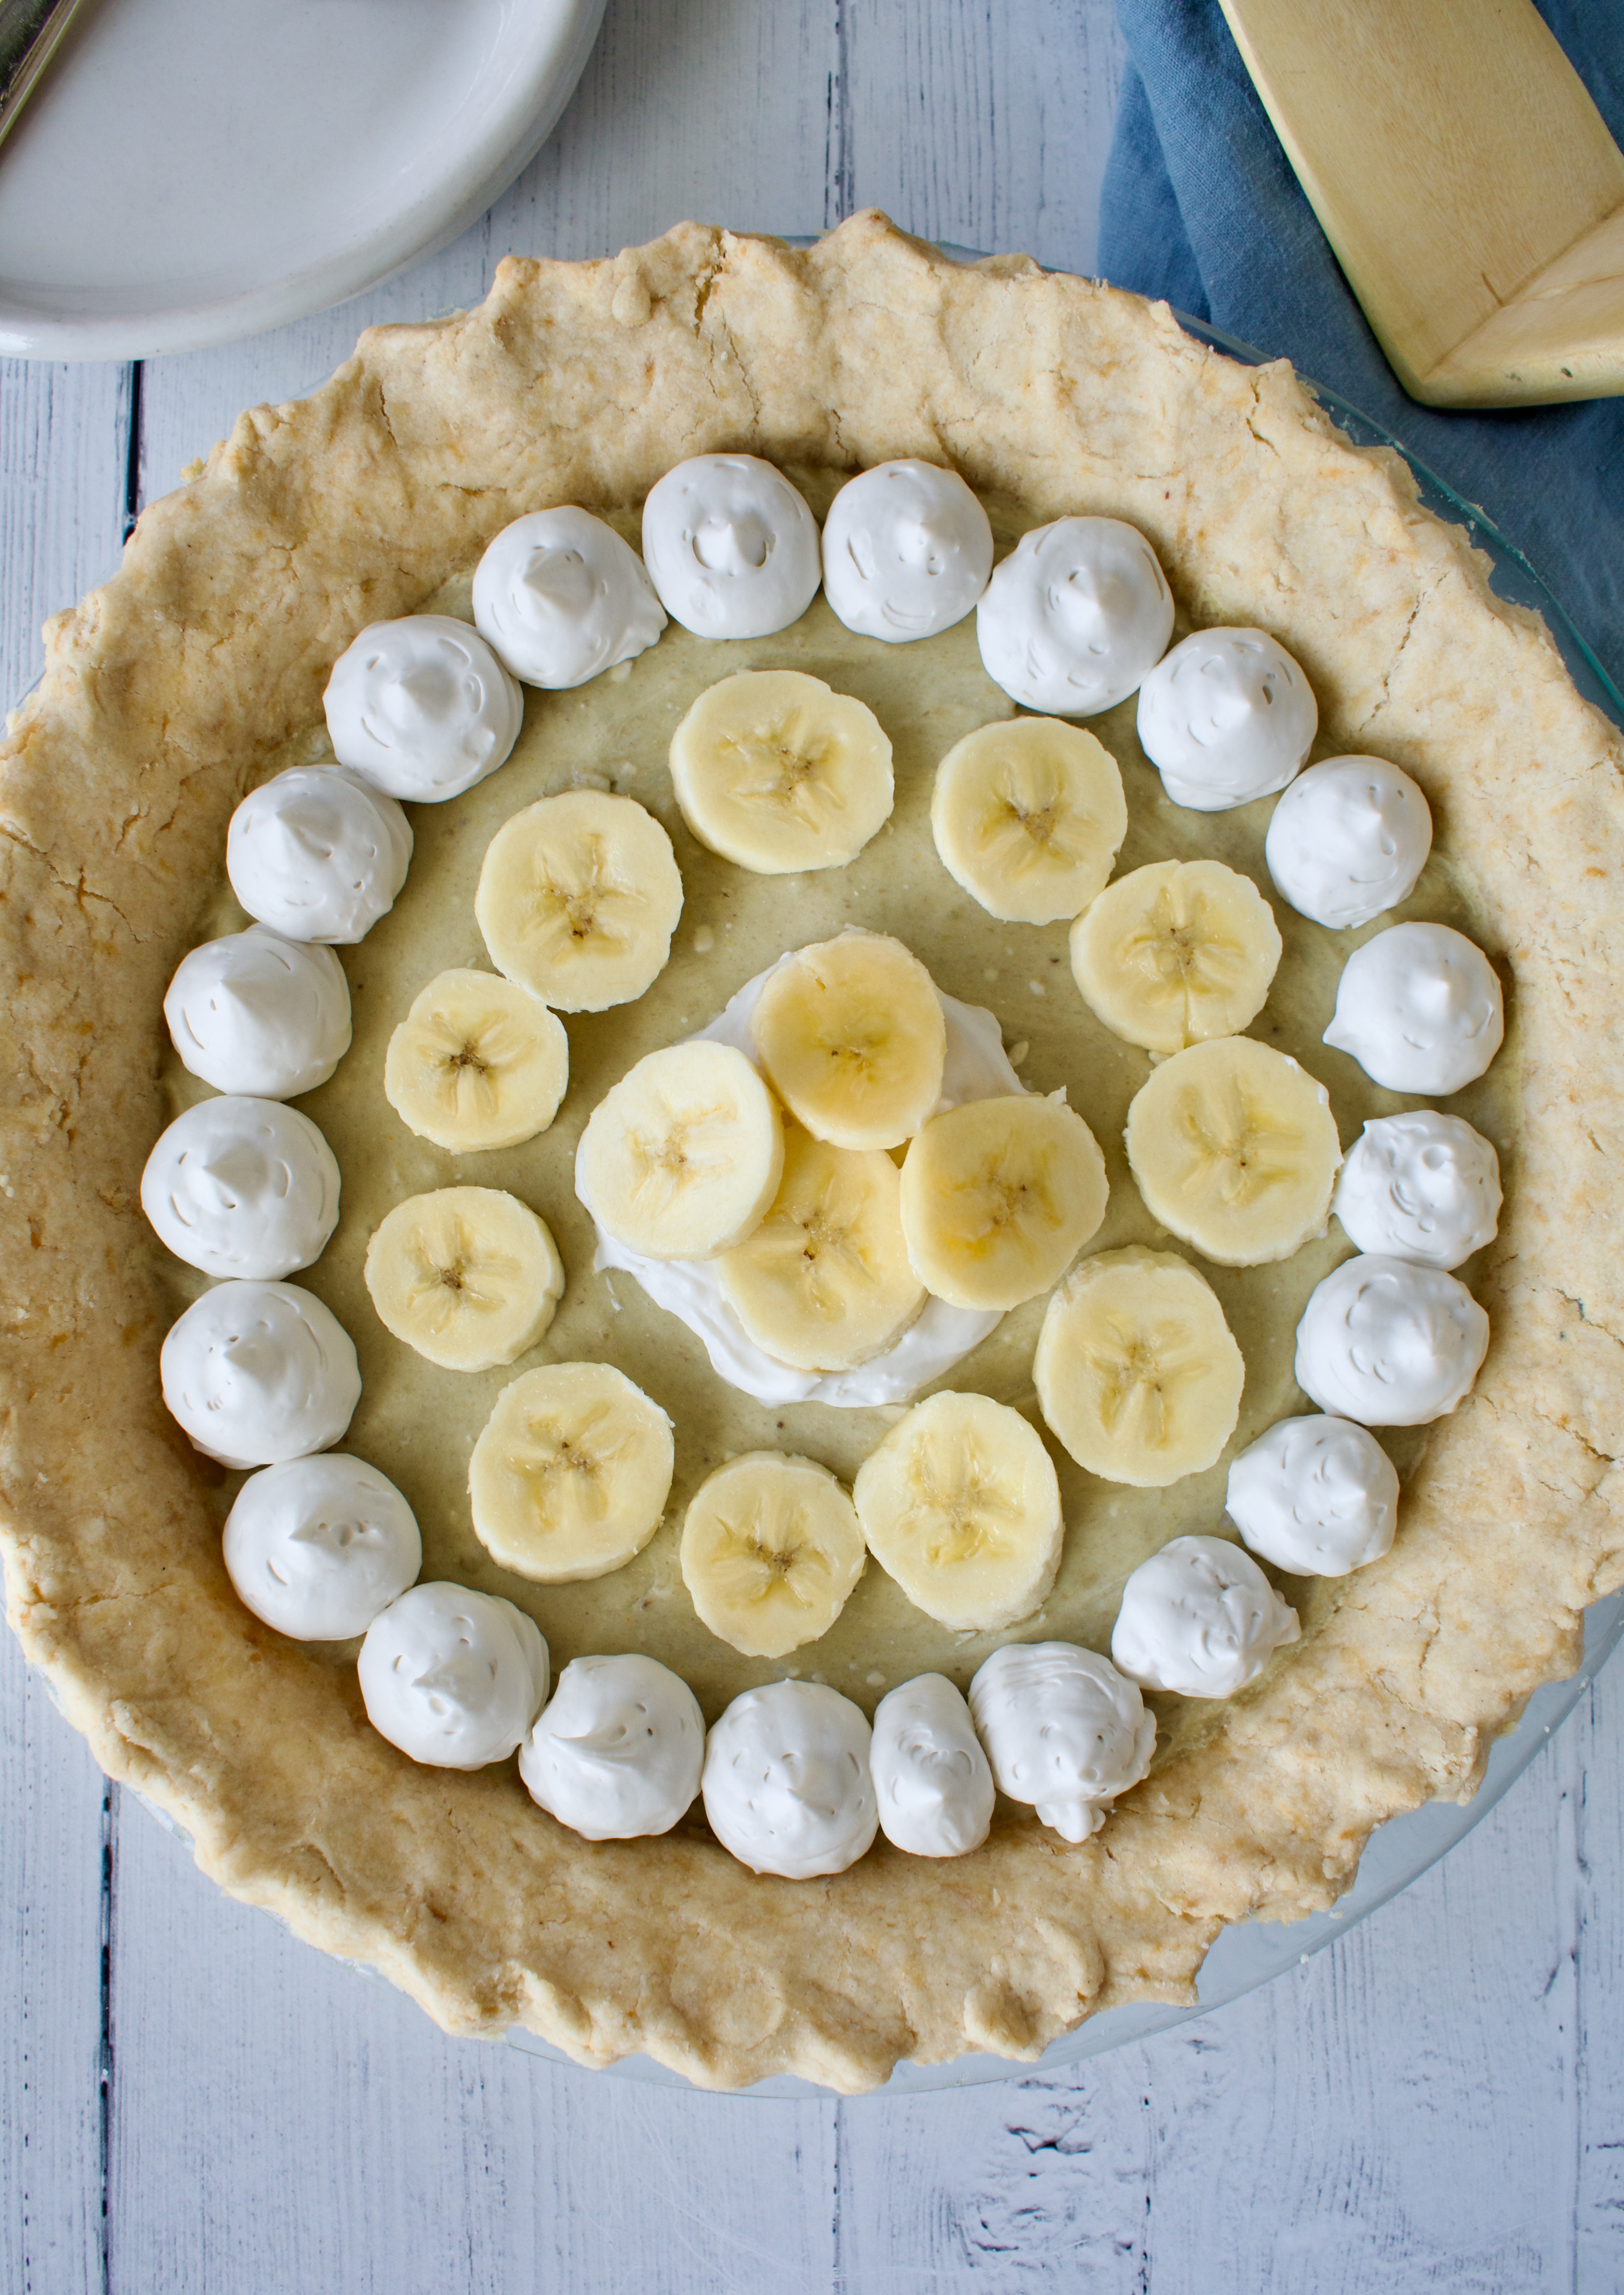
This delicious and healthier banana cream pie is completely gluten free, dairy free, vegan, and refined sugar free. A flakey, butter crust is filled with fresh bananas, banana pudding, and whipped coconut cream.
gluten free banana cream pie
I have a confession… I’d never had banana cream pie before I attempted baking it myself! I had banana pudding as a kid, but never banana cream pie. So I was really excited to attempt making my own version. And I think it turned out pretty good, if I do say so myself.
dairy free banana cream pie
I’ve seen banana cream pie made a few different ways. Crust wise, the options seem to be with a cookie crust, graham cracker curst, or with a more traditional pie crust (like I did). The filling tends to be a creamy pudding, topped with whipped cream and layered with bananas. I felt like for something called BANANA CREAM PIE, it needed to be made with banana pudding! So that is just what I did. My version is a gluten free crust, layered with fresh banana, vegan banana pudding (for all that extra banana flavor!), and topped with coconut whipped cream. The entire pie is also refined sugar free, utilizing coconut sugar and maple syrup as the sweeteners. I tried to rely on the natural sweetness of the banana, so this pie isn’t overly sweetened or too sweet in general.
gluten and dairy free banana cream pie
This healthy vegan banana cream pie isn’t all that labor intensive, but it does take time as you have to cook and set the individual components. Be sure to read the recipe in advance so that you make sure to have enough time to actually make and assemble the pie. This can be done in one day, but to plan in setting time, you’ll want to start in the morning.
This delicious and healthier banana cream pie is completely gluten free, dairy free, and refined sugar free. A flakey, butter crust is filled with fresh bananas, banana pudding, and whipped coconut cream. Enjoy this healthy, refreshing dessert this summer!
2canscoconut milkmake sure it is the canned coconut milk and you chill these cans in the fridge 24 hours before hand.
2Tbspmaple syrup
1tspvanilla extract
Assembly
1-2morebananas
Instructions
First, make sure you chill your coconut milk in the fridge for 24 hours before starting. You want to separate the cream from the liquid.
Crust
You will make the crust first. In a food processor, combine the flour, salt, and coconut sugar. Pulse a few times to mix everything together.
Add the cold, cubed butter and pulse until you have little pebbles. Add the apple cider vinegar and pulse until just combined.
Pour the dough into a bowl and use your hands to bring it together. If the dough is too crumbly and not coming together, add ice cold water 1 Tbsp at a time, gently working the dough until it holds together. You do want to work quickly so the butter doesn't all melt.
Form the dough into a disc, wrap in parchment paper, and place in the fridge for at least 30 minutes.
While the dough chills, make the banana pudding below.
When ready to bake the crust, preheat the oven to 350F. Roll it out on a piece of parchment paper until it is about 2 inches larger in diameter than your pie dish. The dough should be about 1/4 inch thick.
Transfer the crust to the pie dish (I do this by placing the pie dish upside down over the crust then sliding my hand under the parchment paper and flipping everything). Shape the dough to the dish and use cold water on your finger to fix any cracks. You can flute the edges if desired. Poke the bottom of the crust a few times with a fork.
Fill your crust with pie weights and bake for 20 minutes. Increase oven temperature to 375F, remove the weights, and bake another 5 minutes until crust is just beginning to golden on the edges and is baked.
Remove the crust and let it cool.
Banana Pudding
Combine the bananas, 1 cup of the milk, and maple syrup together in a blender and blend until smooth. Add this mixture to a saucepan and heat on medium-low heat.
Whisk together the other 1/2 cup of milk and the starch then add it to the banana mixture on the stove. Whisk frequently until the mixture thickens. It should look like pudding.
Remove the pudding from the heat and whisk in the vanilla extract. Let the mixture cool to room temperature then place in the fridge for 3 hours, while crust cools.
Place a medium size bowl in the freezer at this time- the one you will use to beat the coconut cream.
Coconut Cream
An hour before you are ready to assemble your pie, you'll make the whipped cream.
In your cold bowl, add the coconut cream from the cans of coconut milk (the solid, white part that has risen to the top of the can. Keep the coconut water for smoothies or drinking). Beat on medium speed with an electric mixer until you get a nice, whipped cream consistency and it holds peaks.
Add the maple syrup and vanilla and whip to combine.
Place the coconut cream back in the fridge for the last hour.
Assembly
When ready to assemble, take 1 cup of the coconut cream mixture and fold it into the banana pudding mixture. Set aside.
Line the bottom of your pie crust with sliced bananas then evenly spread the banana pudding mixture on top.
You can using a piping bag to top the pie with the remaining coconut cream or however you desire.
Decorate with more bananas and enjoy! I do suggest letting the pie set for another hour or so, but it is not mandatory.
This pie can keep in the fridge for up to 3 days.
Notes
*This crust should work find with cold coconut oil, as well!
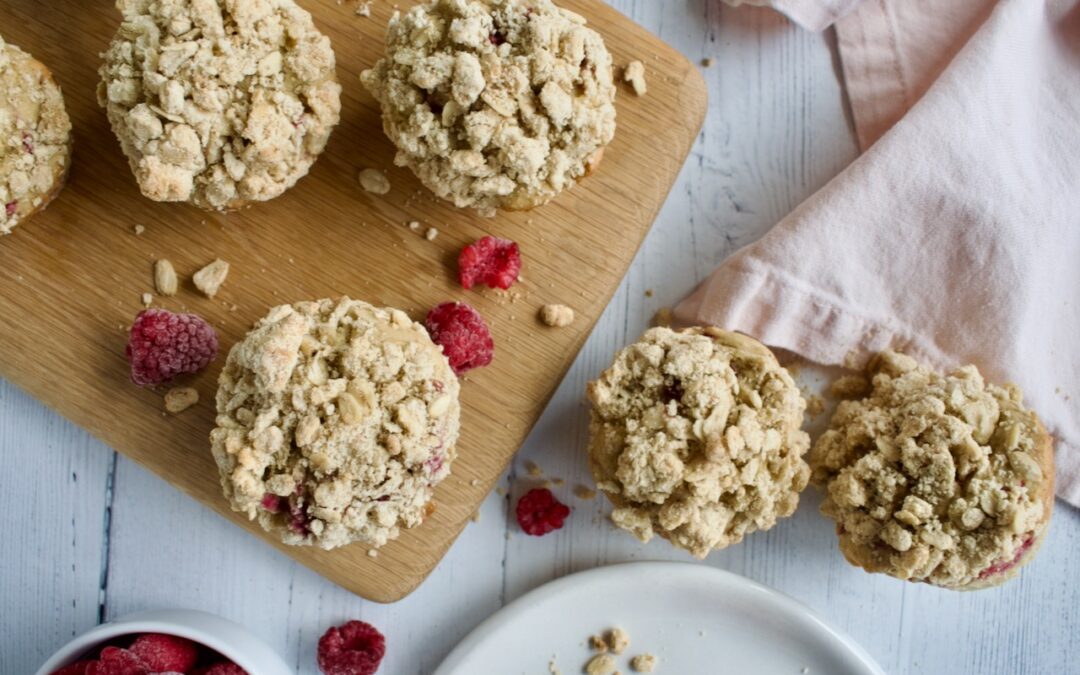
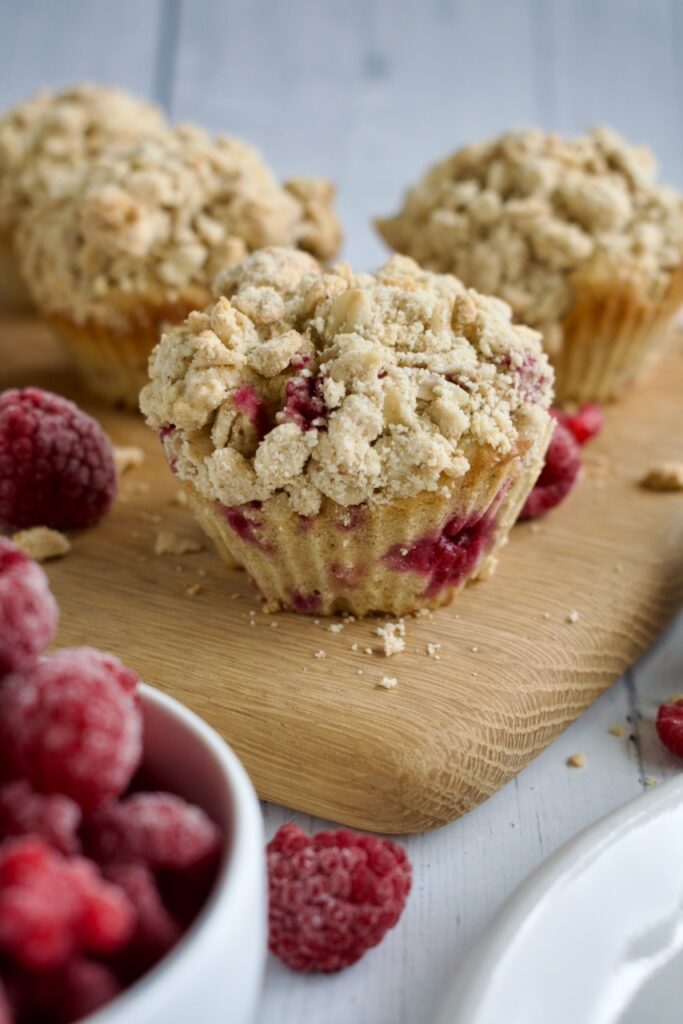
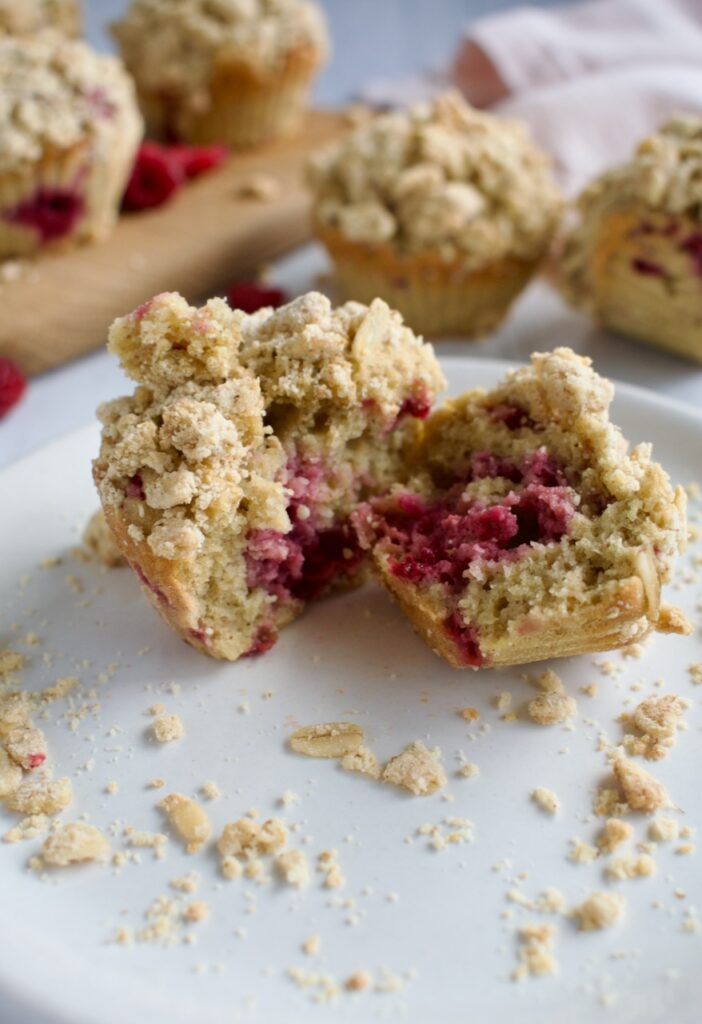
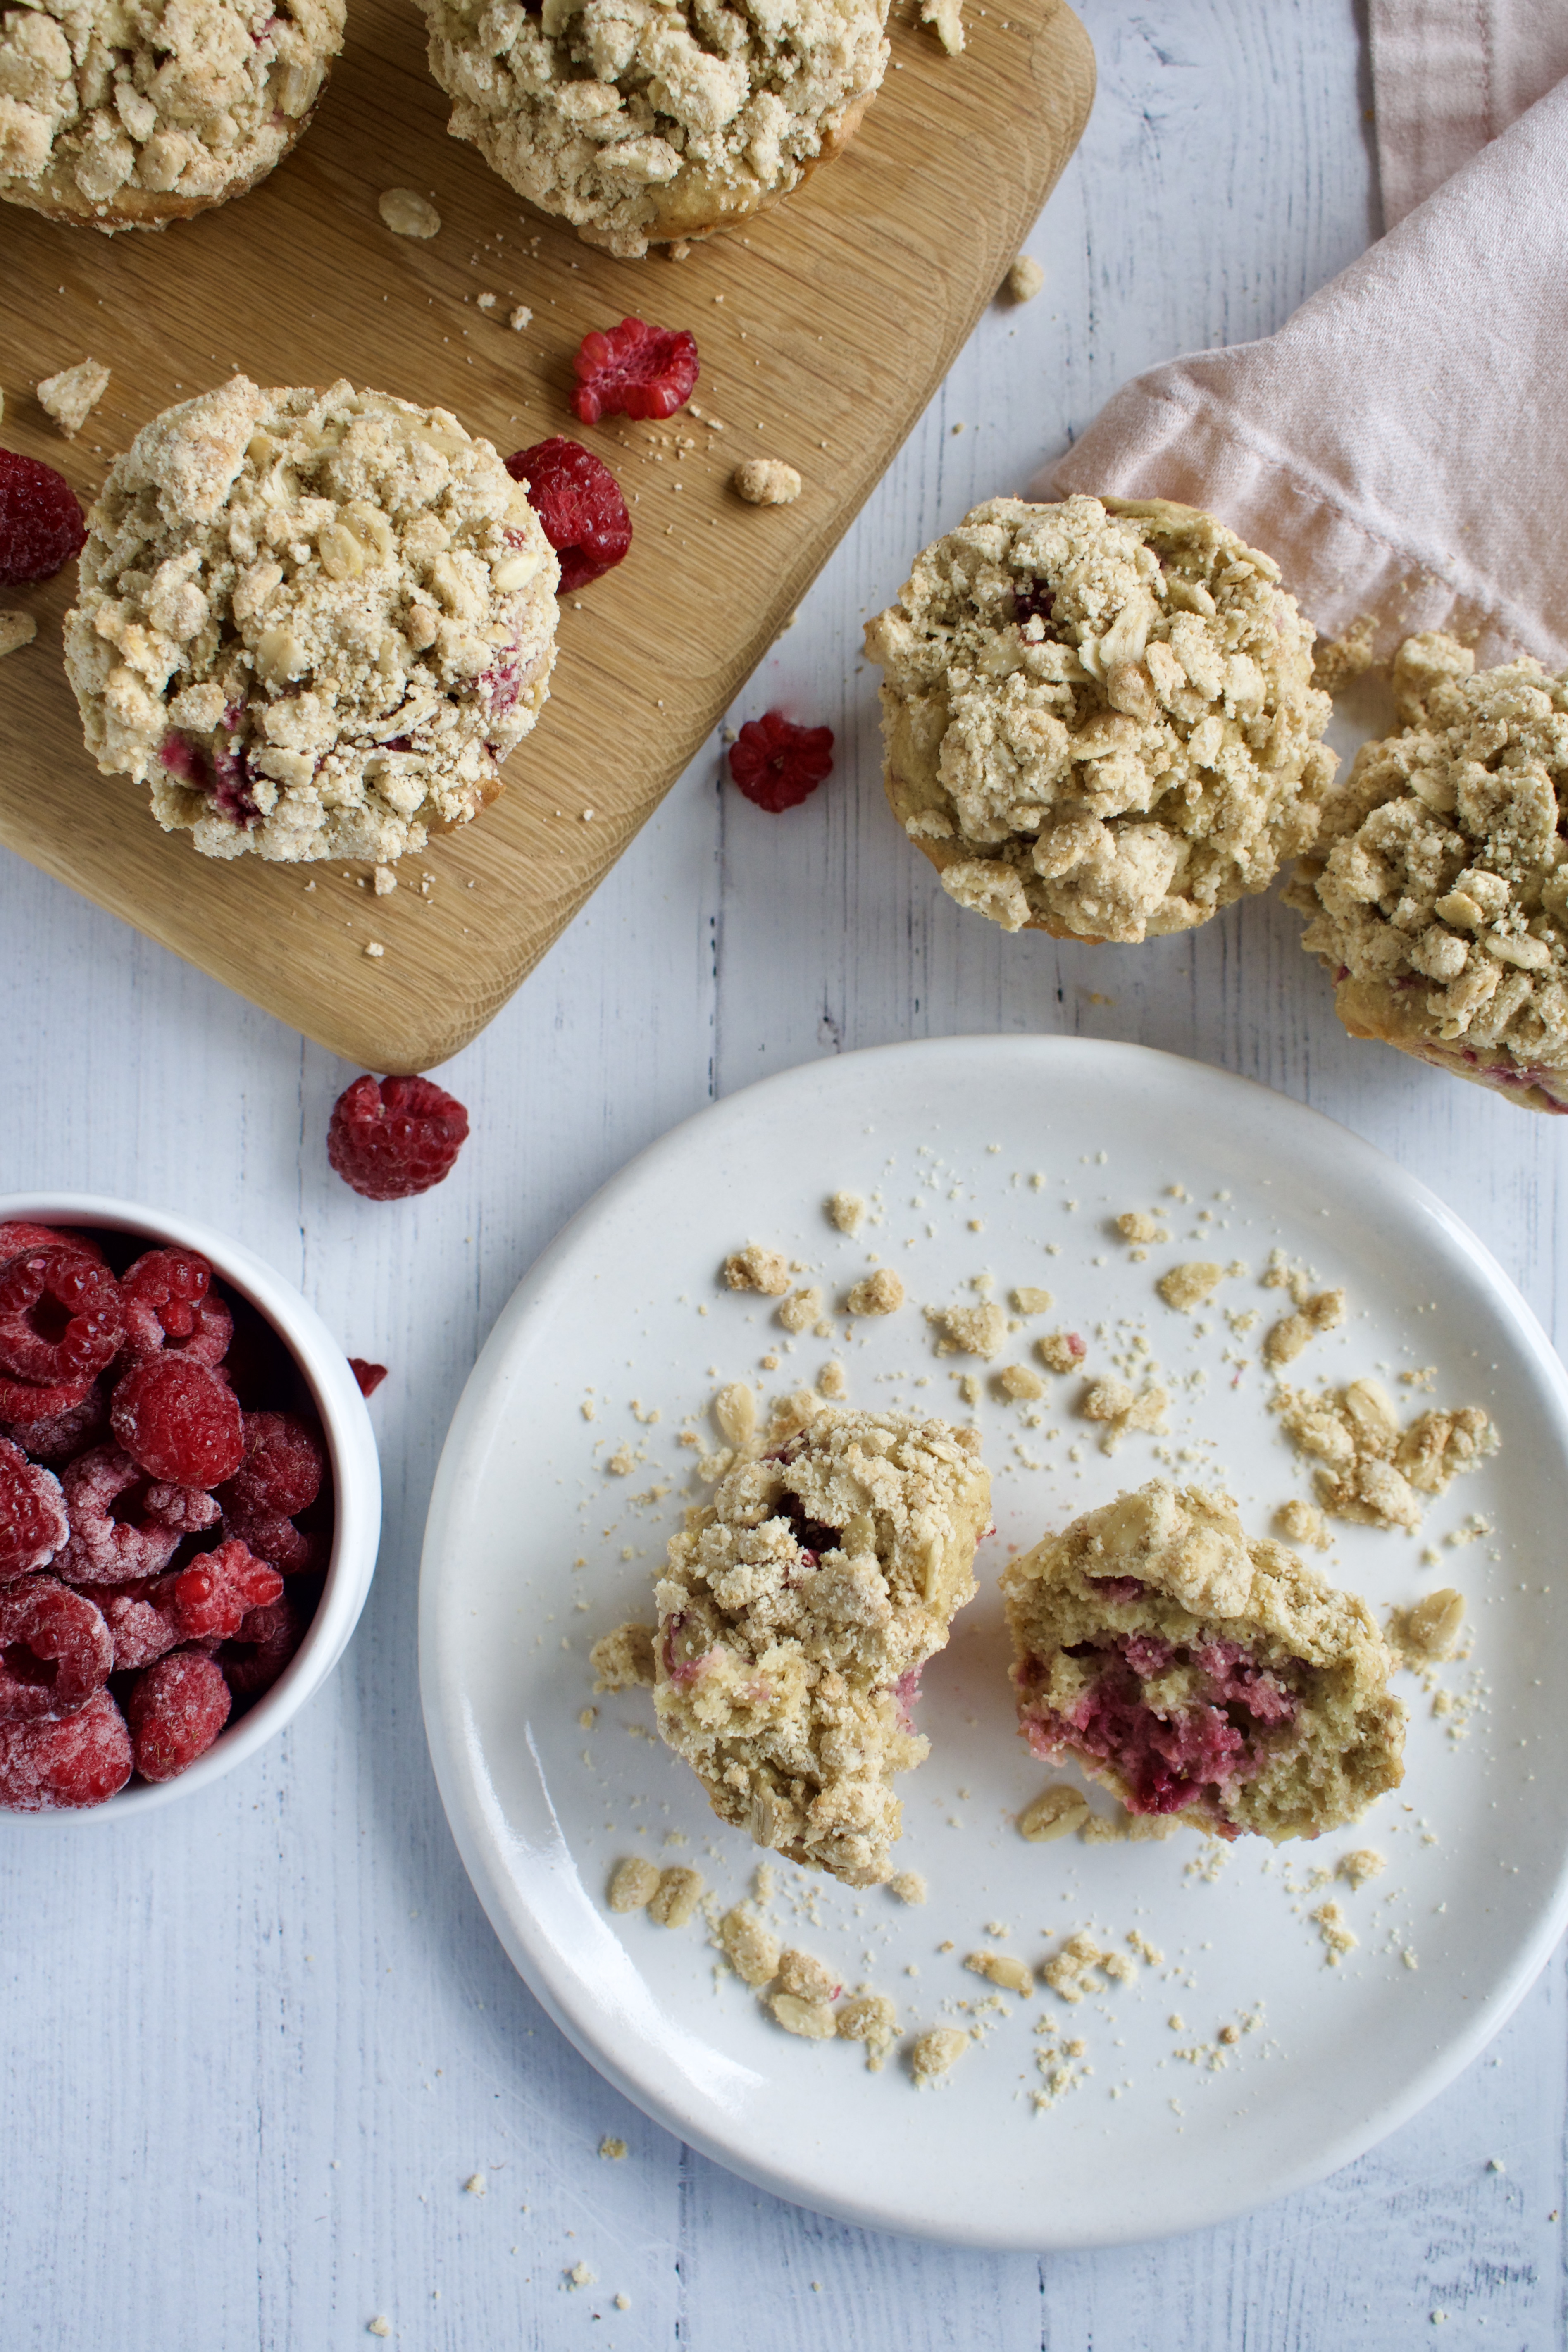
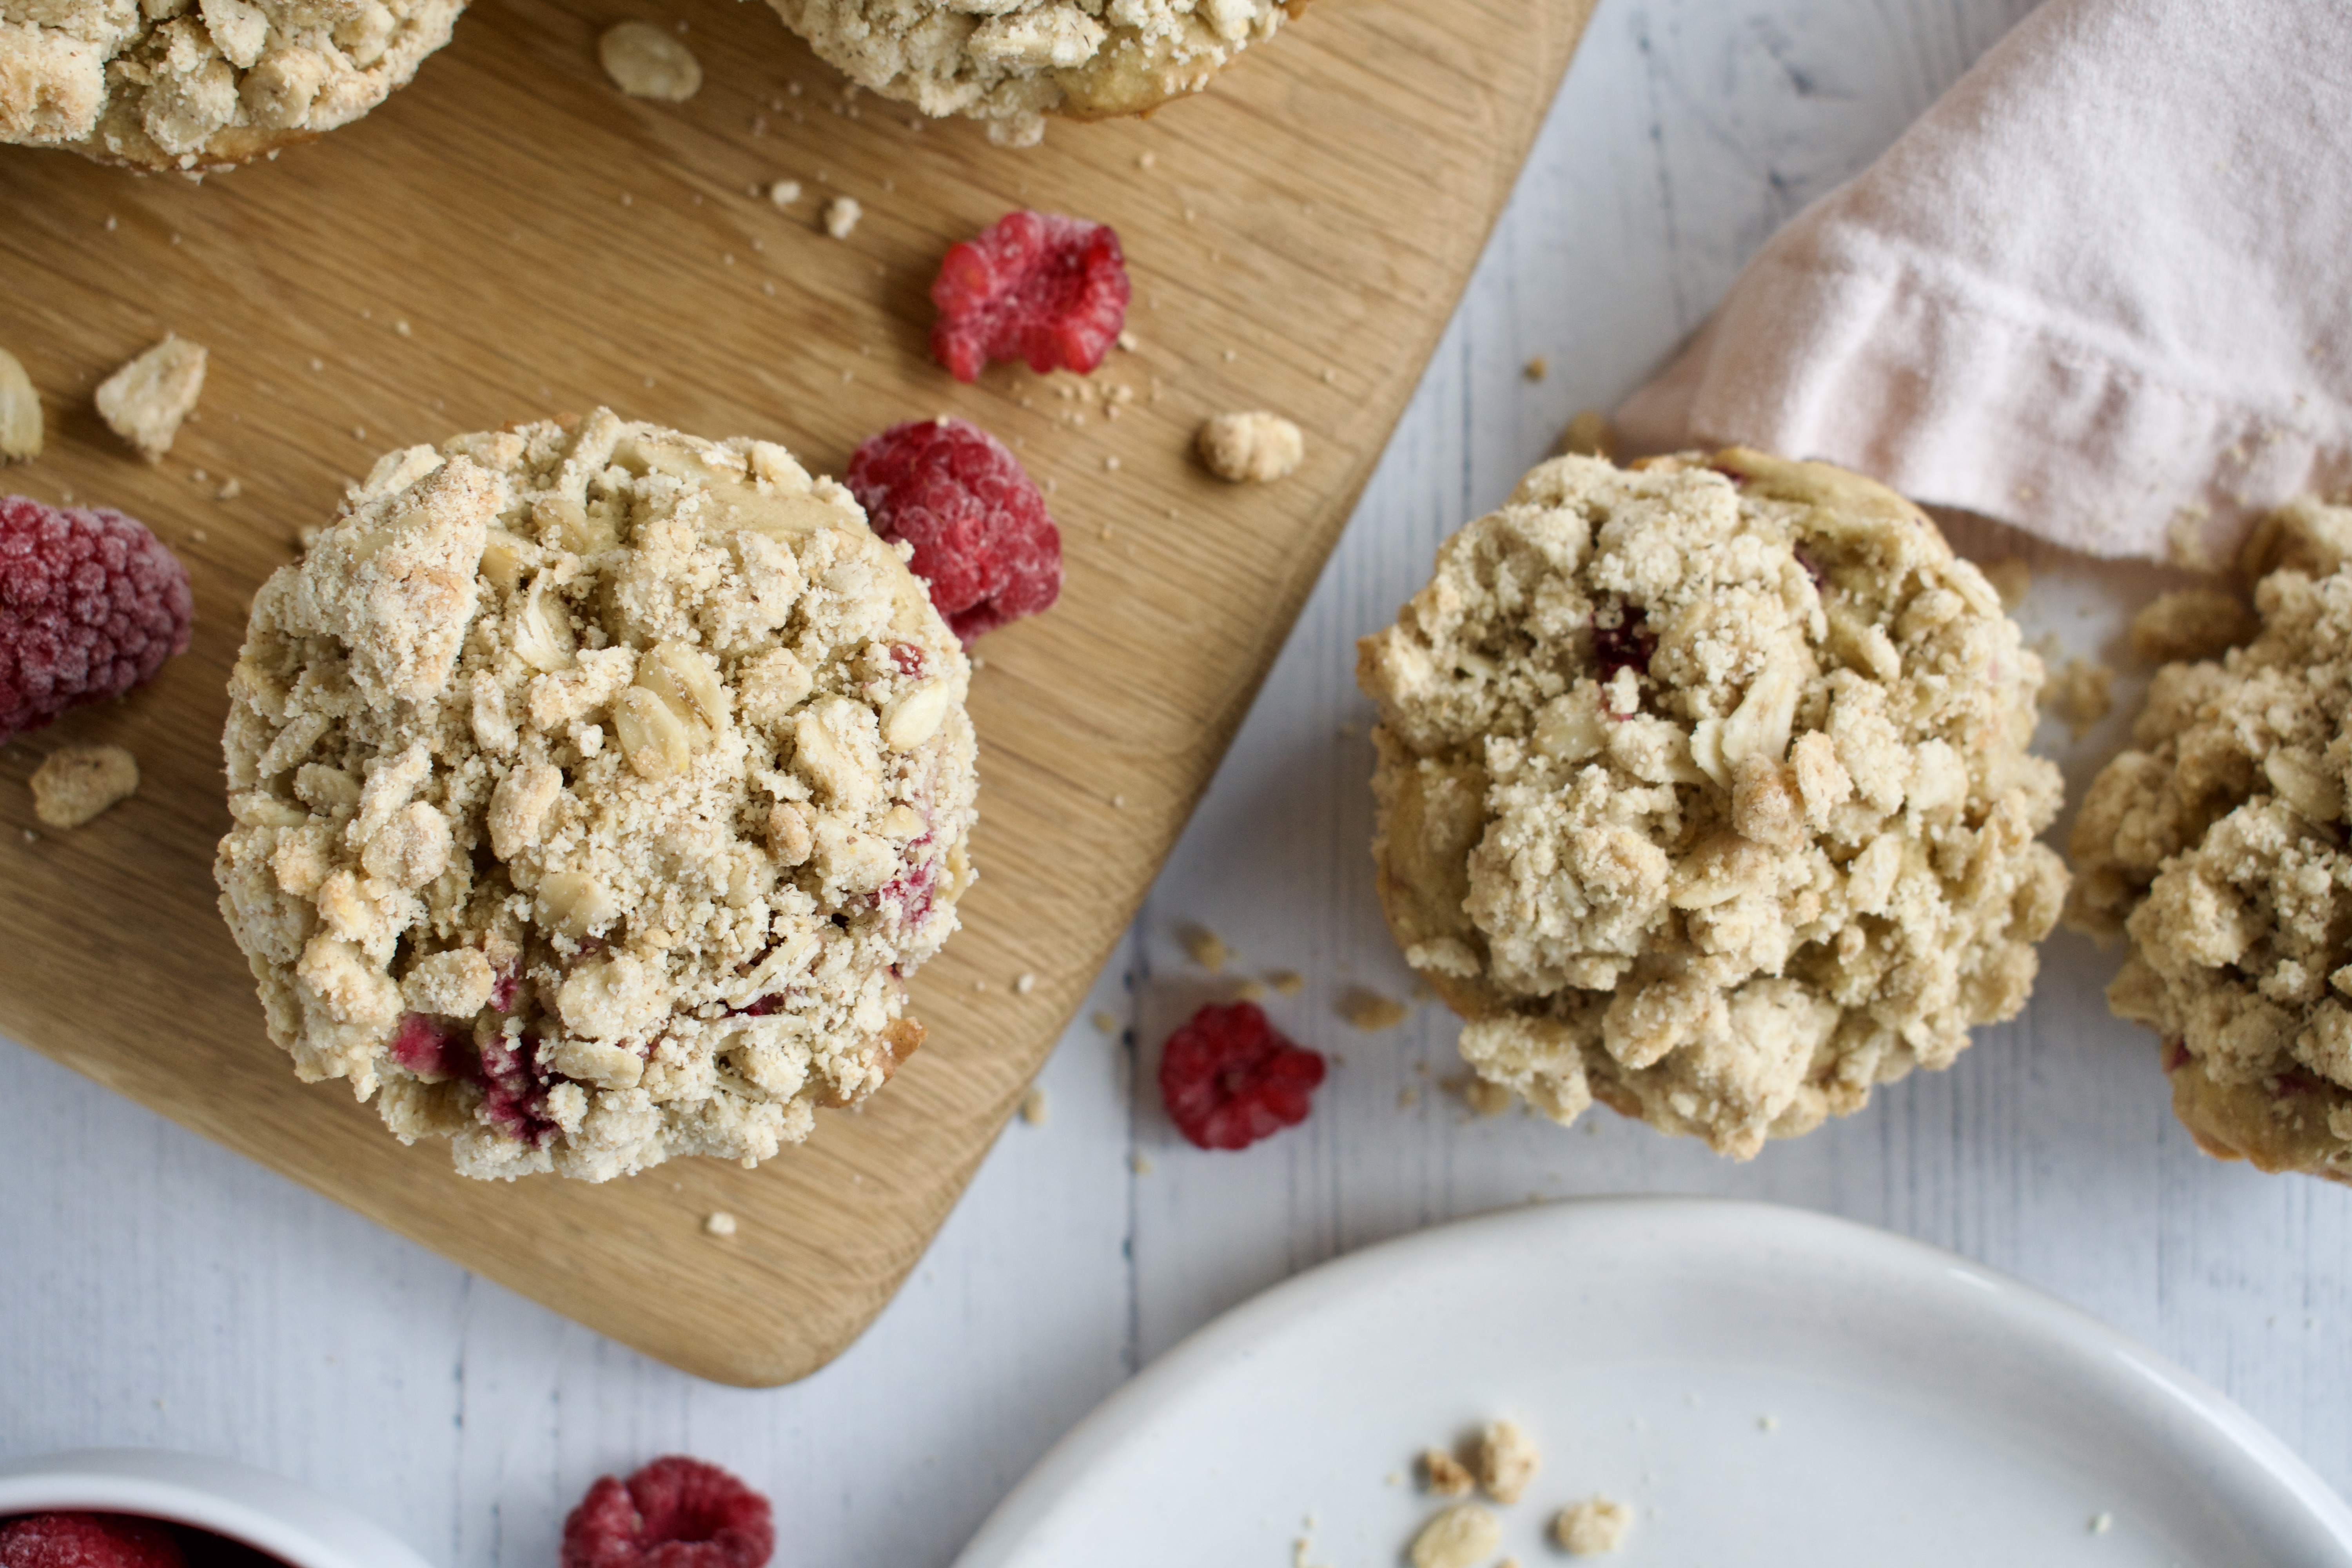
These gluten free raspberry crumble muffins are also dairy free and low sugar, with a completely Paleo option. Packed with fresh raspberries and topped with the perfect crumble, they are a must make!
gluten free raspberry muffins
You honestly can’t beat a good muffin, but I find gluten free muffins are often dry. I’m always disappointed when I purchase a gluten free muffin from the bakery, take a bite, and realize I wasted $10. I always think to myself “I can make a way better version at home!” So, I did with these raspberry crumble muffins! These delicious raspberry muffins are moist AND allergy free.
gluten free raspberry muffins
Bakery muffins are also often filled with processed sugar. I love re-creating healthier versions at home to show you that it’s possible to eat healthy, lower sugar baked goods that still taste amazing. These gluten free muffins are refined sugar free and a fraction of the sugar of a store bought version. They can even be made completely grain free for my Paleo friends!
These healthy muffins are super easy to make! You whisk together the dry ingredients in one bowl and the wet ingredients in another. Combine the two bowls, fold in your raspberries, and you’ve got your batter. Then you mix all the crumble ingredients together, top off the muffins, and bake. It’s that simple.
These gluten free raspberry muffins have a delicious crumble topping and are also completely dairy free with a paleo option. They're a fraction of the sugar of a bakery muffin, making them the perfect allergy friendly muffin to enjoy any time of day!
Combine crumble topping ingredients together and set aside. Start with 1 Tbsp of coconut oil and add more if mixture is too dry and not holding together at all.
Sift all the dry ingredients for muffins together in a bowl (flours, baking powder, salt).
Beat the wet ingredients for muffins together, except for raspberries.
Add the dry muffin ingredients to the wet and mix to combine.
Toss raspberries with 1 Tbsp of gluten free or cassava flour, then fold raspberries into the batter.
Divide batter into lined muffin tin. Top each muffin with some of the crumble topping and press down gently.
Bake for 22-25 minutes until a toothpick comes out clean. Let cool for 10 minutes then transfer to a wire wrack to finish cooling.
Notes
*For all paleo version, substitute the gluten free flour for 1/2 cup cassava and 1/4 cup arrowroot or tapioca starch
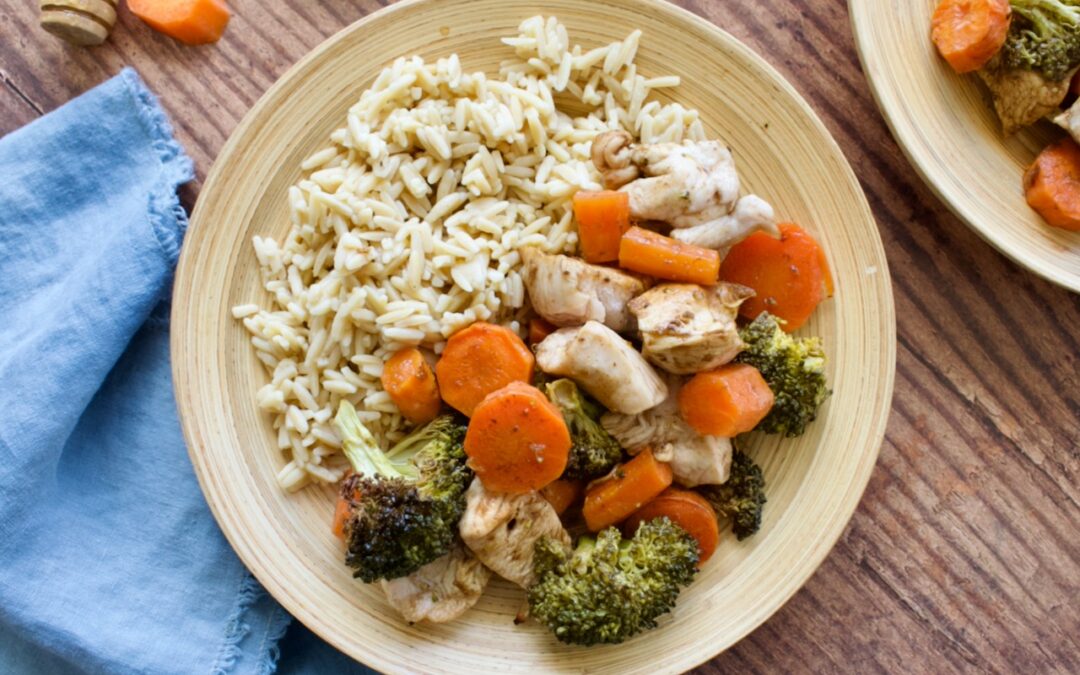
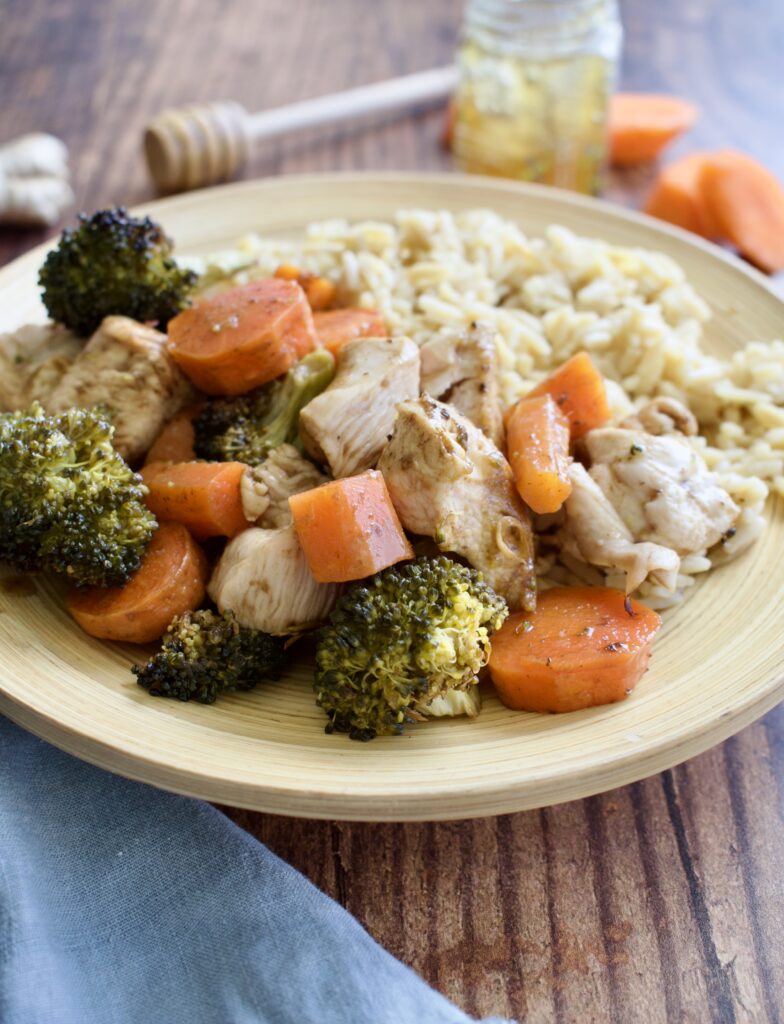
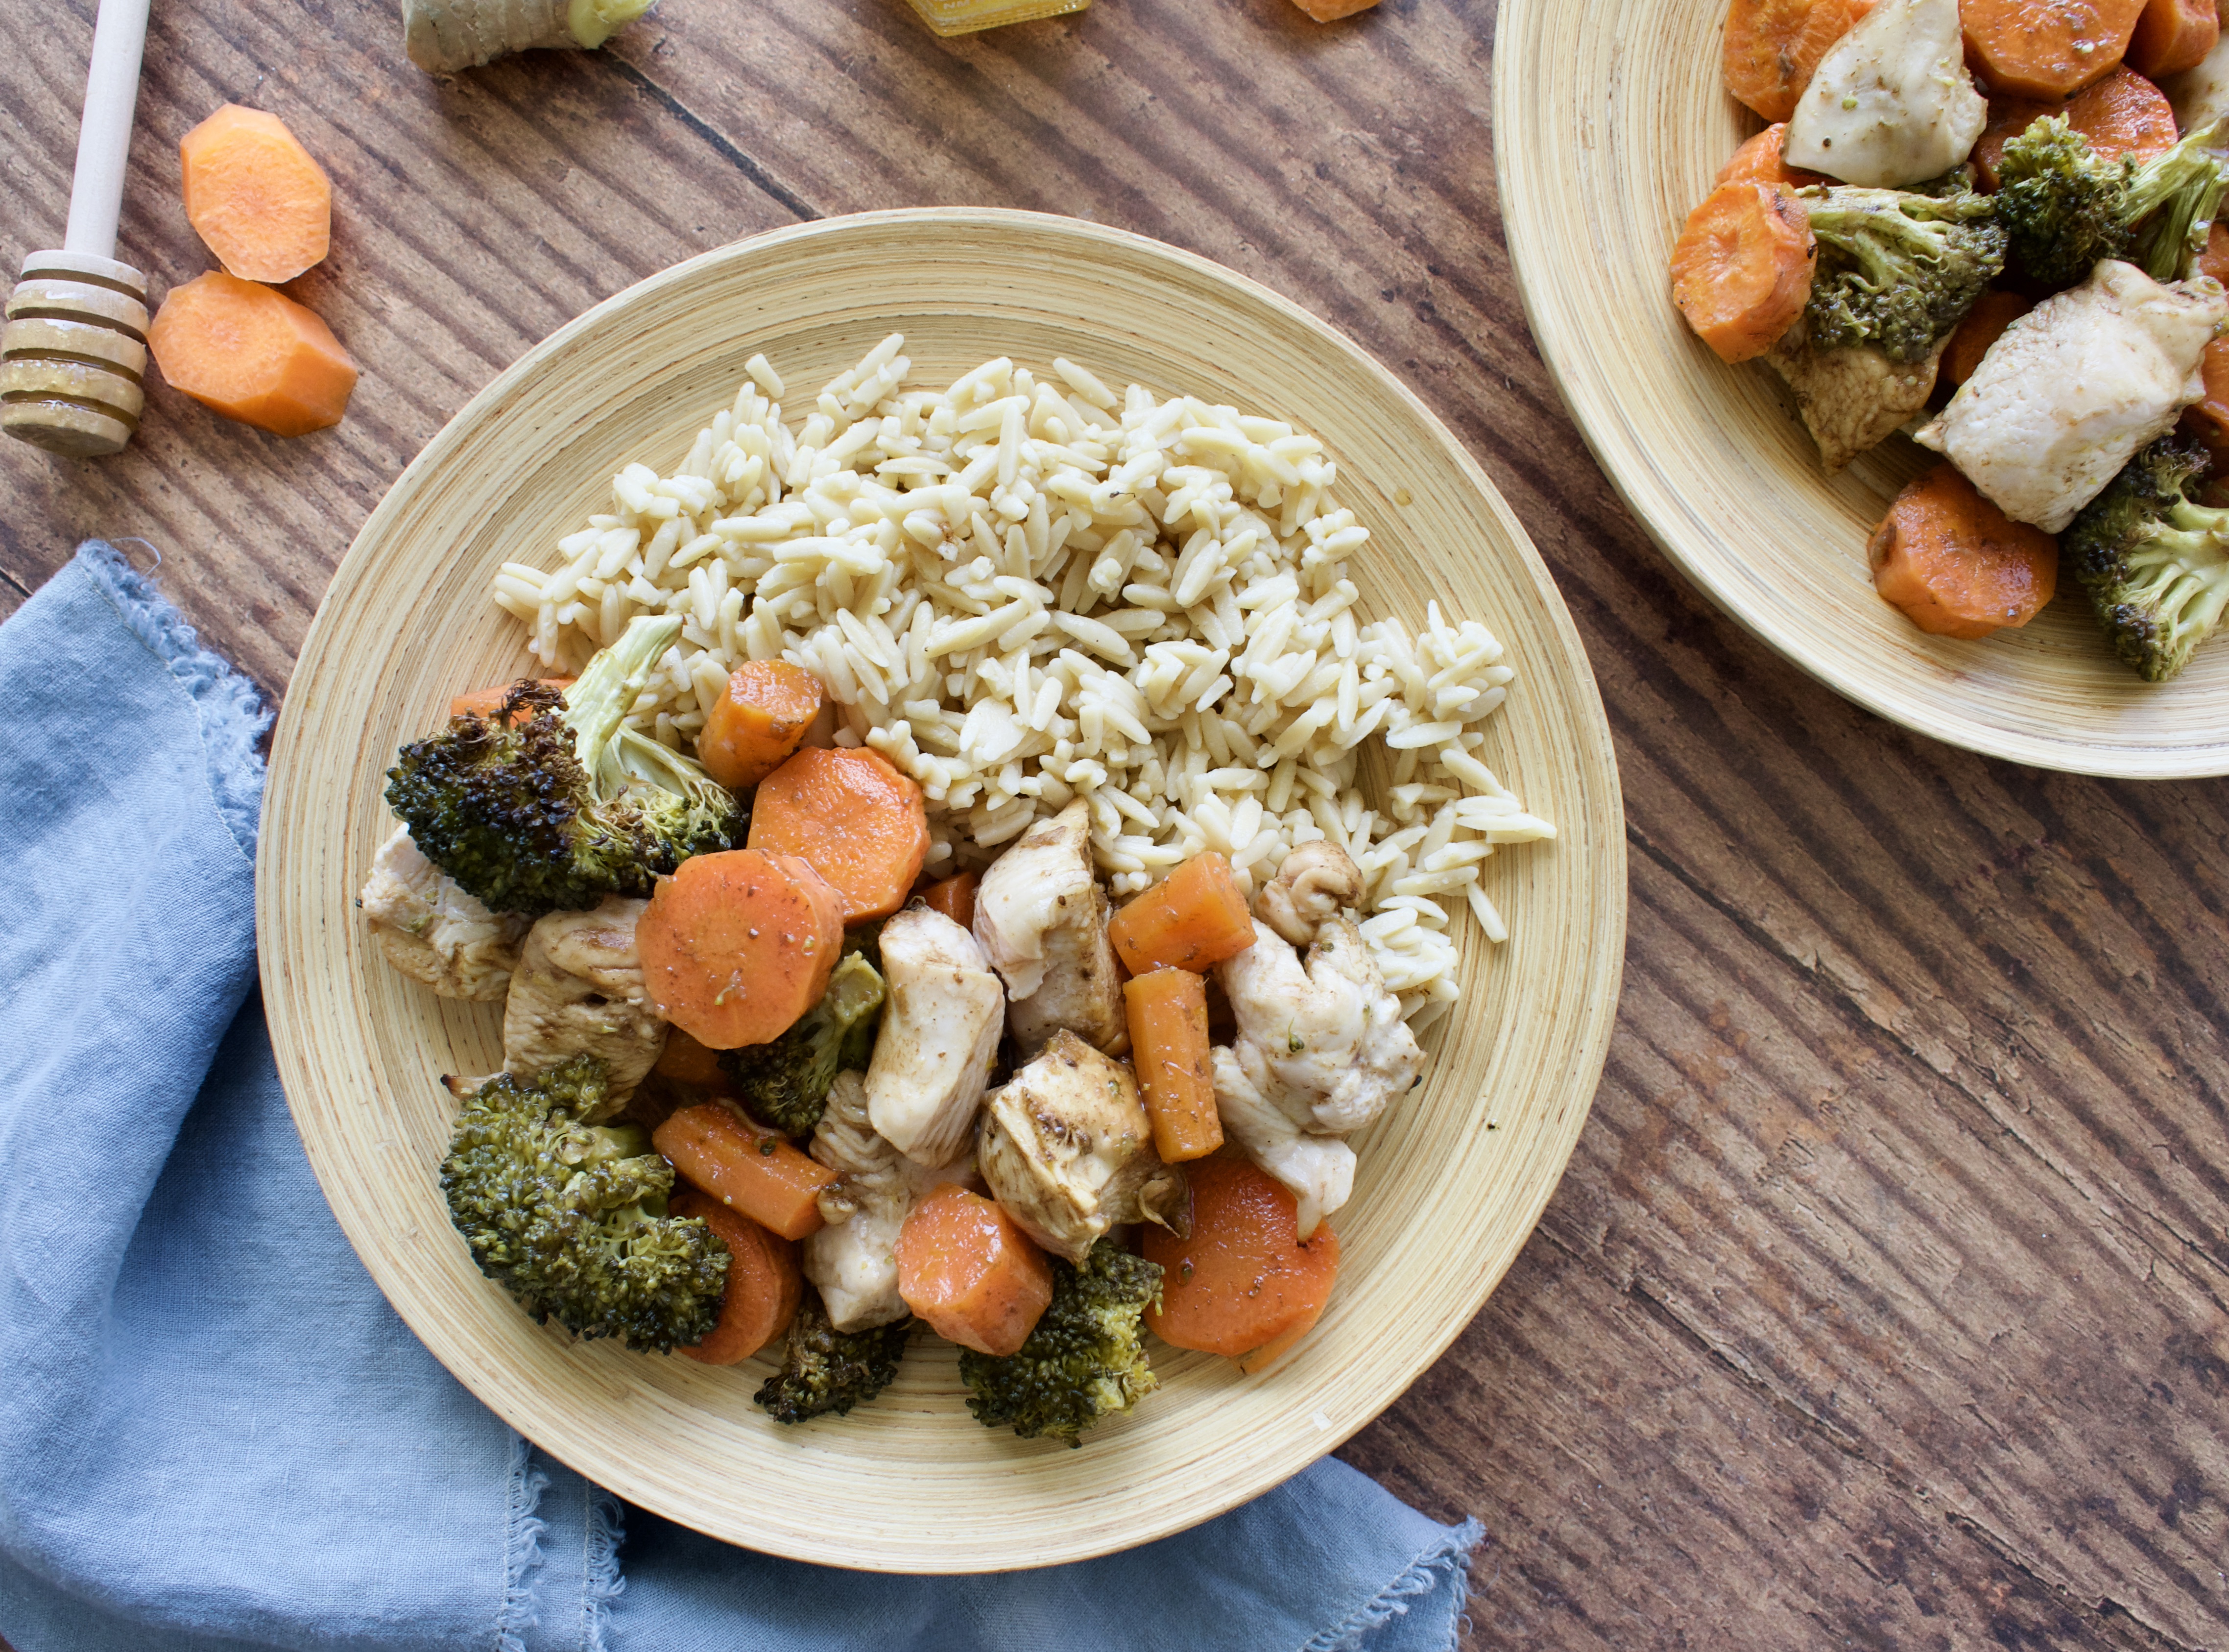
This easy sheet pan dinner is a delicious way to upgrade your standard chicken and vegetable dinner. Coated in a delicious honey balsamic, you’ll love this quick weeknight meal.
honey balsamic chicken and vegetables
Who doesn’t love a simple sheet pan meal? It makes dinner so much easier during a busy week. A lot of sheet pan meals can be boring because they are basically just chicken and veggies on a pan with some olive oil and salt. BORING! We need more flavor, people! That’s why I love this honey balsamic chicken.
This easy dinner is made with a honey balsamic sauce that upgrades your boring chicken and vegetables. I love this meal because it’s made on one sheet pan and doesn’t require reducing the sauce. If I don’t need to take extra steps, then I’m all about it. I wanted to create this meal without having to worry about cooking the sauce separately.
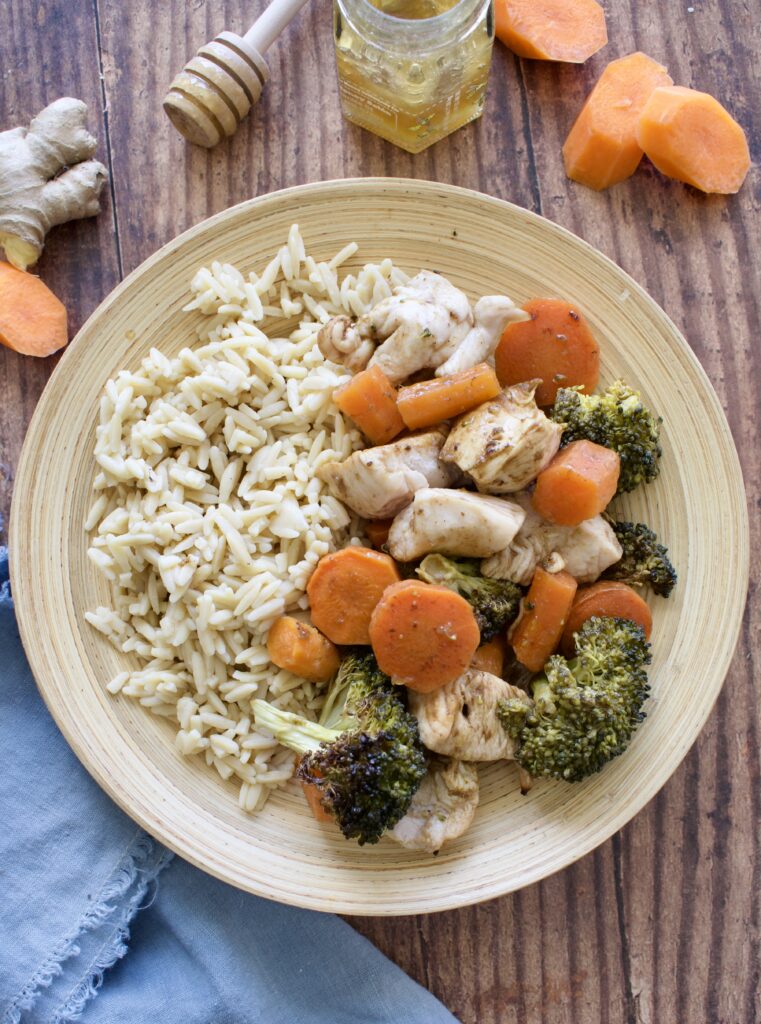
sheet pan honey balsamic chicken and vegetables
This simple sheet pan meal is completely gluten free, dairy free, nut free, and allergy friendly. It’s free of all major allergens, making it the perfect crowd pleasing dish for the entire family (or friends!). This recipe is also completely Paleo.
sheet pan chicken and veggies
Honey Balsamic Chicken and Vegetables
Ingredients:
-chicken
-broccoli
-carrots
-olive oil
-salt
-balsamic
-rice wine vinegar
-honey
-ginger
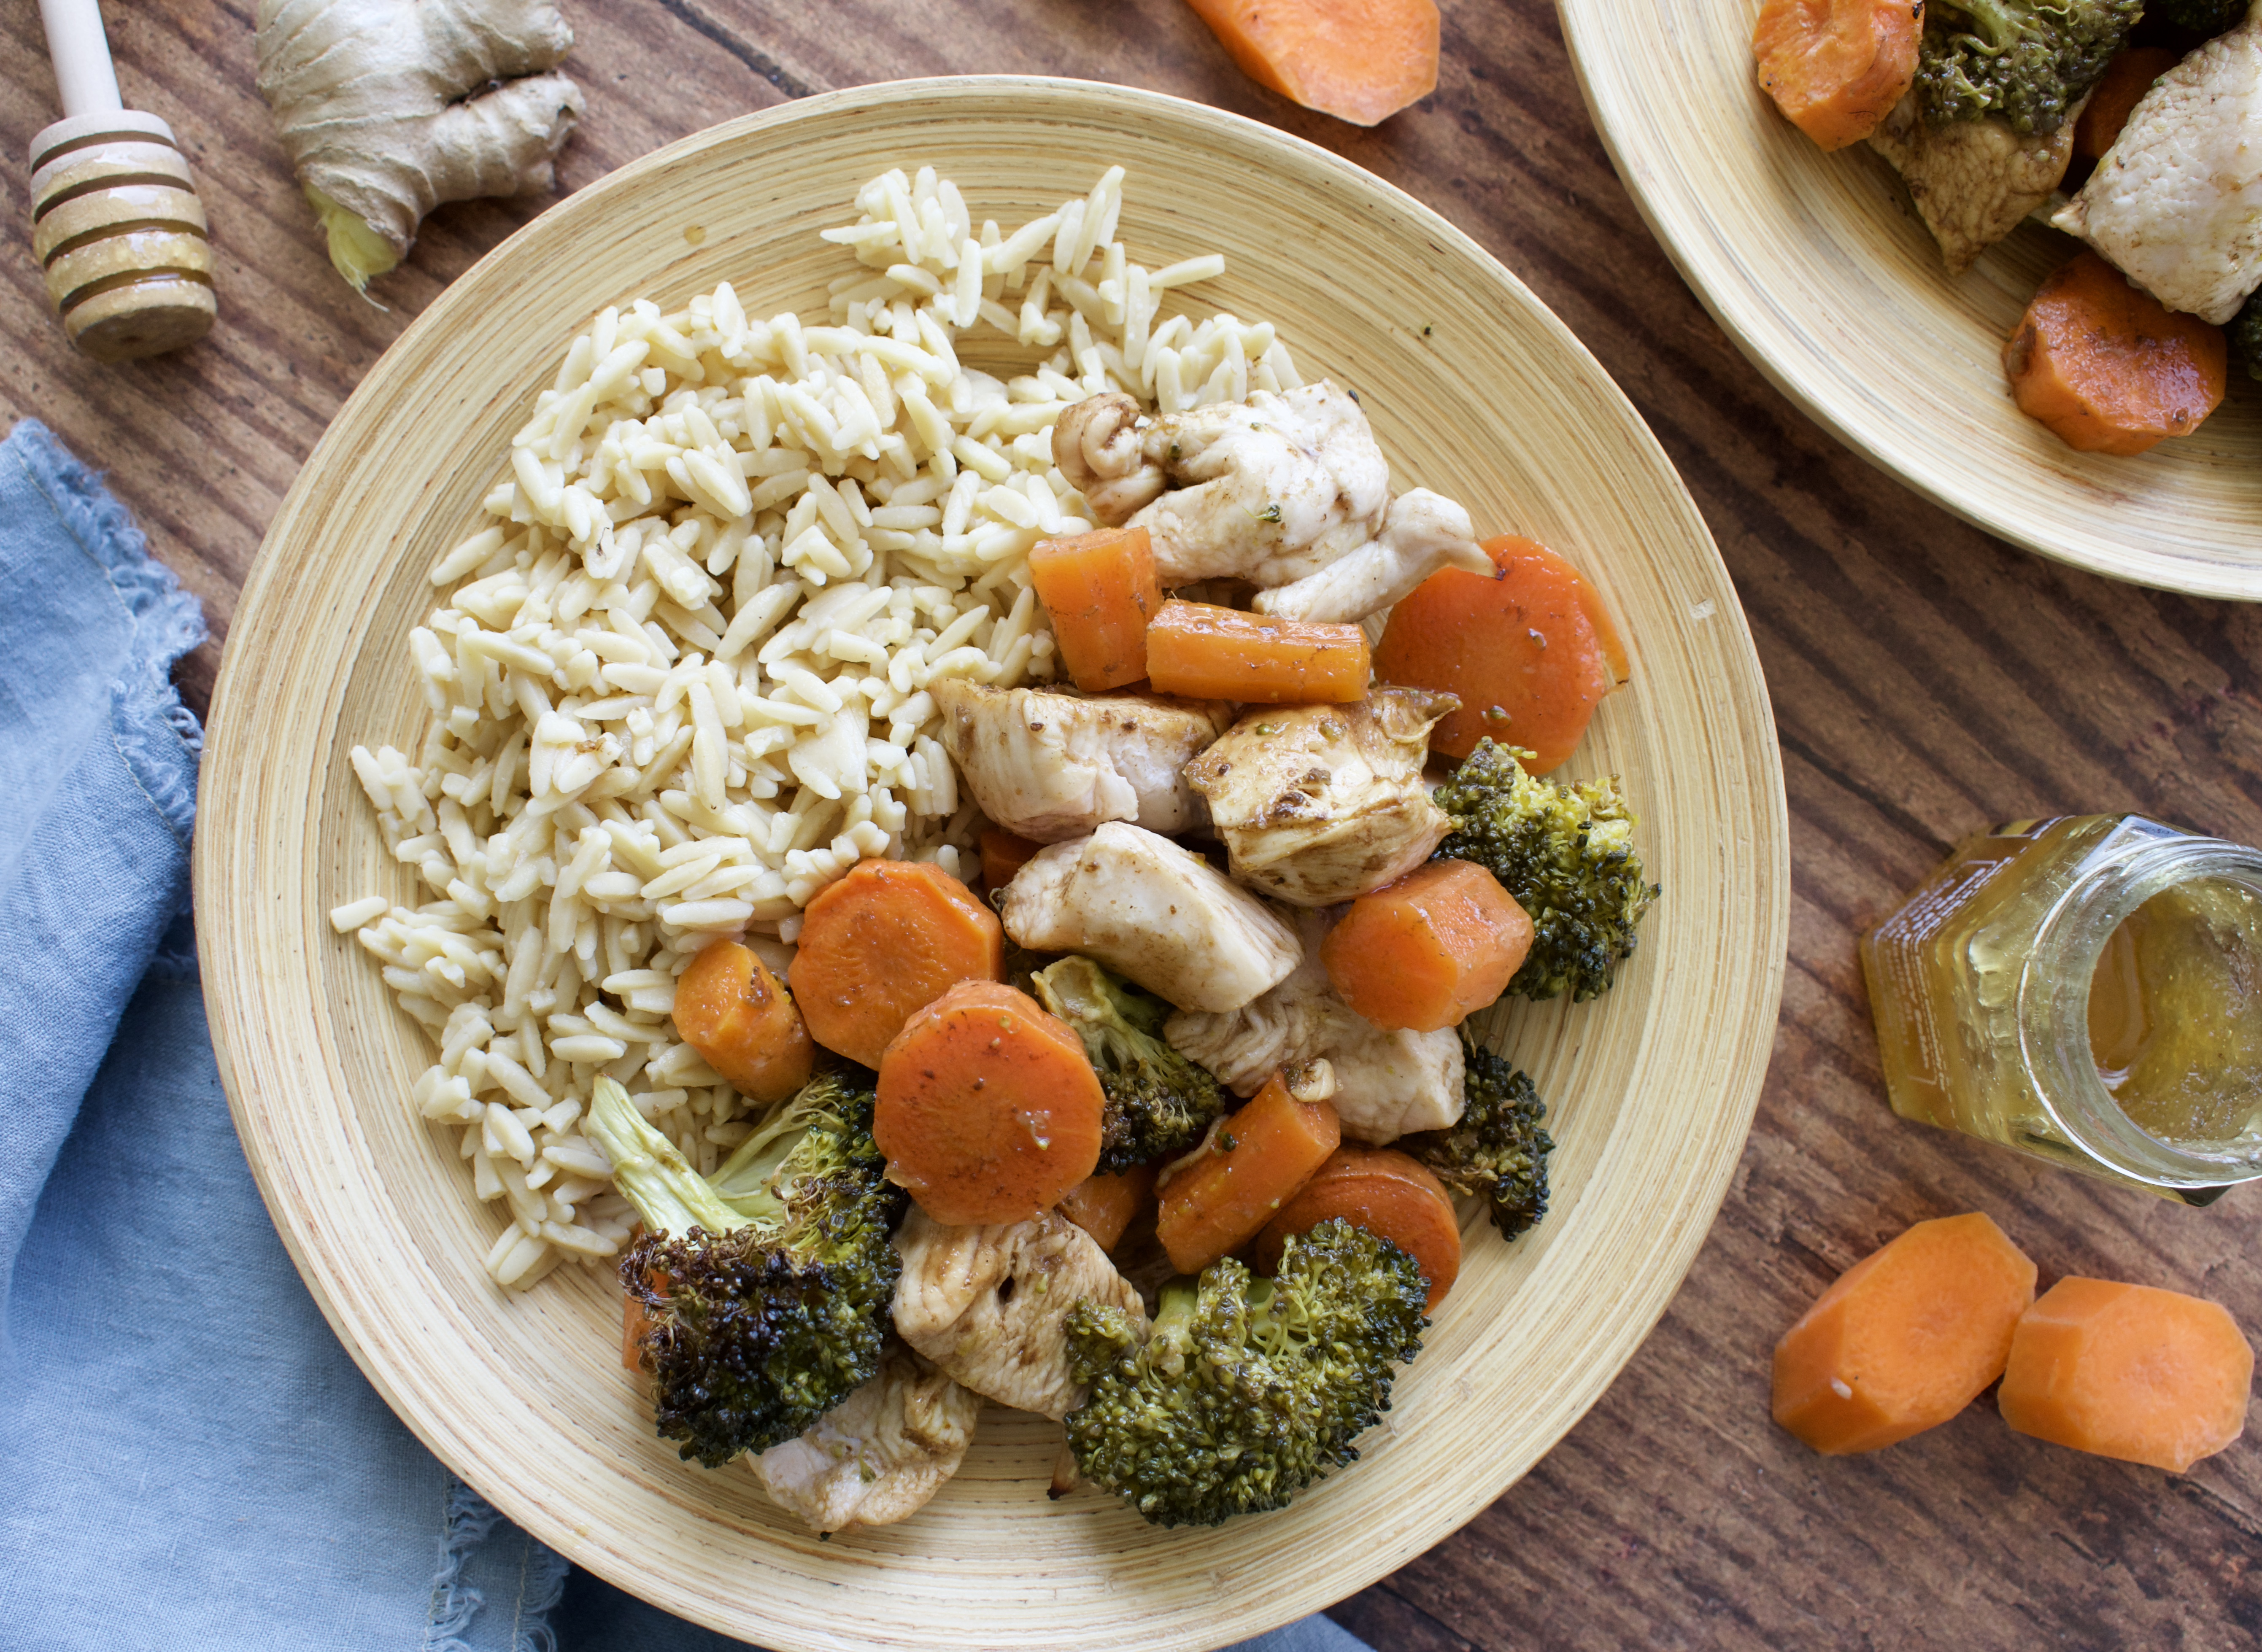
Process
This is the simplest meal you’ll make! You add your chopped veggies to a sheet pan and begin roasting them while you cut up the chicken and prep the sauce. The sauce is just whisking everything together, no reducing needed. Halfway through cooking, you’ll add the chicken to the sheet pan and toss everything with half of the sauce. Finish roasting until the chicken is cooked through, then toss everything with the remaining sauce. That’s it!
Upgrade your standard chicken and vegetable dish with this quick and easy weeknight dinner made on one pan! Packed with flavor and highly nutritious, this is the ultimate simple dinner recipe.
Toss the carrots and broccoli with the olive oil and salt and lay evenly across a parchment lined baking sheet. Bake for 30 minutes.
While veggies are roasting, prepare your sauce by whisking everything together in a measuring cup. Taste and adjust the ginger and honey to your liking.
After the veggies have been cooking for 30 minutes, add the chicken to the sheet pan and half the sauce. Toss everything and spread evenly across the pan again. Roast for another 15 minutes, until chicken is done and veggies are fork tender.
Remove the tray from the oven and toss everything with the remaining sauce.
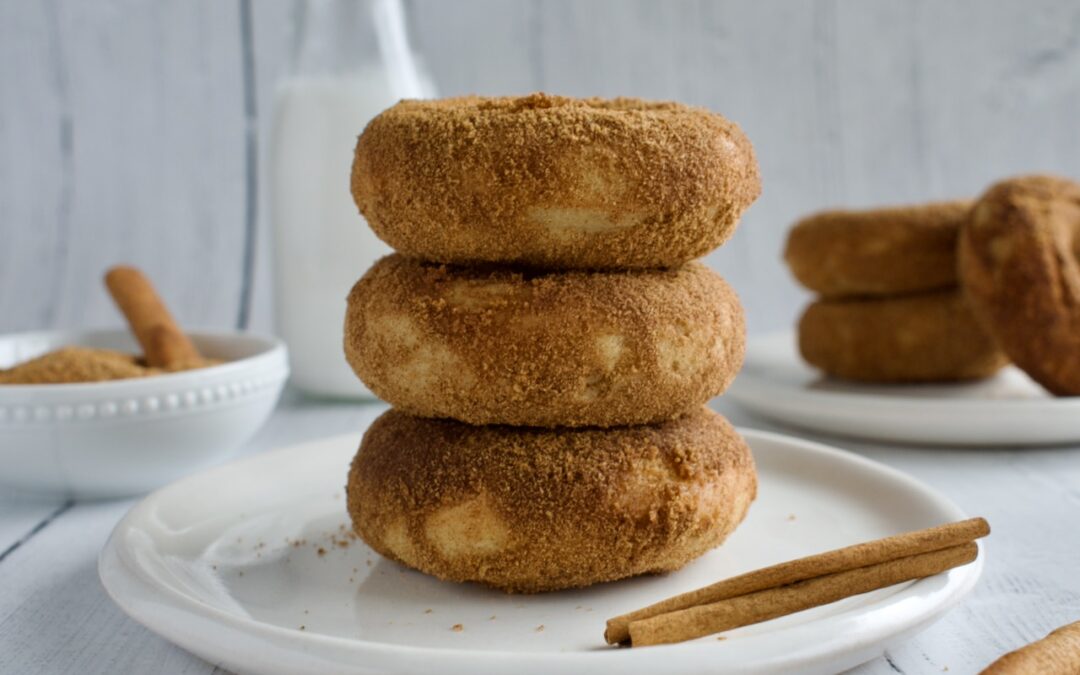
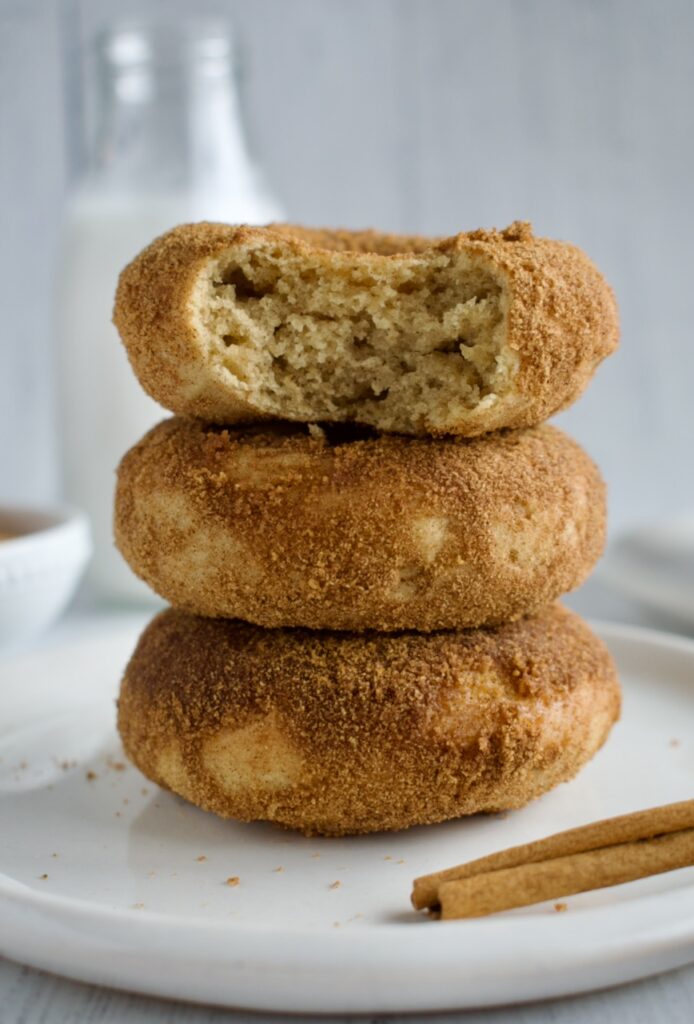
These gluten free donuts are baked and then tossed in a cinnamon sugar coating for pure perfection. Dairy free, refined sugar free, and nut free, how can you go wrong?
gluten free cinnamon sugar donut
I have an important question for you- are you a fried donut person or baked donut person? Let me know in the comments! I’m partial to baked donuts because, well, fried foods can be intense. Also, making baked donuts at home is so much easier. I like that baked donuts are a little denser too.
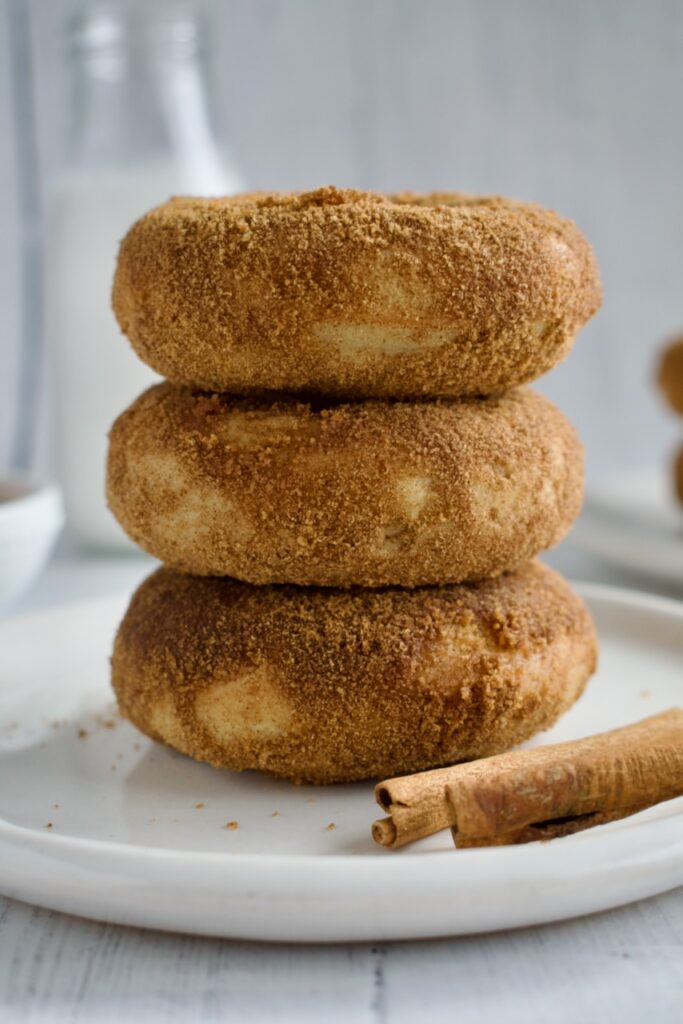
These gluten free baked donuts are allergy friendly, free of dairy, nuts, and refined sugar. Plus, they are lower sugar than any donut you’d find in the store. My mission is always to create lower sugar baked goods. You don’t need all the sugar usually called for in recipes to make treats taste good! Why not enjoy something delicious without the blood sugar crash? Of course, there is a science to baking with sugar and higher amounts are needed in certain recipes.
tigernut or almond flour: this is my favorite way to decrease the amount of sugar needed. Both of these flours are naturally sweet, so you can get away with less added sugar.
maple syrup: there is only 1/4 cup of maple syrup in these donuts making them lower GI.
yogurt: you can use a vegan yogurt like I did (my favorite is Forager) or Greek yogurt if you can have dairy
egg
vanilla
coconut sugar: this unrefined sugar is used to toss the donuts in!
coconut oil
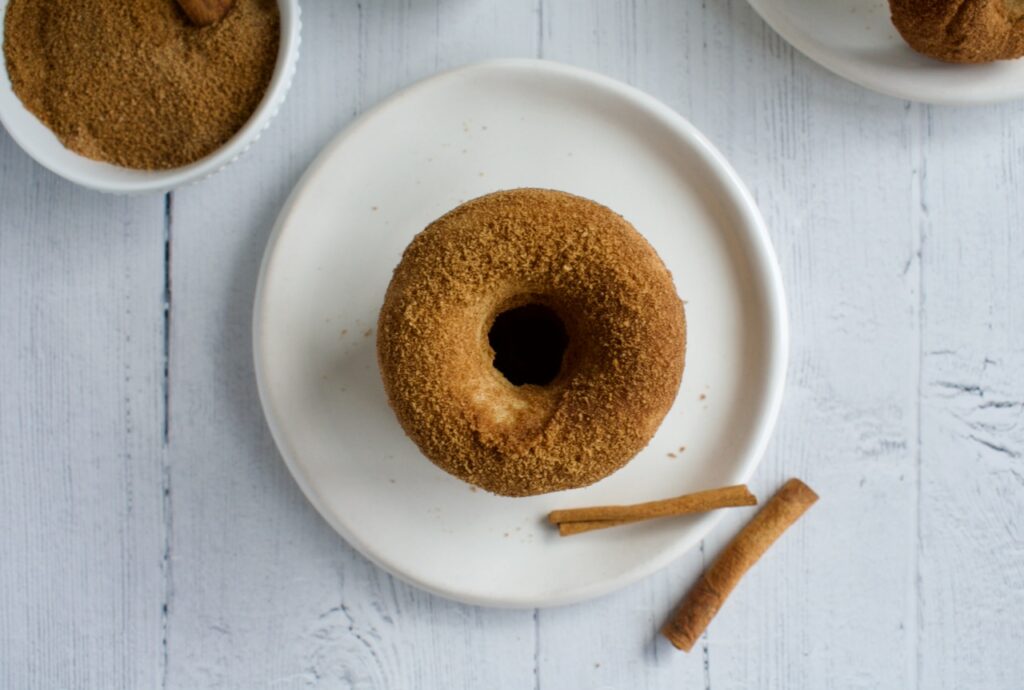
Instructions:
Making donuts is actually super easy. You just combine all the ingredients, pipe the batter into a donut pan, and bake. When the donuts are done, you’ll toss them in cinnamon sugar and try not to eat them all in one sitting.
These baked Strawberries and Cream Donuts are gluten free, dairy free, and refined sugar free. Easy to make and not to sweet, you'll love this easy donut recipe that you can make anytime of year!
Sift together the flours and then whisk in the salt and baking powder.
In a separate bowl, beat together the oil, maple syrup, yogurt, egg, and vanilla extract.
Add the dry to the wet and stir to combine.
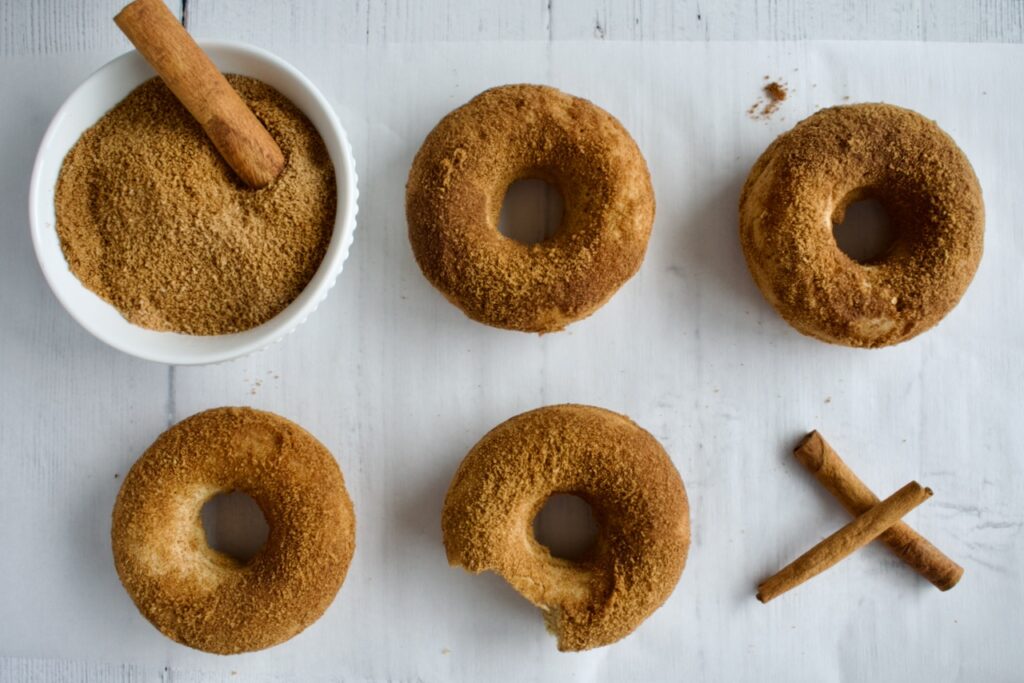
Grease a donut pan then pipe the batter into the pan. You will get 8-10 donuts (so you may have to bake in batches if you only have one pan, or you can make donut holes with the remaining batter).
Bake the donuts for 14-16 minutes until a toothpick comes out clean. Let cool for 10 minutes in the pan before flipping the donuts out.
Strawberry Glaze
Once donuts are fully cooled, mix together the powdered sugar and crushed strawberry powder in a wide bowl.
Add the yogurt and mix to combine then add milk 1 tsp at a time. You want to an achieve a glaze that will stick to the donuts, but isn't too runny. It should be slightly runnier than yogurt.
Dip the donuts into the glaze then place them back on a cooling rack to set. Pop them back in the fridge while you make the cream.
Cream Drizzle
Stir together the melted coconut oil and yogurt until smooth. Add to a piping back or a small ziplock with the tip cut off.
Drizzle the glaze over the donuts then pop them back in the fridge to set. Or eat immediately!
Notes
*melted butter or coconut oil will work too, make sure all ingredients are room temp**For homemade refined sugar free powdered sugar, just blend 1 cup of coconut sugar with 1 Tbsp arrowroot or tapioca starch***Blend freeze dried strawberries in a blender until you have a fine dust
Hi! I'm Victoria. I was diagnosed with Lyme in 2012 and have been on a healing journey ever since. I love helping others on their road to healing through allergy friendly recipes, exercise, and overall well-being.