This Paleo Coffee Cake has the perfect texture, a sweet cinnamon sugar filling, and a delicious crumb topping. Gluten free, dairy free, and nut free, everyone will enjoy this coffee cake!
pale coffee cake
I had never eaten coffee cake in my life before making this. I always thought coffee cake had actual coffee in it (which it doesn’t). I didn’t realize the name was just a reflection of the fact that it is supposed to be eaten WITH coffee. As a tea drinker, I should just call it a tea cake.
Anyway, I finally realized what coffee cake really is and it sounded delicious so I had to try and make my own version! I love a good crumble, so I love that coffee cake has a crumble on top. This coffee cake is completely grain free, refined sugar free, and delicious with coffee, tea, or ice cream ;).
To make this gluten free coffee cake fully vegan or AIP, you would need to find a substitute for the eggs. I have not tested any egg substitutes in this recipe, so I can’t vouch for if that works. If you try it, leave a comment letting us know how it went.
This Paleo Coffee Cake is the perfect grain version of the classic. Filled with a delicious cinnamon swirl and topped off with a coconut filled crumble, this gluten free and dairy free coffee cake is perfect with breakfast, snack, or dessert!
Preheat oven to 350F. Line a loaf pan with parchment paper and set aside.
In a small bowl mix your filling ingredients and set aside.
In another small bowl, mix together your topping ingredients with a fork until they hold together, but are slightly crumbly.
Whisk all dry ingredients for the loaf in a medium bowl.
Beat all wet ingredients together in a large bowl. Add your dry to wet and beat until just combined.
Pour half your batter into the loaf pan, spreading evenly along the bottom. Sprinkle your filling evenly over the batter and then top with the other half of the batter. Crumble topping on top.
Bake for 32-35 minutes or until a toothpick comes out clean (I have had this bake as quickly as 25-27 minutes in a different oven and altitude, so check it!). Remove from the oven and let cool 10 minutes in the pan before lifting the loaf out with the parchment paper and setting on a wire rack to completely cool.
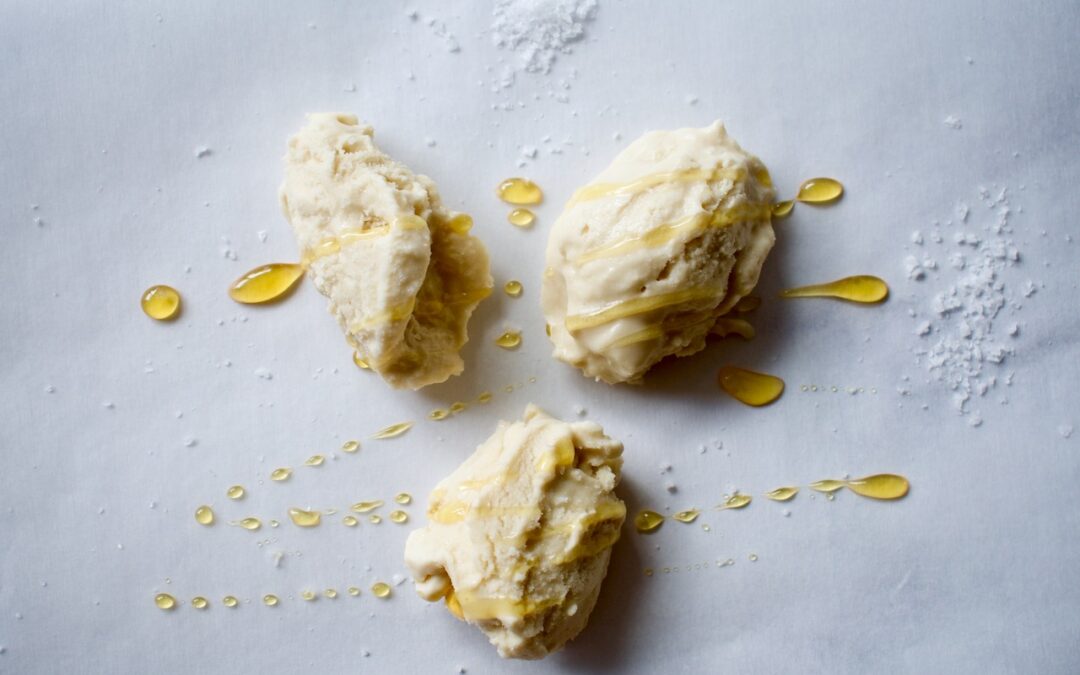
Summer is for all the ice cream and I haven’t been able to get enough lately! This Vegan Salted Honey Ice Cream is the perfect balance of sweet and salty. It’s also fully paleo and far less sugar than the average ice cream. You can feel confident you won’t get a sugar crash while enjoying this to cool off.
vegan ice cream
I’ve been wanting to make a salted honey ice cream for awhile and finally got around to it. I’m a salt fanatic, so whenever I can make a dessert with a salty kick, I’m in. This homemade ice cream definitely has it’s salty kick and that can be adjusted based on your preference. I think this ice cream is excellent if you have POTS/Dysuatonomia or need an electrolyte boost in the hot summer weather because the honey and salt combo is great for balancing those levels.
This homemade vegan ice cream is the perfect mix of sweet and salty. It’s also a fraction of the sugar of average ice cream, making it healthier and perfect to enjoy without a sugar crash! This paleo ice cream is made with a coconut milk base and just a handful of other ingredients
Ingredients
2cans full fat coconut coconut milk1/4 cup reserved
1/4cuphoney+ 2 tbs
2tbscoconut sugar
3tsp.flaked saltI use Maldon Sea Salt, divided
1tbsstarcharrowroot, tapioca, or corn
2tspvanilla extract
Instructions
Blend the coconut milk (except the 1/4 cup reserved), 1/4 cup honey, the coconut sugar, and 1 tsp of salt in a blender until combined.
Heat over medium heat. While the ice cream base is heating up, whisk the starch and 1/4 cup reserved coconut milk together in a small bowl. Once the base has warmed, add the starch mixture and whisk occasionally until the mixture has thickened. You’ll find it starts to thicken on the bottom and edges of the pan first and will coat the back of a spoon. You may get some small bubbles, but don’t let it boil.
Remove from heat and stir in the vanilla extract. Pour into a glass dish and place in the fridge, whisking every 30 minutes until completely cooled (about 2 hours).
Once your base has cooled, transfer to ice cream maker per manufacturers directions. I have this Cuisinart ice cream maker and it takes about 15 minutes for the ice cream to finish churning.
Once done churning, transfer half of the ice cream into your freezer safe dish. Drizzle with 1 tbs of honey and 1/2-1 tsp of salt and use a knife to marble it into the ice cream. Top with the remaining ice cream and complete the same process with the last tablespoon of honey and another 1/2-1 tsp of salt.
Freeze for several hours to harden completely and remove about 10+ minutes before serving to soften slightly. Enjoy!
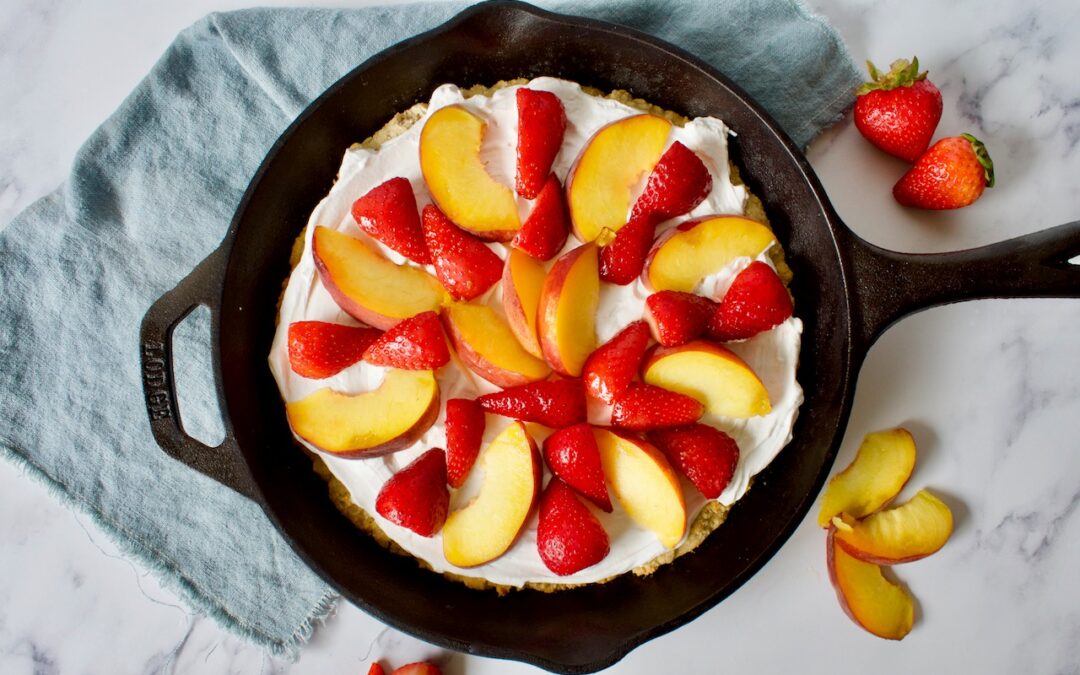
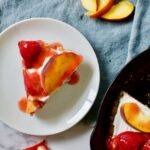
I really wanted to put a twist on the traditional strawberry shortcake and also had peaches ‘n cream on my mind, so I thought why not add some delicious, in-season peaches to strawberry shortcake? This gluten free shortcake is taken to another level by adding the peaches and it’s completely allergy friendly!
gluten free strawberry shortcake
I also made this more of a strawberry shortcake cake. Instead of individual shortcakes, the biscuit dough is baked as one big shortcake that you slice up. The “cake” is topped with a coconut whipped cream to keep it dairy free, then layered with fruit and strawberry sauce. This is such a fun summer recipe, incorporating all the flavors of the season.
This phenomenal summer dessert is completely gluten free, paleo, and dairy free with a vegan option. Although it has multiple steps, it is quite simple to make. Just make sure to prepare your ingredients ahead of time and read the recipe through before starting.
gluten free strawberry shortcake with peaches
Gluten Free Strawberry Shortcake with Peaches
How to keep this Peaches ‘N Cream Strawberry Shortcake vegan:
This recipe does call for an egg and some honey, but you can use a vegan egg substitute (I have tested this recipe with the Bob’s Red Mill egg replacement and it works great!) and maple syrup. This shortcake recipe is very allergy friendly!
What makes this recipe paleo? Can I just use gluten free flour?
This strawberry shortcake recipe is kept completely gluten free AND paleo by utilizing grain-free flours. A range of paleo flours is used to create the perfect taste and texture. I have not tested a 1:1 gluten free flour blend in this recipe, but you might be able to get away with substituting all the flours for a gluten free flour. If you try this, be sure to let me know in the comments!
A completely gluten free and dairy free take on strawberry shortcake. This delicious summer dessert utilizes two of the best seasonal fruits and combines them into one amazing dessert. Strawberry shortcake, but with peaches ‘n cream!
2Tbsphoneyalthough honey complements the flavor best, you can use maple syrup for a vegan version
1eggor egg substitute
1tspvanilla extract
Strawberry Sauce
1/2pintstrawberries, halved
1/3cupwater
2Tbspmaple syruphoney or sugar would work, as well
1tspvanilla extract
1tsplemon juice
Coconut Whipped Cream
116 ozcan of full fat coconut milkrefrigerated overnight
1tspvanilla extract
Instructions
First, make sure you place the can of coconut milk in the fridge the night before.
Fruit Topping
Toss the strawberries for the topping with 1 Tbsp of sugar and let sit in the fridge until ready to use.
Shortcake
Preheat the oven to 375 F. Before starting the cake, place a medium bowl in the freezer to use for the coconut whipped cream later (you want this in the freezer for at least 30-60 minutes before you make the whipped cream).
Combine the coconut milk and apple cider vinegar in a small bowl to make vegan buttermilk and set aside.
Whisk all the dry ingredients together in a large bowl. Using a pastry cutter or fork, cut in the cold coconut oil until combined with the dry ingredients.
Form a well in the center of the dry ingredients and add all the wet ingredients, including the buttermilk. Use an electric mixer to blend all ingredients until just combined.
Grease a 10 inch cast iron skillet (you can also use a cake pan if you don't have a cast iron) and pour the dough into the skillet, spreading evenly across the pan.
Bake for 18-20 minutes until lightly golden and a toothpick comes out clean. Remove from the oven and let cool completely.
Strawberry Sauce
While the cake is baking, make the strawberry sauce. Combine all ingredients for the sauce in a saucepan over medium heat. Bring to a simmer and reduce to low. Simmer for 10 minutes until sauce has reduced and thickened some (it won’t thicken much). Use an immersion blender to puree the sauce- I like it a little chunky still. Alternatively, you can use a fork to mash the strawberries or pulse gently in a food processor/blender.
Coconut Whipped Cream
While your cake is cooling, make the whipped cream. Take your bowl out of the freezer and scoop out the thick coconut cream from the can (you don't want all the liquid that should have separated at the bottom). Add the vanilla extract and then use an electric mixer to beat the cream on medium high until light and fluffy (depending on the brand of coconut cream and your mixer, this can take anywhere from 3-10 minutes). If not ready to use immediately, keep in the fridge.
Assembly
When you are ready to assemble your cake, line up the coconut cream, fruit, and strawberry sauce. Spread the coconut cream in an even layer over the shortcake base. Next, top with the sliced peaches and strawberries. Lastly, drizzle the strawberry sauce on top. Slice and enjoy!
Keep leftovers in the fridge for up to 5 days. Don’t leave this cake out at all or the coconut cream will melt and go bad.
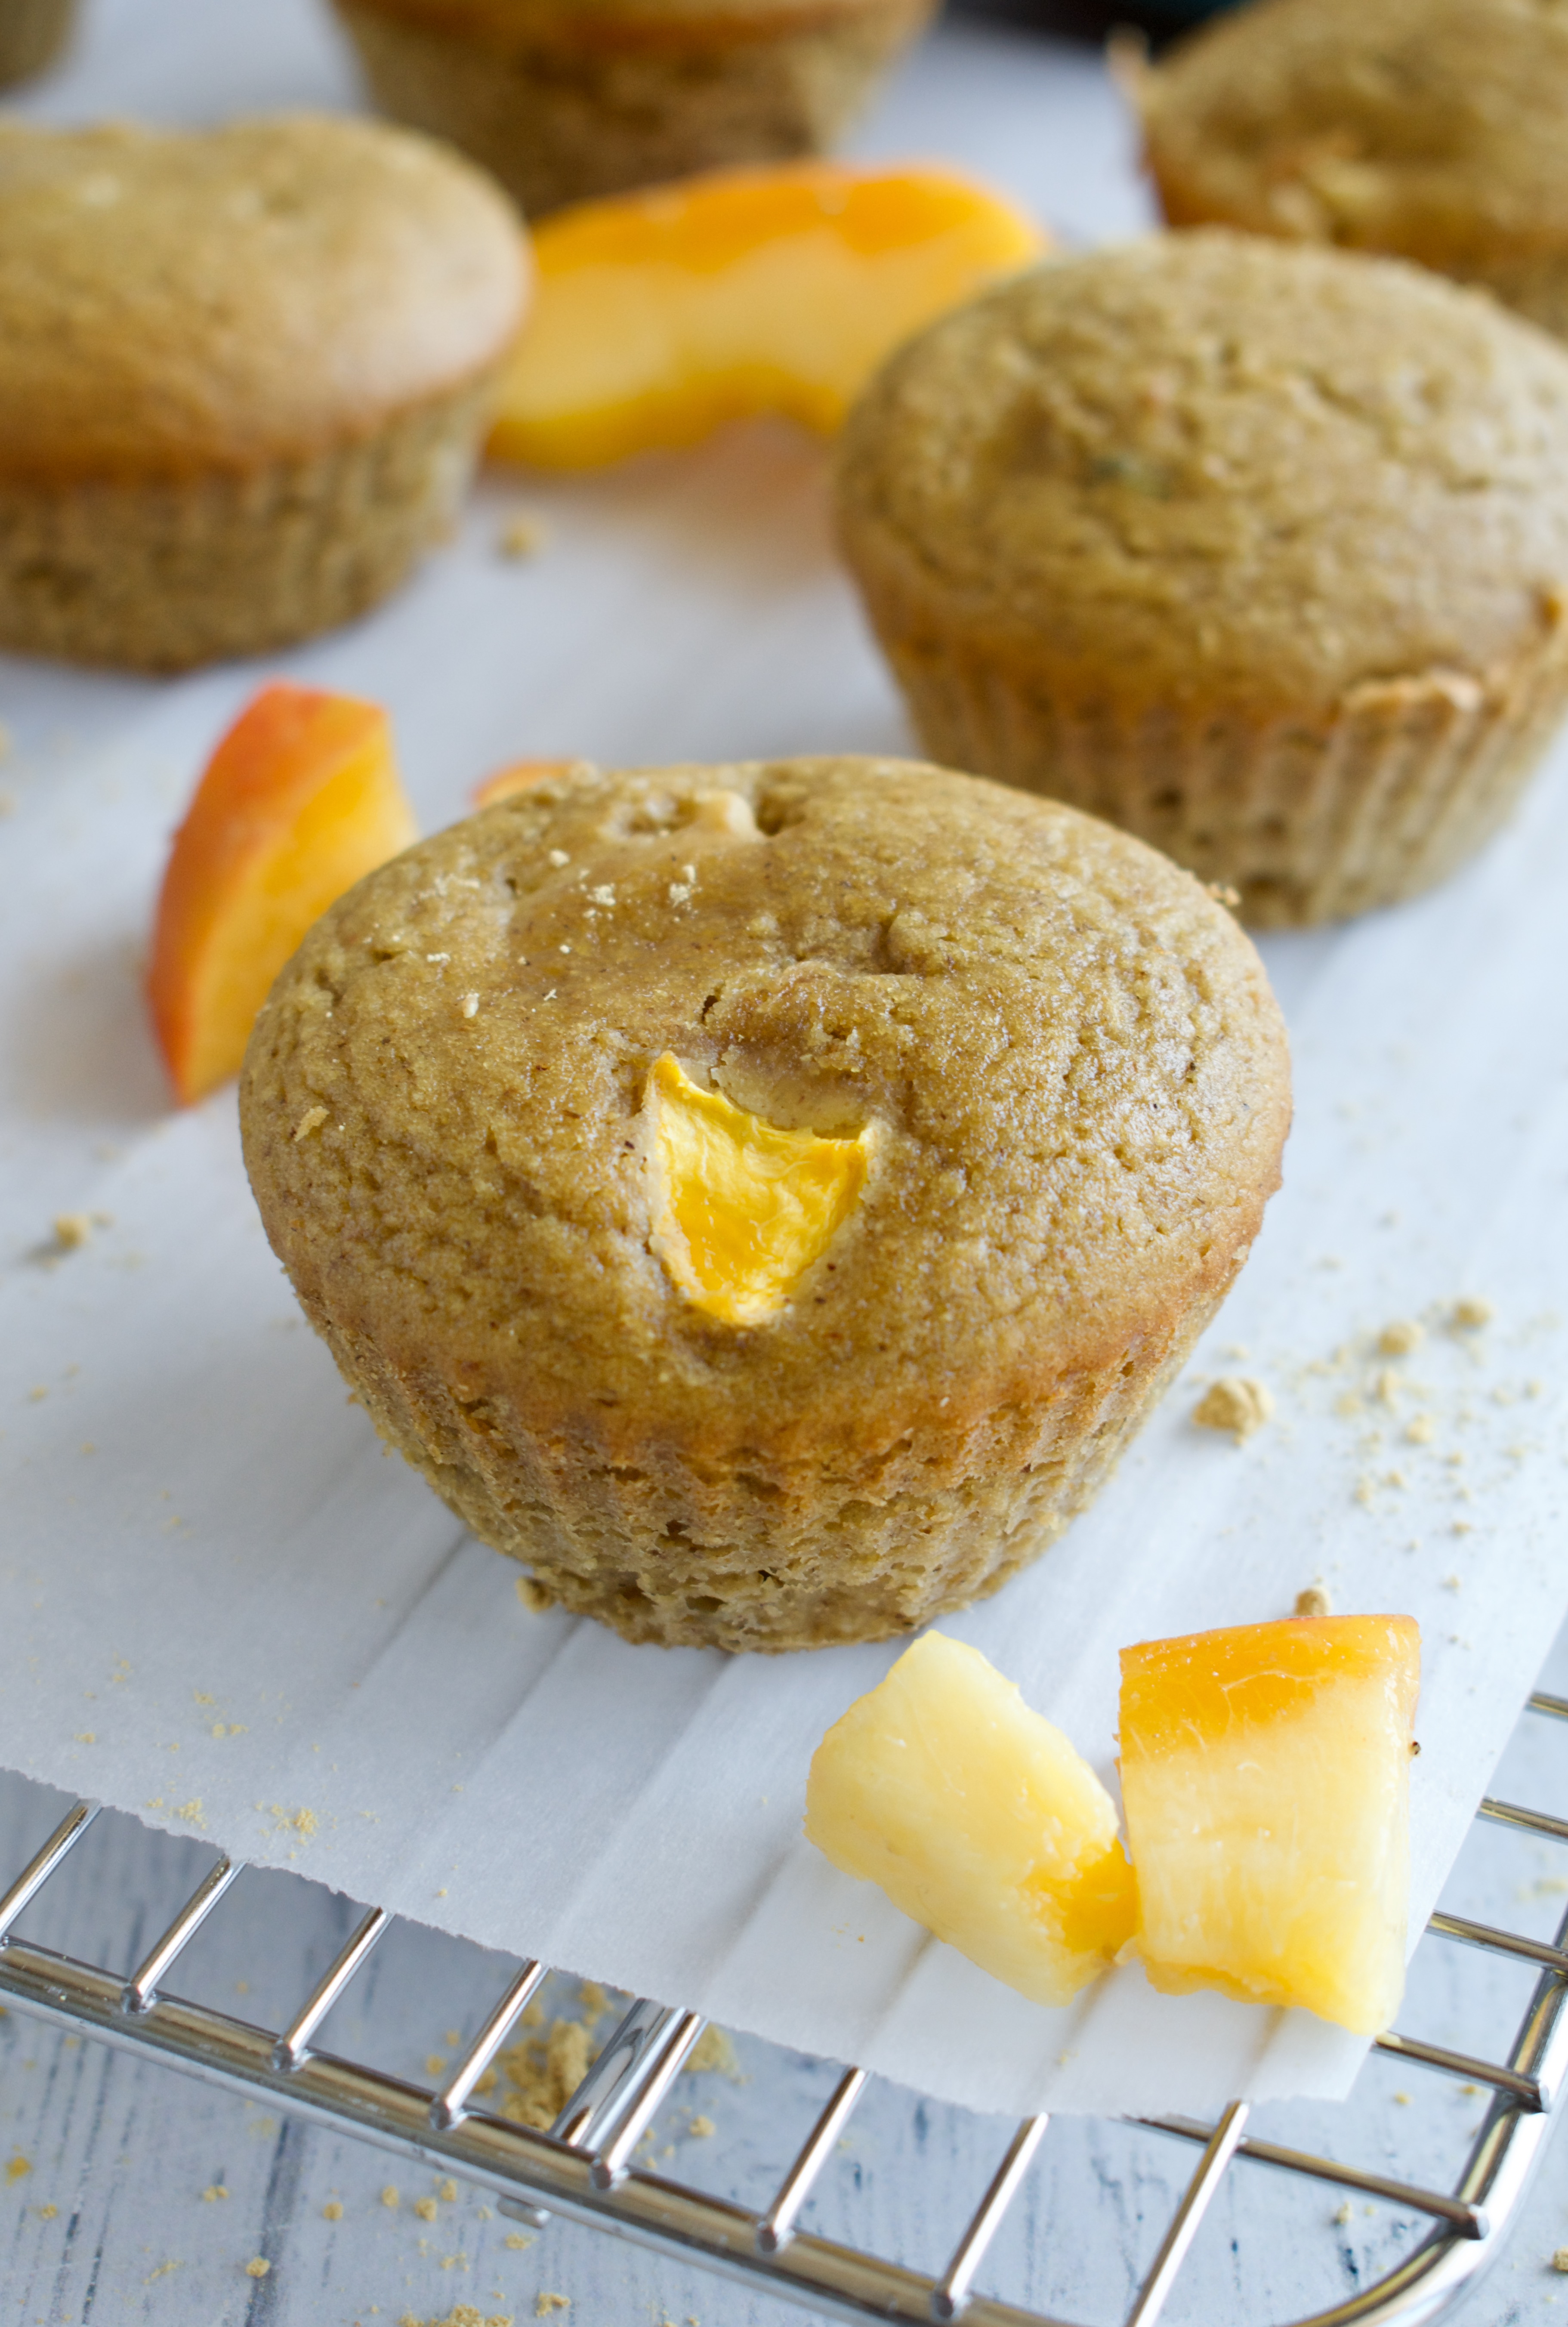
Make these Paleo Ginger Peach Muffins before peach season is over! Gluten free, dairy free, and refined sugar free, these delicious muffins bring all that peach flavor.
paleo ginger peach muffins
It’s officially peach season, baby! Can you really beat biting into a ripe, juicy peach on a hot day? Okay, maybe some sweet watermelon can beat it, but peaches are up there. What’s your favorite summer fruit?
If you’ve been following me for a while, you’ll know I have a major obsession with ginger. Peaches and ginger are an elite combination, in my opinion, so I couldn’t resist adding some to these muffins for a flavor boost. I feel like these muffins really encompass summer in one bite.
These paleo muffins are made with a mix of grain free flours for achieve the perfect texture. They are light and fluffy without the gummy consistency that can often result in gluten free or paleo baking. Tigernut flour is my flour of choice since it is also nut free, but you can use almond flour if tolerated.
Can I Make These Peach Muffins Vegan?
I have made a vegan version of these peach muffins using an egg substitute, just leave out the egg yolk and use 1 egg substitute. I like the Bob’s Red Mill egg substitute.
Can I Use Frozen or Canned Peaches?
I have not tested this recipe using frozen or canned peaches. If you did so, I would suggest thawing the peaches first and draining off any excess liquid. Same goes if you use canned peaches (and I suggest using a brand without added sugar). If you try it, leave a comment letting us know how it went!
paleo and dairy free ginger peach muffins
How to Store Gluten Free Peach Muffins
You can store these paleo muffins in an airtight container at room temperature for 3 days or in the fridge for up to a week. They also freeze well!
Other Peach Recipes
Looking for more delicious peach recipes? Try these gluten free peach based treats…
These muffins are a must make during peach season! Delicious fresh peaches pair perfectly with a little ginger in these Paleo Peach Muffins. These muffins are completely grain free, dairy free, gluten free, nut free, and refined sugar free.
1/4cupliquid oilmelted coconut oil or butter works or olive oil
1/2cupnon-dairy milk
1egg
1egg yolk
1tspvanilla extract
1tspfresh grated ginger
1tspapple cider vinegar
1cupof diced peachesabout 1 peach
Instructions
Preheat the oven to 350F.
Mix all dry ingredients in a small bowl (flours, baking soda, salt, and ginger).
Beat all wet ingredients (maple syrup, oil, eggs, milk, vanilla) in a large bowl except the apple cider vinegar and peaches. Once your wet ingredients are thoroughly blended together, add the ACV and dry ingredients and mix to combine.
Fold in the peaches to the batter.
Evenly distribute batter in lined muffin tin (you should get 12 muffins) and bake for 25-27 minutes until golden and a toothpick comes out clean. Let cool in the muffin tin most of the way then you can remove and finish cooling on a wire rack.
These keep in the fridge in an airtight container for a week.
This simple Nut Free Paleo Banana Bread is comforting and delicious, without the gluten, grains, refined sugar, or dairy. This allergy friendly and healthier banana bread is the perfect way to use ripe bananas.
nut free paleo banana bread
This is a staple recipe in my house and one I make repeatedly when I have some leftover, super ripe bananas. Since it’s relatively low sugar, it’s a great alongside some eggs at breakfast, as part of an afternoon snack, or for dessert with some ice cream or whipped coconut cream. It’s so easy to make, I think this will become a go-to recipe for you too!
healthy nut free paleo banana bread
Nut Free Paleo Banana Bread Ingredients
Bananas: make sure your bananas have black spots. The riper the banana, the better for baking!
Applesauce: I love using applesauce to substitute for some of the oil in a recipe and to add a little natural sweetness.
Olive oil: the main fat for this paleo banana bread.
Eggs: helps with rise and texture.
Maple syrup: this is the main sweetener for this recipe. Maple syrup is both delicious and refined sugar free!
Vanilla
Tigernut flour: a nut free paleo flour alternative to almond flour.
Cassava flour: a great grain free flour substitute in paleo baking.
Tapioca or arrowroot starch: it’s best to use a combination of flours in paleo baking for the best texture.
Applesauce: if you don’t have applesauce on hand, you can just use an extra 1/4 cup of oil. Yogurt should also work (dairy free or regular).
Olive oil: the olive oil in this recipe can be replaced with melted coconut oil (just make sure all ingredients are room temperature) or melted butter.
Tigernut flour: if you don’t have a nut allergy, almond flour will work just fine!
Storage
Keep this nut free paleo banana bread stored in an airtight container at room temperature for up to 3 days or in the fridge for up to 5.
You can also slice and freeze this banana bread for up to 3 months. Thaw in the fridge overnight or at room temperature for a couple hours.
healthy gluten free banana bread
How to Serve Paleo Banana Bread
This healthy banana bread can be eaten as is, but I love warming it up with a scoop of vanilla ice cream, yogurt, or smear of butter. It tastes great with a spread of nut/seed/granola butter on top and a drizzle of honey.
How to Make Paleo Banana Bread Moist
Nobody likes dry banana bread and gluten free baked goods can often be dry. So, here are a few tips to keep this delicious gluten free banana bread moist.
The combination of flours. To keep this gluten free and paleo banana bread moist and not gummy, we are using 4 different flours in this recipe. This helps achieve the perfect texture.
Don’t over bake! I find that it’s easy to over bake paleo and gluten free baked goods. You want to keep an eye on the oven towards the end of baking and take your baked goods out just as soon as a toothpick comes out clean. This banana bread takes a full hour to bake, but depending on your oven and altitude, you may want to start checking it at 50 minutes. If you are at a higher altitude, definitely check it sooner.
Can I Make these into Paleo Banana Bread Muffins?
Yes! This batter will work for muffins. Just bake for about half the time, 25-30 minutes.
Can I Make this Gluten Free Banana Bread Egg Free and Vegan?
I have not tested this recipe with an egg substitute. If you try it, leave a comment and let us know how it went!
healthy gluten free and paleo banana bread
More Banana Recipes
If you love a good banana recipe, then you’ll love these other gluten free baked goods
This easy nut free paleo banana bread is grain, gluten, dairy, and refined sugar free! Healthy and low sugar, this banana bread recipe is the best way to use up ripe bananas.
Mash 3 of the bananas with a fork in a large bowl then add the remaining wet ingredients and mix in a stand mixer or with a hand mixer until well combined.
Whisk all dry ingredients together in a smaller bowl, make sure there are no lumps.
Add dry to wet and mix on low until all ingredients are just combined (don't over mix). You may need to scrape down the sides of a bowl with a spatula to make sure all ingredients are combined.
Let batter sit for 5-10 minutes. The batter should now be somewhat thick. You don’t want a runny batter and it should need to be scooped into the pan, not easily run from bowl to pan.
Line a loaf pan with parchment paper while you let the batter sit then scoop batter into the pan and even out the top. Slice the leftover banana in half lengthwise and gently press it into the top of the batter (this is purely for aesthetics and doesn't need to be done).
Bake for 60-65 minutes until golden on top and a toothpick comes out clean.
Let cool in the pan for 10 minutes before transferring to a wire rack to finish cooling. Let cool completely before cutting! This is key.
This bread tastes even better the next day, so if you have the patience to let it sit at room temperature overnight before cutting, do it!
Notes
Homemade baking powder: 2 parts cream of tartar, 1 part baking soda, 1 part tapioca starch
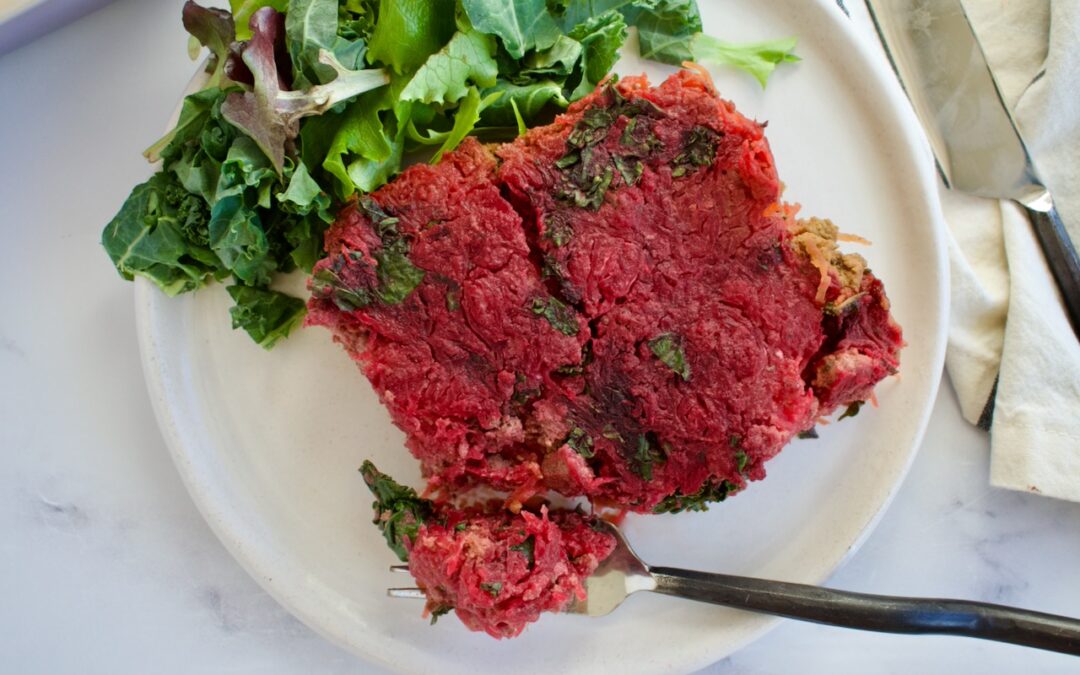
This Paleo spaghetti squash casserole is veggie packed, high protein, and completely allergy friendly! AIP friendly, gluten free, and dairy free. A delicious and nightshade free nomato sauce brings this dish together. It is the perfect meal prep or family dinner option.
paleo spaghetti squash casserole
With what’s happening in the world right now, I have, like others, stocked up on food and am prepared to self isolate for a few weeks. During this time, I’m focusing on making large meals/bulk cooking, so I can freeze portions and have food for awhile. A casserole was first on my list! This recipe was inspired by A Squirrel in the Kitchen, but with some tweaks.
If you are not following me on Instagram, hop on over there! I’m sharing all about what I’m meal prepping, food ideas, and more during this time. This recipe is completely AIP compliant, lower FODMAP, and utilizes a nomato sauce to keep it nightshade free. I was hesitant the sauce wasn’t going to be very good or too beet-y tasting, but honestly it was delicious and went so well with the entire dish!
Spaghetti squash casserole
I love that this casserole is completely grain free and packed with all the veggies! You can use vegetables you have on hand or what you can access at this time. The sauce is made of beets, butternut squash, coconut milk, and herbs. You can use fresh cooked, pre-packaged, or frozen beets. Grab some canned butternut squash puree and coconut milk, you don’t need to make this from scratch!
This paleo casserole is a great meal prep option as it does freeze well. It is a complete meal on its own, so just serve up a big slice and you’re good to go! I like to include a side salad for extra greens and micronutrients, though.
This spaghetti squash casserole is AIP compliant, nightshade free, and completely allergy friendly! It’s the perfect nutrient dense meal prep or family dinner option.
1bunch of kalewashed, de-stemmed and finely chopped
1package of button mushroomschopped
1large fennel bulbdiced
1tspsalt
1Tbspolive oil or garlic infused oil(great low FODMAP option to still get garlic flavor)
Nomato Sauce
1/2cupcooked red beetsabout 1 medium beet
1cupbutternut squash pureeyou can use canned
1/2cupcoconut milk
1/2tspsalt
1-2Tbspnutritional yeast
1tspdried basil
1tspdried oregano
Instructions
First, cook your spaghetti squash by placing the squash on a baking sheet in the oven while it preheats to 425 F. Then remove the squash and cut it in half (this makes it so much easier to cut!) and place it face down on a baking tray, baking for about 30-45 minutes until done (easily shreds).
You can cook the squash ahead of time or turn down oven to 400F when it is done.
While squash is cooking, blend all sauce ingredients together in a blender for a smooth nomato sauce.
Sauté the fennel in olive oil over medium heat until softened and beginning to brown, then add in the mushrooms and cook for a minute or two until beginning to soften. Finally, add in the kale and sauté until wilted.
You can either brown your ground beef in a different pan while cooking the veggies or set veggies aside in a bowl and then cook your ground beef.
Combine the ground beef and veggies together when cooked and season with salt.
When spaghetti squash is done, shred into "noodles" and place in a large bowl.
Now mix the ground beef and veggies with the spaghetti squash and the nomato sauce and combine everything thoroughly so sauce and beef is evenly distributed with squash. Spread everything into a glass baking dish (I used a 8×12 dish) and bake at 400F for 30 minutes. Broil for 5 more minutes then remove and let sit for 5 minutes before cutting and serving. This freezes well!
Hi! I'm Victoria. I was diagnosed with Lyme in 2012 and have been on a healing journey ever since. I love helping others on their road to healing through allergy friendly recipes, exercise, and overall well-being.