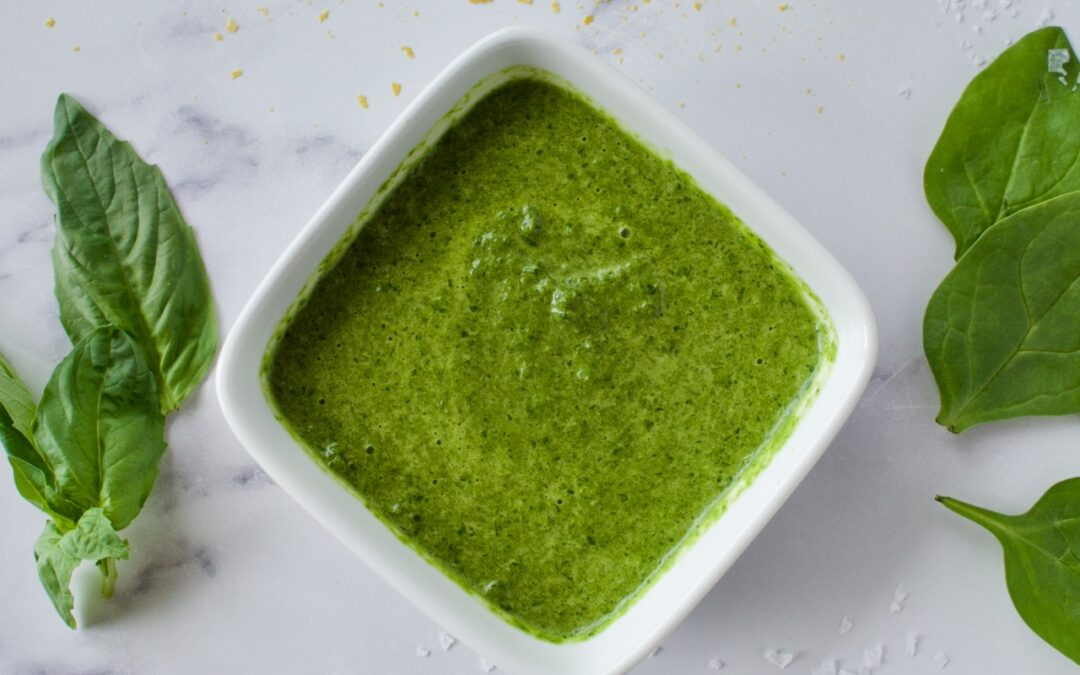
This healthy homemade pesto is completely allergy friendly and easy to make. It’s packed with flavor and a quick sauce to whip up for dinner. The spinach gives this dairy free pesto a nutritional boost, while the basil provides all the delicious taste!
low FODMAP spinach pesto
Many store-bought pestos contain nuts, cheese, and garlic, but if you’ve got food allergies/intolerances and GI issues, these ingredients are likely to set you off. It was impossible to find safe and healthy pestos at the store, so I started making my own. Pesto is super easy to make and the best part about making a homemade variety is that you can adjust the flavors to your liking. I’ve been whipping up this super quick and easy pesto for years and figured I better finally get this recipe on the my website and share it!
allergy free vegan pesto
This pesto is packed with an extra punch of nutrients from the spinach. The other ingredients are simple- olive oil, basil, and salt! It’s that simple. This pesto is completely allergy friendly, being gluten-free, AIP/paleo, and vegan, plus no garlic so it is low FODMAP! Gut friendly, nutrient packed, and healthy ingredients.
This easy and delicious homemade pesto is perfect for any diet. There are no major offenders and you can whip it up in just a couple of minutes! This pesto is nut-free, vegan, and low FODMAP
Course Main Course
Cuisine American
Keyword Easy, low fodmap, nut free, Simple, vegan
Total Time 5 minutesminutes
Servings 4servings
Author Victoria Faling
Ingredients
3cupsspinach
1cupfresh basil leaves
1/4cupolive oil
1/2tspsalt
2-4Tbspnutritional yeastOPTIONAL
Instructions
Wash and dry the basil leaves.
Add everything to a small blender. Blend on high until smooth.
If needed, add more olive oil to achieve desired consistency.
Add nutritional yeast as desired for a more cheese-y flavor.
Store in an airtight container in the fridge for up to 5 days or freeze in ice cubes for later use.
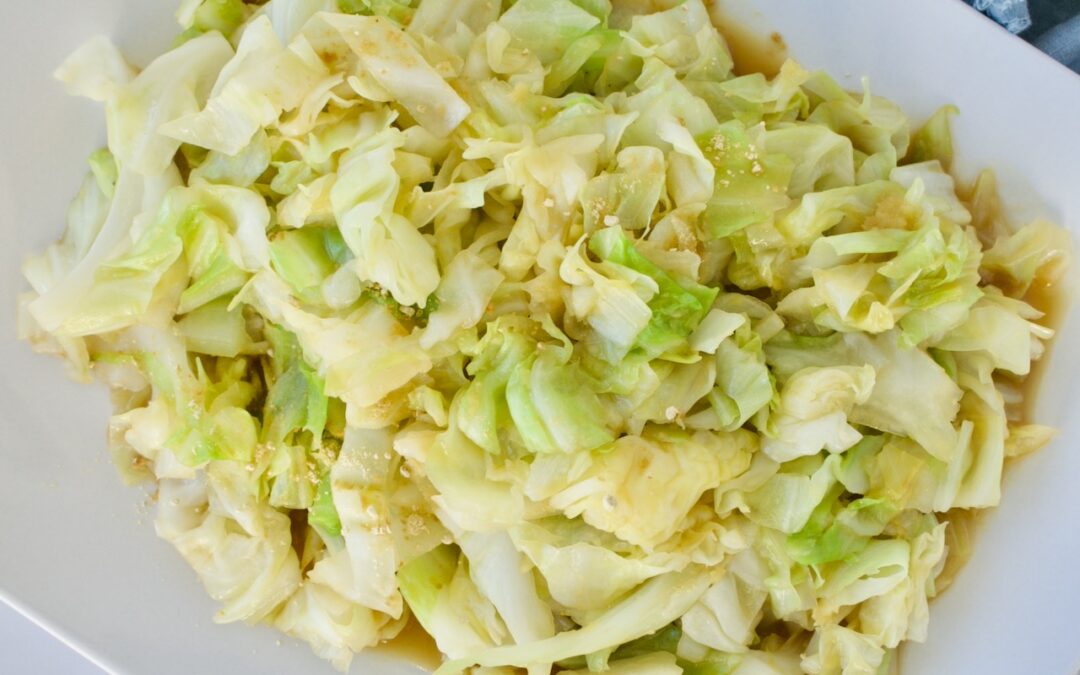
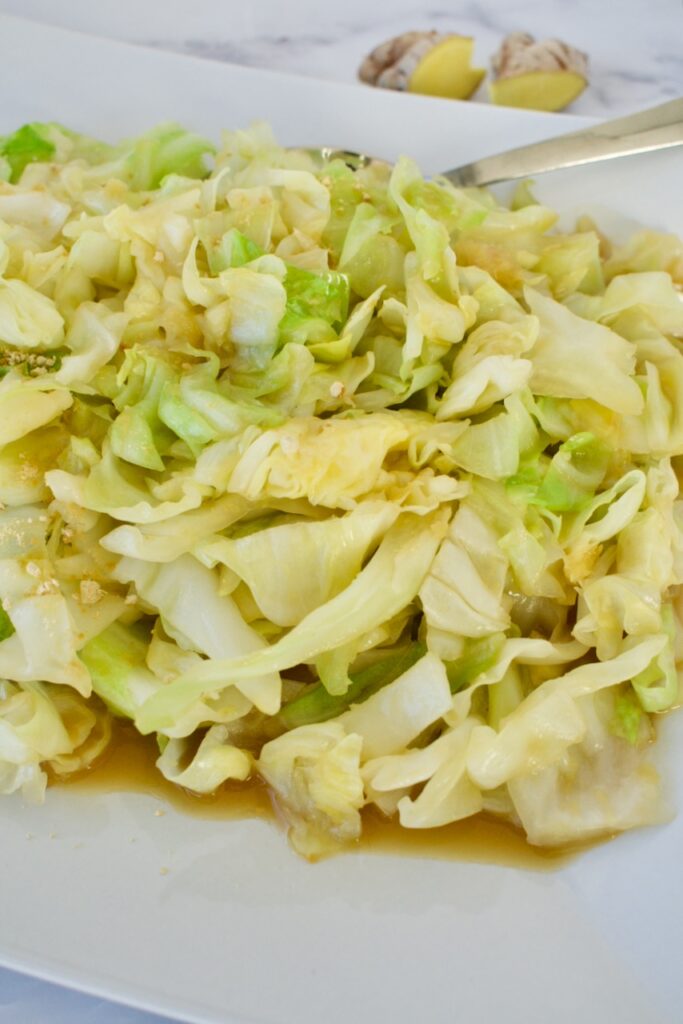
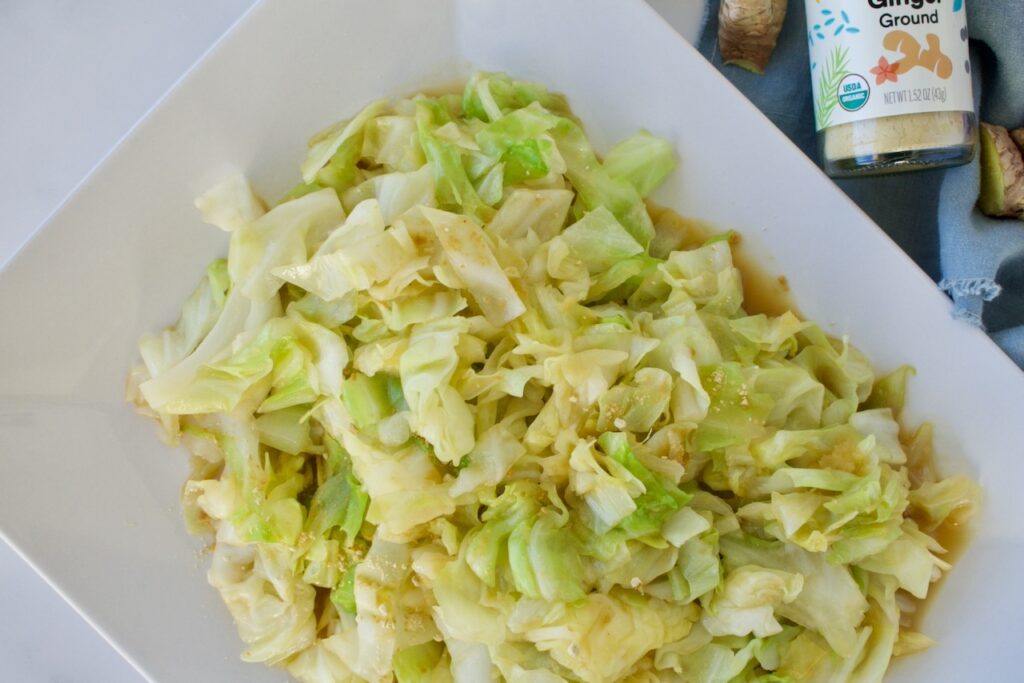
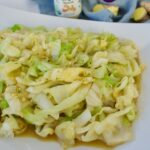
This ginger cabbage recipe is super easy to make and it’s the perfect quick side dish for a weeknight meal or even a larger dinner affair. This cabbage is made on the stove, so it’s a sautéed cabbage with bold ginger flavor. All you have to do is sauté the cabbage with ginger, then add in some broth and coconut aminos. It really is that easy.
AIP gingered cabbage
I’m obsessed with ginger… ginger anything and I’m happy! The more ginger the better. If you also love ginger, then you’ll love this recipe, too. Ginger is a fantastic spice with some amazing anti-inflammatory benefits. It’s also great for stomach upset and GI distress as well as improving nutrient absorption. Ginger stimulates circulation and can help support the immune system. It’s delicious and amazing for you!
1/4cupbroth of choicebone broth, chicken broth, or vegetable broth works!
1/2Tbspground ginger
2Tbspcoconut aminos
Instructions
Slice your cabbage in quarters and de-core, then slice into thin strips.
Heat coconut oil over medium heat in a large skillet until melted. Add the grated ginger ginger and sauté for about 1 minute.
Add cabbage and cook stirring frequently for 3-4 minutes, until cabbage starts to soften.
While cabbage is cooking, whisk together the broth, ground ginger (you can leave this out if you prefer a more mild taste, this adds the last super kick of spice and ginger), and coconut aminos. Add this mixture to the cabbage and cook another 3-4 minutes until cabbage is soft.
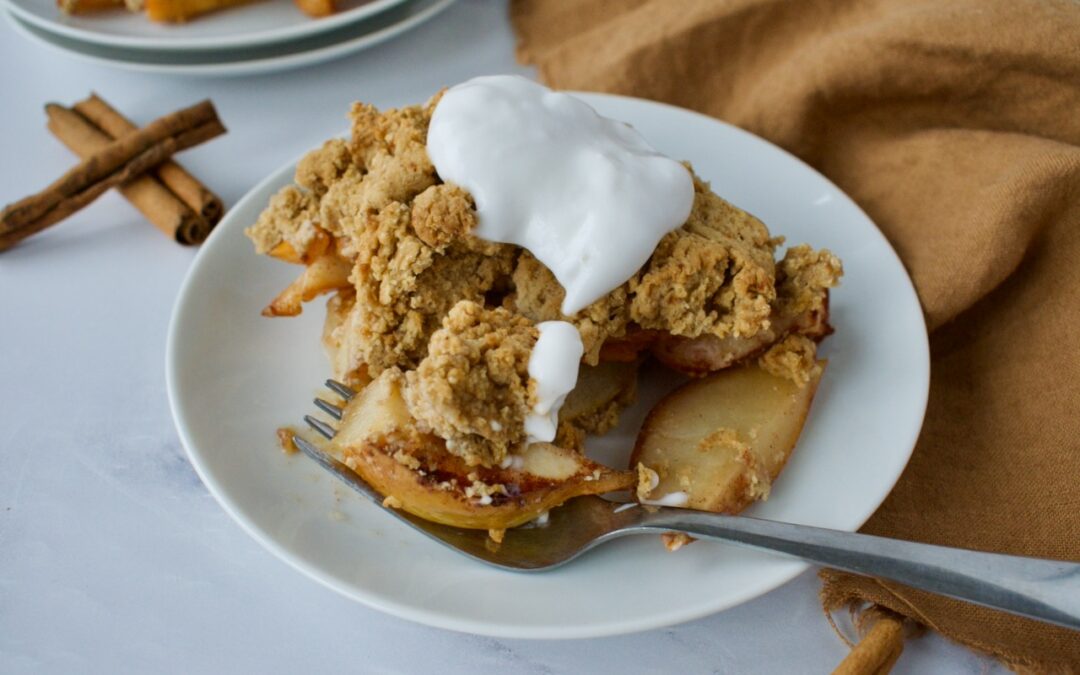
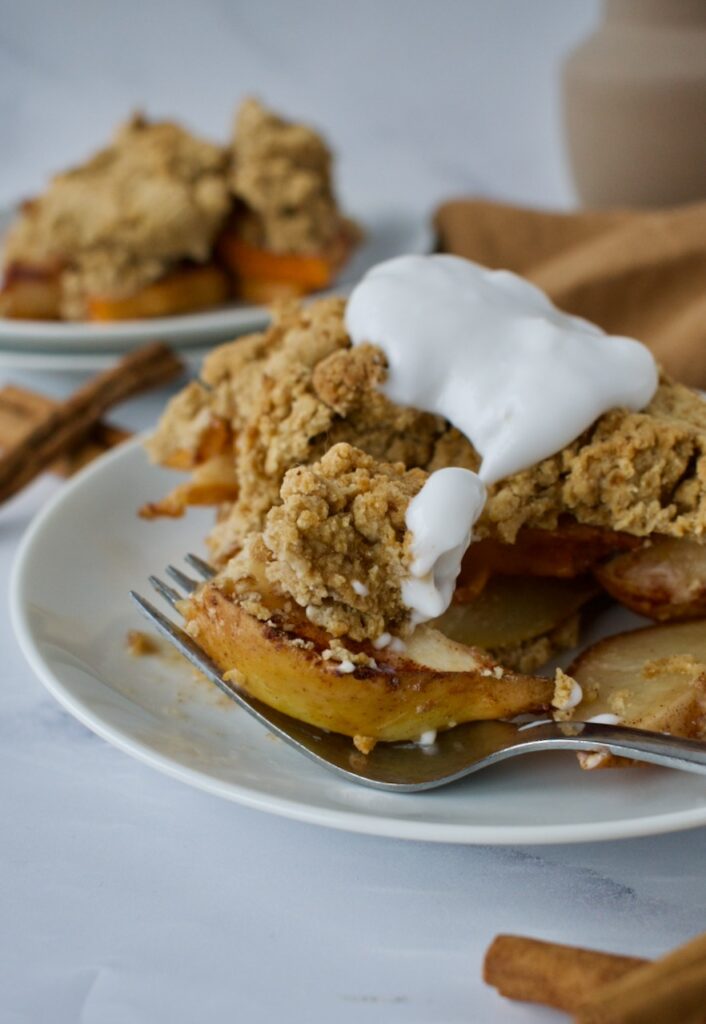
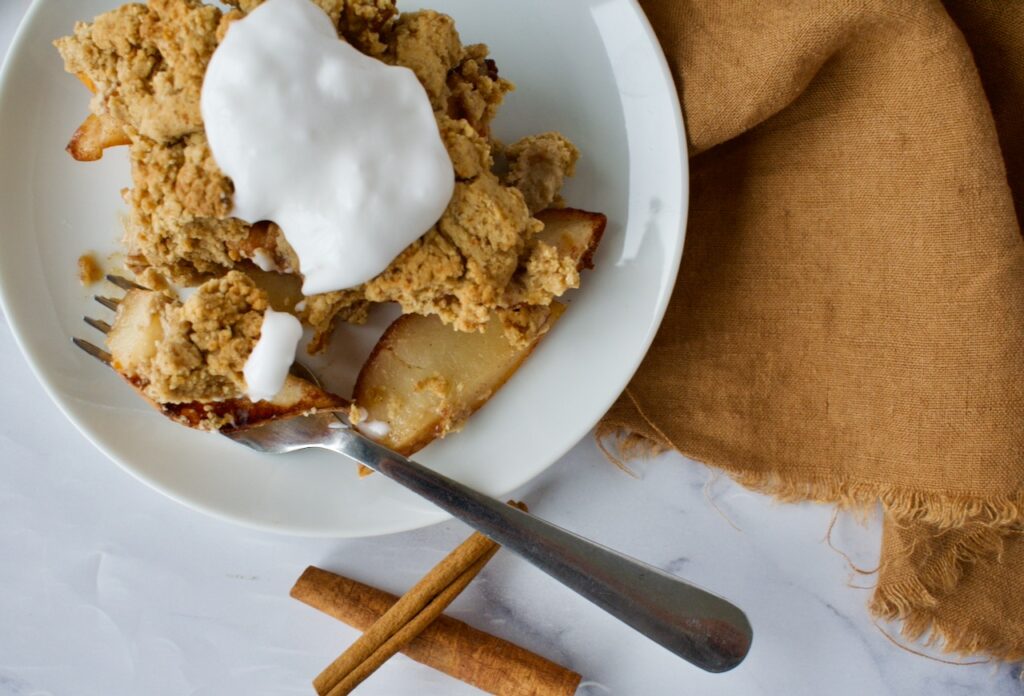
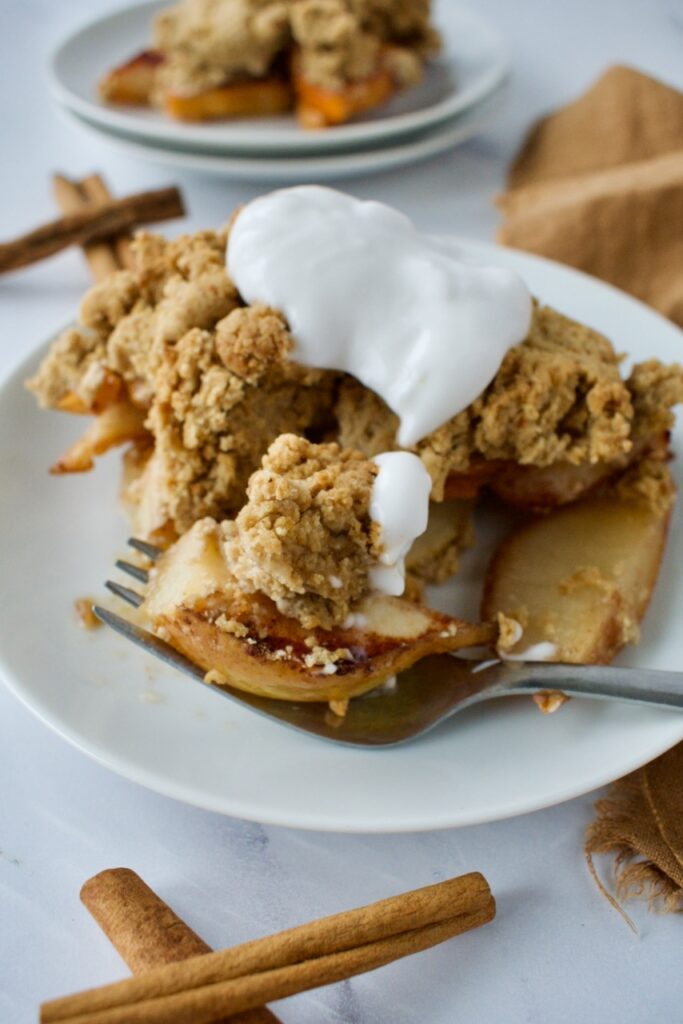
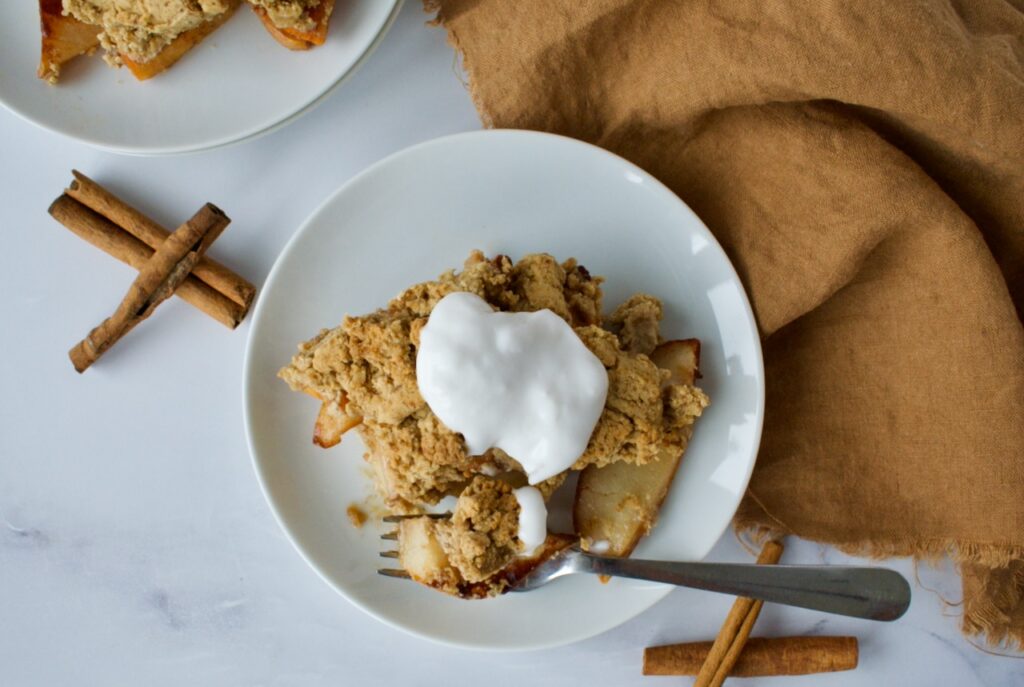
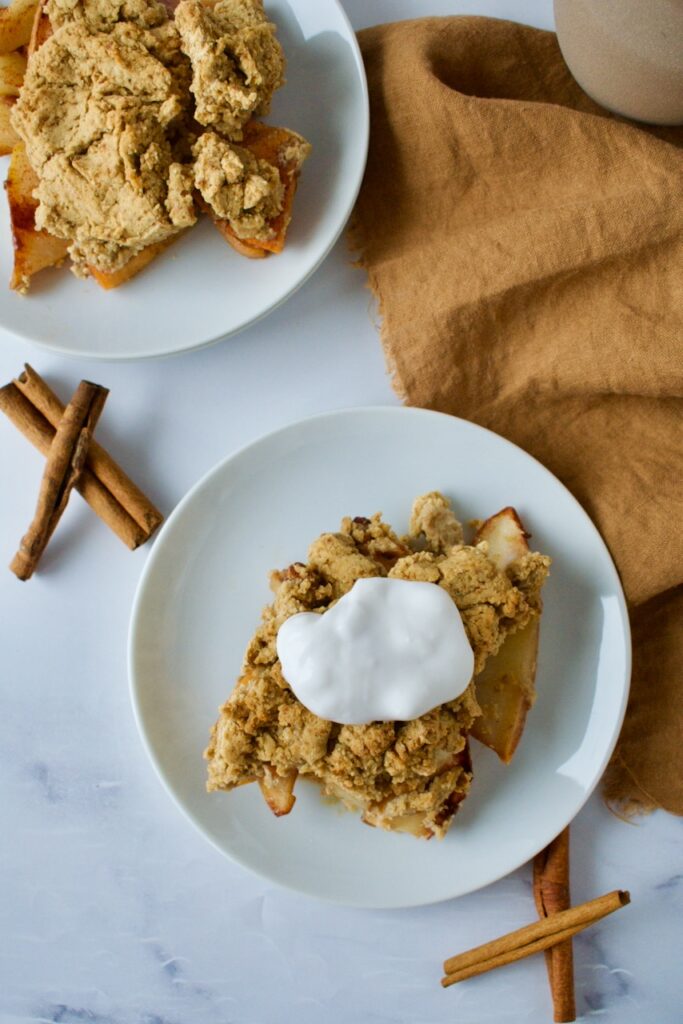
Gluten free cobbler is one of my favorite desserts. Delicious fruit with a sweet, doughy topping? Yes please! This pear and persimmon cobbler is the perfect winter dessert. It utilizes in season pears and persimmons mixed with warming cinnamon and topped with a gluten free dough.
gluten free fruit cobbler
This healthy fruit cobbler is also completely vegan and nut free! Although you can use butter and regular milk in the dough, I opt for coconut oil (or vegan butter) and a plant-based milk to keep this recipe dairy free. It’s the perfect allergy friendly dessert for the winter. I like making this for the week or even for a dinner party.
gluten free cobbler
This gluten free cobbler tastes amazing topped with fresh whipped coconut cream or even some vanilla ice cream. The smooth vanilla pairs lovely with the warm cinnamon of the cobbler. Bonus, this is a super easy dessert to make. No fancy skills or steps. It’s basically a dump and bake!
This gluten free cobbler is the ultimate way to use seasonal pears and persimmons! Fresh fruit is topped with a sweet, gluten free dough and baked to perfection. Serve with fresh whipped cream and a cup of tea and your cold winter evenings will be warm in no time.
Toss fruit with cinnamon, coconut sugar and tapioca starch.
Pour fruit into a 9×9 glass baking dish and set aside.
In a bowl, combine the gluten free flour, tigernut flour, baking powder, and salt. Whisk to combine.
Cut in the coconut oil or butter with a fork or pastry cutter until evenly distributed. Add the remaining wet ingredients and use a fork to combine until the dough comes together.
Scoop large spoonfuls of dough evenly over the fruit. Bake for 40-45 minutes until golden and set.
Let cool for at least 10 minutes. Serve with fresh whipped cream or ice cream!
gluten free and vegan fruit cobblergluten free and vegan fruit crisp
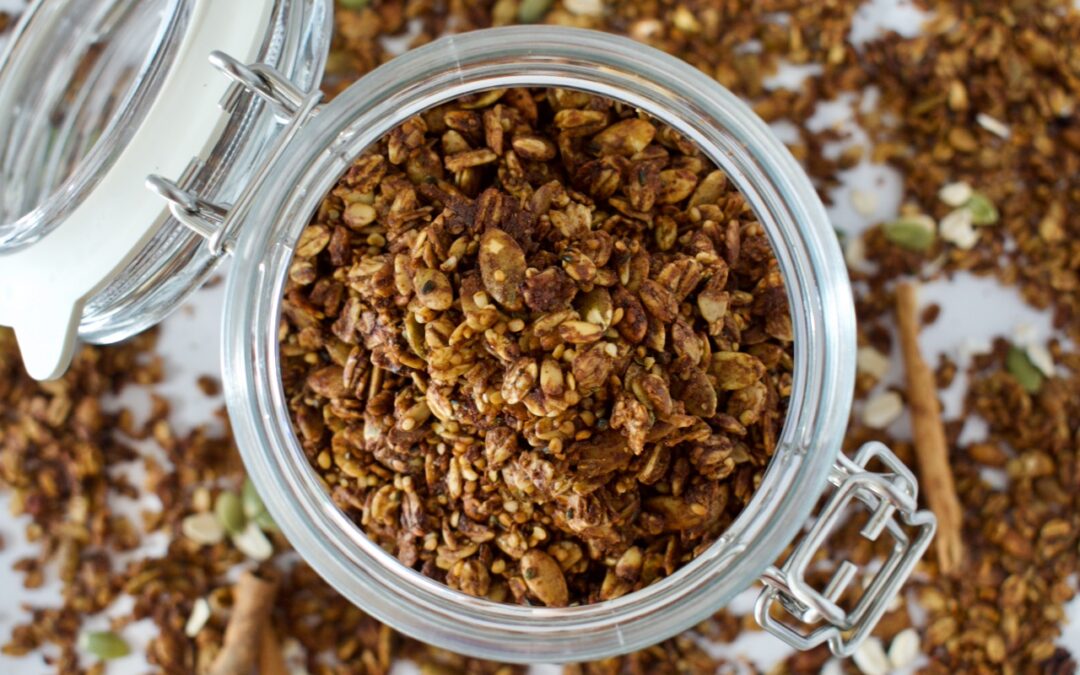
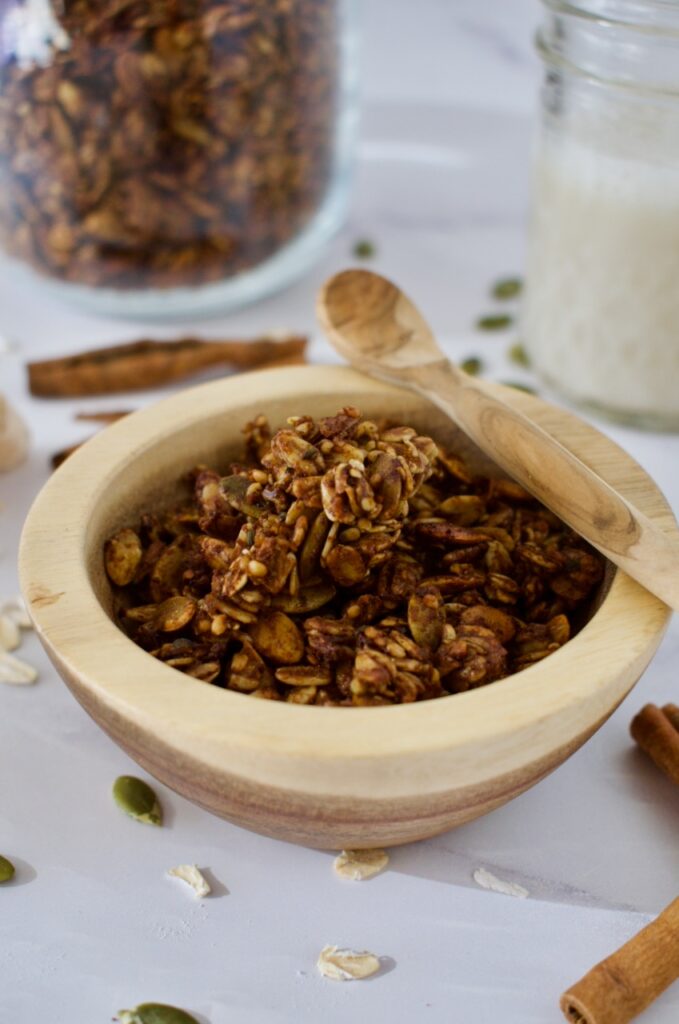
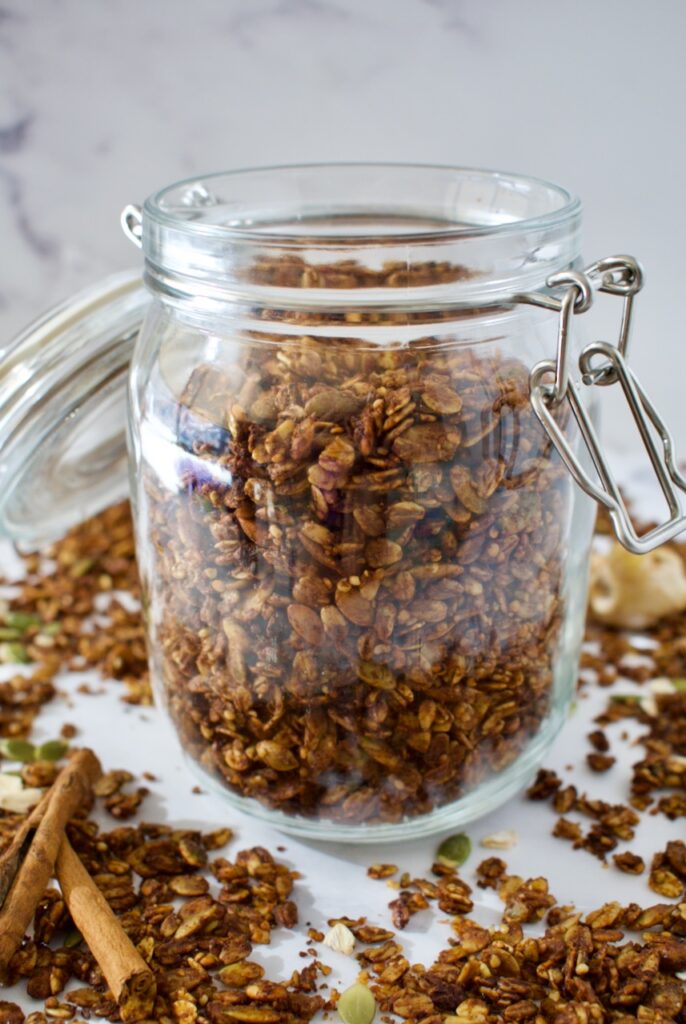
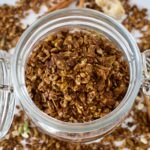
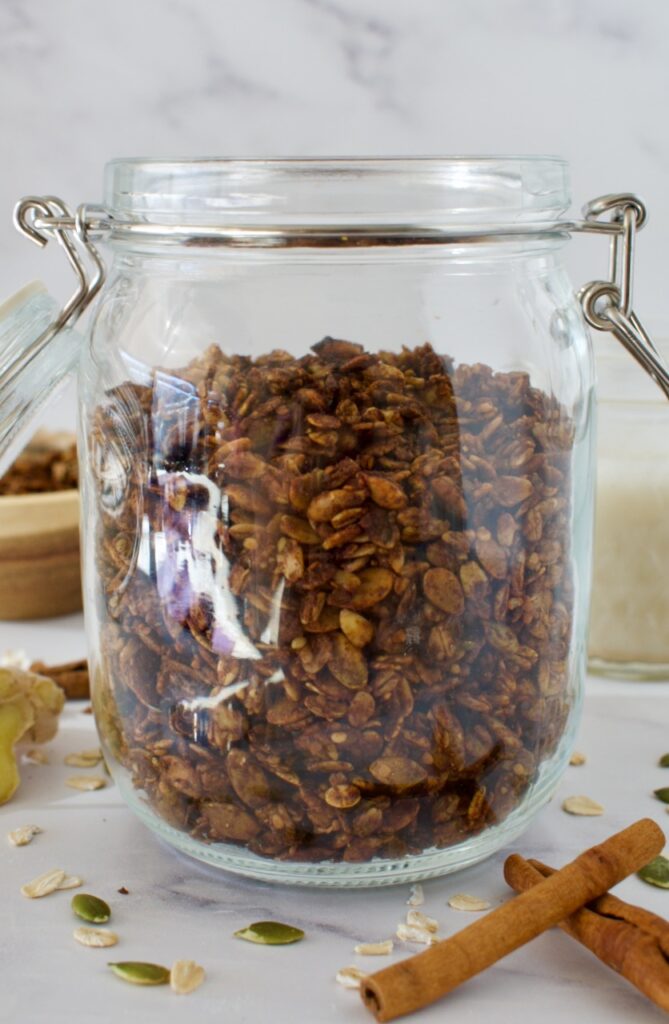
I’m so excited to be sharing this delicious and healthy version of gluten free cereal. This gingerbread gluten free granola is so good and one of my favorite winter recipes with the warming spices, rich molasses flavor, and touch of sweetness. This granola recipe is allergy friendly, vegan, and nut free.
gluten free granola
Ingredient Notes
Dry Ingredients: One thing I love about homemade granola is how versatile it is. You truly can add whatever you have in the pantry to oats and it will taste good. I provide specifics that I think taste good in this recipe to keep it a nut free granola, but you can sub out the seeds for your favorite nuts, like walnuts or almonds.
One thing to note is that, although oats are naturally gluten free, they often encounter cross contamination during the processing and packaging of them. This is why it is important to use certified gluten free oats if you have a gluten allergy or celiac disease.
This granola recipe also calls for a combination of gingerbread spices, including cinnamon, ginger, and nutmeg. They really pull this recipe together!
Wet Ingredients: The wet ingredients in this recipe are a combination of pumpkin puree, maple syrup, oil, and molasses to keep it a completely vegan granola. The pumpkin and molasses are important for that rich, grounding gingerbread flavor. The molasses and maple syrup add the perfect amount of sweetness without being overbearing like some store bought cereals can be. We’re keeping this a low sugar granola and healthy granola!
nut free granola
How do you make granola? It’s super easy! All you do is mix everything together in a big bowl and bake it. One key to getting evenly crunchy homemade granola is to spread your mixture evenly over a baking sheet. Then you want to mix it regularly during the baking process so that all of the granola bakes evenly. You also want to make sure not to over bake it. Granola can burn quickly, so you want to keep an eye on it and take it out before you think it’s done. Homemade granola hardens as it cools and that is where the crunch will come from.
This delicious and warming allergy friendly granola is gluten free, vegan, and nut free. It incorporates warming spices and a touch of sweetness for the perfect healthy, homemade granola recipe!
1tspflaky sea saltuse 1/2 tsp regular salt if you don't have flaky
1/4cuppumpkin puree
1/3cup maple syrup
1/4cupolive oilmelted coconut oil also works or another neutral oil
1/4cupmolasses
Instructions
Preheat oven to 350F.
Mix the oats, pumpkin seeds, hemp seeds, spices, and salt together in a large bowl.
Combine the pumpkin, maple syrup, oil, and molasses together in a small bowl.
Add the wet ingredients to the dry and mix to combine well so all the dry ingredients are coated.
Spread the granola mixture over a large, parchment lined baking sheet in an even layer.
Bake for 15 minutes then mix the granola and bake for another 15 minutes. The granola is done when it starts smelling fragrant and the granola around the edges of the pan are starting to really brown. Let the granola cool at room temperature, it will harden up and get nice and crunchy!
I like to store my granola in the freezer. It keeps it crunchy and fresh! Either way, be sure to keep granola stored in an airtight container.
Notes
*You can sub the nuts for 1.5 cups of your favorite nut or seed blend!
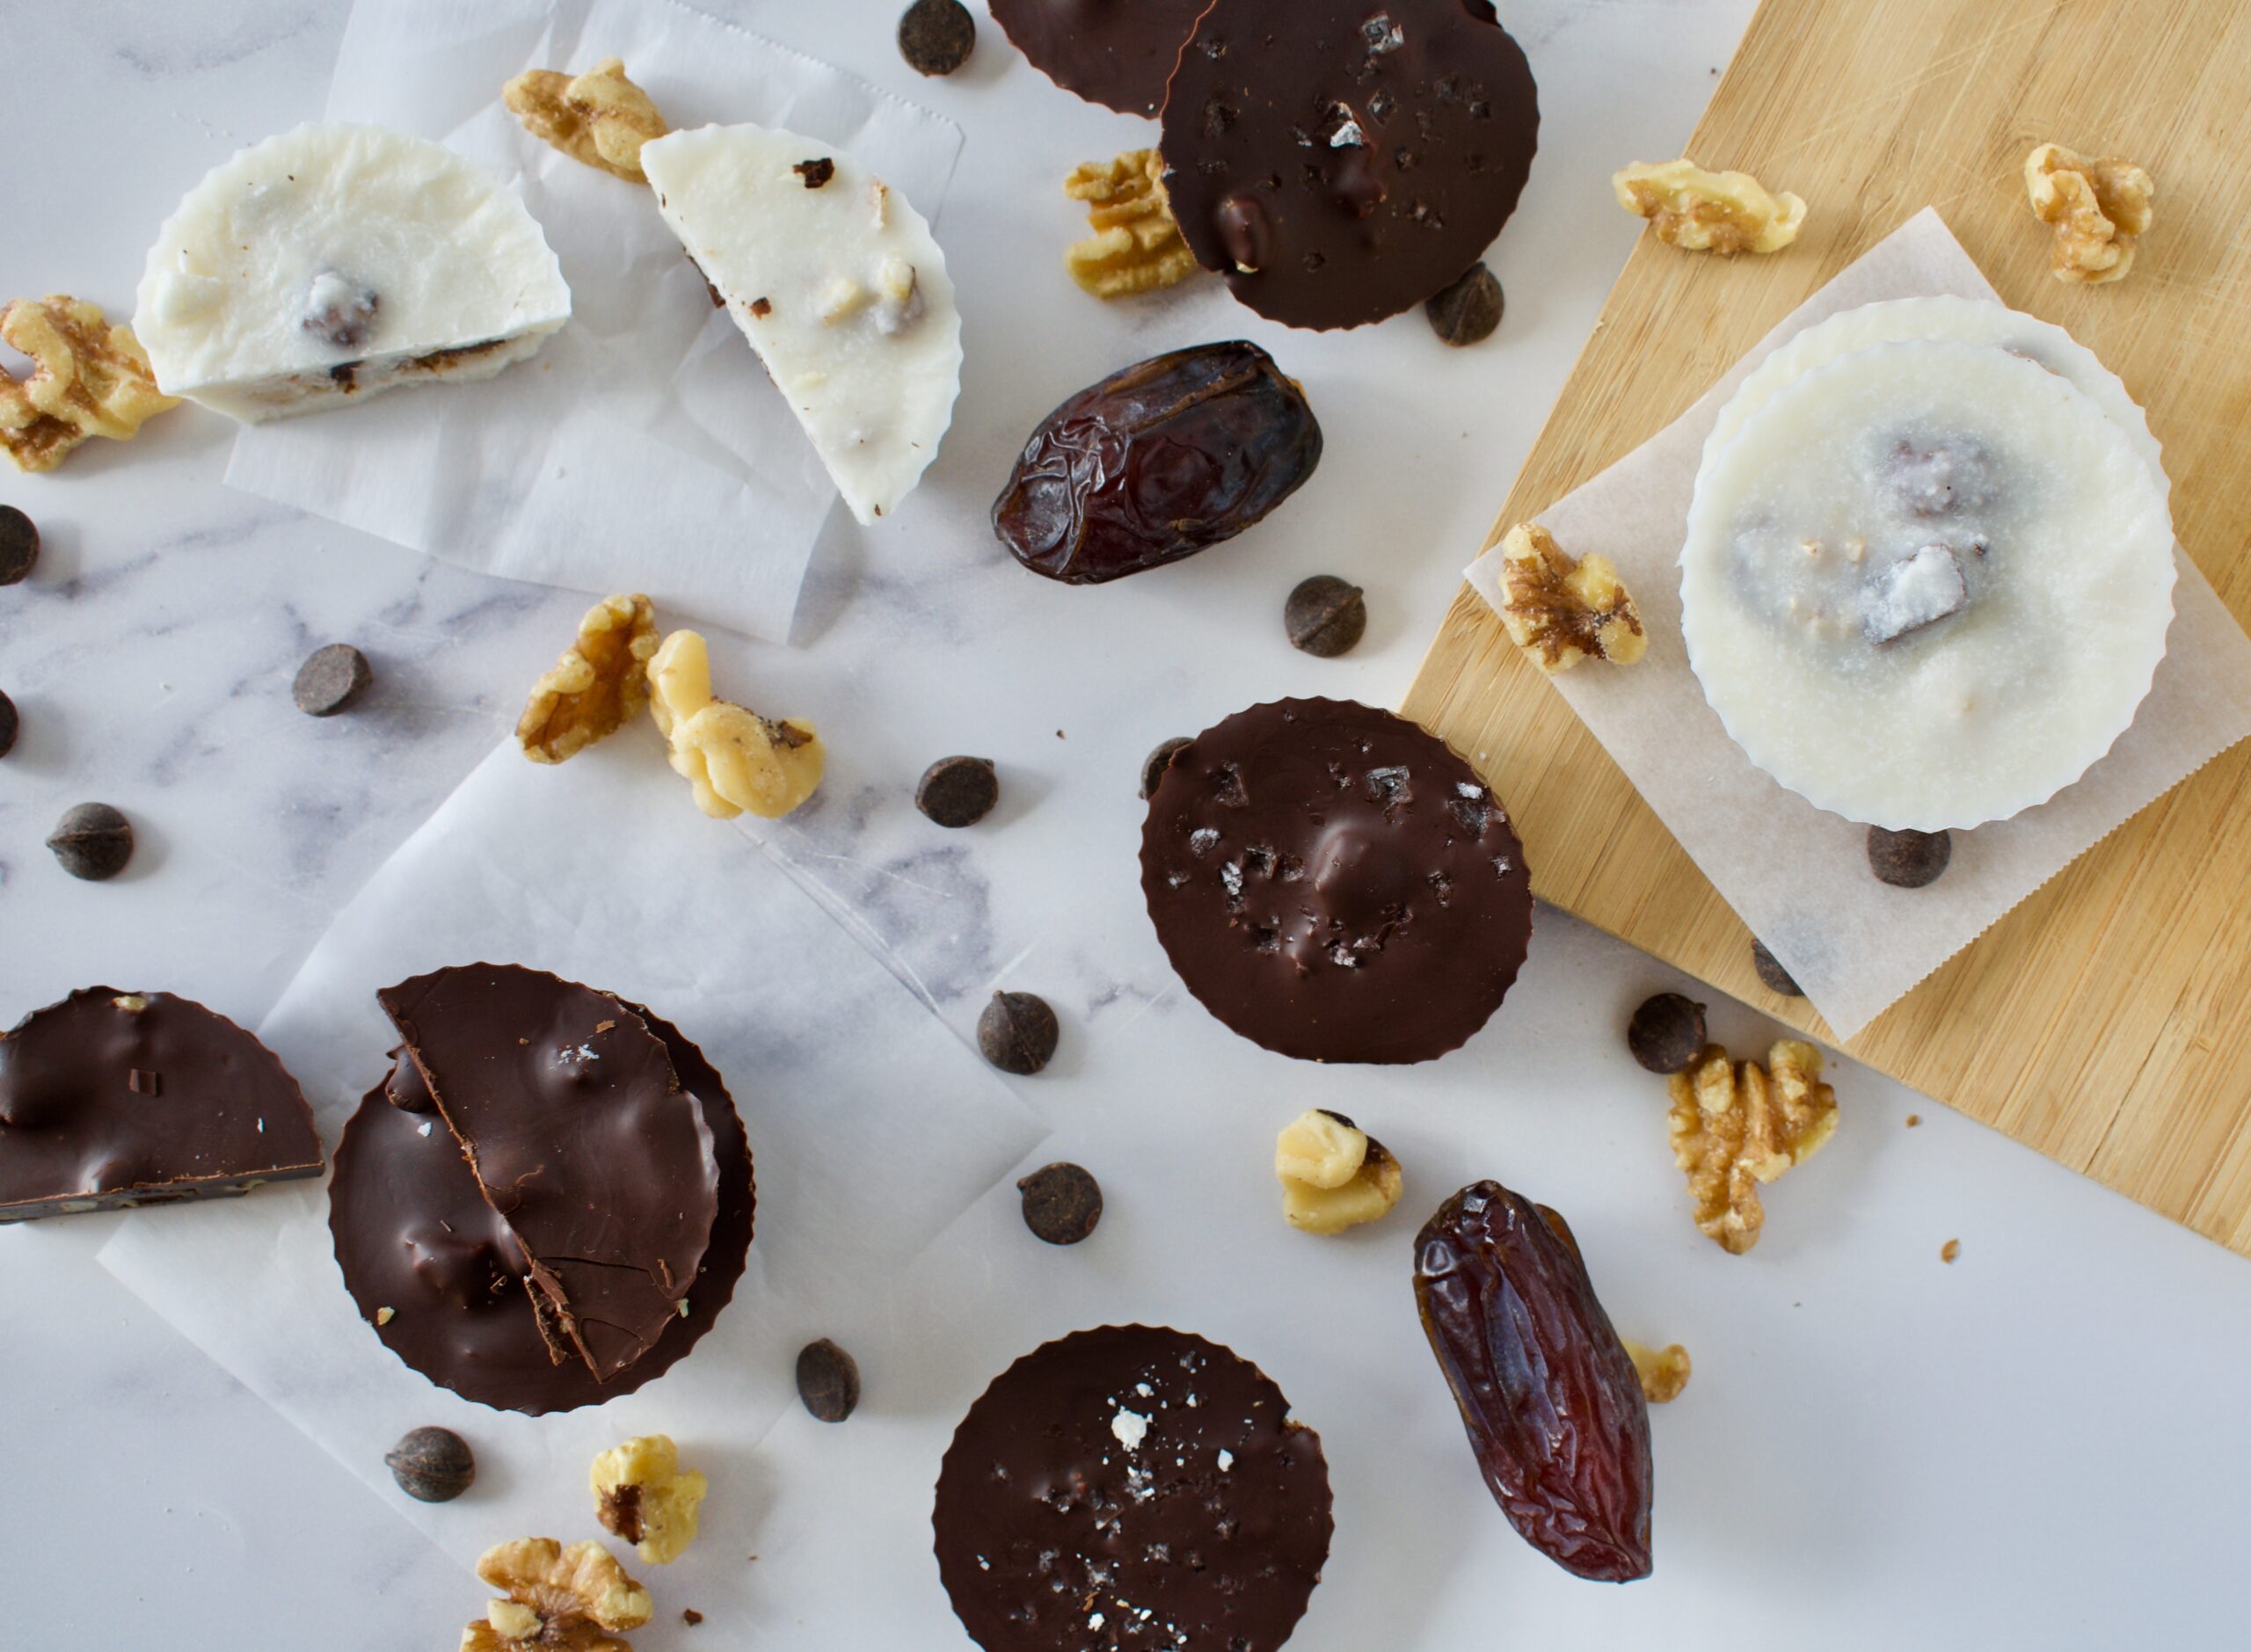
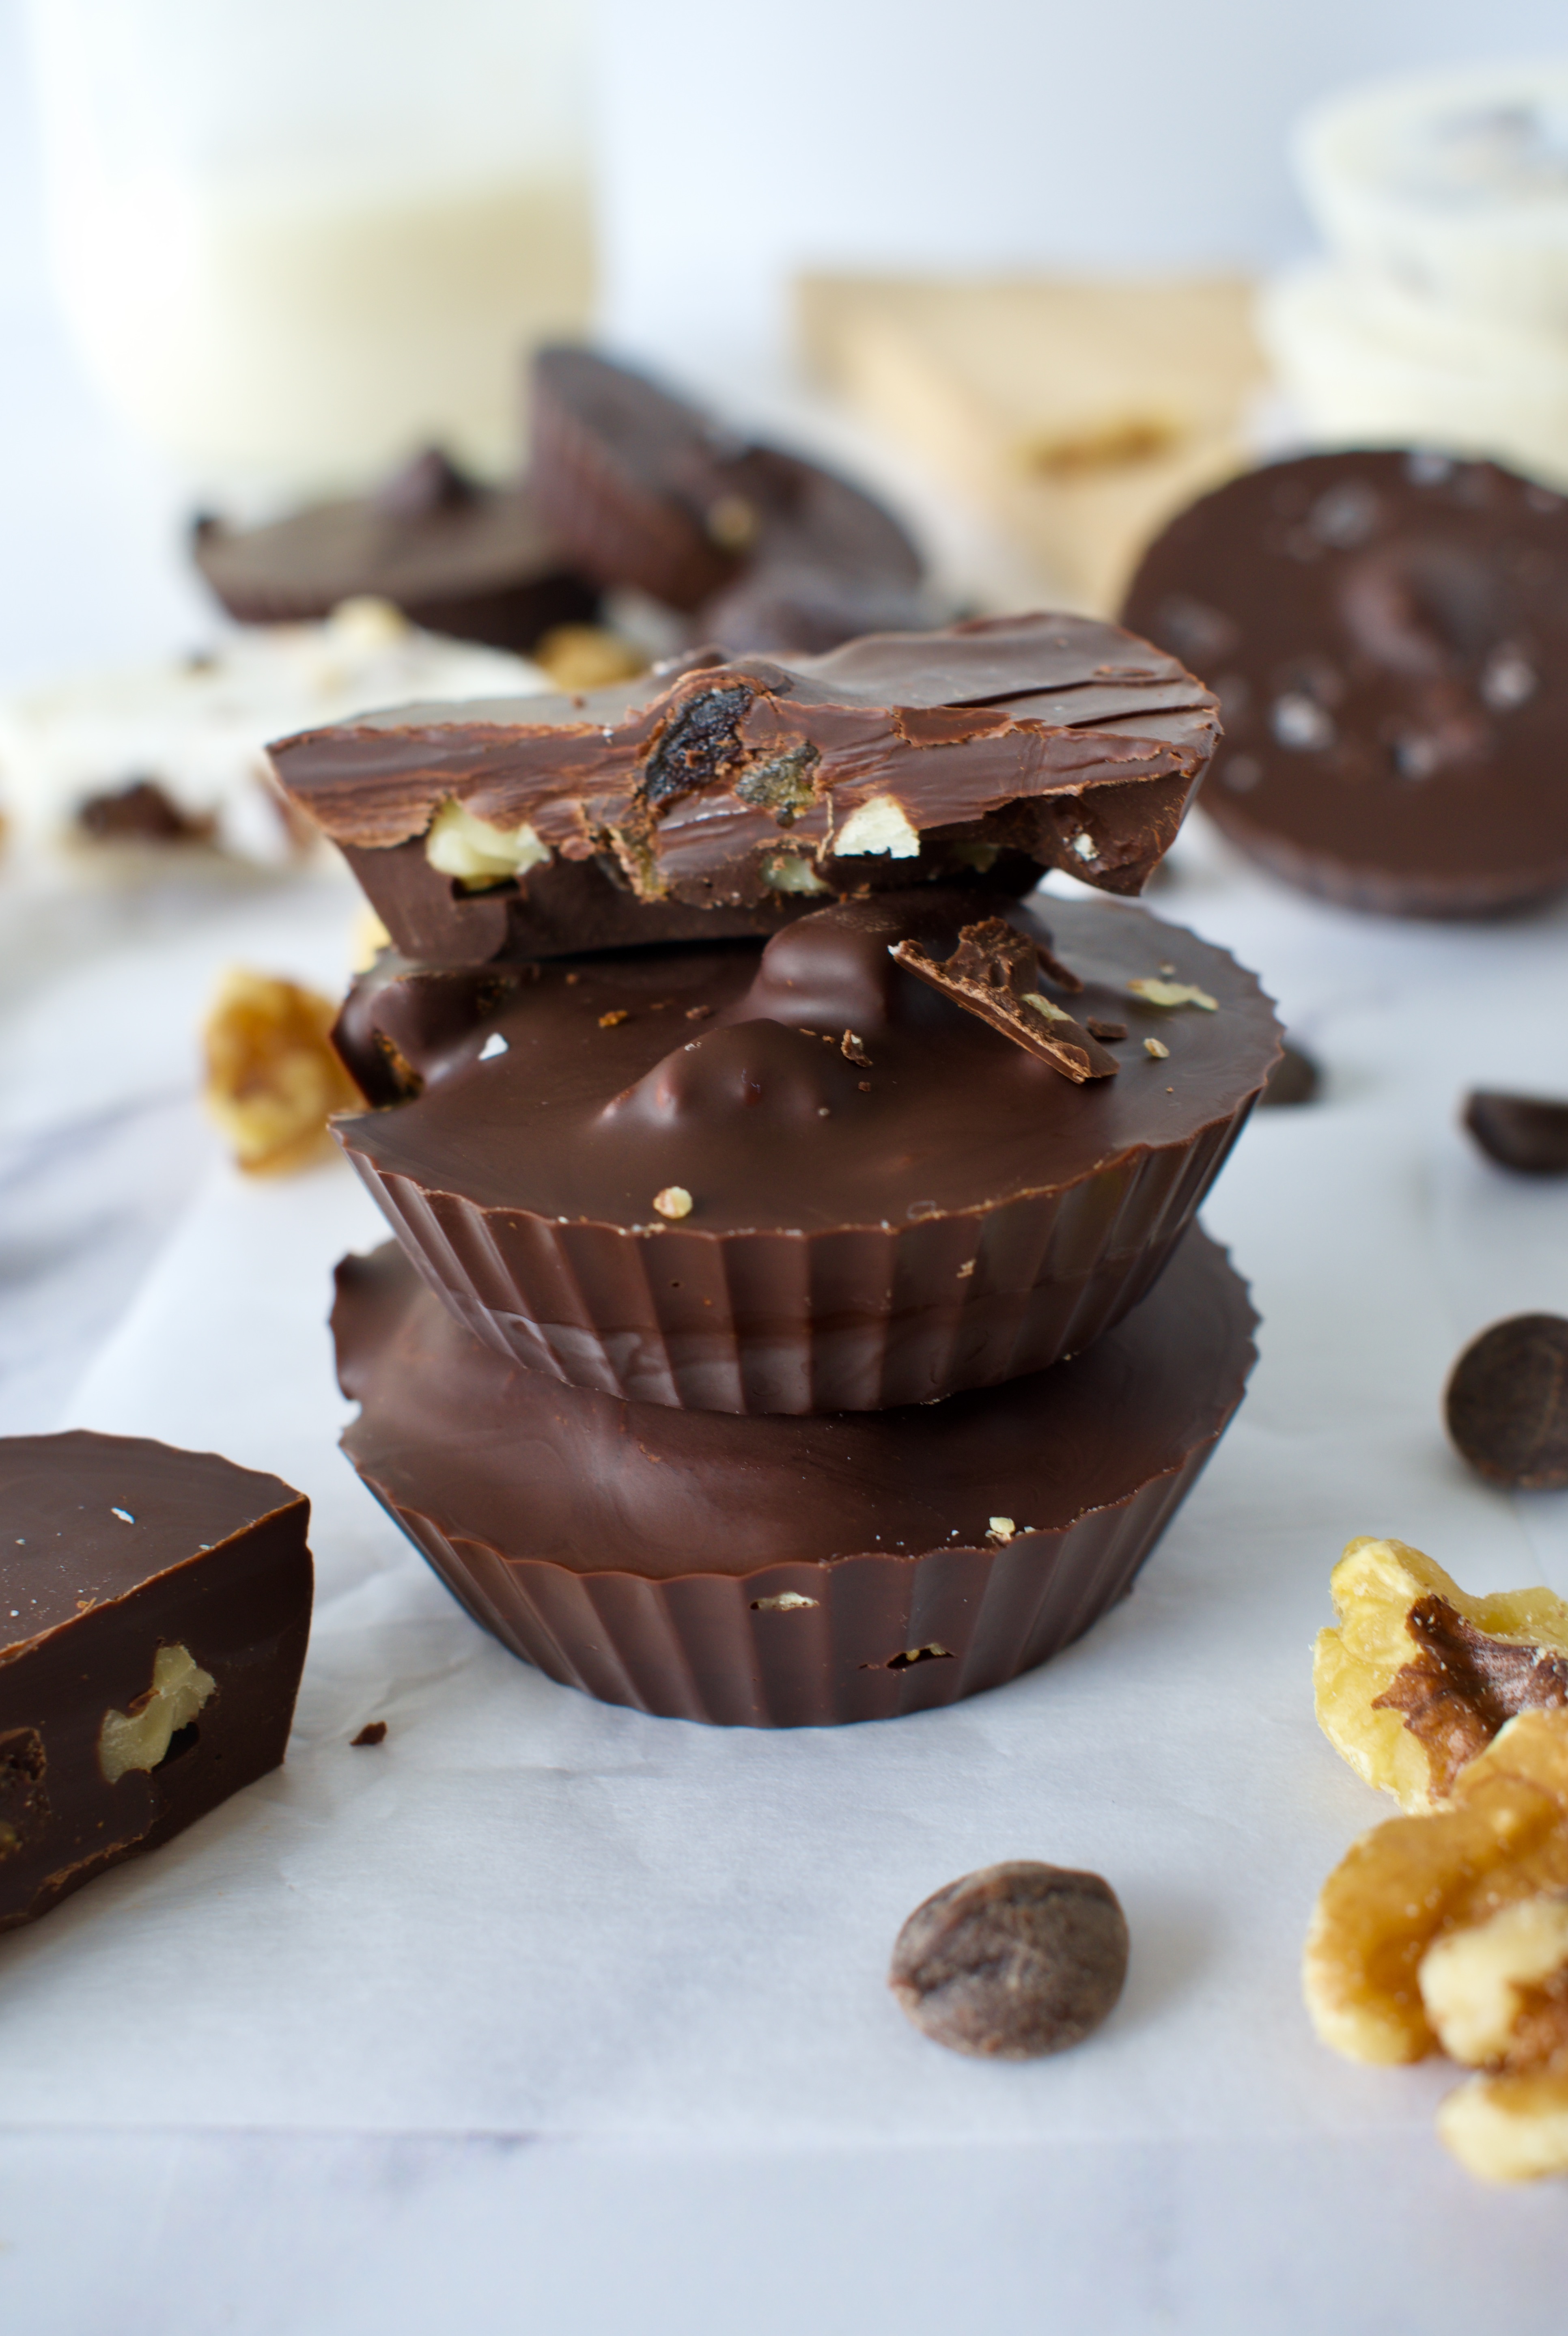
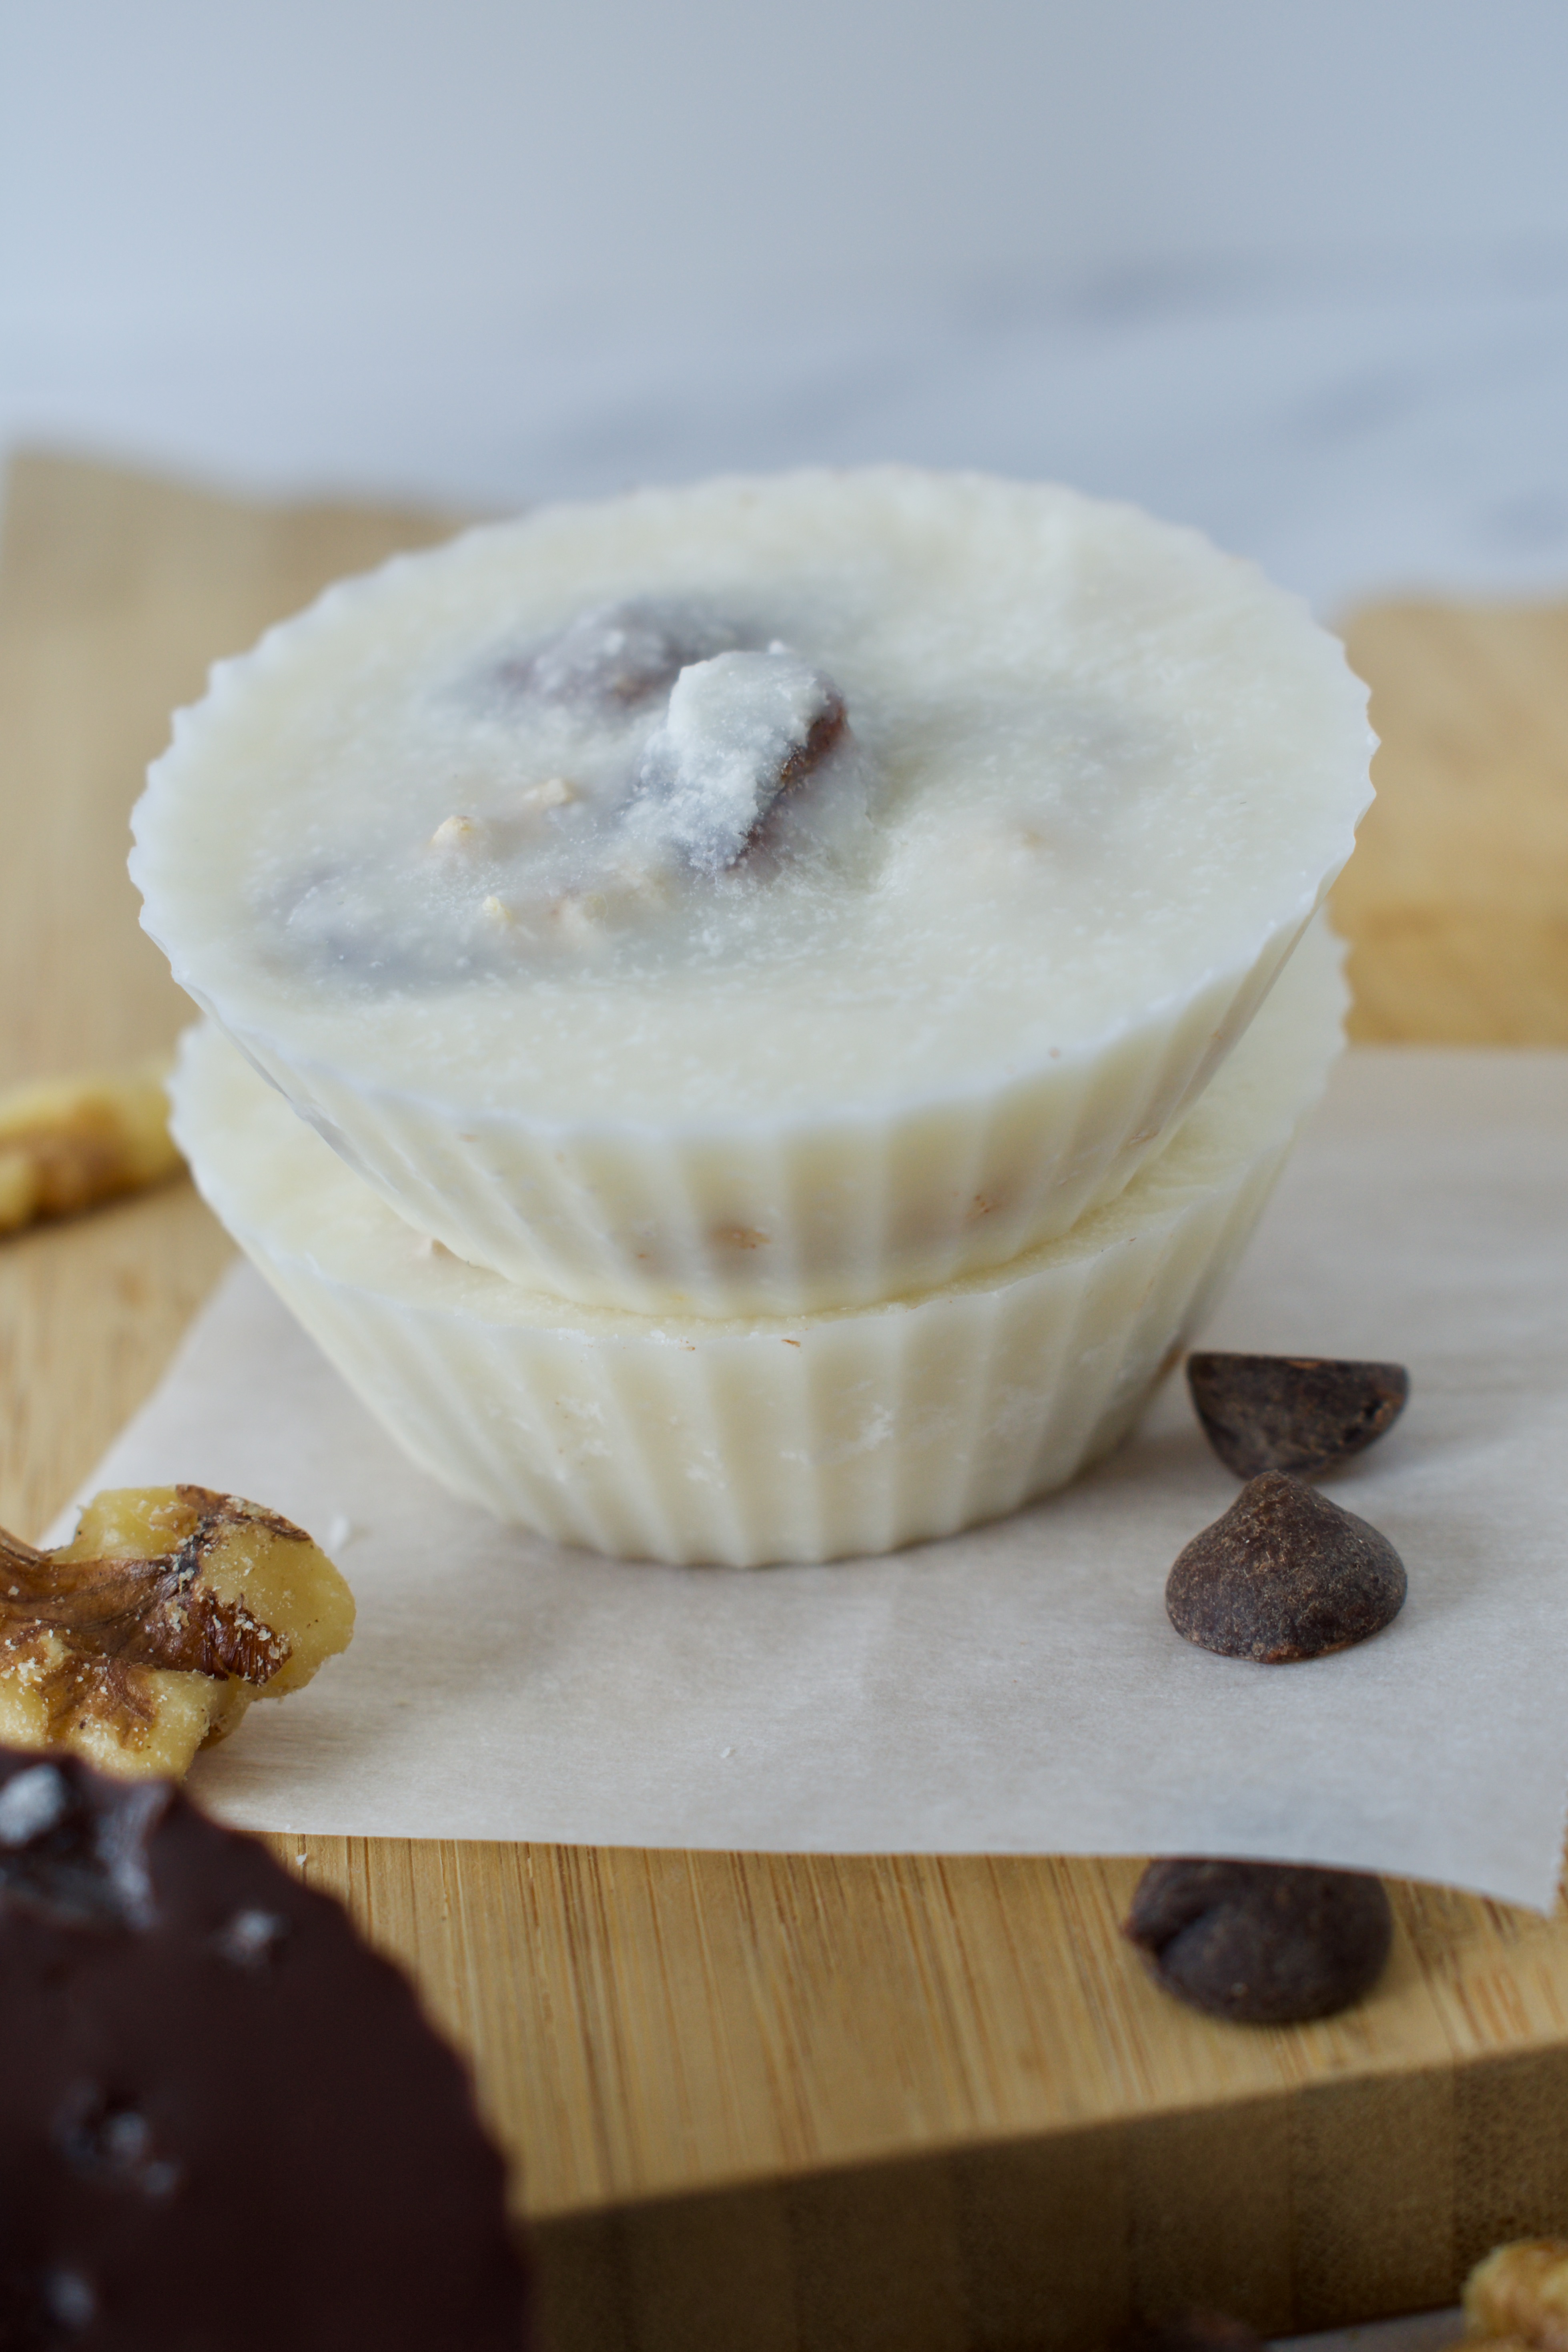
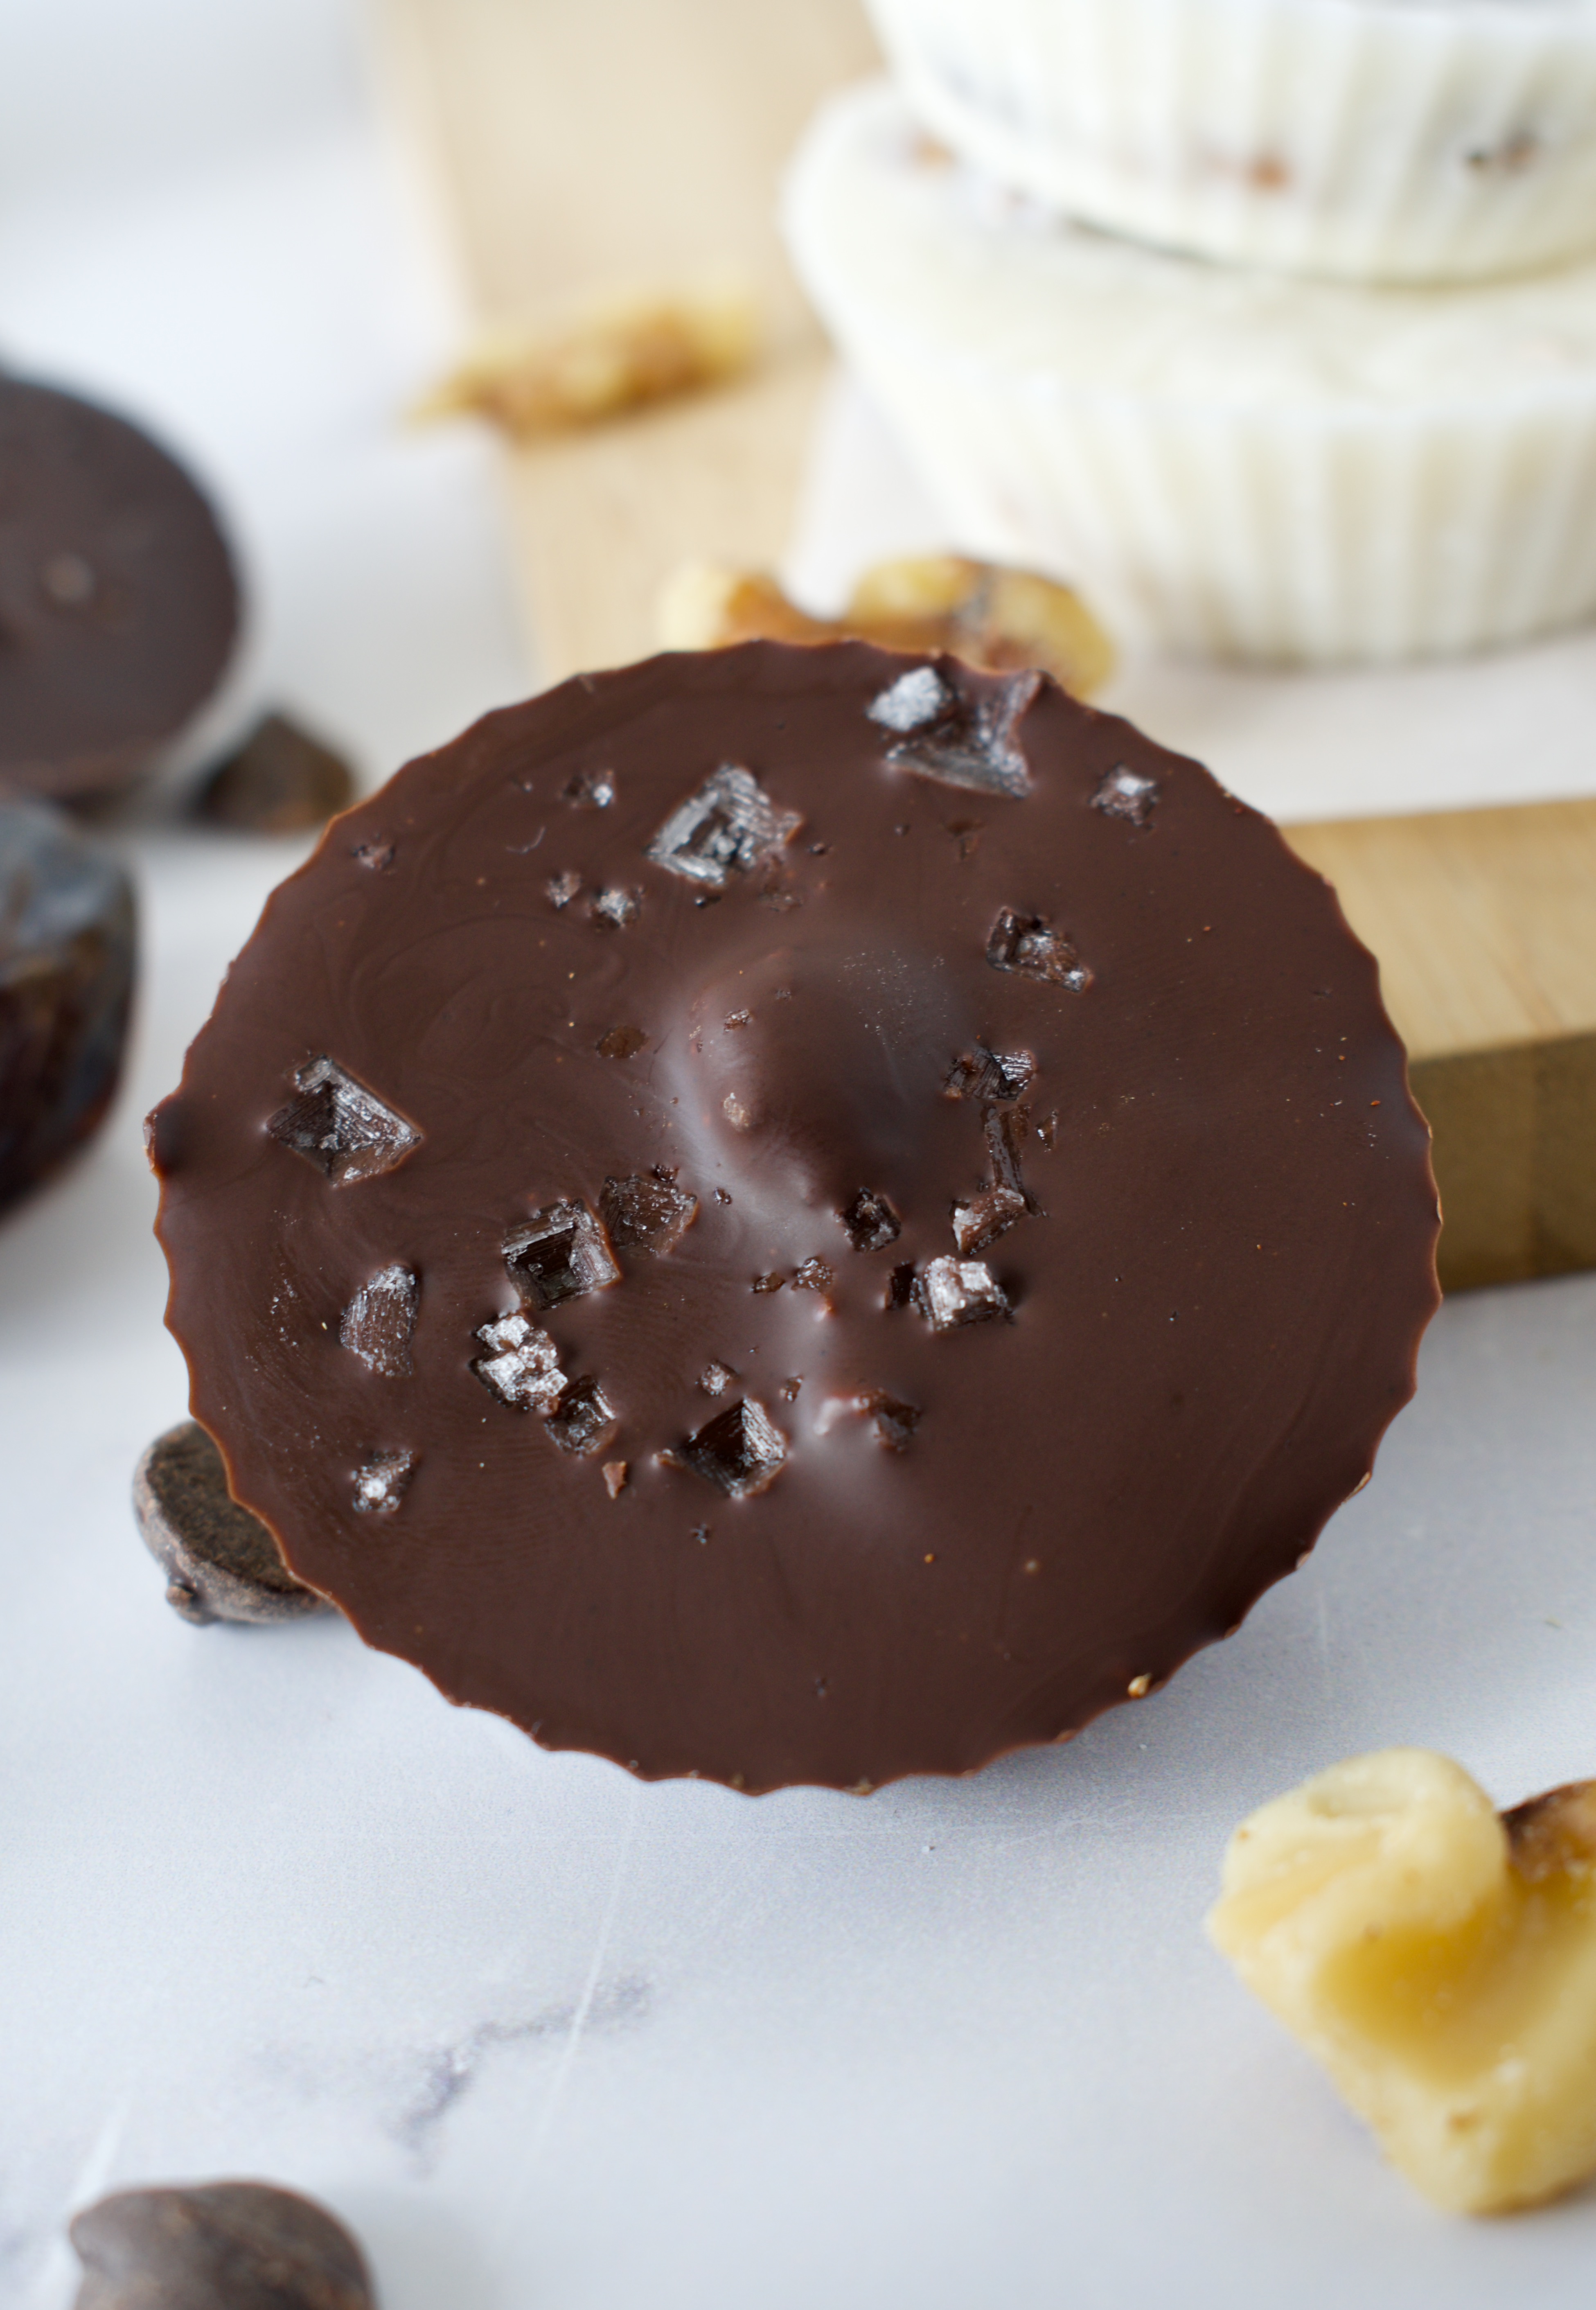
If you’re trying to eat healthier, but still want candy, then you’ve got to make these walnut-date cups! These are super easy to make and perfect for Halloween! Save yourself, and the kids, the sugar rush with this more balanced treat.
These chocolate and coconut butter cups are completely gluten free and vegan. They are filled with walnuts for that crunch and dates for natural sweetness. We mix the filling with some cinnamon to bring it all together. I prefer to use dark chocolate for the chocolate cups to keep it dairy free and low sugar, plus that’s the best chocolate. The coconut butter cups use pure coconut butter, no added sugars! Balance the sweetness with some flaky salt on top.
Lower sugar and healthier candy is possible! Switch up the Reese’s for these brain boosting walnut and date cups. Keep them low sugar with dark chocolate or sugar free by using naturally sweet coconut butter
1cupchocolate chipsEnjoy Life is my preferred, allergy friendly brand
1tbspcoconut oil
3/4cupmelted coconut butter
1/2cupchopped walnutsYou can substitute the walnuts for your favorite nut or seed!
1/2cupchopped dates
1tspcinnamon
Flaky salt
Instructions
Line a muffin tin with silicone or paper liners.
Melt the chocolate chips and coconut oil together in the microwave at 30 second intervals or over the stove.
Pour 1 heaping teaspoon of melted chocolate in the bottom of 6 cups. Enough to cover the bottom of the cup.
Pour 1 heaping teaspoon of coconut butter in the bottom of the other 6 cups.
Pop the muffin tin in the freezer for 10 minutes, until the butter and chocolate has hardened.
Combine the walnuts, dates, and cinnamon together in a bowl.
When the cups are ready, place about 1-2 teaspoons of the filling in each cup. Spread it evenly over the cup so you have an even layer.
Top each chocolate cup with ~2 teaspoons of melted chocolate (if the chocolate began to harden, zap it in the microwave for 10 seconds until smooth and melted again). You want enough chocolate to cover the filling. Sprinkle some flaky salt on top if desired (I highly suggest doing so!).
Repeat this process with the coconut butter cups. I don’t suggest salt for the coconut butter cups, it compliments the chocolate cups better.
Place back in the freezer until cups are solid (at least 20 minutes), then transfer to a glass container and store in the fridge for up to a week. You can keep any leftovers in the freezer.
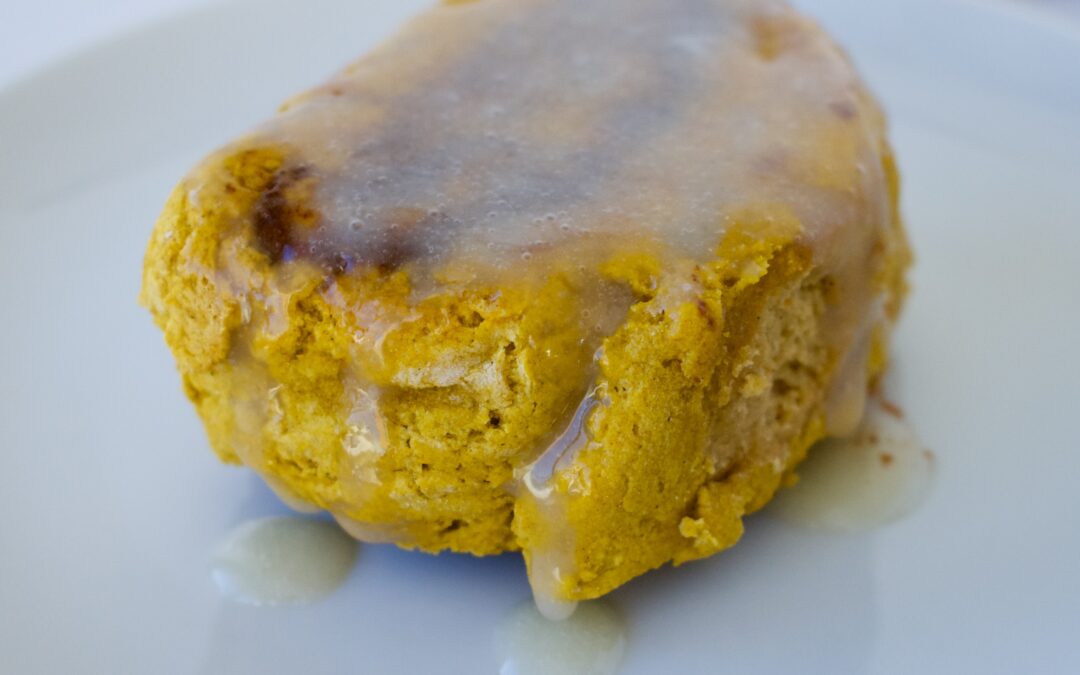
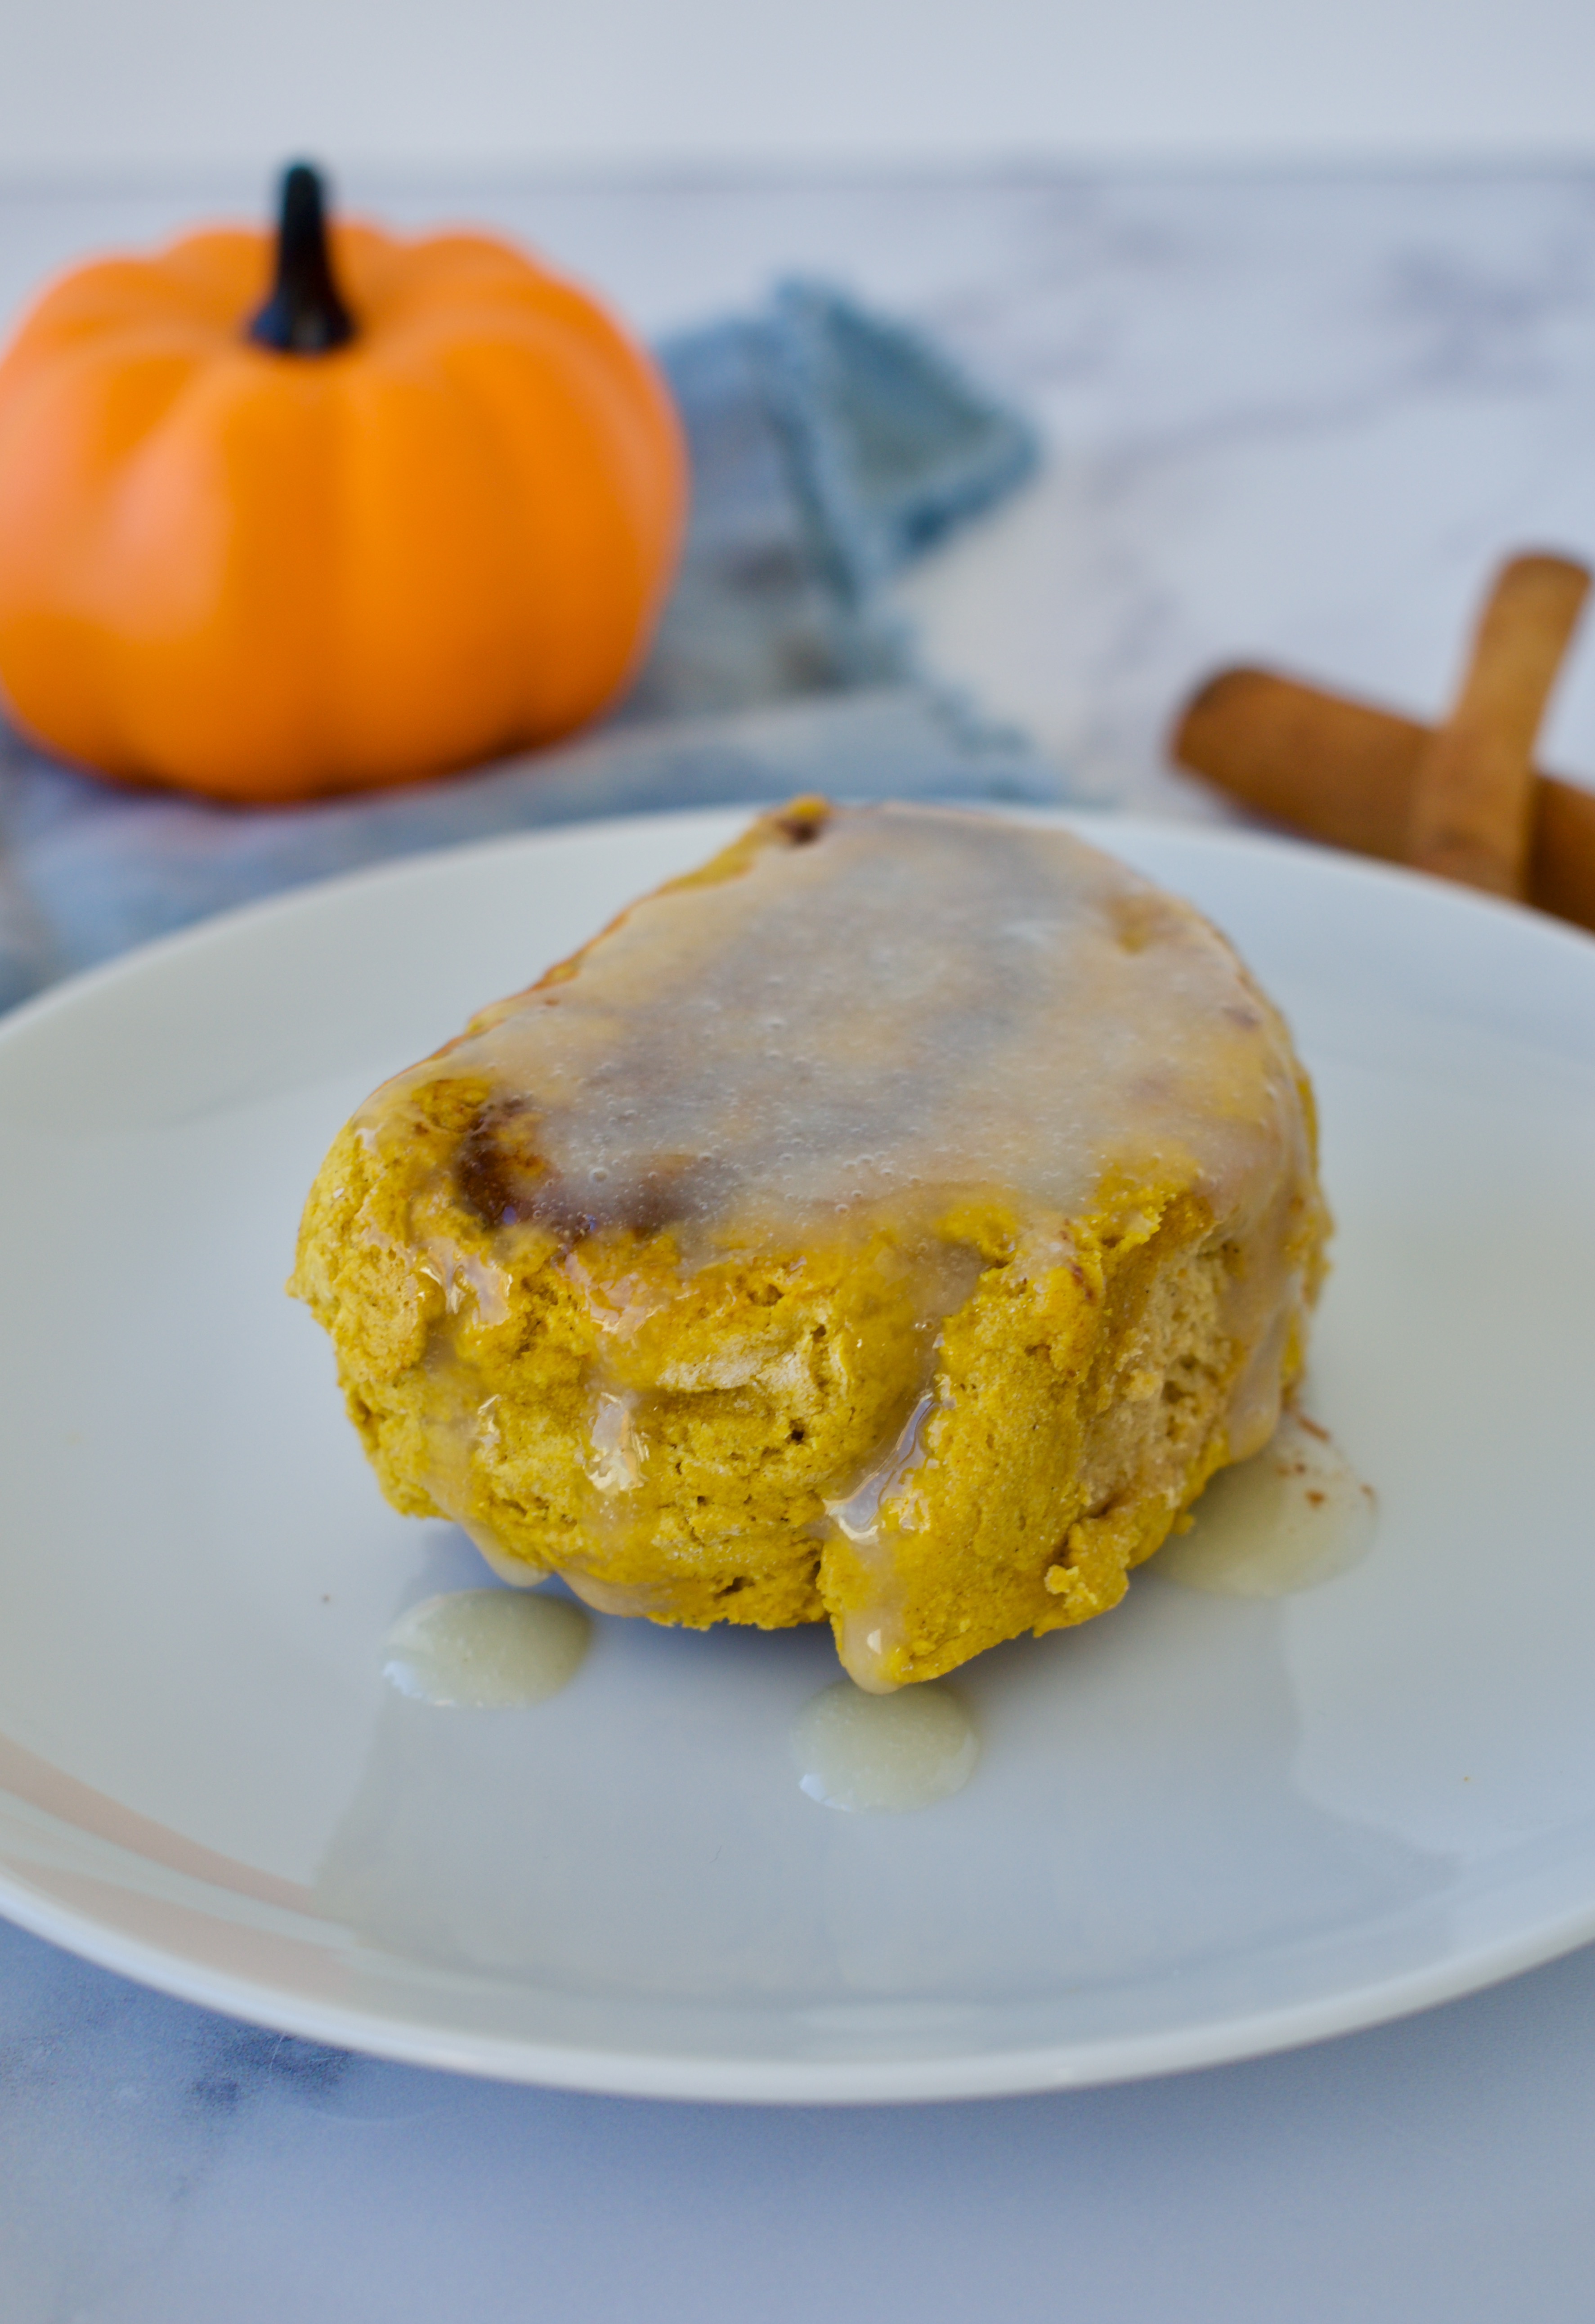
Cinnamon rolls are delicious all year round, but pumpkin cinnamon rolls scream fall. These delicious rolls are completely gluten free and dairy free with a vegan option. They are also healthier than traditional cinnamon rolls, so they are a great addition to breakfast.
If you haven’t heard, there’s been a viral 2-ingredient dough going around the internet over the last year. This is where you combine Greek yogurt and self-rising flour in a 1:1 ratio to create an easy dough that can be used for pizza, bagels, rolls, and more. We’re amping up that dough in this recipe to create this simple pumpkin cinnamon rolls.
What is Self-Rising Flour?
Self-rising flour contains baking powder. If you don’t have gluten-free self rising flour at home, it’s easy to make! All you have to do is combine 2 cups of 1:1 gluten-free flour (it must have a binder like xanthum gum in it!) with 3 teaspoons of baking powder and 1/2 teaspoon of salt. Mix everything well and you are ready to go!
What Yogurt Should I Use?
Although the original 2-ingredient dough calls for Greek yogurt, I use a vegan yogurt in this recipe to keep it dairy free. This means we have to use a bit more flour. I have tried this recipe with both Oatly oat yogurt and Forager Project cashew-coconut yogurt. I find the cinnamon rolls come out best with the Oatly yogurt, but you should be able to sub in a different brand if needed.
What’s the Best Ratio of Flour to Yogurt?
You may use up to 2 cups of self-rising flour in this recipe depending on the yogurt you use. If you decide to use Greek yogurt, you’ll start with just 1 cup of flour. If using a vegan yogurt, you’ll start with 1 1/4 cups of flour and increase as needed. Don’t worry, I walk you through the entire process to get the right dough consistency in the recipe below.
How Do I Make This Recipe Vegan?
I added an egg to the dough because I think that gives it a better rise, especially with gluten-free flour, but you can sub the egg for another 1/4 cup of vegan yogurt to keep the entire recipe plant-based!
These healthy Pumpkin Cinnamon Rolls are gluten-free & dairy-free and can be made completely vegan too! We're amping up the viral 2-ingredient dough for these easy, no-yeast cinnamon rolls.
Course Breakfast, Dessert, Snack
Cuisine American
Keyword Easy, No Yeast
Servings 10rolls
Author Victoria
Ingredients
Dough
1/2cupGreek yogurt or vegan yogurt
1egg*use another 1/4 cup of vegan yogurt for vegan version
1/4cuppumpkin puree
1tspvanilla extract
2tbspcoconut sugar
2cupsself-rising 1:1 gluten free flour*see note for homemade version
Filling
3/4cuppumpkin puree
2tbspcoconut sugar
1 tbspcinnamon
Icing
1/4cuppowdered sugar
1tbspyogurt of choice
1/2 tspvanilla extract
1tspmelted coconut oil or butter
Instructions
Preheat the oven to 350F.
Combine yogurt, egg (or more yogurt), pumpkin, vanilla, and sugar together in a large bowl. If using Greek yogurt, add 1 cup of the flour to start. If using vegan yogurt, add 1 1/4 cup of flour.
Mix gently with a rubber spatula to combine. We want to create a dough that holds together and isn’t very sticky to the touch. If the dough is really wet and sticky still, add another 1/4 cup of flour then add flour 1 Tbs. at a time after that as necessary until you reach the right consistency.
Once the dough begins to come together, use your hands to gently need the flour into the dough and create a dough ball that isn’t too wet and can be held without it completely sticking to your hands.
Lay out a large piece of parchment paper (at least 15-20 inches long so you have enough space to work on) and flour your work surface.
Place the dough on the floured surface and lightly flour the top of the dough, as well. Use a rolling pin to roll the dough into about a 10″x12-15″ rectangle that is about 1/4inch thick.
Combine all your filling ingredients in a bowl and mix will.
Spread the filling in a thin layer over the dough.
Starting at one end, use the parchment paper to help you roll the dough medium-tight.
I find using a knife run under cold water works best for cutting the rolls. You want to cut the dough in 1 inch increments. Place the rolls 1/2inch apart in a baking dish.
Bake for 30-35 minutes until golden and firm to the touch.
Let cinnamon rolls cool slightly before making the icing.
To make the icing, combine the sugar, yogurt, and vanilla. Mix well. Add in the melted oil or butter and stir quickly. Drizzle the icing over the rolls.
Store in the fridge for up to 5 days and warm up slightly in the oven or microwave before eating.
Notes
Self-rising flour contains baking powder. If you don’t have gluten-free self rising flour at home, it’s easy to make! All you have to do is combine 2 cups of 1:1 gluten-free flour (it must have a binder like xanthum gum in it!) with 3 teaspoons of baking powder and 1/2 teaspoon of salt. Mix everything well and you are ready to go!
Hi! I'm Victoria. I was diagnosed with Lyme in 2012 and have been on a healing journey ever since. I love helping others on their road to healing through allergy friendly recipes, exercise, and overall well-being.