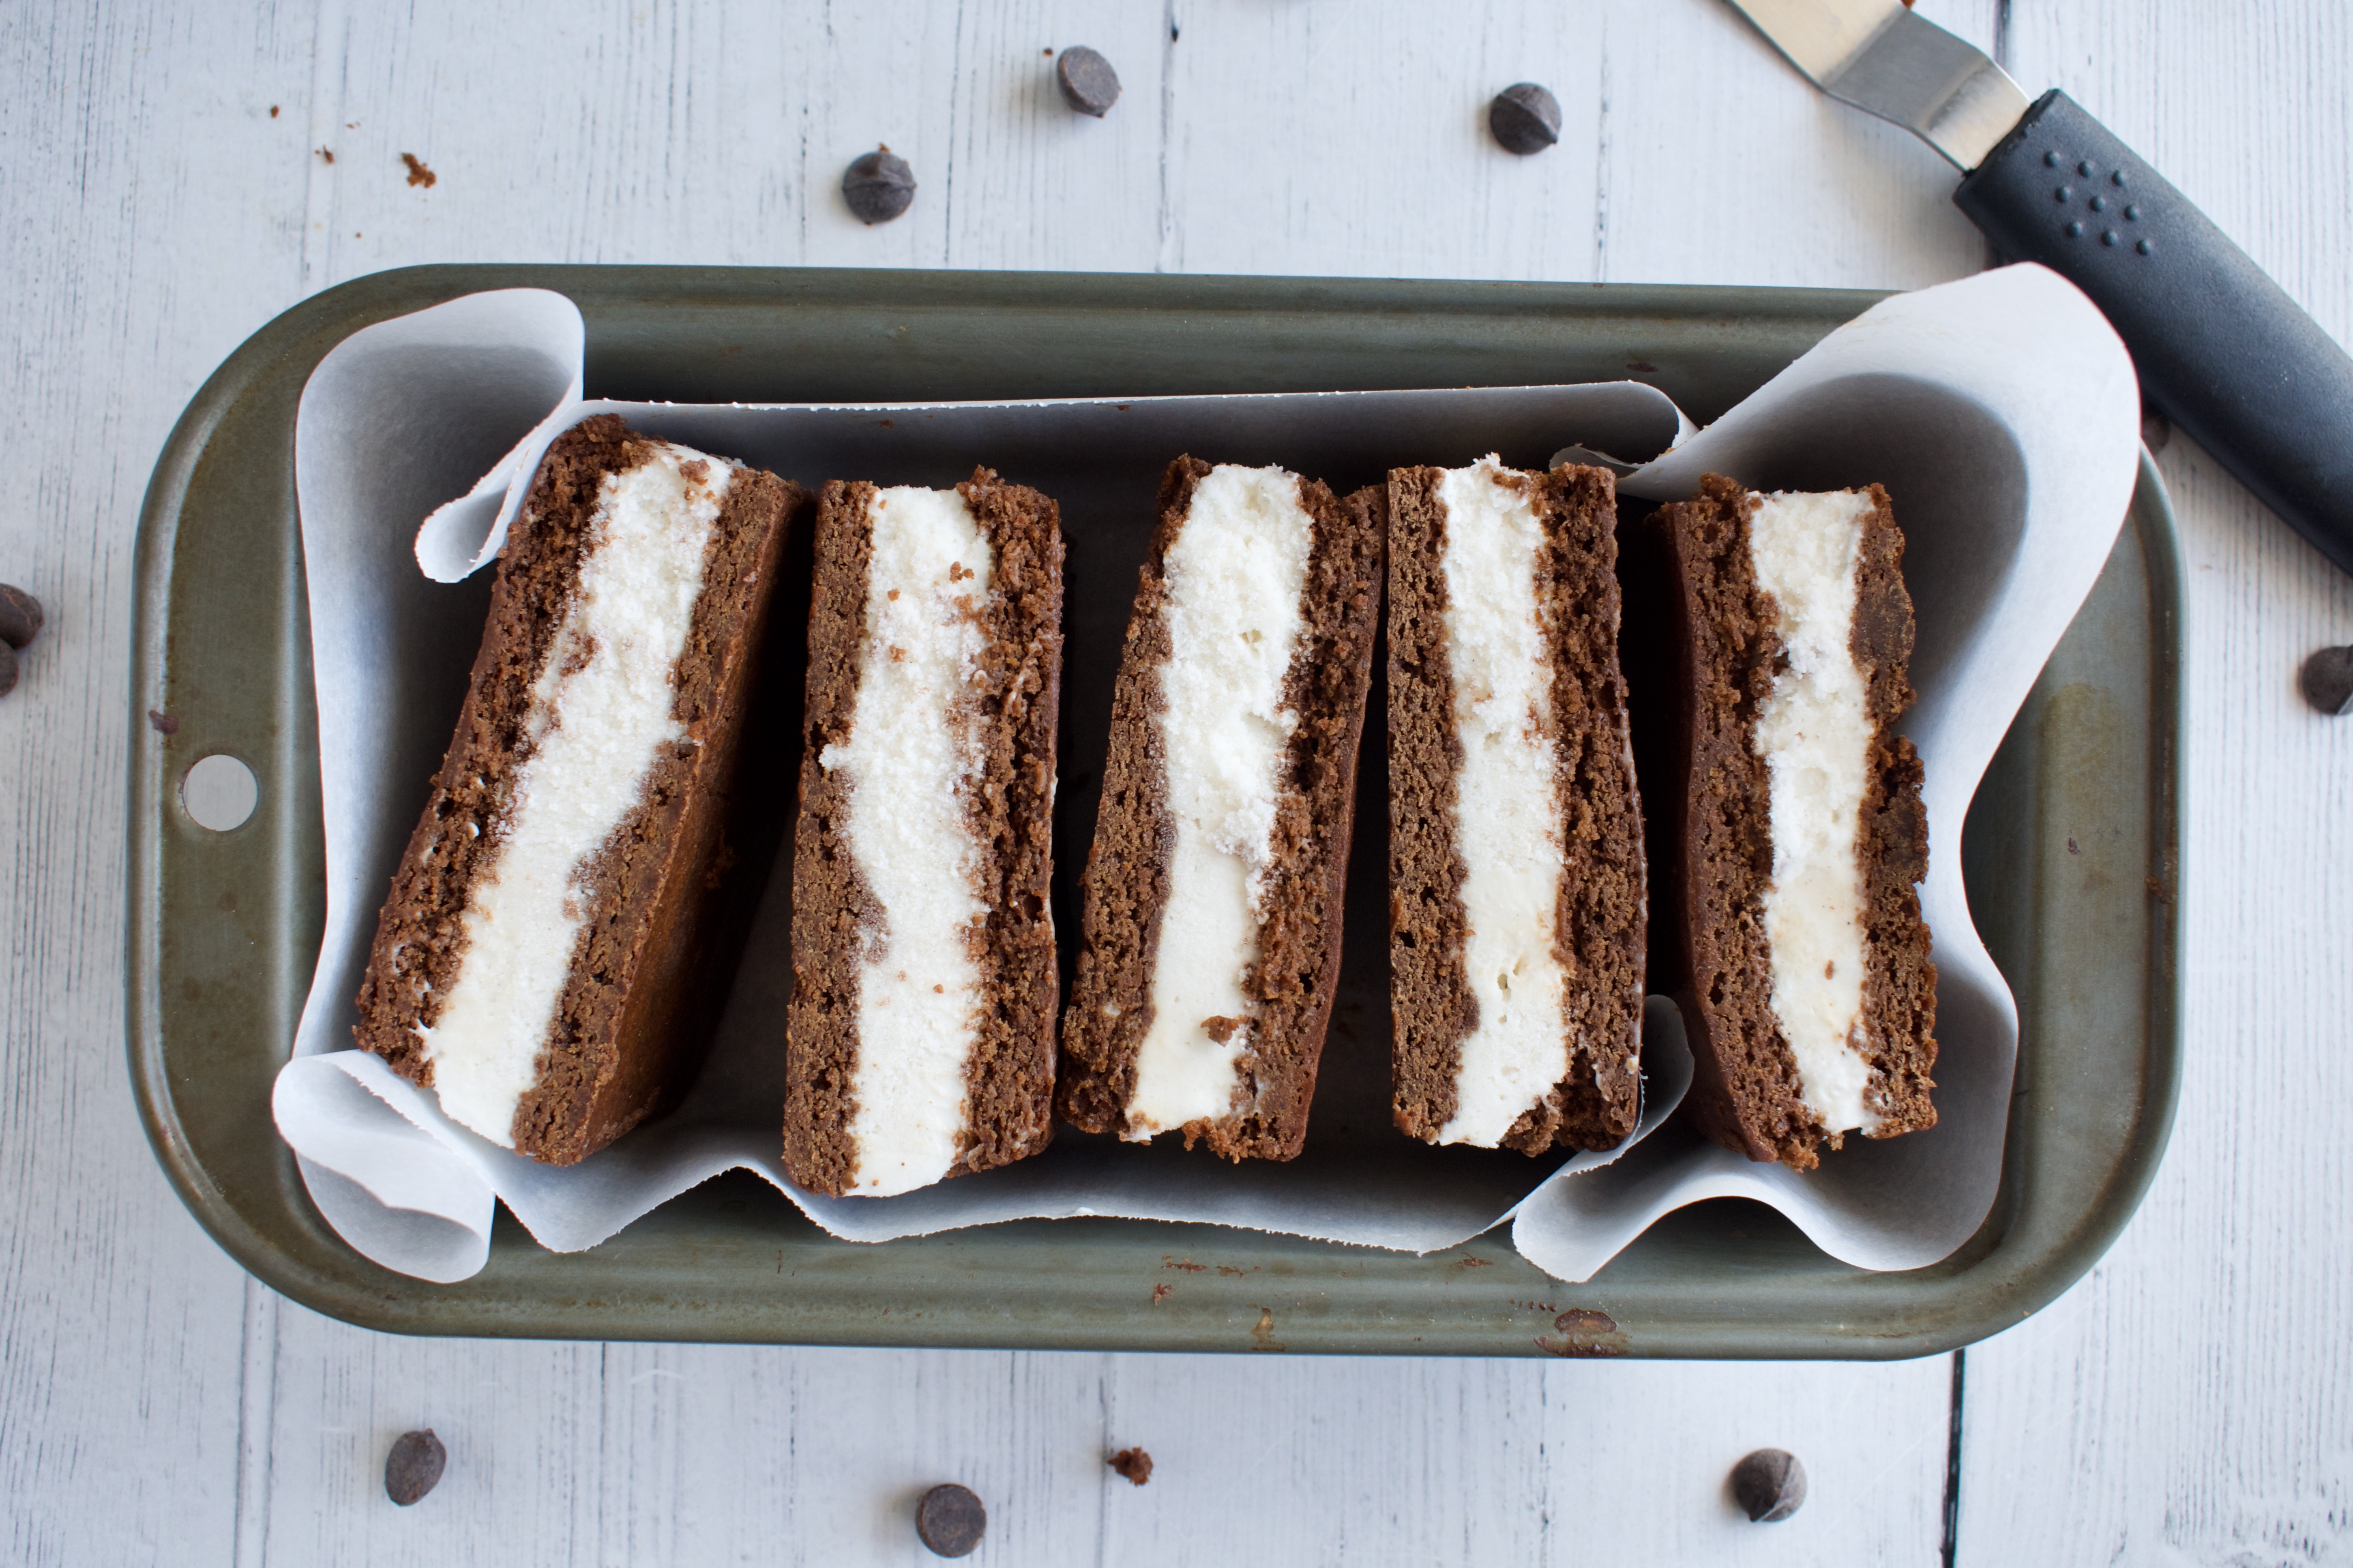
These homemade Ice Cream Sandwiches taste just like the classic. Dairy free ice cream is sandwiched between a gluten free chocolate cookie base and just like when you are a kid, it is stick to your fingers delicious!

Welcome to my Ice Cream Sandwich series! I am so excited about this one. What’s summer without a delicious ice cream sandwich? Not as enjoyable, that’s what. So join me for this series where I’ll be sharing a new ice cream sandwich flavor each week. We are kicking things off with the classic, but I have a ton of fun and unique flavor combos coming. And every single sammie will be gluten free, dairy free, and refined sugar free.
I’m teaching you how to make healthier and allergy friendly ice cream sandwiches this summer and you don’t want to miss out! Make sure you are subscribed to my newsletter or following me on Instagram, TikTok, and/or Pinterest so that you don’t miss a flavor. I can’t wait for you to make some of these healthy ice cream sandwiches. Make sure to share a photo on social media and tag me if you do make these!
How to Make Ice Cream Sandwiches
Ice Cream Sandwich Ingredients:
- 1:1 Gluten free flour
- Tapioca starch
- Cocoa powder
- Baking powder
- Salt
- Coconut sugar
- (Vegan) butter or coconut oil
- Egg and egg yolk
- Milk
- Vanilla extract
- Vanilla Ice Cream
Process:
If you’re making homemade ice cream, be sure to make it ahead of time.
For the cookie base, preheat the oven to 350F.
Whisk the flours, cocoa powder, baking powder, and salt together in a bowl and set aside.
Beat together the melted butter and sugar until combined. Add the egg and egg yolk, vanilla extract, and milk, and beat to combine.
Add the dry to the wet and mix until just combined.
Line a baking sheet with parchment paper then spread the batter over the baking sheet evenly.
Bake for 10 minutes then let cool completely before cutting in half and sandwiching ice cream between the two halves.
Wrap tightly in plastic wrap and place in the freezer to set for at least 3 hours, preferably overnight before cutting.
Ice Cream Sandwich Ingredient Notes
Gluten free ice cream sandwiches are not the easiest to make. It took 4 tries before I nailed the cookie base. The cookies can’t be too firm and dry, nor can they be too light and fluffy, so ingredient substitutions aren’t recommended. There are a few swaps you can make if necessary, though.
Flour: I use my favorite King Arthur 1:1 Gluten Free Flour in this recipe. I have not tested it with any other gluten free flours. I find King Arthur works best in gluten free baking, but make sure to use a 1:1 gluten free flour substitute if you try a different flour variety. I have not tested a Paleo version of this recipe.
Butter: I used Miyoko’s vegan butter in this recipe which worked perfectly. Regular butter would also work if you can tolerate dairy. Melted coconut oil should also work in this recipe.
Sugar: To keep these ice cream sandwiches refined sugar free and slightly healthier, I used coconut sugar. Coconut sugar can behave slightly differently than other sugars. I have not tested any other sugars in this recipe, but I *think* white sugar would work fine. If you try it, leave a comment and let me know how it went!
Milk: Any milk should do- vegan or otherwise!
What Ice Cream Should I Use?
I used my homemade vanilla ice cream in this recipe, but you can totally use whatever vanilla ice cream (or mint or chocolate chip!) that you want. You’ll need about a pint and a half of ice cream (or the full 2 pints if you like a thick ice cream layer). These days, vegan ice cream is expensive, so I like to make it at home for half the cost.
My homemade ice cream has both a dairy free and fully vegan option to fit your needs.
Can I Make Vegan Ice Cream Sandwiches?
Although you can make and use a vegan ice cream in these gluten free ice cream sandwiches, I have not tested a vegan version of the cookie base. The cookie does require eggs. If you try making a vegan version, please leave a comment and let us know how it went!
How To Serve and Store These Ice Cream Sandwiches
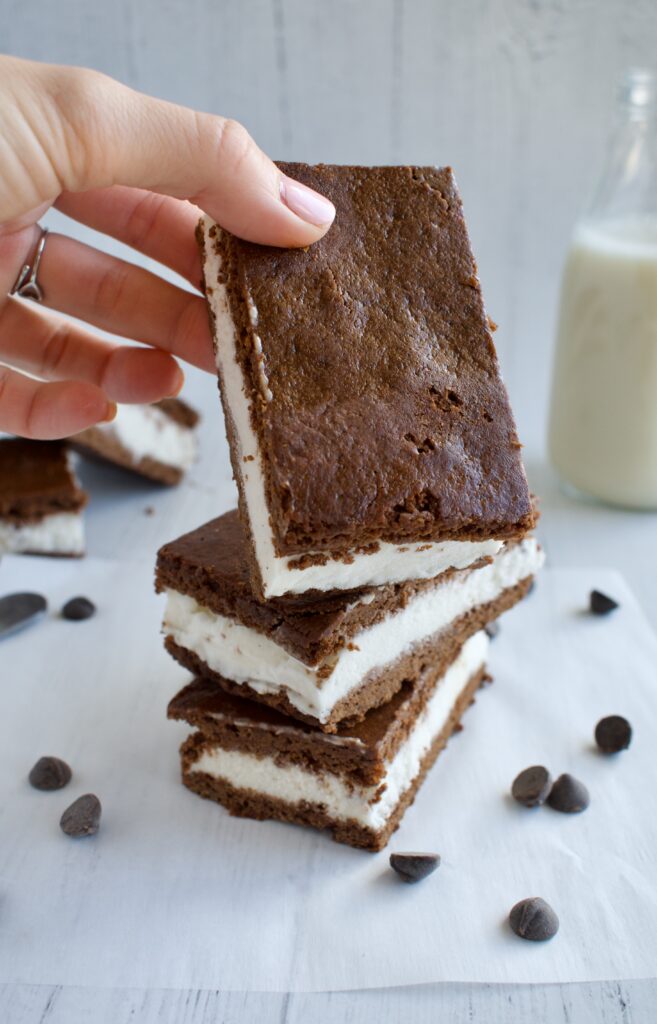
Serve: I like to let my ice cream sandwiches sit for a couple of minutes at room temperature to soften the ice cream, but that is a personal preference. Just don’t let them sit out too long or they’ll melt!
Store: Once you have sliced the ice cream sandwiches, wrap each individually in plastic wrap, parchment paper, or wax paper. You can then place all of the sandwiches into a large ziplock bag or freezer container and store in the freezer until ready to eat.


Gluten & Dairy Free Ice Cream Sandwiches
Equipment
Ingredients
Cookie Base
- 1/2 cup 1:1 gluten free flour
- 2 Tbsp tapioca starch
- 1/3 cup cocoa powder
- 1/2 tsp baking powder
- 1/4 tsp salt
- 1/2 cup (vegan) melted butter or coconut oil
- 3/4 cup coconut sugar
- 1 egg
- 1 egg yolk
- 2 Tbsp milk of choice
- 2 tsp vanilla extract
Ice Cream
- homemade vanilla ice cream OR
- 2 pints (dairy free) vanilla ice cream
Instructions
Ice Cream
- If you are making your own ice cream, be sure to make this ahead of time so it is ready to go. You will want to take the ice cream out about 10-30 minutes before ready to use (depending on how hot your kitchen is) so it is nice and soft.
Cookie Base
- Preheat oven to 350F.
- Whisk the flours, cocoa powder, baking powder, and salt together in a bowl and set aside.
- Beat the melted butter and sugar together until combined. Add the egg, egg yolk, milk, and vanilla and beat to combine.
- Add the dry ingredients to the wet and beat on low until just combined.
- Line a 10x15inch baking pan with parchment paper (You could get away with using a bigger pan and not spreading the batter all the way out or use a 9×13 inch baking dish. Your cookies will just be slightly thicker and sandwiches slightly smaller).
- Spread the batter out evenly over the baking pan, trying to get even edges and a nice thin layer.
- Bake the cookie base for 10 minutes.
- Let the base completely cool for at least an hour before assembling the sandwiches.
Assembly
- Pull your ice cream out of the freezer 10-30 minutes before ready to assemble. You don't want it to be melted, but it should be very soft and spreadable.
- Place a medium cutting board or flat plate that is freezer safe (and fits into your freezer- check this before starting!) on the counter. Next, place two long pieces of plastic wrap in a cross over the cutting board.
- Trim the edges of your ice cream sandwich cookie base if desired then cut in half. GENTLY slide one half into the middle of your cutting board/plastic wrap.
- Spread your homemade ice cream or about 1.5-2 pints of vanilla ice cream of choice over one half of the cookie base. Work gently and use as much or as little ice cream as you want. I like about an inch thick of ice cream.
- Adding the top part of the cookie is hard since it is fragile, but do your best to flip the other half of the cookie base onto the top of your ice cream. Line everything up then tightly wrap up the sandwiches in the plastic wrap. Wrapping tightly holds everything together while the ice cream is soft. The plate/cutting board provides a sturdy support as the sandwiches freeze.
- Place the sandwiches in the freezer for at least 4-6 hours, preferably overnight to allow the ice cream to fully set.
- When ready, slice into 8 sandwiches.
- I like to wrap each sandwich individually in plastic wrap or parchment paper then store in a freezer safe bag or container until ready to eat. Pull one out on a hot summer afternoon and enjoy!
