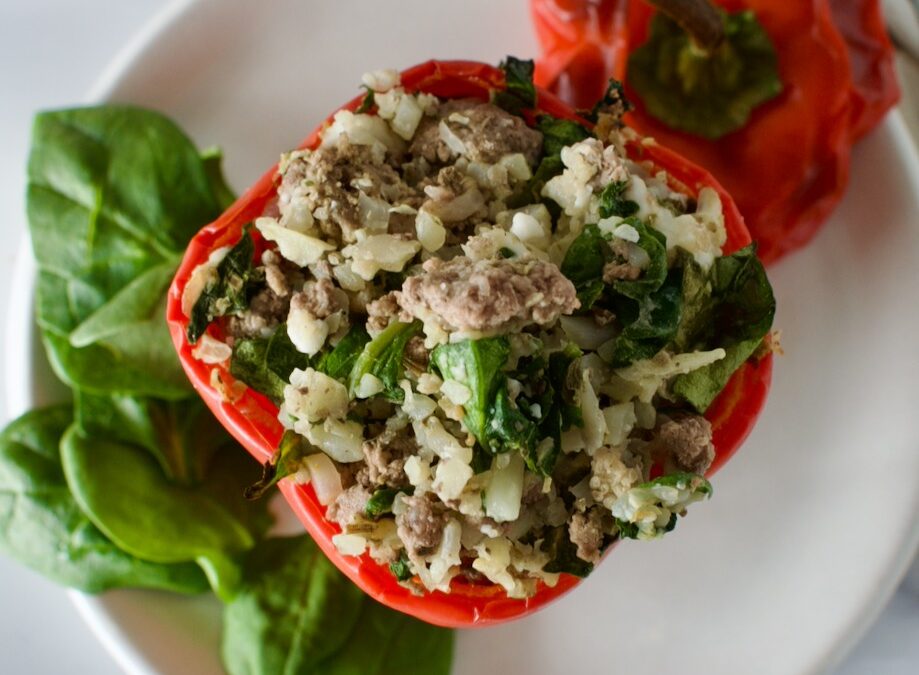
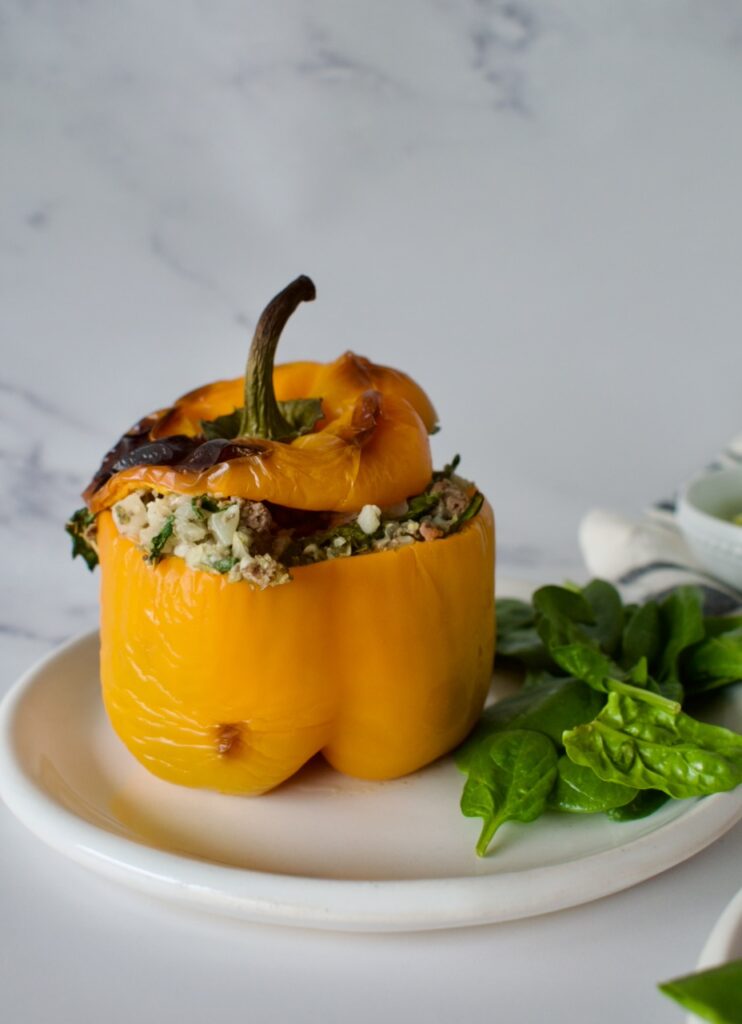
These easy Low FODMAP Stuffed Peppers are the perfect meal prep or dinner party dish. They contain no tomatoes for those with allergies, but are filled with Italian spices to keep the flavor high! Dairy free, completely paleo, and delicious.
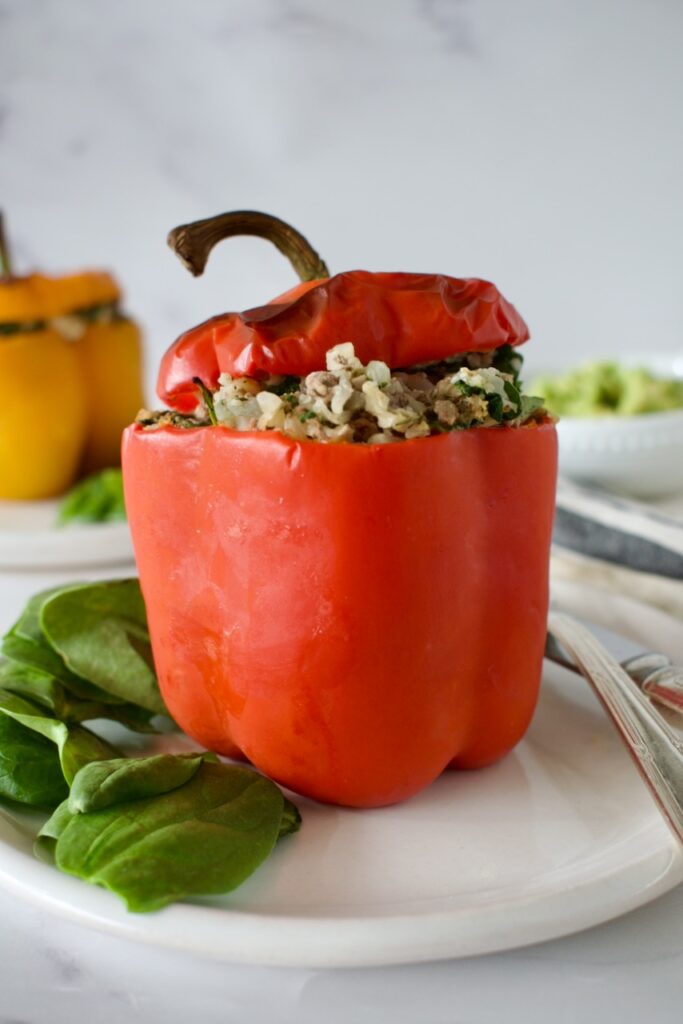
paleo stuffed peppers
I was never a huge fan of stuffed peppers, but, honestly, they are a super easy dish that can be adjusted to your tastes. Stuffed peppers are a great meal prep dish or main dish for family dinner or a dinner party. I love that you can adjust the herbs or mix-ins to your taste buds and/or to use up what you have in the fridge.
low fodmap paleo stuffed peppers
Ingredients in Low FODMAP Stuffed Peppers
Olive oil: for sautéing the veggies
Garlic infused olive oil: for flavor without the FODMAPs
Bell peppers: obviously
Ground beef: for protein
Cauliflower rice: to keep this recipe grain free and paleo
Kale: for added nutrients and flavor
Italian spice: to flavor these peppers
Salt
Feta, regular or vegan: this adds creaminess and flavor!
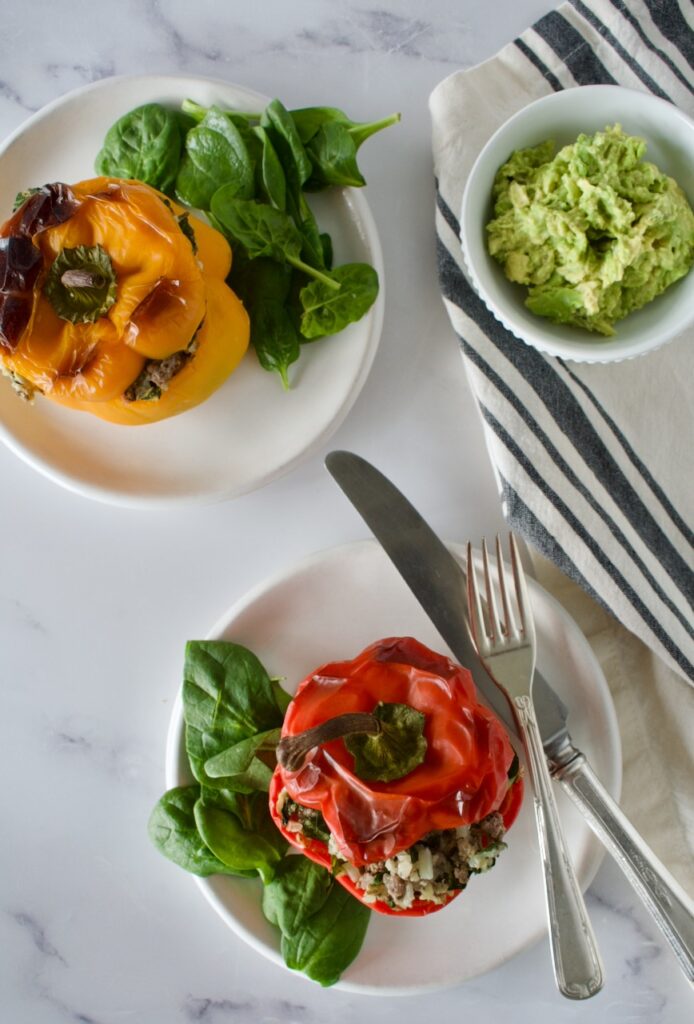
These paleo stuffed peppers utilize ground beef, cauliflower rice to keep them grain free, kale, and feta. I used a vegan feta to keep them dairy free, but the melty cheese is a must in these peppers! A combination of garlic infused olive oil (for low FODMAP) and Italian herbs bumps up the flavor profile. I also love serving these with guacamole. That may seem random, but it goes so well!
Substitutions and Variations
Garlic olive oil: Garlic infused olive oil is low FODMAP and won’t upset your GI system. If you can tolerate garlic, use some fresh chopped garlic instead!
Beef: Ground chicken or turkey would also work! Just use your preferred ground meat.
Cauliflower rice: You can always use cooked white or brown rice instead. I use cauliflower rice to keep this recipe paleo, but you can use grains as desired.
Feta:I don’t tolerate dairy, so I always use a vegan feta, but regular feta will work fine too. You can also use your cheese of choice like mozzarella, cheddar, or even some parmesan.
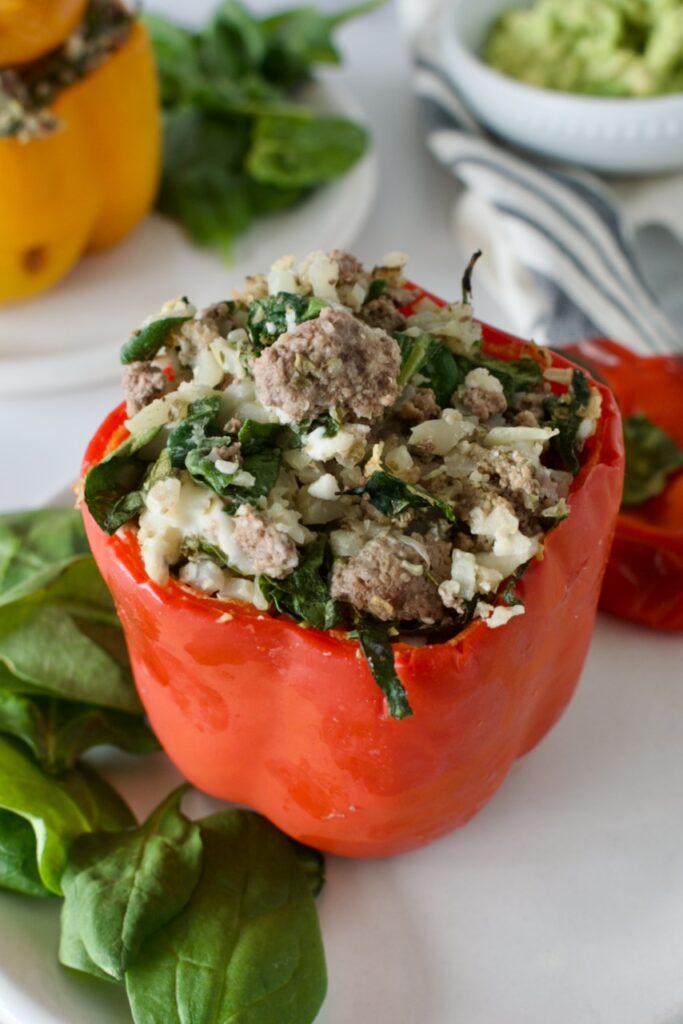
paleo stuffed peppers
Storage
Keep this leftover stuffed peppers in an airtight container in the fridge for up to 3 days. These also freeze well which makes them great for batch cooking. Wrap individual peppers in plastic wrap or tinfoil and freeze for in an airtight bag/container for up to 3 months.
These easy stuffed peppers are the perfect nutrient dense meal prep or dinner party dish! Packed with Italian herbs, lots of veggies, and ground beef, you can’t go wrong making a batch of these.
Heat a skillet over medium heat and add 1 Tbsp of olive oil. Cook your ground beef until almost browned.
While beef is cooking, slice the tops off the peppers and de-seed them. Place them in a baking dish and set aside.
Before beef is finished cooking and is still a little pink in places, add the cauliflower rice. Cooking for about 5 minutes until it's softer.
Add the kale, garlic olive oil, salt, and Italian herbs. Sauté for a minute or two until kale has wilted.
Mix in the feta, then evenly divide your mixture between the 6 peppers. Place the tops back onto the peppers and bake for 35-45 minutes, until peppers are soft.
Serve with a side salad, guac, or other favorite sauces!
Notes
If you don’t have garlic infused olive oil, just use regular. If you can tolerate garlic, sauté a couple of diced cloves before adding the ground beef.
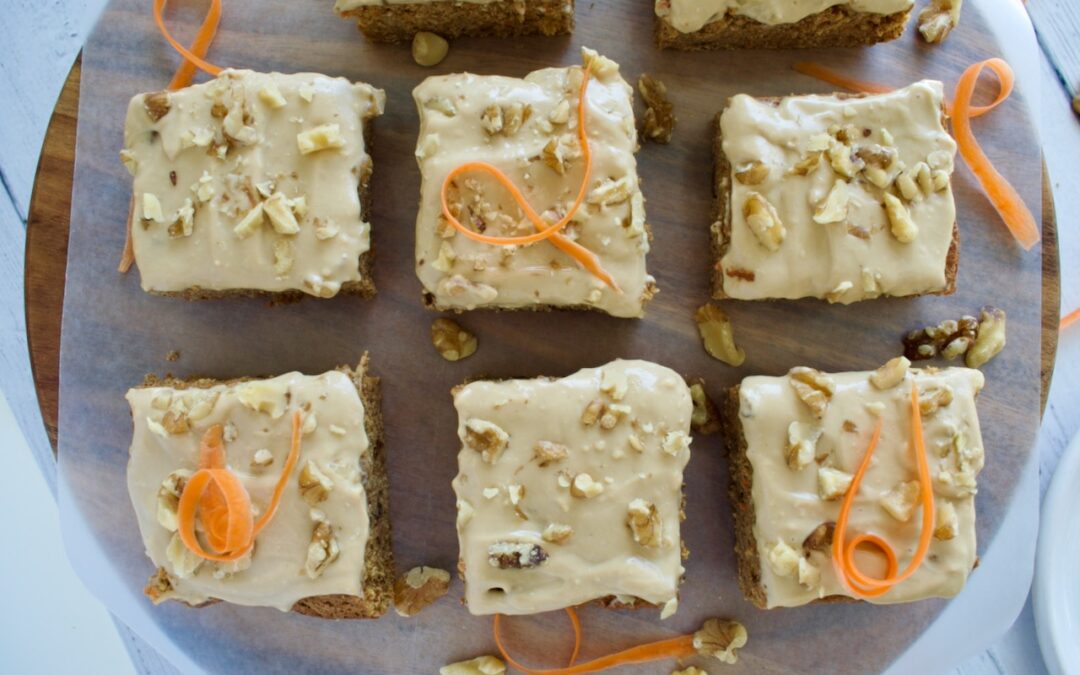
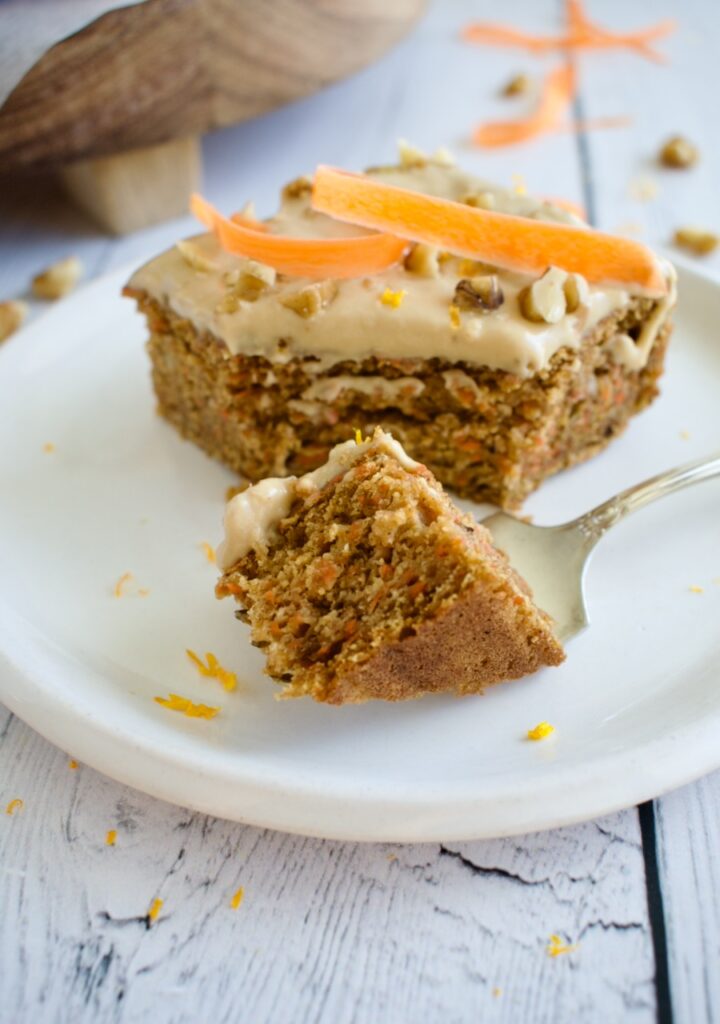
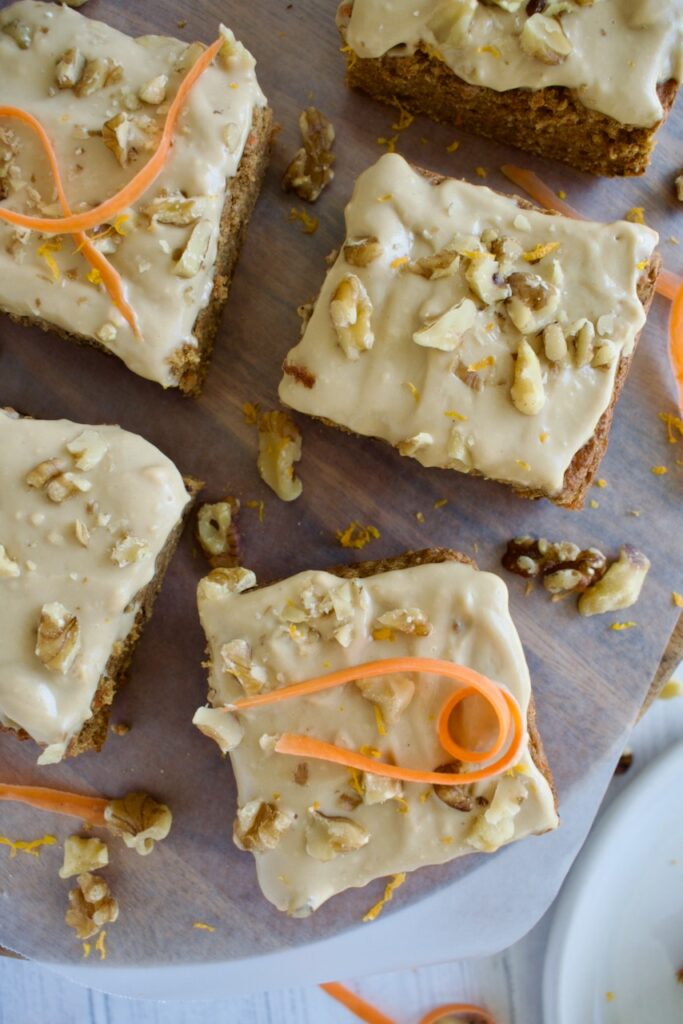
This healthier carrot cake is perfection! Gluten free and dairy free, it’s packed with spice and flavor all while being lower sugar than your average cake with a refined sugar free option.
gluten free carrot cake
I’ve been making this paleo carrot cake for years with rave reviews from friends (it’s often requested as the dessert I bring to parties and get togethers) and I finally got around to photographing it and getting it on my website. If these pictures don’t do it justice, then let me explain to you why you need this carrot cake in your life!
This gluten free cake is filled with just the right amount of spice and carrot, all while being low sugar, dairy free, and fully grain free. I offer a fully refined sugar free option, as well. My secret ingredient is a tiny bit of orange zest and juice. I find that amplifies the spices and carrot perfectly.
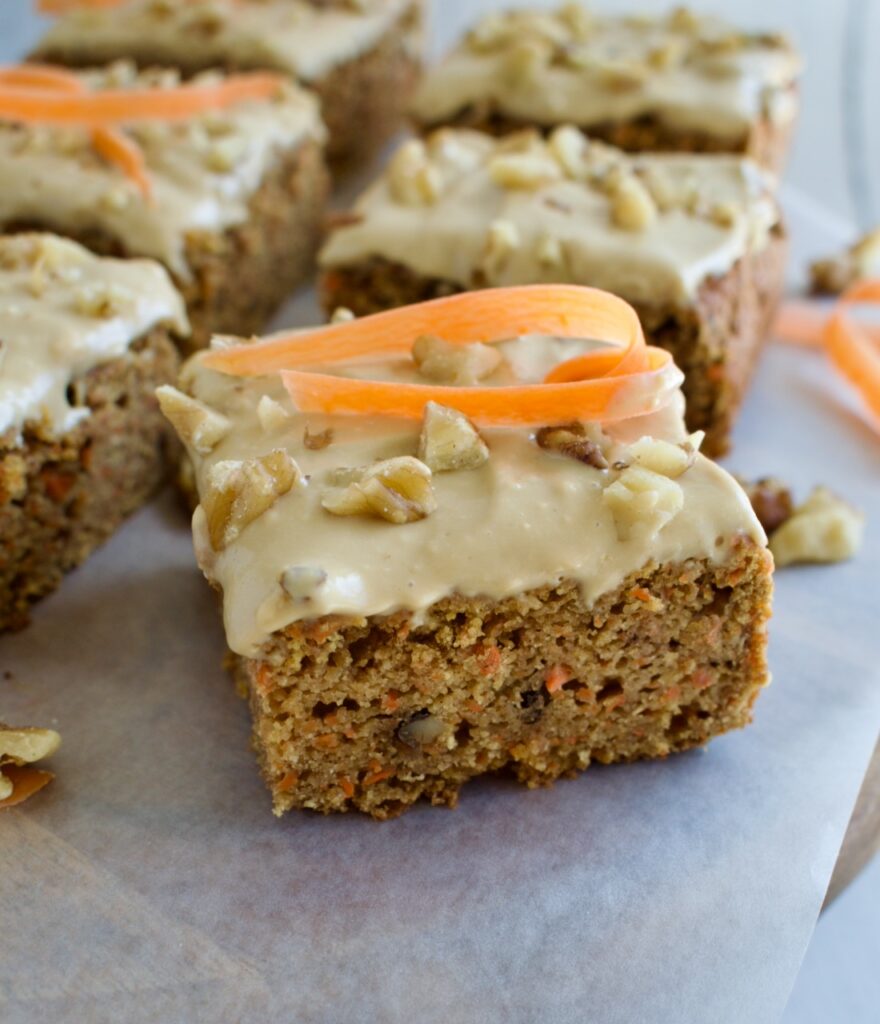
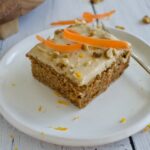
paleo carrot cake bars
Something I love about this gluten free carrot cake is that it is lower in sugar than your average cake and tastes way more grounding and earthy. I already don’t love overly sweet desserts, but part of why carrot cake is so great is that it’s made with such a grounding root vegetable. I want to be able to taste that and feel whole upon eating it. This carrot cake does just the trick!
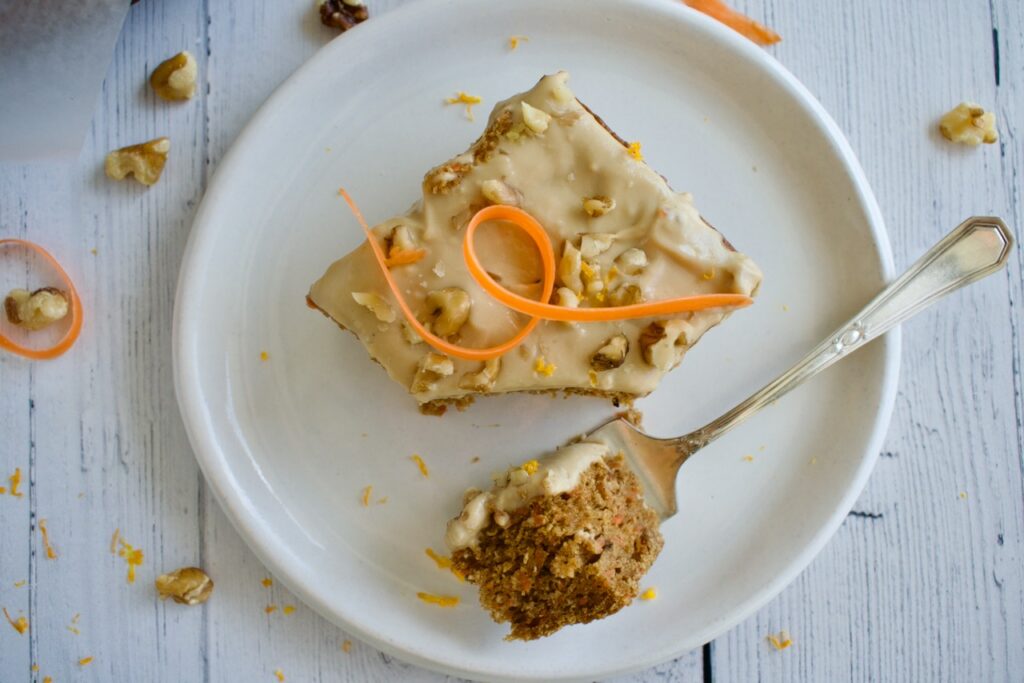
gluten free and dairy free carrot cake
Paleo Carrot Cake
Ingredients: The dry ingredients in this cake consist of a mix of grain free flours, baking powder, baking soda, and the best blend of spices. These spices include cinnamon, ginger, cloves, and nutmeg. The best sugar to use in this recipe is brown sugar, but you can sub in coconut sugar for a refined sugar free option.
The wet ingredients include eggs, olive oil, applesauce, vanilla extract, orange juice, orange zest, and shredded carrots.
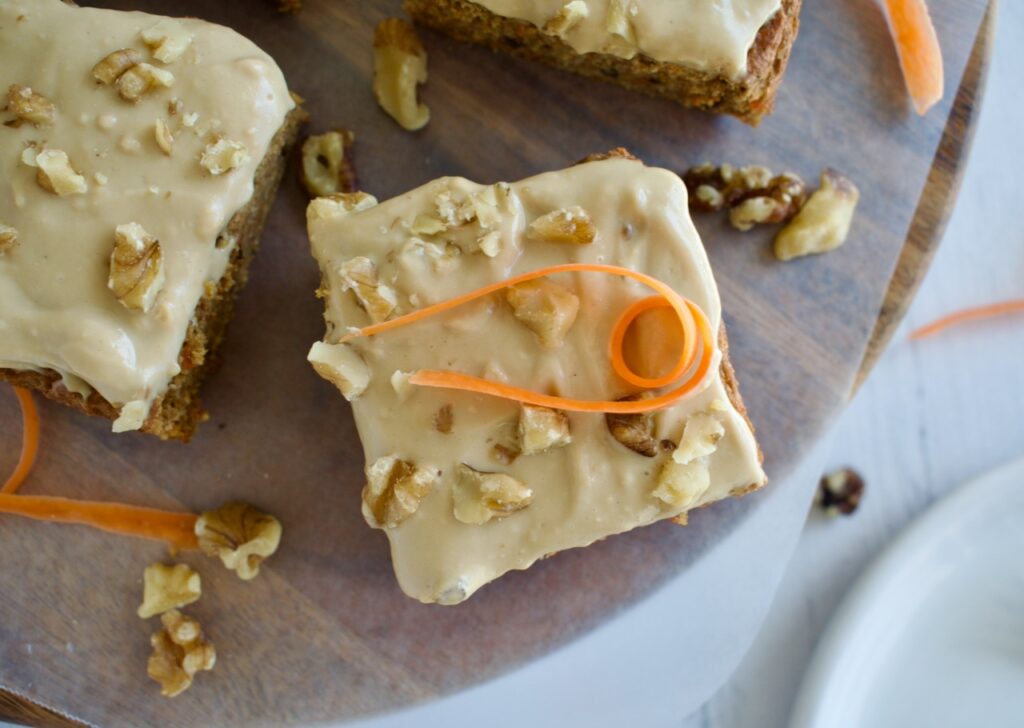
Add-ins: The best add-ins are walnuts, in my opinion. The added crunch is the perfect balance with this soft cake and creamy frosting. I’m not a huge raisin fan, but you can certainly add in some raisins if desired.
Icing: My favorite icing is this dairy free cashew buttercream from The Minimalist Baker. There was no point in trying to remake something that is already perfect. I do provide an alternative with dairy free yogurt, powdered sugar, vanilla extract, and lemon juice that is also quite delicious and a bit easier to make.
Homemade powdered sugar: If you are making my icing which includes powdered sugar, you can make your own at-home coconut sugar powdered sugar to keep this cake refined sugar free. All you have to do is blend 1 cup of coconut sugar with 1 Tbsp of tapioca or arrowroot starch.
grain free carrot cake
How to Make This Cake
As an American, I rarely ever weigh ingredients, I always just measure them. I know, that’s not precision baking! But we Americans are useless and never learned how to weigh ingredients ;). Well, not for this recipe! I tested so many other carrot cake recipes and made this cake so many times before getting it right. I found that weighing the ingredients truly gives this cake the best texture.
If you don’t have a kitchen scale, I have provided cup measurements, but I highly suggest weighing your ingredients if possible.
1cupyogurt of choiceThicker yogurts work best, like Greek yogurt or Forager cashew yogurt.
1/2cuppowdered sugarmake your own at home powdered coconut sugar to keep refined sugar free (see notes above)
1tsp vanilla extract
2Tbsplemon juice
Instructions
Preheat oven to 350F.
Shred your carrots first and set aside. The easiest way to do this is in a food processor.
Sift all your dry ingredients together in a bowl. This include the flours, baking powder and soda, spices, and salt.
In a large bowl or stand mixer, combine all of the wet ingredients and sugar- eggs, applesauce, oil, vanilla, orange juice and zest, and sugar. Beat on medium until well combined.
Add your dry ingredients to your wet and beat on low until just combined. Using the paddle attachment if using a stand mixer. If the batter seems way too thick, add your milk. I find this really depends on the brand of flours that you are using, so you may not need the milk if you are using the same brands I have linked.
Fold in your carrots and walnuts/raisins if using.
Let batter sit while you line a 8×8 or 9×9 baking dish with parchment paper.
Evenly spread batter into baking dish and bake for 35-40 minutes, until a toothpick comes out clean.
Let the cake cool completely before icing the cake. If making the first icing option, be sure to read the recipe as it does require chilling time and should be made in advance.
To make the second icing option, combine all ingredients together in a bowl and mix well until you have a thicker, spreadable icing. If the icing is too runny for any reason, you can add more powdered sugar.
Once cake is cooled, remove from pan and ice. I like to add more crushed walnuts on top, but decorate as desired. Slice, serve, and enjoy!
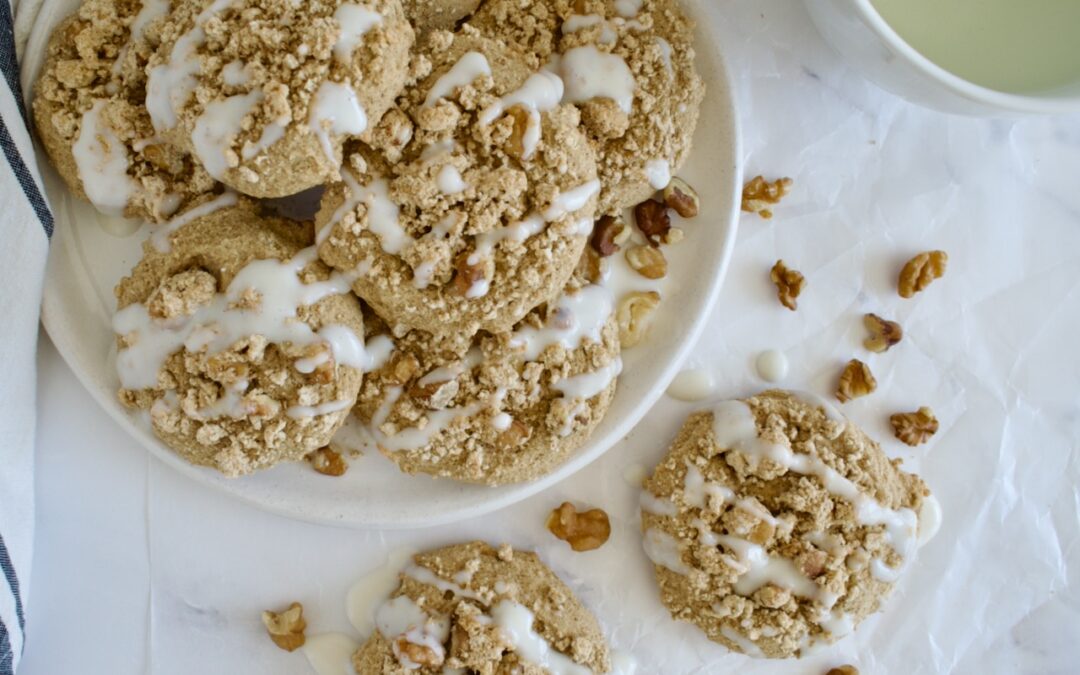
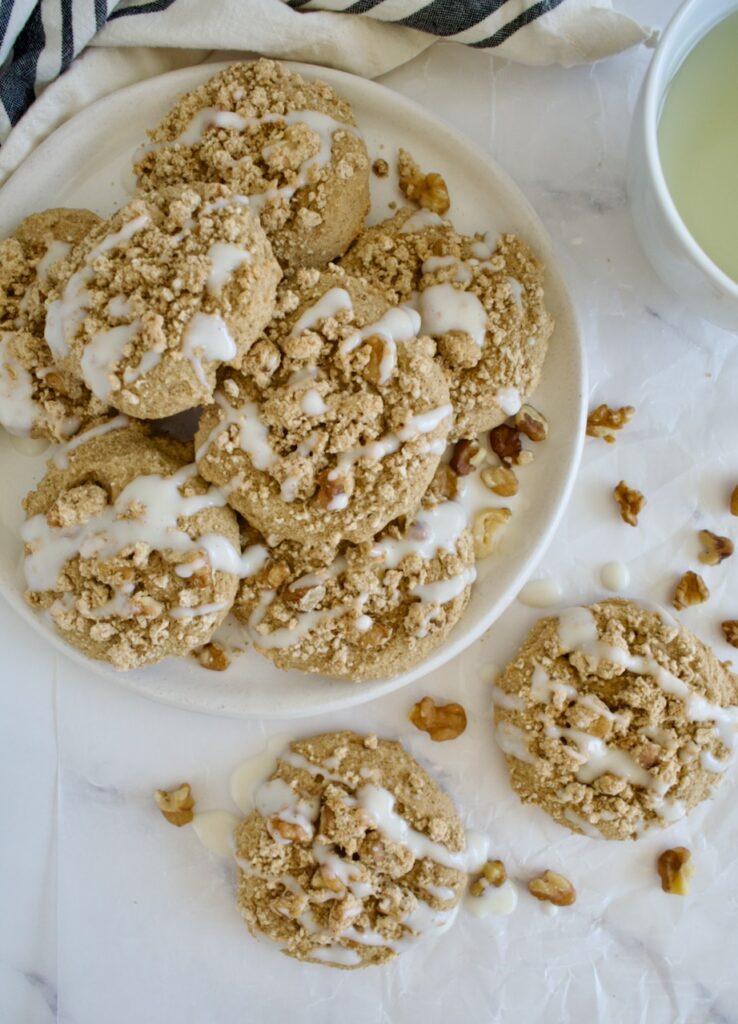
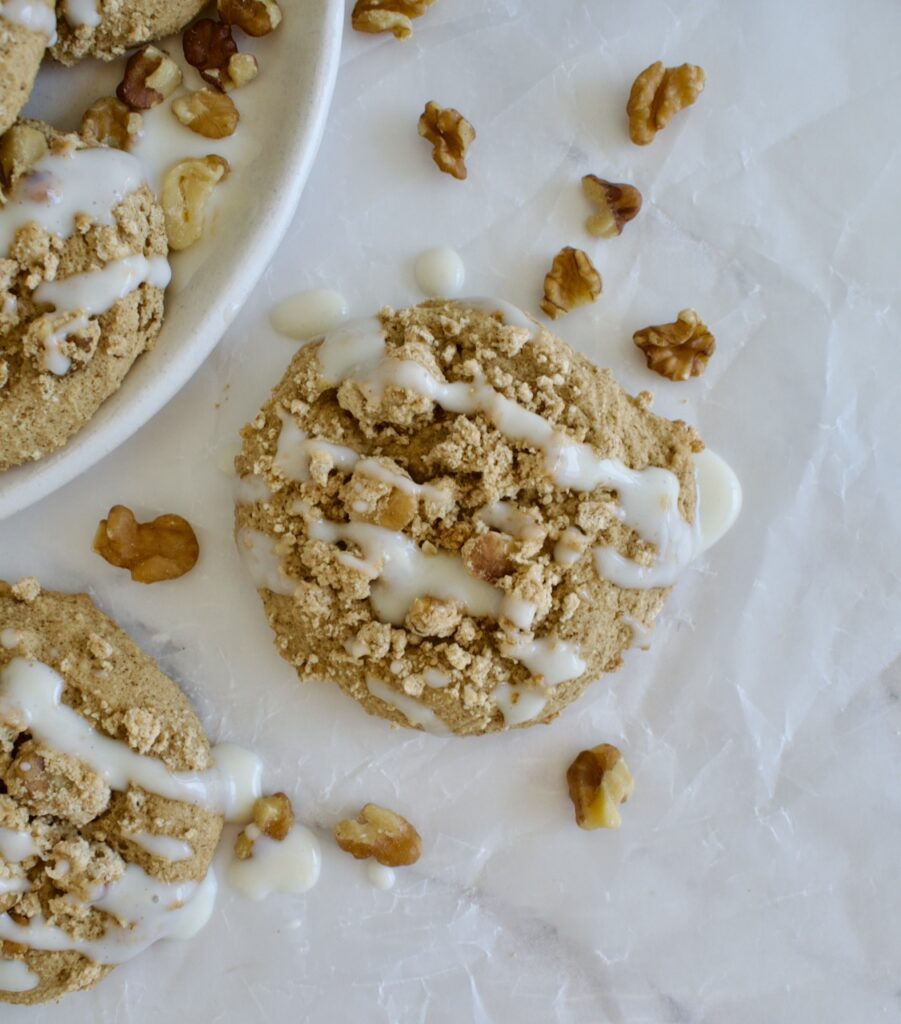
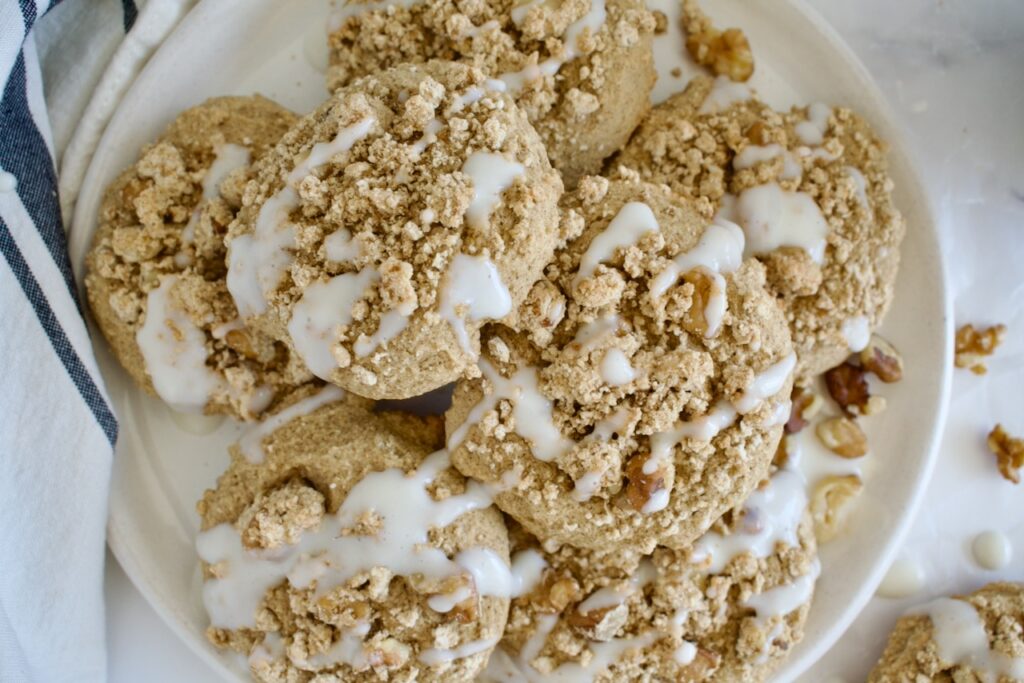
These walnut crumble cookies are the perfect mix of a soft gluten free cookie base, topped with a crunchy walnut topping. The icing drizzle brings them together with just the right amount of sweetness. These are the perfect cookie for dessert or with your morning coffee.
paleo walnut cookies
I love these paleo cookies! They pair perfectly with tea or coffee and aren’t too sweet. They contain no refined sugar, as long as you make your own powdered sugar with coconut sugar.
gluten free cookies
These gluten free cookies come together easily. You’ll start by making the cookie base, which is just a blend of paleo flours, olive oil, maple syrup, and an egg. The crumble topping is where the walnuts are that give these cookies the perfect crunch. The dairy free icing that pulls these cookies together is something you can’t skip! It’s just made of a mix of powdered sugar and yogurt of choice- feel free to use a dairy variety if desired.
These walnut crumble cookies are the perfect mix of soft and crunchy. They are completely paleo, gluten free, dairy free, and refined sugar free. Enjoy for dessert or with your morning coffee!
For the cookies, sift all dry ingredients together in a bowl.
Beat the oil, maple syrup, vanilla, and egg together in a large bowl on medium low speed until combined.
Add the dry ingredients to the wet and beat on low (or use your paddle attachment to combine) until just combined. Dough should be pretty wet.
Place the dough in the freezer for 10-15 minutes or in the fridge for 20-30 minutes.
Preheat oven to 350F while dough is cooling.
Combine all topping ingredients in a small bowl during this time. Everything should just come together and be slightly crumbly.
When dough is more solid, remove from fridge and form 12 balls. Place on a parchment lined baking sheet about 2 inches apart (cookies will spread) and press down into cookie shape about 1/2 inch thick.
Sprinkle the topping mix on top of the cookies and gently press down so it sticks to the cookies (it’s okay for cookies to flatten a bit more during this process).
Bake one tray at a time on the middle rack for 14-16 minutes, until edges are just golden. Let cool for a few minutes before transferring to a wire rack to finish cooling before icing.
While cookies are cooling, make the icing.
Place 2 Tbsp of yogurt in a small bowl and then add your powdered sugar 1 tsp at a time (start with 3-4 tsp, then add one at a time after that) until you get your desired consistency (the more you add, the thicker it will get so it’s less runny).
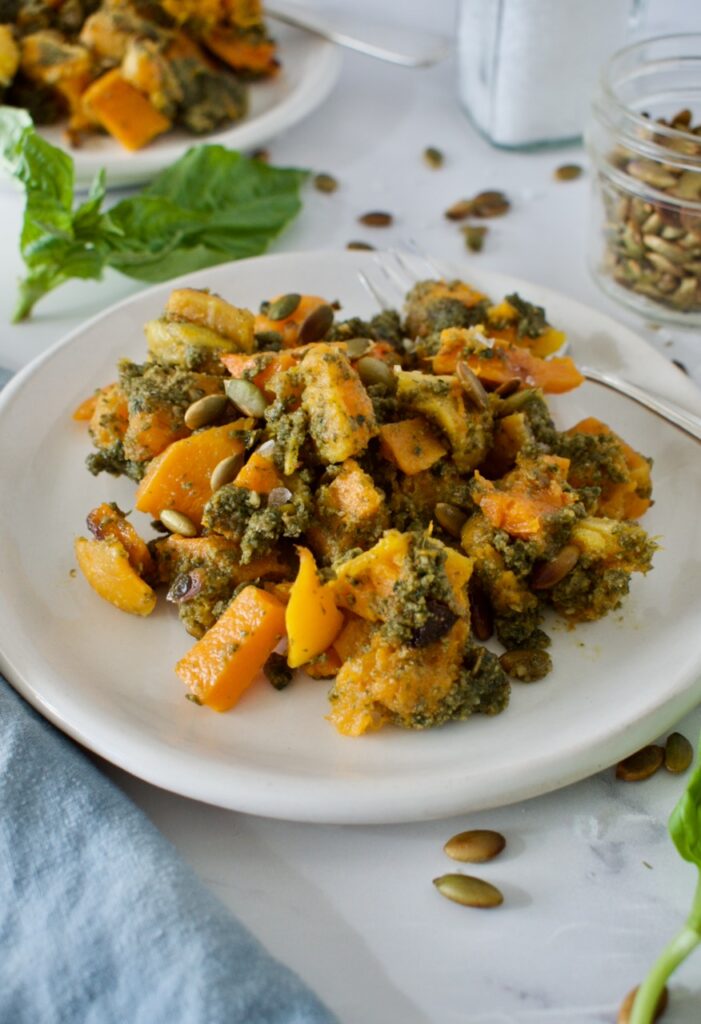
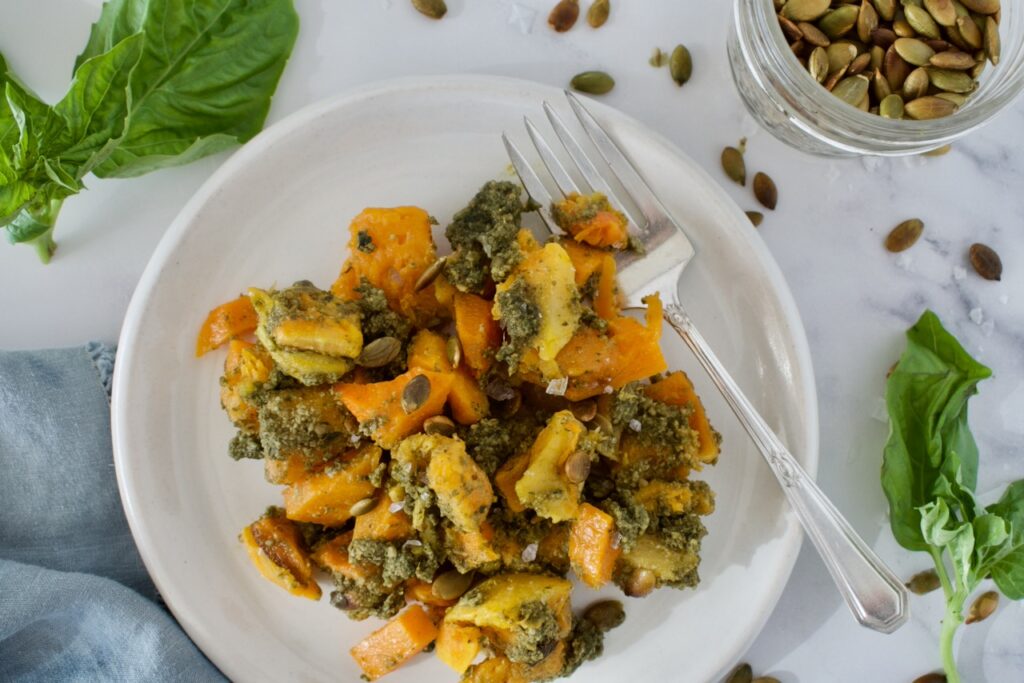
This pumpkin seed pesto butternut squash is one of the most addicting recipes ever. The pumpkin seed pesto is the perfect amount of crunchy and salty that pairs perfectly with the sweet and soft butternut squash. You won’t be able to stop eating this delectable side dish!
pumpkin seed pesto and butternut squash
My mom used to make a variation of this butternut squash recipe when I was in high school and I absolutely loved it. When I got to college, I made my own version and shared it on my website years ago. Since I can’t have dairy, this vegan pesto is so delicious! The recipe, photos, and overall post needed a revamp, and I finally got a chance to do so.
This vegan and paleo side dish is easy to make and very simple. There are only a few ingredients in this healthy pesto that you blend together and toss with roasted butternut squash. Plus, it’s allergy friendly! There is no gluten, dairy, or nuts in this homemade pesto. It’s guaranteed to be a crowd pleaser.
nut free pesto
How to make pumpkin seed pesto butternut squash
Ingredients
1 large butternut squash
3/4 cup pumpkin seeds
1 Tbsp olive oil
1/2 tsp salt, divided
1 cup fresh basil leaves, packed
1/2 cup olive oil
1 Tbsp garlic infused olive oil you can use 1-2 garlic cloves instead
Instructions
Peel and dice the butternut squash into cubes. Toss with 1 Tbsp olive oil and 1/4 tsp. salt and spread evenly over parchment lined baking sheet.
Bake squash for 40-45 minutes at 425F, until fork tender and browning.
While squash is baking, make the pesto. Heat a skillet over medium low heat and add the pumpkin seeds. Toast, stirring occasionally, until seeds are fragrant and beginning to golden. Remove from heat and let cool for 10 minutes.
In a blender, add the basil, 1/2 cup olive oil, garlic olive oil or garlic cloves and roughly blend until basil is broken down. Add 1/2 a cup of the pumpkin seeds and 1/4 tsp. salt and pulse into you have a rough pesto texture. Taste and add more salt as needed.
Once butternut squash is cooked, let cool for 5 minutes before tossing with the pesto in a large bowl. Sprinkle with remaining 1/4 cup pumpkin seeds and serve.
vegan pesto
Pumpkin Seed Pesto Ingredient Notes
Butternut squash: I have not tried this recipe with any other root vegetables. I think it could be very good with pumpkin though!
Pumpkin Seeds: The pumpkin seeds are what give this pesto its unique flavor. Although you certainly could try substituting them for another nut or seed, I can’t guarantee the addicting outcome.
paleo and vegan pumpkin seed pesto with butternut squash
This pumpkin seed pesto with butternut squash is one of the most addicting dishes you'll ever eat. It packs a flavor punch and you won't be able to stop eating it. Enjoy this healthy and delicious paleo and vegan side dish with any protein!
Course Side Dish
Cuisine American
Keyword gluten free, healthy, paleo, vegan
Prep Time 20 minutesminutes
Cook Time 40 minutesminutes
Total Time 1 hourhour
Servings 4servings
Author Victoria Faling
Ingredients
1largebutternut squash
3/4cuppumpkin seeds
1Tbspolive oil
1/2tspsalt, divided
1cupfresh basil leaves, packed
1/2 cupolive oil
1Tbspgarlic infused olive oilyou can use 1-2 garlic cloves instead
Instructions
Preheat oven to 425F.
Peel and dice the butternut squash into cubes. Toss with 1 Tbsp olive oil and 1/4 tsp. salt and spread evenly over parchment lined baking sheet.
Bake squash for 40-45 minutes, until fork tender and browning.
While squash is baking, make the pesto. Heat a skillet over medium low heat and add the pumpkin seeds. Toast, stirring occasionally, until seeds are fragrant and beginning to golden. This takes about 5-10 minutes. Remove from heat and let cool for 10 minutes.
In a blender, add the basil, 1/2 cup olive oil, garlic olive oil or garlic cloves and roughly blend until basil is broken down. Add 1/2 a cup of the pumpkin seeds and 1/4 tsp. salt and pulse into you have a rough pesto texture. Taste and add more salt as needed.
Once butternut squash is cooked, let cool for 5 minutes before tossing with the pesto in a large bowl. Sprinkle with remaining 1/4 cup pumpkin seeds and serve.
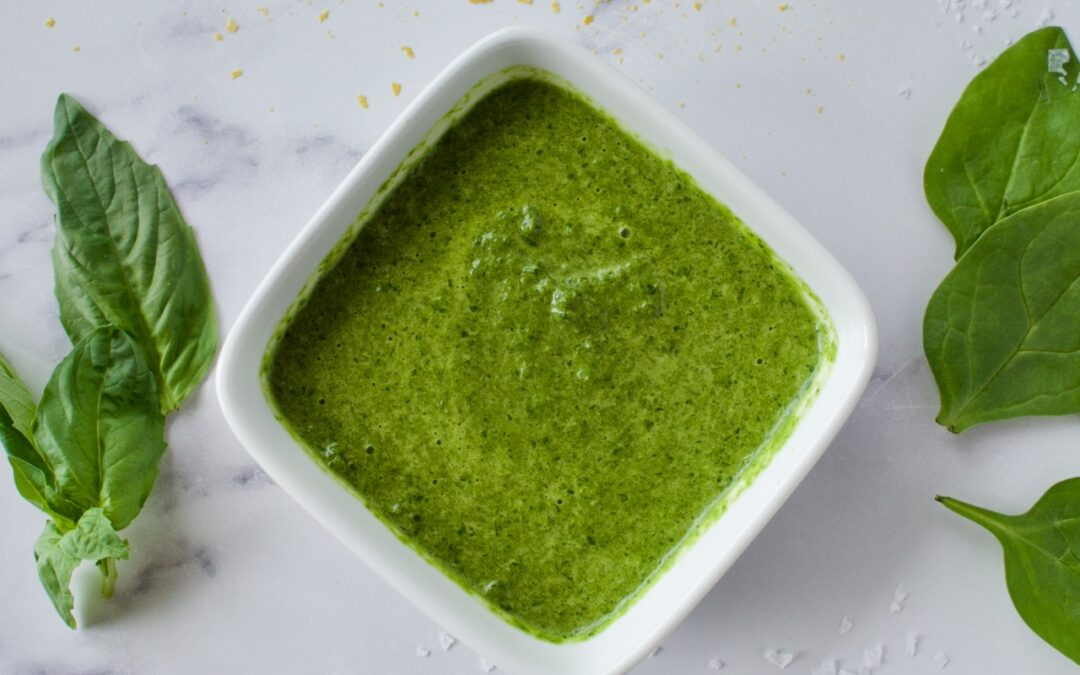
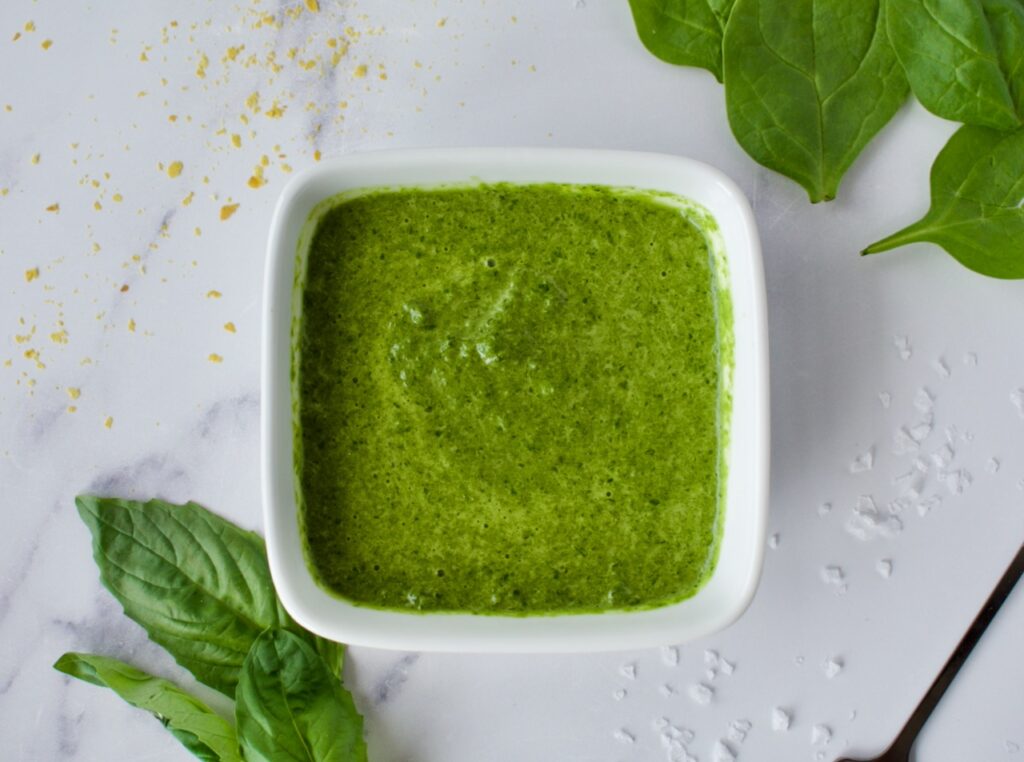
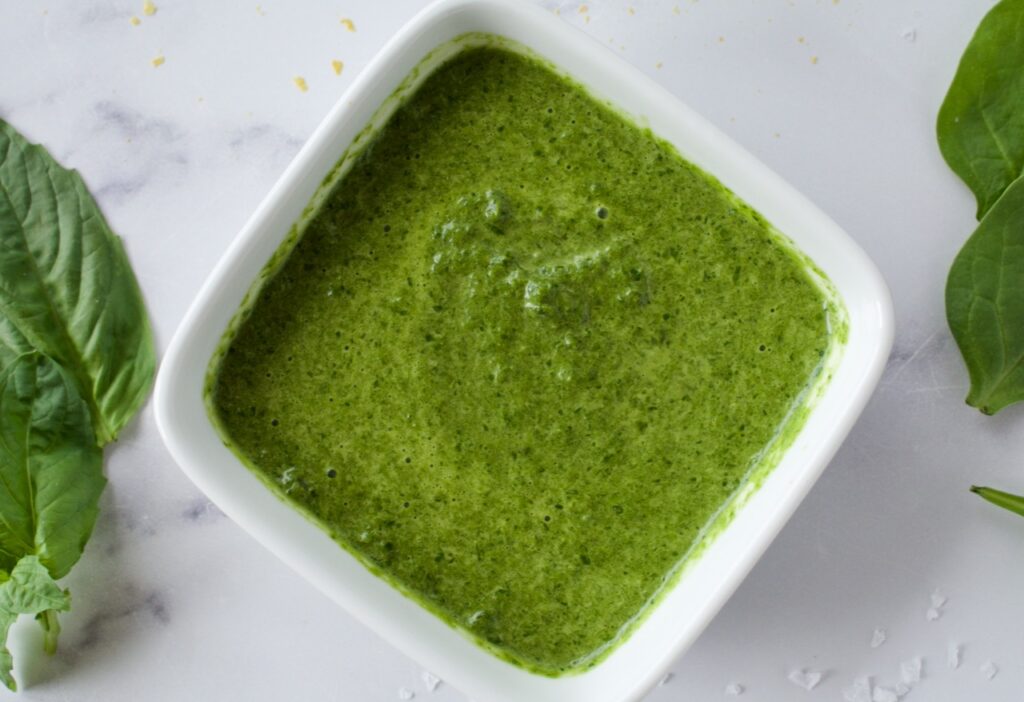
This healthy homemade pesto is completely allergy friendly and easy to make. It’s packed with flavor and a quick sauce to whip up for dinner. The spinach gives this dairy free pesto a nutritional boost, while the basil provides all the delicious taste!
low FODMAP spinach pesto
Many store-bought pestos contain nuts, cheese, and garlic, but if you’ve got food allergies/intolerances and GI issues, these ingredients are likely to set you off. It was impossible to find safe and healthy pestos at the store, so I started making my own. Pesto is super easy to make and the best part about making a homemade variety is that you can adjust the flavors to your liking. I’ve been whipping up this super quick and easy pesto for years and figured I better finally get this recipe on the my website and share it!
allergy free vegan pesto
This pesto is packed with an extra punch of nutrients from the spinach. The other ingredients are simple- olive oil, basil, and salt! It’s that simple. This pesto is completely allergy friendly, being gluten-free, AIP/paleo, and vegan, plus no garlic so it is low FODMAP! Gut friendly, nutrient packed, and healthy ingredients.
This easy and delicious homemade pesto is perfect for any diet. There are no major offenders and you can whip it up in just a couple of minutes! This pesto is nut-free, vegan, and low FODMAP
Course Main Course
Cuisine American
Keyword Easy, low fodmap, nut free, Simple, vegan
Total Time 5 minutesminutes
Servings 4servings
Author Victoria Faling
Ingredients
3cupsspinach
1cupfresh basil leaves
1/4cupolive oil
1/2tspsalt
2-4Tbspnutritional yeastOPTIONAL
Instructions
Wash and dry the basil leaves.
Add everything to a small blender. Blend on high until smooth.
If needed, add more olive oil to achieve desired consistency.
Add nutritional yeast as desired for a more cheese-y flavor.
Store in an airtight container in the fridge for up to 5 days or freeze in ice cubes for later use.
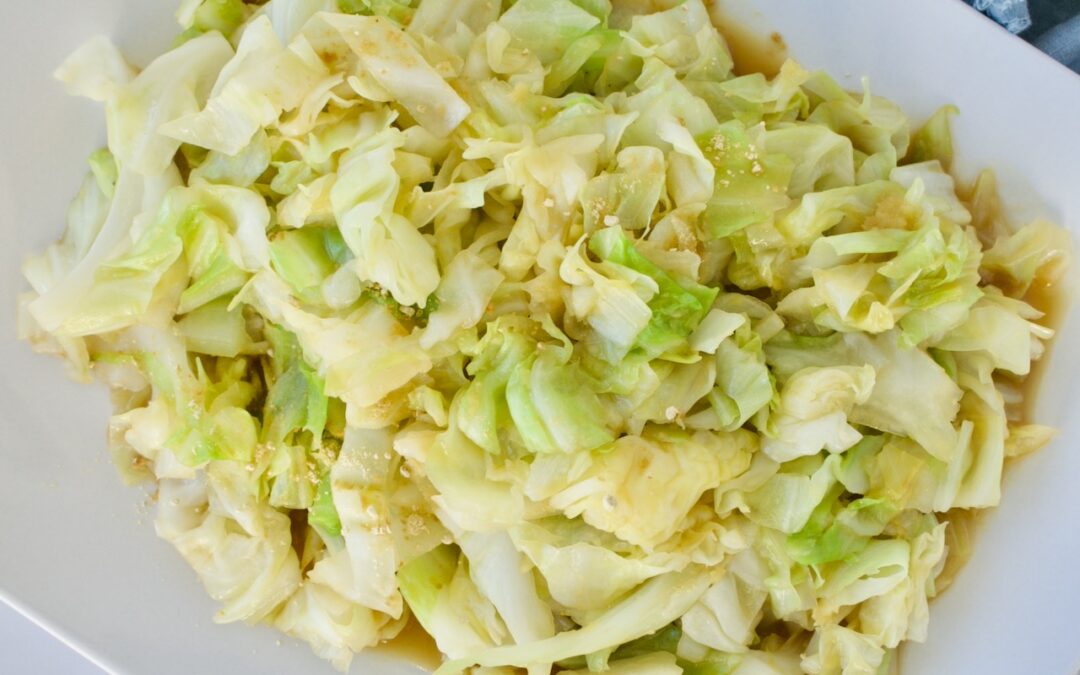
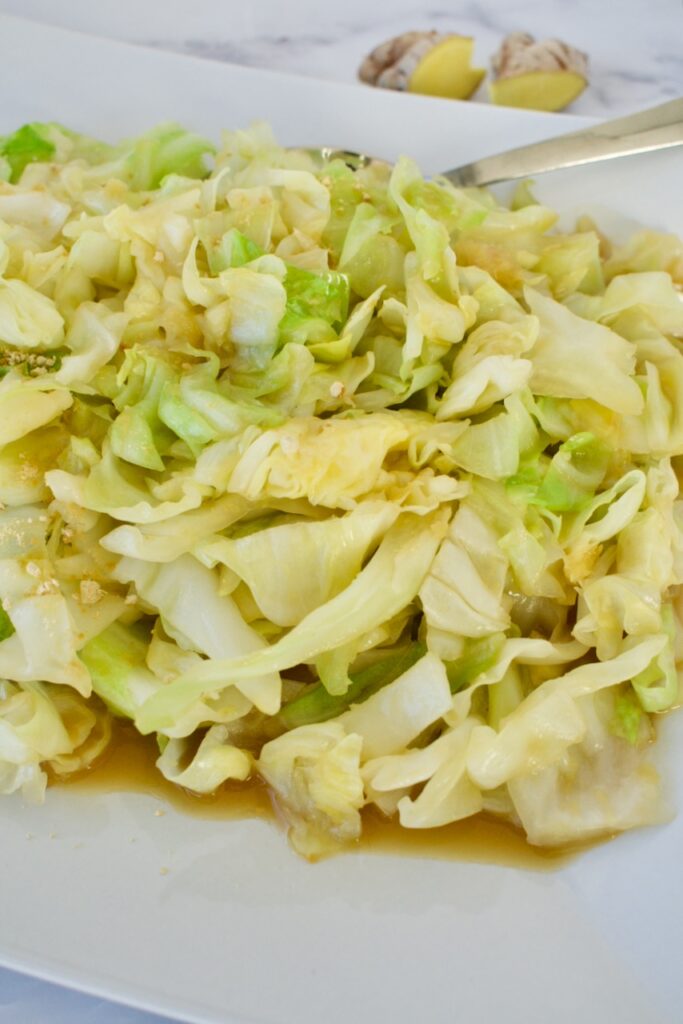
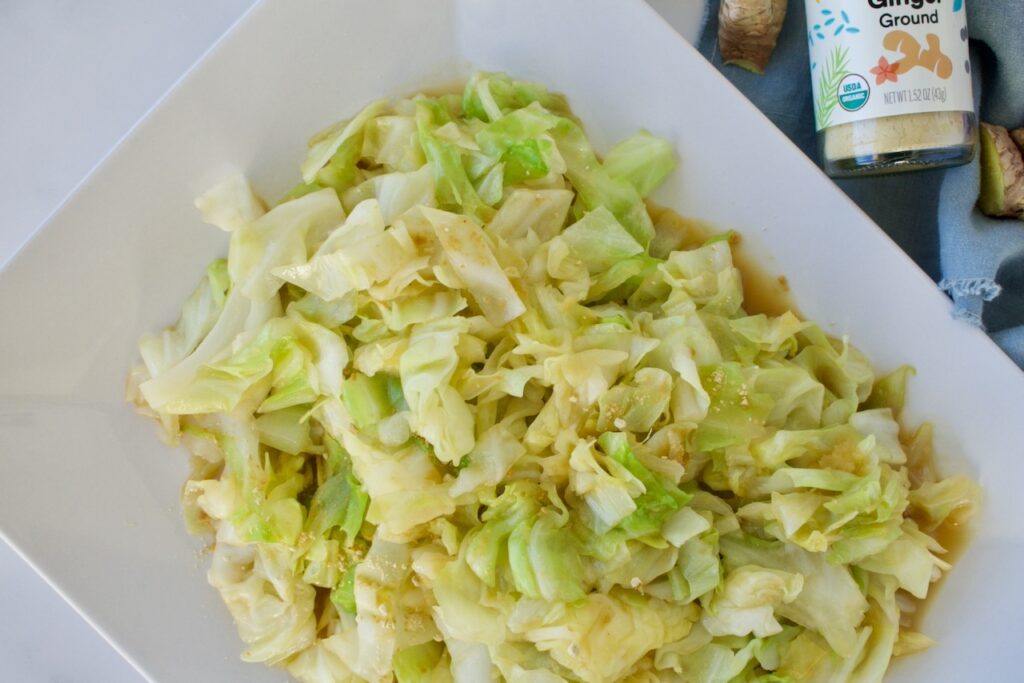
This ginger cabbage recipe is super easy to make and it’s the perfect quick side dish for a weeknight meal or even a larger dinner affair. This cabbage is made on the stove, so it’s a sautéed cabbage with bold ginger flavor. All you have to do is sauté the cabbage with ginger, then add in some broth and coconut aminos. It really is that easy.
AIP gingered cabbage
I’m obsessed with ginger… ginger anything and I’m happy! The more ginger the better. If you also love ginger, then you’ll love this recipe, too. Ginger is a fantastic spice with some amazing anti-inflammatory benefits. It’s also great for stomach upset and GI distress as well as improving nutrient absorption. Ginger stimulates circulation and can help support the immune system. It’s delicious and amazing for you!
1/4cupbroth of choicebone broth, chicken broth, or vegetable broth works!
1/2Tbspground ginger
2Tbspcoconut aminos
Instructions
Slice your cabbage in quarters and de-core, then slice into thin strips.
Heat coconut oil over medium heat in a large skillet until melted. Add the grated ginger ginger and sauté for about 1 minute.
Add cabbage and cook stirring frequently for 3-4 minutes, until cabbage starts to soften.
While cabbage is cooking, whisk together the broth, ground ginger (you can leave this out if you prefer a more mild taste, this adds the last super kick of spice and ginger), and coconut aminos. Add this mixture to the cabbage and cook another 3-4 minutes until cabbage is soft.
Hi! I'm Victoria. I was diagnosed with Lyme in 2012 and have been on a healing journey ever since. I love helping others on their road to healing through allergy friendly recipes, exercise, and overall well-being.