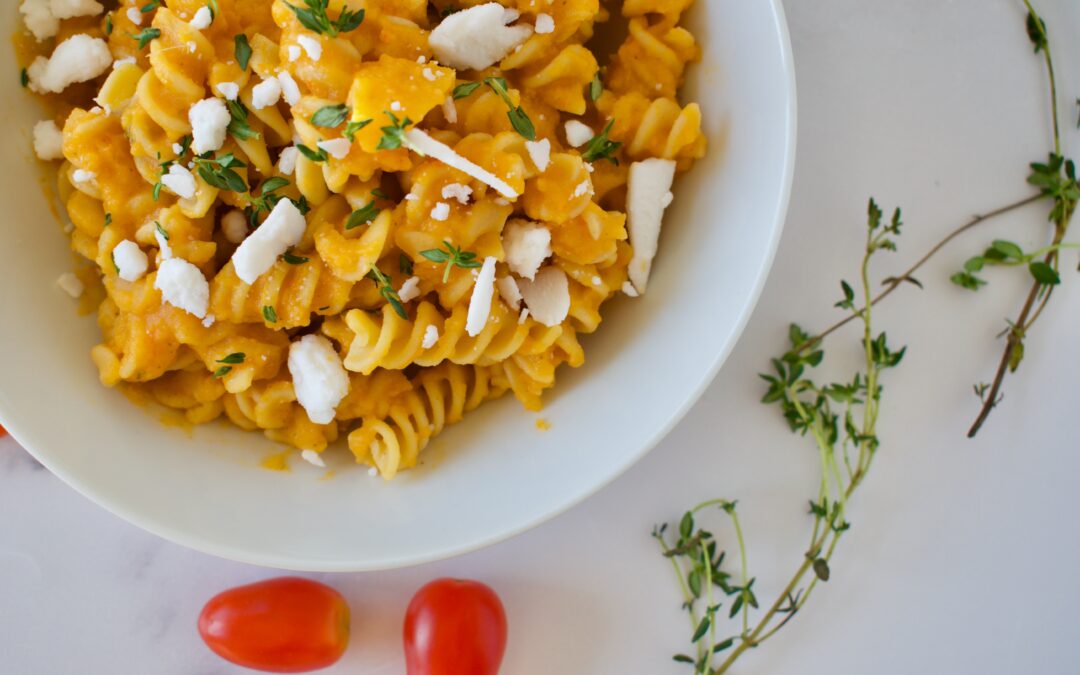
Remember the viral baked feta pasta? Well, we are making it fall themed with this creamy feta and butternut squash version! This is an easy dish to make and perfect for a family dinner or meal with friends.
This delicious and cozy meal is perfect as the weather cools off. I keep this dish completely dairy free by using a plant-based feta option, but you can use regular feta, as well. You can keep the dish completely gluten free or even paleo based on the pasta you decide to use.
This super simple meal basically just involves roasting everything, blending it together, and tossing with your pasta of choice! I love adding in chicken-apple sausage, as well as some other veggies. If you’re not a huge veg person, this is a great way to get your veggies in and perfect for hiding veggies in dishes for picky eaters.
This is a fall take on the viral feta pasta. A creamy, cheesy butternut squash sauce brings all the fall flavors into this savory dish.
Course Main Course
Cuisine American
Keyword Easy, fall, Fall flavors, Simple
Servings 4
Author Victoria
Ingredients
4cupschopped butternut squashabout a 1.5 lbs butternut
1cupcherry/baby tomatoes
2tbspfresh thyme, de-stemmed and chopped
1tspsage powder
1tspsalt
2-4tbspolive oilI like to use 1 tbs. of garlic infused olive oil (If you are not using garlic infused, add a few cloves of garlic to the dish)
1blockfeta4 servings of crumbled feta (I use a vegan version)
1 1/2cupsmilk of choice
4servingspasta of choice*cooked
Optional: protein, veggiesI like to use chicken-apple sausage, extra veggies like sautéed kale, peas, or bell pepper
Instructions
Preheat oven to 425F
Add chopped butternut squash, tomatoes, herbs, and salt to a baking dish. Toss with olive oil to coat. If you are not using a garlic infused olive oil, add a few garlic cloves to the dish.
Add your block of feta in the middle of the dish or sprinkle feta on top.
Bake for about 40 minutes, until squash is fork tender.
Let the squash cool down for 10 minutes before adding to a high speed blender or food processor with the milk. Blend until smooth.
Taste and add more salt or herbs as desired.
Toss your cooked pasta, protein, and veggies (if using) with the butternut squash sauce. I like to sprinkle some nutritional yeast on top. Enjoy!
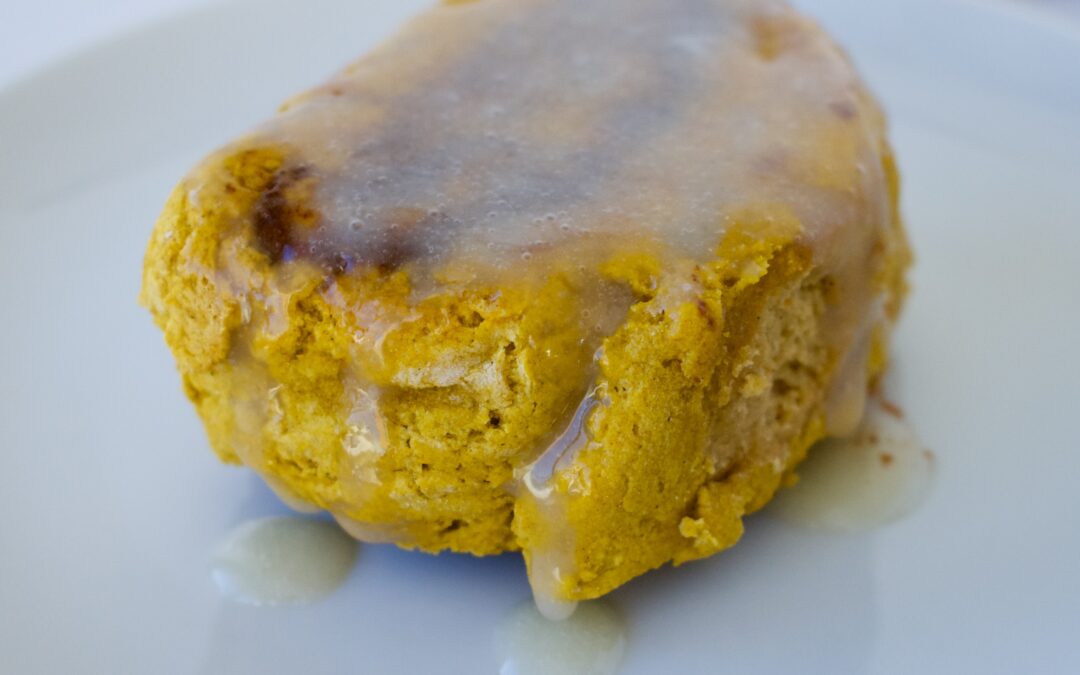
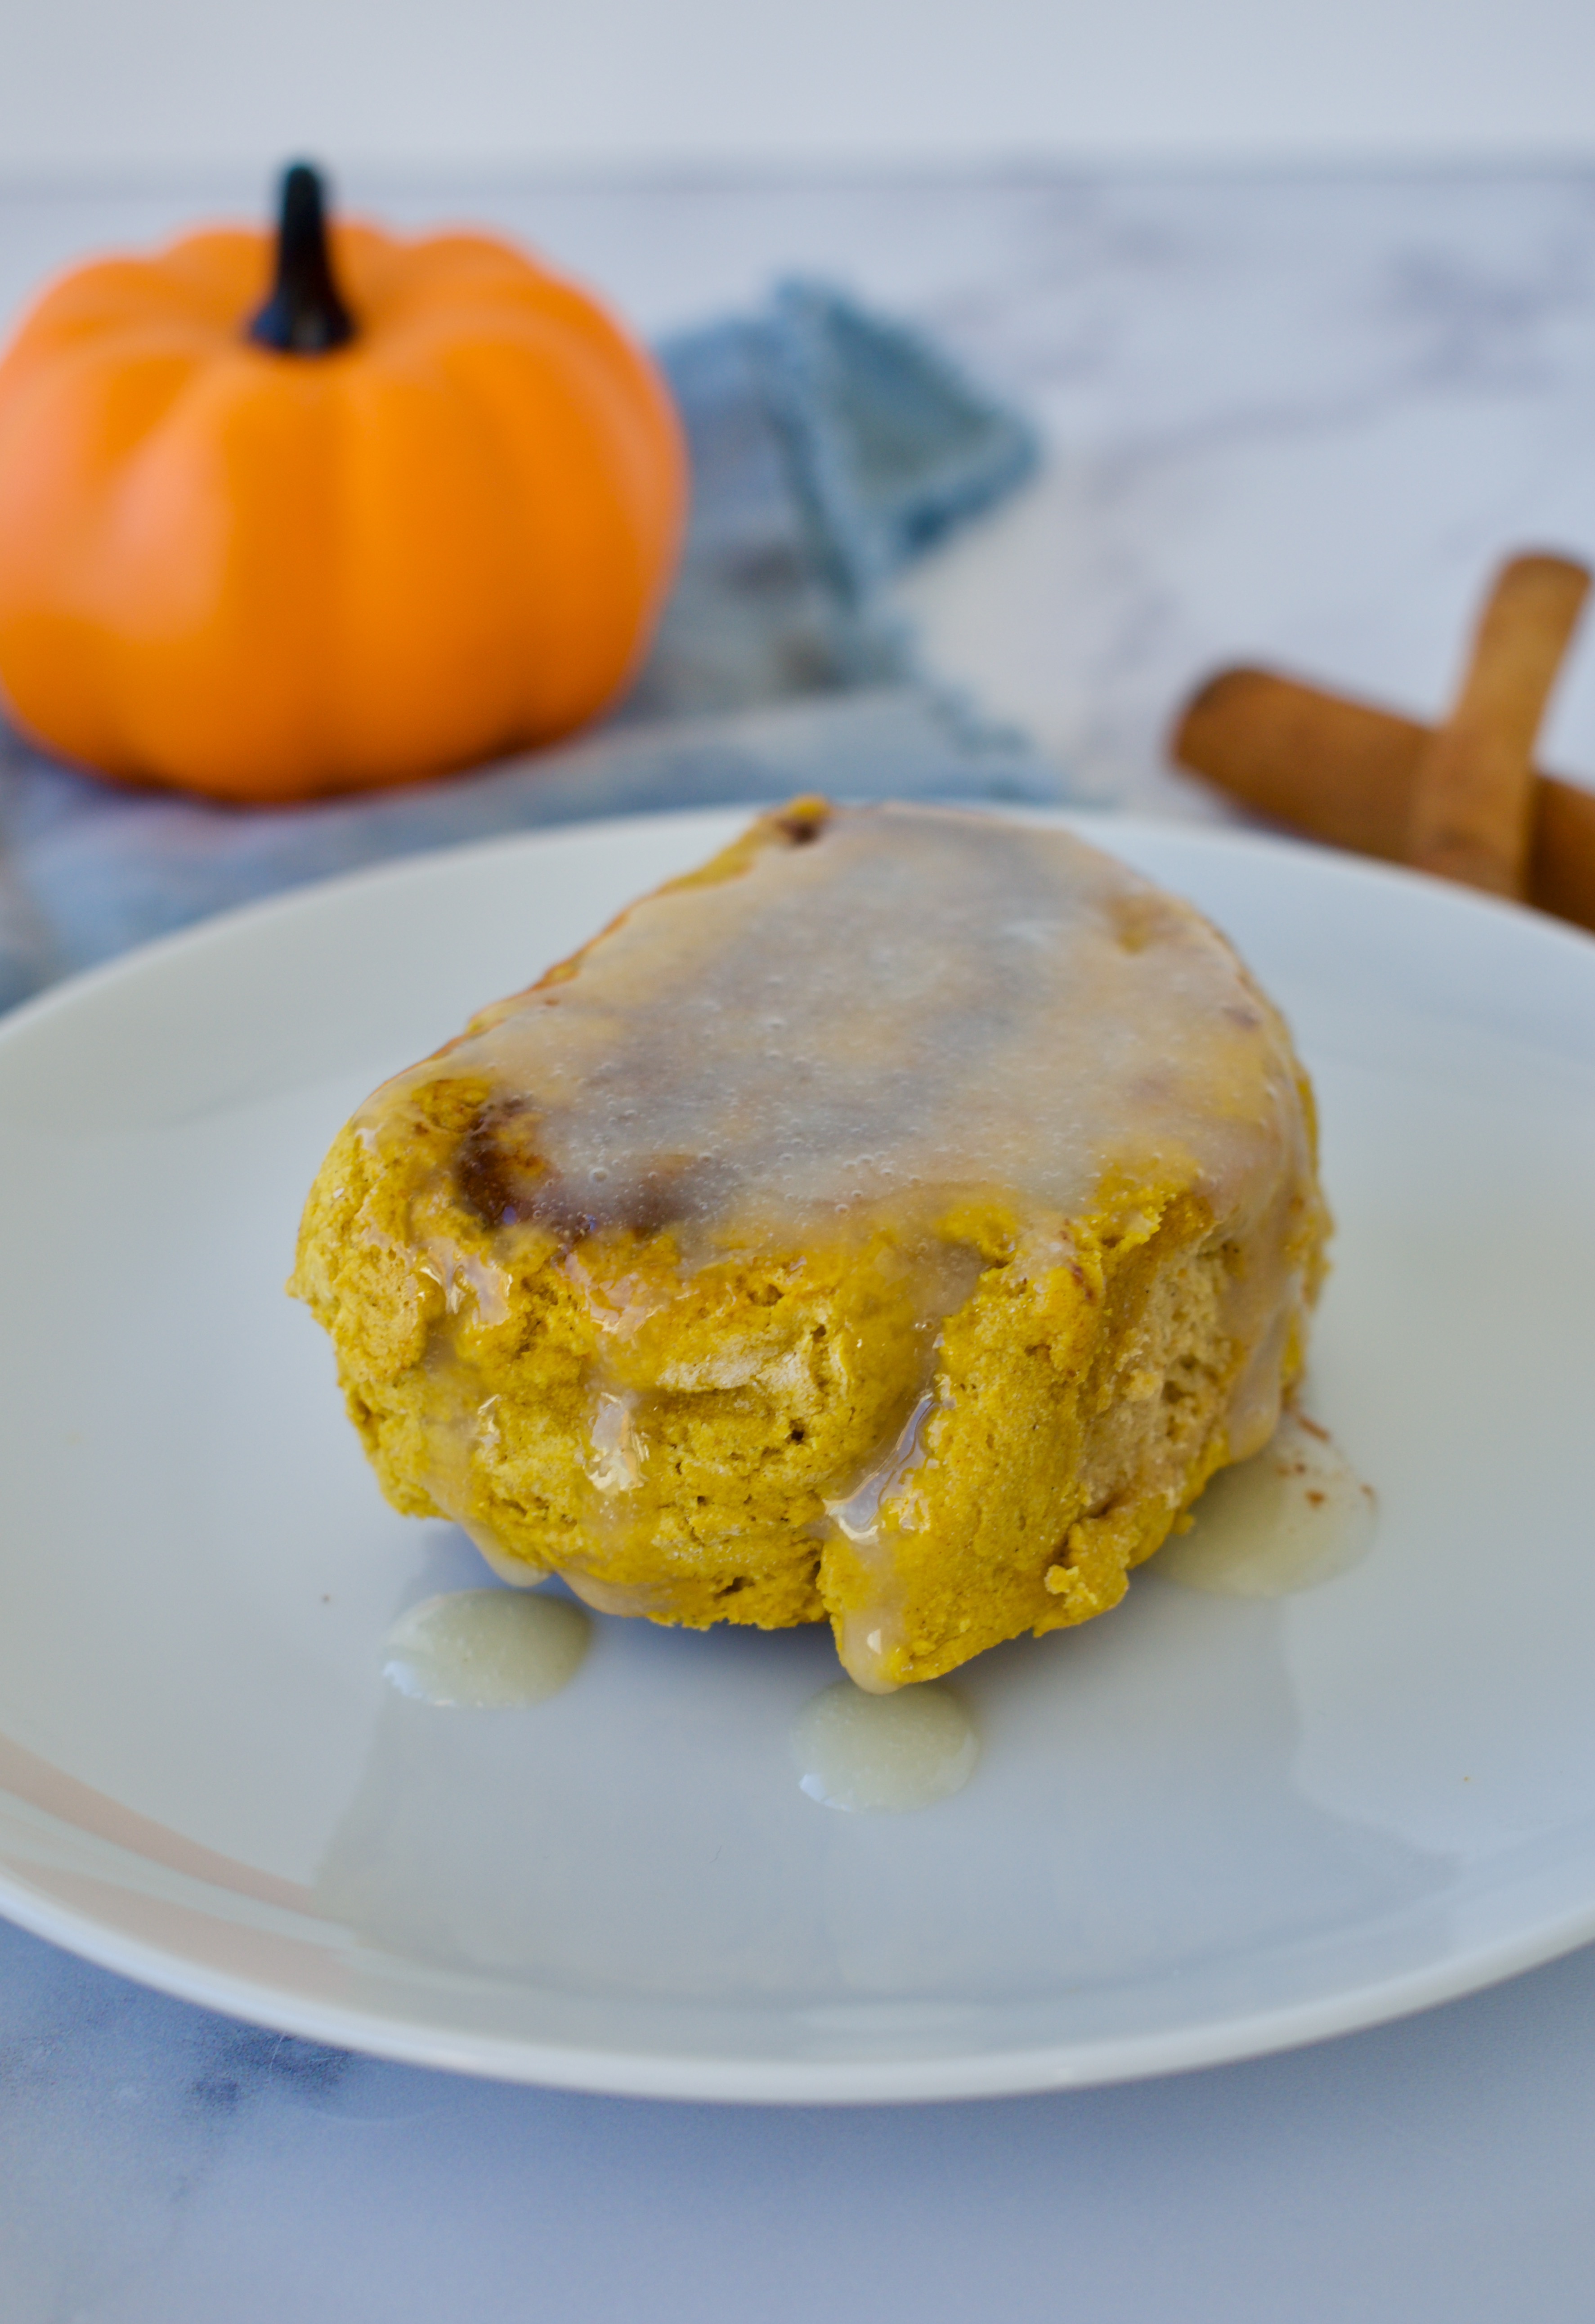
Cinnamon rolls are delicious all year round, but pumpkin cinnamon rolls scream fall. These delicious rolls are completely gluten free and dairy free with a vegan option. They are also healthier than traditional cinnamon rolls, so they are a great addition to breakfast.
If you haven’t heard, there’s been a viral 2-ingredient dough going around the internet over the last year. This is where you combine Greek yogurt and self-rising flour in a 1:1 ratio to create an easy dough that can be used for pizza, bagels, rolls, and more. We’re amping up that dough in this recipe to create this simple pumpkin cinnamon rolls.
What is Self-Rising Flour?
Self-rising flour contains baking powder. If you don’t have gluten-free self rising flour at home, it’s easy to make! All you have to do is combine 2 cups of 1:1 gluten-free flour (it must have a binder like xanthum gum in it!) with 3 teaspoons of baking powder and 1/2 teaspoon of salt. Mix everything well and you are ready to go!
What Yogurt Should I Use?
Although the original 2-ingredient dough calls for Greek yogurt, I use a vegan yogurt in this recipe to keep it dairy free. This means we have to use a bit more flour. I have tried this recipe with both Oatly oat yogurt and Forager Project cashew-coconut yogurt. I find the cinnamon rolls come out best with the Oatly yogurt, but you should be able to sub in a different brand if needed.
What’s the Best Ratio of Flour to Yogurt?
You may use up to 2 cups of self-rising flour in this recipe depending on the yogurt you use. If you decide to use Greek yogurt, you’ll start with just 1 cup of flour. If using a vegan yogurt, you’ll start with 1 1/4 cups of flour and increase as needed. Don’t worry, I walk you through the entire process to get the right dough consistency in the recipe below.
How Do I Make This Recipe Vegan?
I added an egg to the dough because I think that gives it a better rise, especially with gluten-free flour, but you can sub the egg for another 1/4 cup of vegan yogurt to keep the entire recipe plant-based!
These healthy Pumpkin Cinnamon Rolls are gluten-free & dairy-free and can be made completely vegan too! We're amping up the viral 2-ingredient dough for these easy, no-yeast cinnamon rolls.
Course Breakfast, Dessert, Snack
Cuisine American
Keyword Easy, No Yeast
Servings 10rolls
Author Victoria
Ingredients
Dough
1/2cupGreek yogurt or vegan yogurt
1egg*use another 1/4 cup of vegan yogurt for vegan version
1/4cuppumpkin puree
1tspvanilla extract
2tbspcoconut sugar
2cupsself-rising 1:1 gluten free flour*see note for homemade version
Filling
3/4cuppumpkin puree
2tbspcoconut sugar
1 tbspcinnamon
Icing
1/4cuppowdered sugar
1tbspyogurt of choice
1/2 tspvanilla extract
1tspmelted coconut oil or butter
Instructions
Preheat the oven to 350F.
Combine yogurt, egg (or more yogurt), pumpkin, vanilla, and sugar together in a large bowl. If using Greek yogurt, add 1 cup of the flour to start. If using vegan yogurt, add 1 1/4 cup of flour.
Mix gently with a rubber spatula to combine. We want to create a dough that holds together and isn’t very sticky to the touch. If the dough is really wet and sticky still, add another 1/4 cup of flour then add flour 1 Tbs. at a time after that as necessary until you reach the right consistency.
Once the dough begins to come together, use your hands to gently need the flour into the dough and create a dough ball that isn’t too wet and can be held without it completely sticking to your hands.
Lay out a large piece of parchment paper (at least 15-20 inches long so you have enough space to work on) and flour your work surface.
Place the dough on the floured surface and lightly flour the top of the dough, as well. Use a rolling pin to roll the dough into about a 10″x12-15″ rectangle that is about 1/4inch thick.
Combine all your filling ingredients in a bowl and mix will.
Spread the filling in a thin layer over the dough.
Starting at one end, use the parchment paper to help you roll the dough medium-tight.
I find using a knife run under cold water works best for cutting the rolls. You want to cut the dough in 1 inch increments. Place the rolls 1/2inch apart in a baking dish.
Bake for 30-35 minutes until golden and firm to the touch.
Let cinnamon rolls cool slightly before making the icing.
To make the icing, combine the sugar, yogurt, and vanilla. Mix well. Add in the melted oil or butter and stir quickly. Drizzle the icing over the rolls.
Store in the fridge for up to 5 days and warm up slightly in the oven or microwave before eating.
Notes
Self-rising flour contains baking powder. If you don’t have gluten-free self rising flour at home, it’s easy to make! All you have to do is combine 2 cups of 1:1 gluten-free flour (it must have a binder like xanthum gum in it!) with 3 teaspoons of baking powder and 1/2 teaspoon of salt. Mix everything well and you are ready to go!
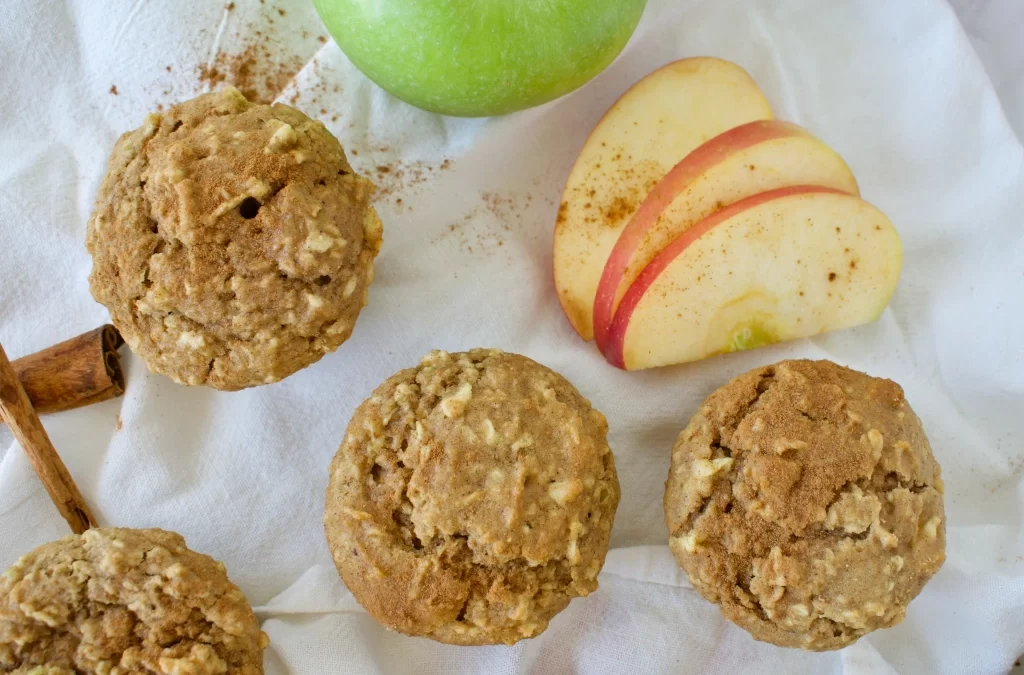
If you’re looking for a simple apple muffin recipe this season, then these Gluten Free Cinnamon Apple Muffins are it! They are allergy friendly and filled with fall flavor.
gluten free cinnamon apple muffins
I was in the mood for a simple cinnamon-apple muffin and these delivered. These muffins aren’t anything fancy, but they’ll satisfy your cravings for all the fall flavors. If you’re not usually a fan of apple muffins or bread because of the chunks of apple, these muffins are your new best friend because we’re using shredded apple to disperse that apple flavor and moisture throughout the muffin.
These gluten-free and dairy-free muffins are also filled with delicious cinnamon, making them perfect alongside your cup of coffee or tea. If you are a huge cinnamon fan, you can amp up the cinnamon flavor by using cinnamon applesauce or even a cinnamon infused maple syrup if you want to get really fancy.
1/2 cup applesauce *if you are a huge cinnamon fan, you can use cinnamon applesauce
1/3 cup maple syrup
The hardest part of this recipe is chopping and shredding the apples. I suggest using a food processor to make it easy, but you can always do it by hand if you desire. Once the apples are shredded, the recipe comes together quickly. You’ll just beat together your wet ingredients, add the dry, then fold in the apples and bake!
gluten free and dairy free cinnamon apple muffins
Other Apple Recipes
If you are looking for more apple recipes, then don’t worry, I’ve got plenty of gluten free options for you!
These gluten free and dairy free Cinnamon Apple Muffins are a great way to embrace fall flavors! They are lightly sweetened, keeping them low sugar & perfect for everyone
1/2cupapplesauce*if you are a huge cinnamon fan, you can use cinnamon applesauce
1/3 cupmaple syrup
Instructions
Preheat oven to 350F
Chop and grate your apple. Place shredded apple in a paper towel or cheesecloth and gently squeeze once to remove just a little bit of the moisture. Don’t overdo it and don’t squeeze all the liquid out. Set aside.
Sift all dry ingredients together in a bowl (flours, baking soda, salt, cinnamon).
Combine all wet ingredients together in a separate bowl (eggs, oil, applesauce, maple syrup) and beat until smooth.
Add dry ingredients to the wet ingredients and combine on low (with paddle attachment if available).
Fold in the shredded apple.
Divide batter evenly among a lined muffin tin. you should get 12 muffins.
Bake for 23-27 minutes, until a toothpick just comes out clean. Start checking at 23 minutes and don’t over bake!
Let cool for 10 minutes in the pan then remove muffins to a wire rack to finish cooling.
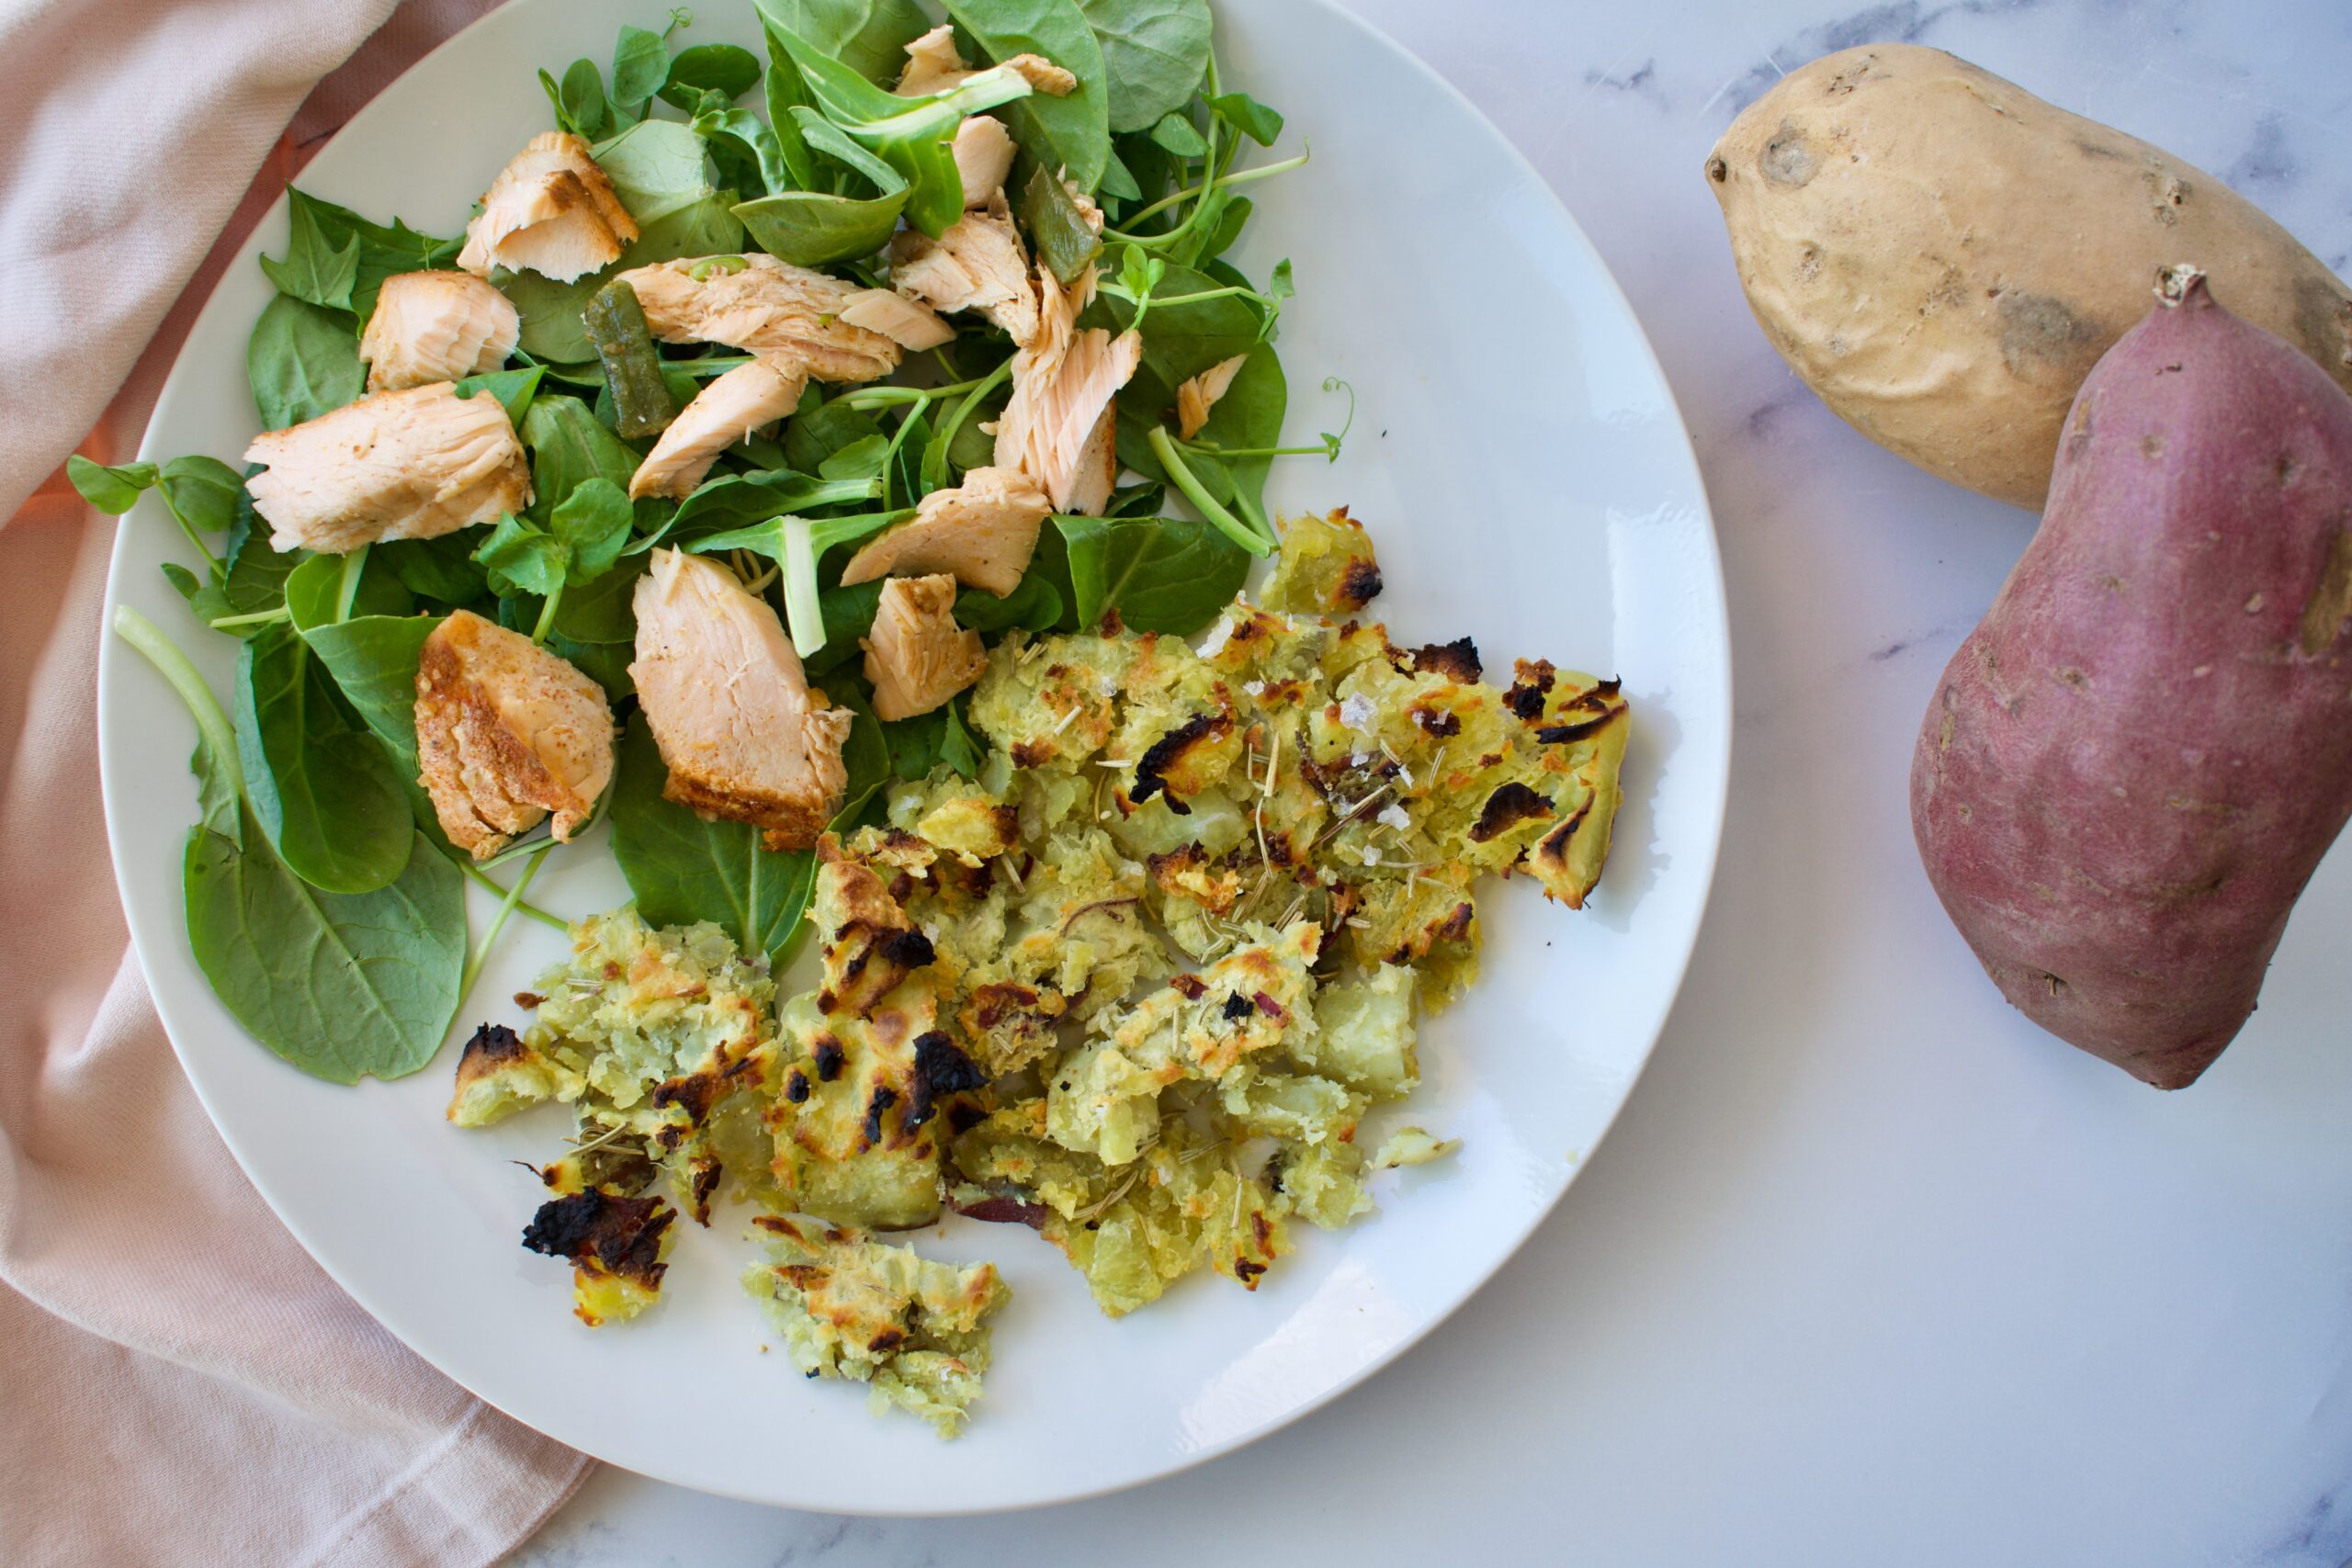
Japanese sweet potatoes are the superior sweet potato. They are so sweet and delicious! They pair well with almost anything and take on flavors in a lovely way. I eat them all the time, but wanted to find a new way to cook them. This crispy smashed version is fantastic.
After steaming the sweet potatoes, we’ll smash and broil them to get a crispy top. Of course, lots of oil and butter to keep them moist and delicious, plus some herbs for a little pop of flavor. This is a delicious, allergy friendly side dish that will please everyone!
This side dish is sure to please with it’s sweet and salty, soft and crunchy combo. We’re using my favorite sweet potatoes combined with aromatic herbs for a delicious potato dish!
Ingredients
2-3Japanese sweet potatoes
2-3tbspolive oilI prefer the garlic infused kind
1tbspdried thyme
1tbspdried rosemary
1tbspflakey sea salt
Butter of choiceI used a vegan variety
Instructions
Chop your sweet potatoes into large chunks and steam until fork tender.
Preheat oven to broil as you prep the potatoes.
Spread steamed potatoes on a parchment baking sheet and use the bottom of a glass to smash them down slightly. They may stick, just smash and scrape off the bottom of the glass. This doesn’t have to look any type of way.
Once smashed, make sure the sweet potatoes are evenly spread out.
Drizzle with olive oil, enough to cover them generously. Then sprinkle the thyme, rosemary, and salt evenly over top.
Broil for 8-15 minutes. The time will depend on your oven. You want a light crisp on the top without burning them.
Mini desserts are the cutest and that includes these mini apple pies. Plus, you get to eat a whole pie yourself! Um, win-win! Apple pie is my favorite pie and I thought it would be so fun to make mini ones.
gluten free mini apple pies
This recipe is completely gluten free with a paleo option. I will be honest, using the Beth Blends does result in a drier crust, but if you are going for full Paleo then it’s a great option (use code LNL for 10% off) . There is also no dairy or nuts in this recipe and I provide a few ways to make the crust depending on your desired sugar intake.
These mini apple pies are an adorable way to enjoy one of the best desserts ever. Each person can get their own pie, topped with a scoop of ice cream, of course! Enjoy these completely gluten free and dairy free mini pies
Whisk the dry ingredients for your crust together.
Cut in the oil/butter then add in the maple syrup (if using) and egg and use a fork to combine. You'll eventually want to switch to your hands to bring the dough together. If the dough seems dry or isn't holding together well, add 1 tbs. of cold water as needed.
Form the dough into a ball and wrap in plastic wrap. Place in the fridge while you make the apple filling.
Filling
For the filling, mix your chopped apples with the remaining filling ingredients
Preheat oven to 350F.
It’s best to line a muffin tin with silicone muffin liners. That is the easiest way to get the pies out. If you don’t have these, spray your muffin tin generously with oil.
Roll the dough out between two sheets of parchment paper until it is about 1/4 inch thick or slightly thinner than that. Use a glass or round cookie cutter that is about 3inches in diameter to cut out 8 circles.
Lift a circle with a spatula and carefully line a muffin hole. It’s okay if the crust breaks, just press it back together and form it into the muffin hole. Repeat with remaining circles.
Fill each pie base with apple filling.
Re-roll out the remaining dough and use a slightly smaller circle to cut 8 crust tops out. Place a circle over the top of a mini pie and gently shape it to fit, pressing the edge into the base as possible. Use the tip of a fork to press the edges together and crimp the dough. Poke a couple holes in the top of the crust with the fork. Repeat for all pies. You will need to work gently with this dough, but it’s easy to fix any breaks.
If you have leftover dough, you can make another pie!
Brush the top of each pie with olive oil or egg.
Bake for about 20 minutes, until the tops are golden and firm to the touch.
Let cool completely and enjoy!
Notes
*Alternatively, you can use Beth Blends for a paleo option (use code LNL for 10% off)**If you don’t want to add the maple syrup, you can use 1/3 cup of coconut oil or butter
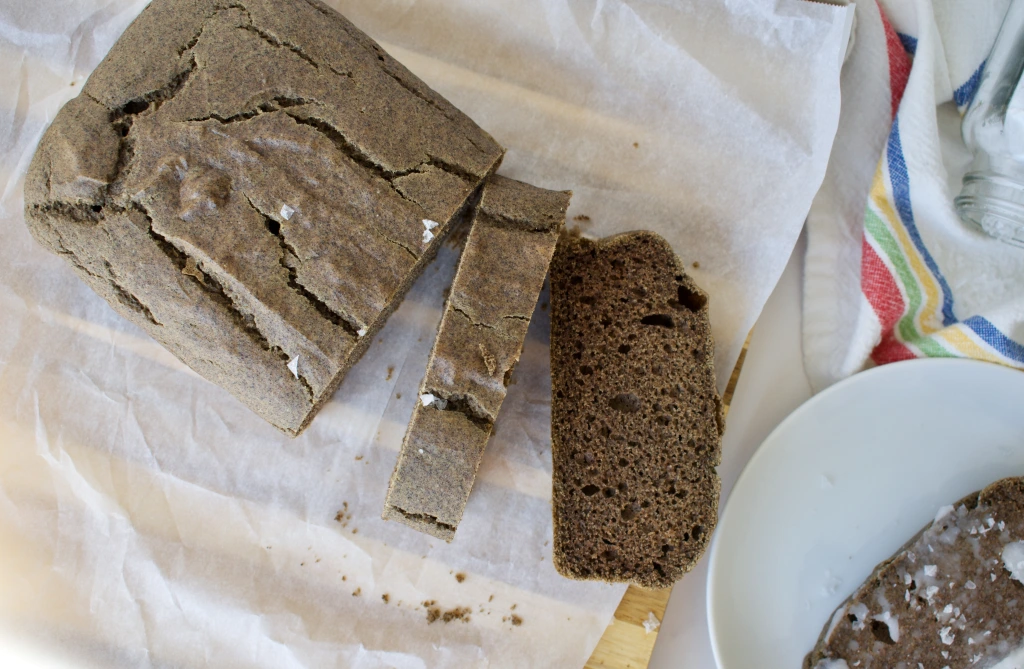
This is a super quick and easy recipe to whip up when craving some gluten free bread. All you have to do is mix the dry ingredients, whisk in the wet, and bake. If you are looking for an egg free bread, check out this version of my Buckwheat Bread.
I love the earthy taste of buckwheat, but it can be a bit drier on the mouth, so slathering a slice in coconut oil or your favorite nut/seed butter makes the bread best. This is more of a snack/side bread than a sandwich bread as there is no yeast, so it doesn’t get as much rise. I really enjoy smeared with granola butter or coconut oil and salt!
Whisk the dry ingredients together in a medium bowl.
Add the wet ingredients and mix until combined, do not over mix. Let sit while you line a loaf pan with parchment paper.
Scoop the mixture into your loaf pan and bake for 25-30 minutes or until a toothpick comes out clean. At 25 minutes, check it every 2 minutes if not done. This bread will cook and dry out fast so you want to pull out as soon as it’s done.
Let cool for 5 minutes before transferring to a wire rack to cool completely before cutting into it. This bread tastes best if you can let it sit overnight before cutting.
Stores well in the fridge for up to 5 days or sliced and stored in the freezer for up to 6 months.
Hi! I'm Victoria. I was diagnosed with Lyme in 2012 and have been on a healing journey ever since. I love helping others on their road to healing through allergy friendly recipes, exercise, and overall well-being.