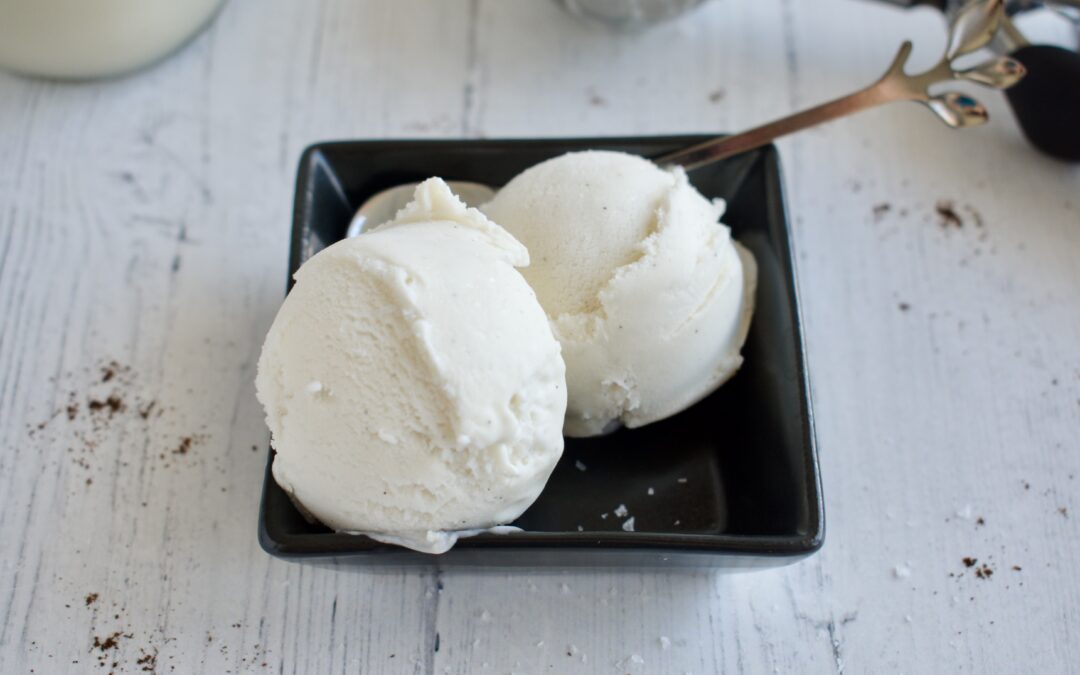
This homemade Dairy Free Vanilla Ice Cream is the perfect summer treat! It’s easy, allergy friendly, and only a handful of ingredients, plus it can be made completely vegan.
dairy free vanilla ice cream
Summer calls for ice cream, right? Well, anytime calls for ice cream really ;), but summer does 100%. I got an ice cream maker for Christmas and I’ve been a bit obsessed. I haven’t made anything too fancy yet, but I have a lot of ideas in mind. I was craving just a good, basic vanilla ice cream recently so I had to share the recipe.
The best part about this homemade ice cream is that it fits most diets! It can be made vegan, it’s gluten free, dairy free, refined sugar free, nut free, Paleo, and can be made AIP. This is just your reminder that you can eat amazing, fun foods no matter what your food allergies are! My website is packed with allergy friendly recipes, so make sure to explore because I promise there is something for everyone here.
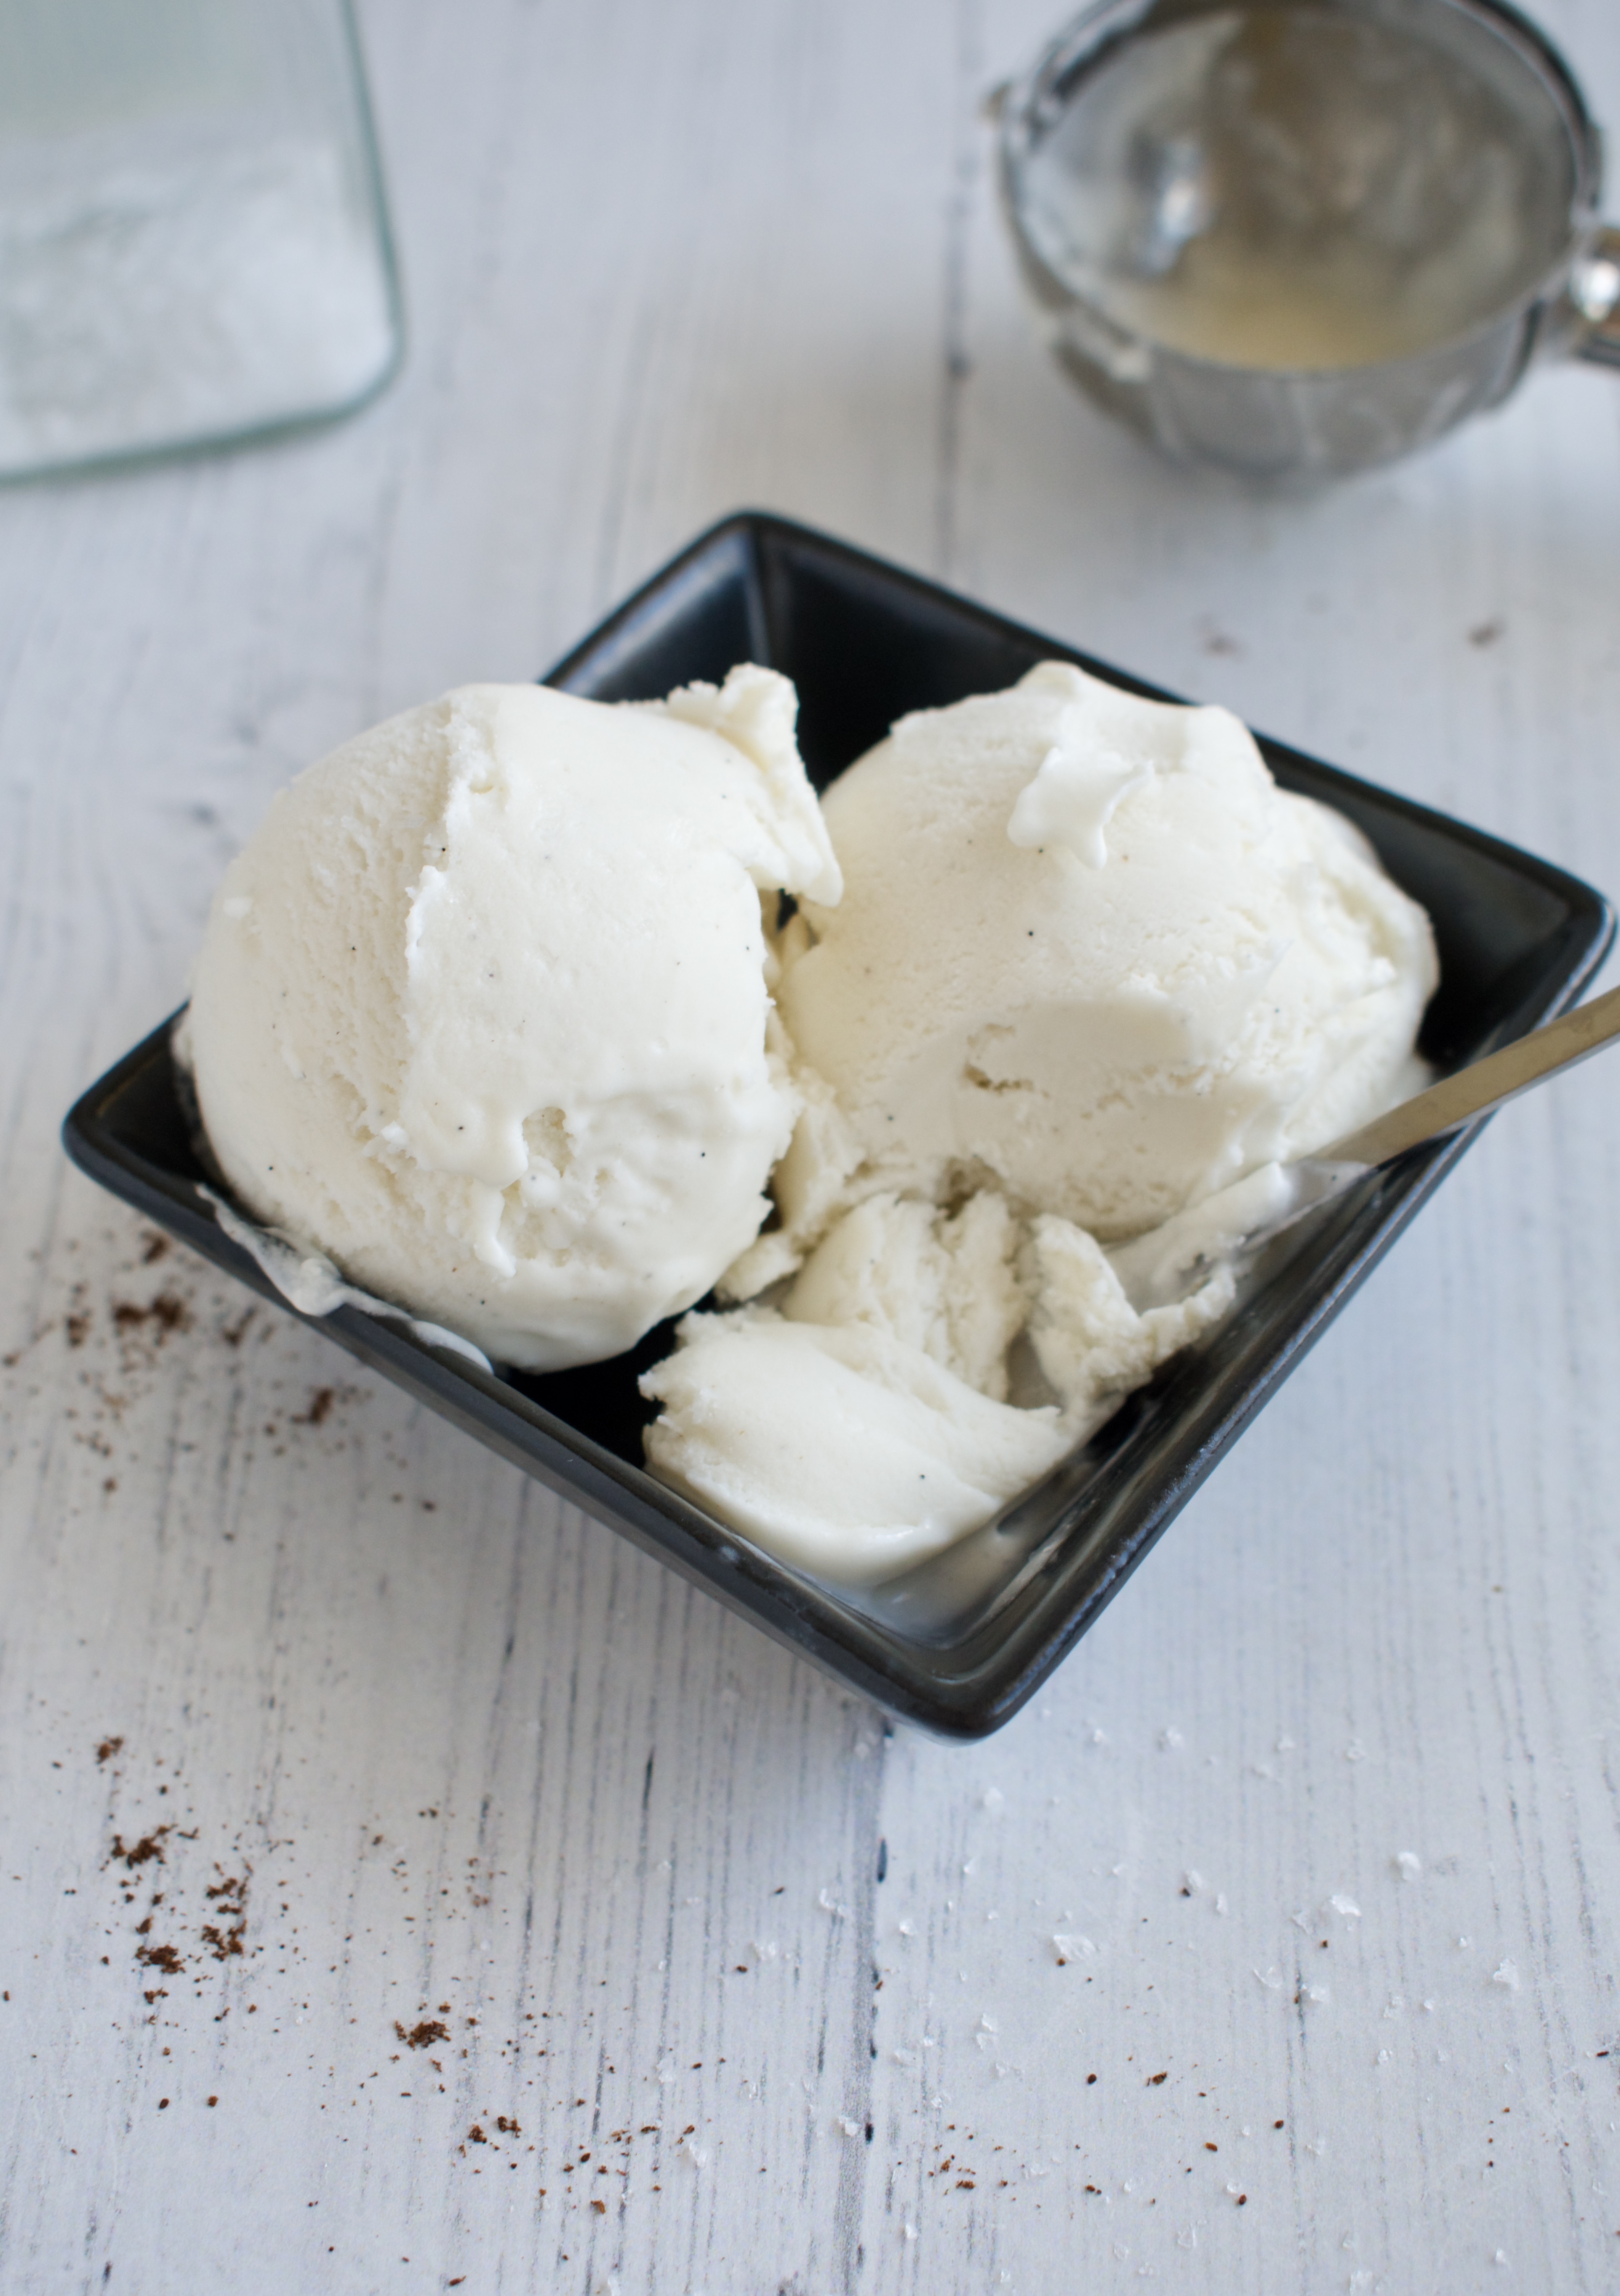
dairy free vanilla ice cream
How to Make Dairy Free Ice Cream
In this recipe, I share both a more traditional version made with egg yolks and a completely vegan option.
Blend the coconut milk, maple syrup, sugar, and seeds from the vanilla bean in a blender until combined.
Transfer the mixture to a saucepan and heat over medium-low heat. While your base begins to heat, whisk your egg yolks together in a small bowl. When the mixture is warm to the touch but not hot, mix 1/4 cup of the ice cream base with the egg yolks OR starch. Whisk to combine then add it to the base in the saucepan.
Stirring occasionally, heat your entire ice cream mixture until it just begins to thicken slightly and the mixture coats the back of a spoon. This will take about 10 minutes, depending on your stove.
Once it has reached the right consistency, let cool at room temperature before placing in the fridge to finish cooling.
Once your base has cooled, add it to your ice cream maker following the manufacturers directions. I’ve found that it takes 15-20 minutes for my ice cream to churn, at which point you usually have a soft serve consistency. Transfer to an ice cream container, freezer safe glass dish, or loaf pan lined with parchment paper (top with wax paper or plastic wrap pressed against the ice cream) and leave in the freezer for several hours or overnight to harden completely.
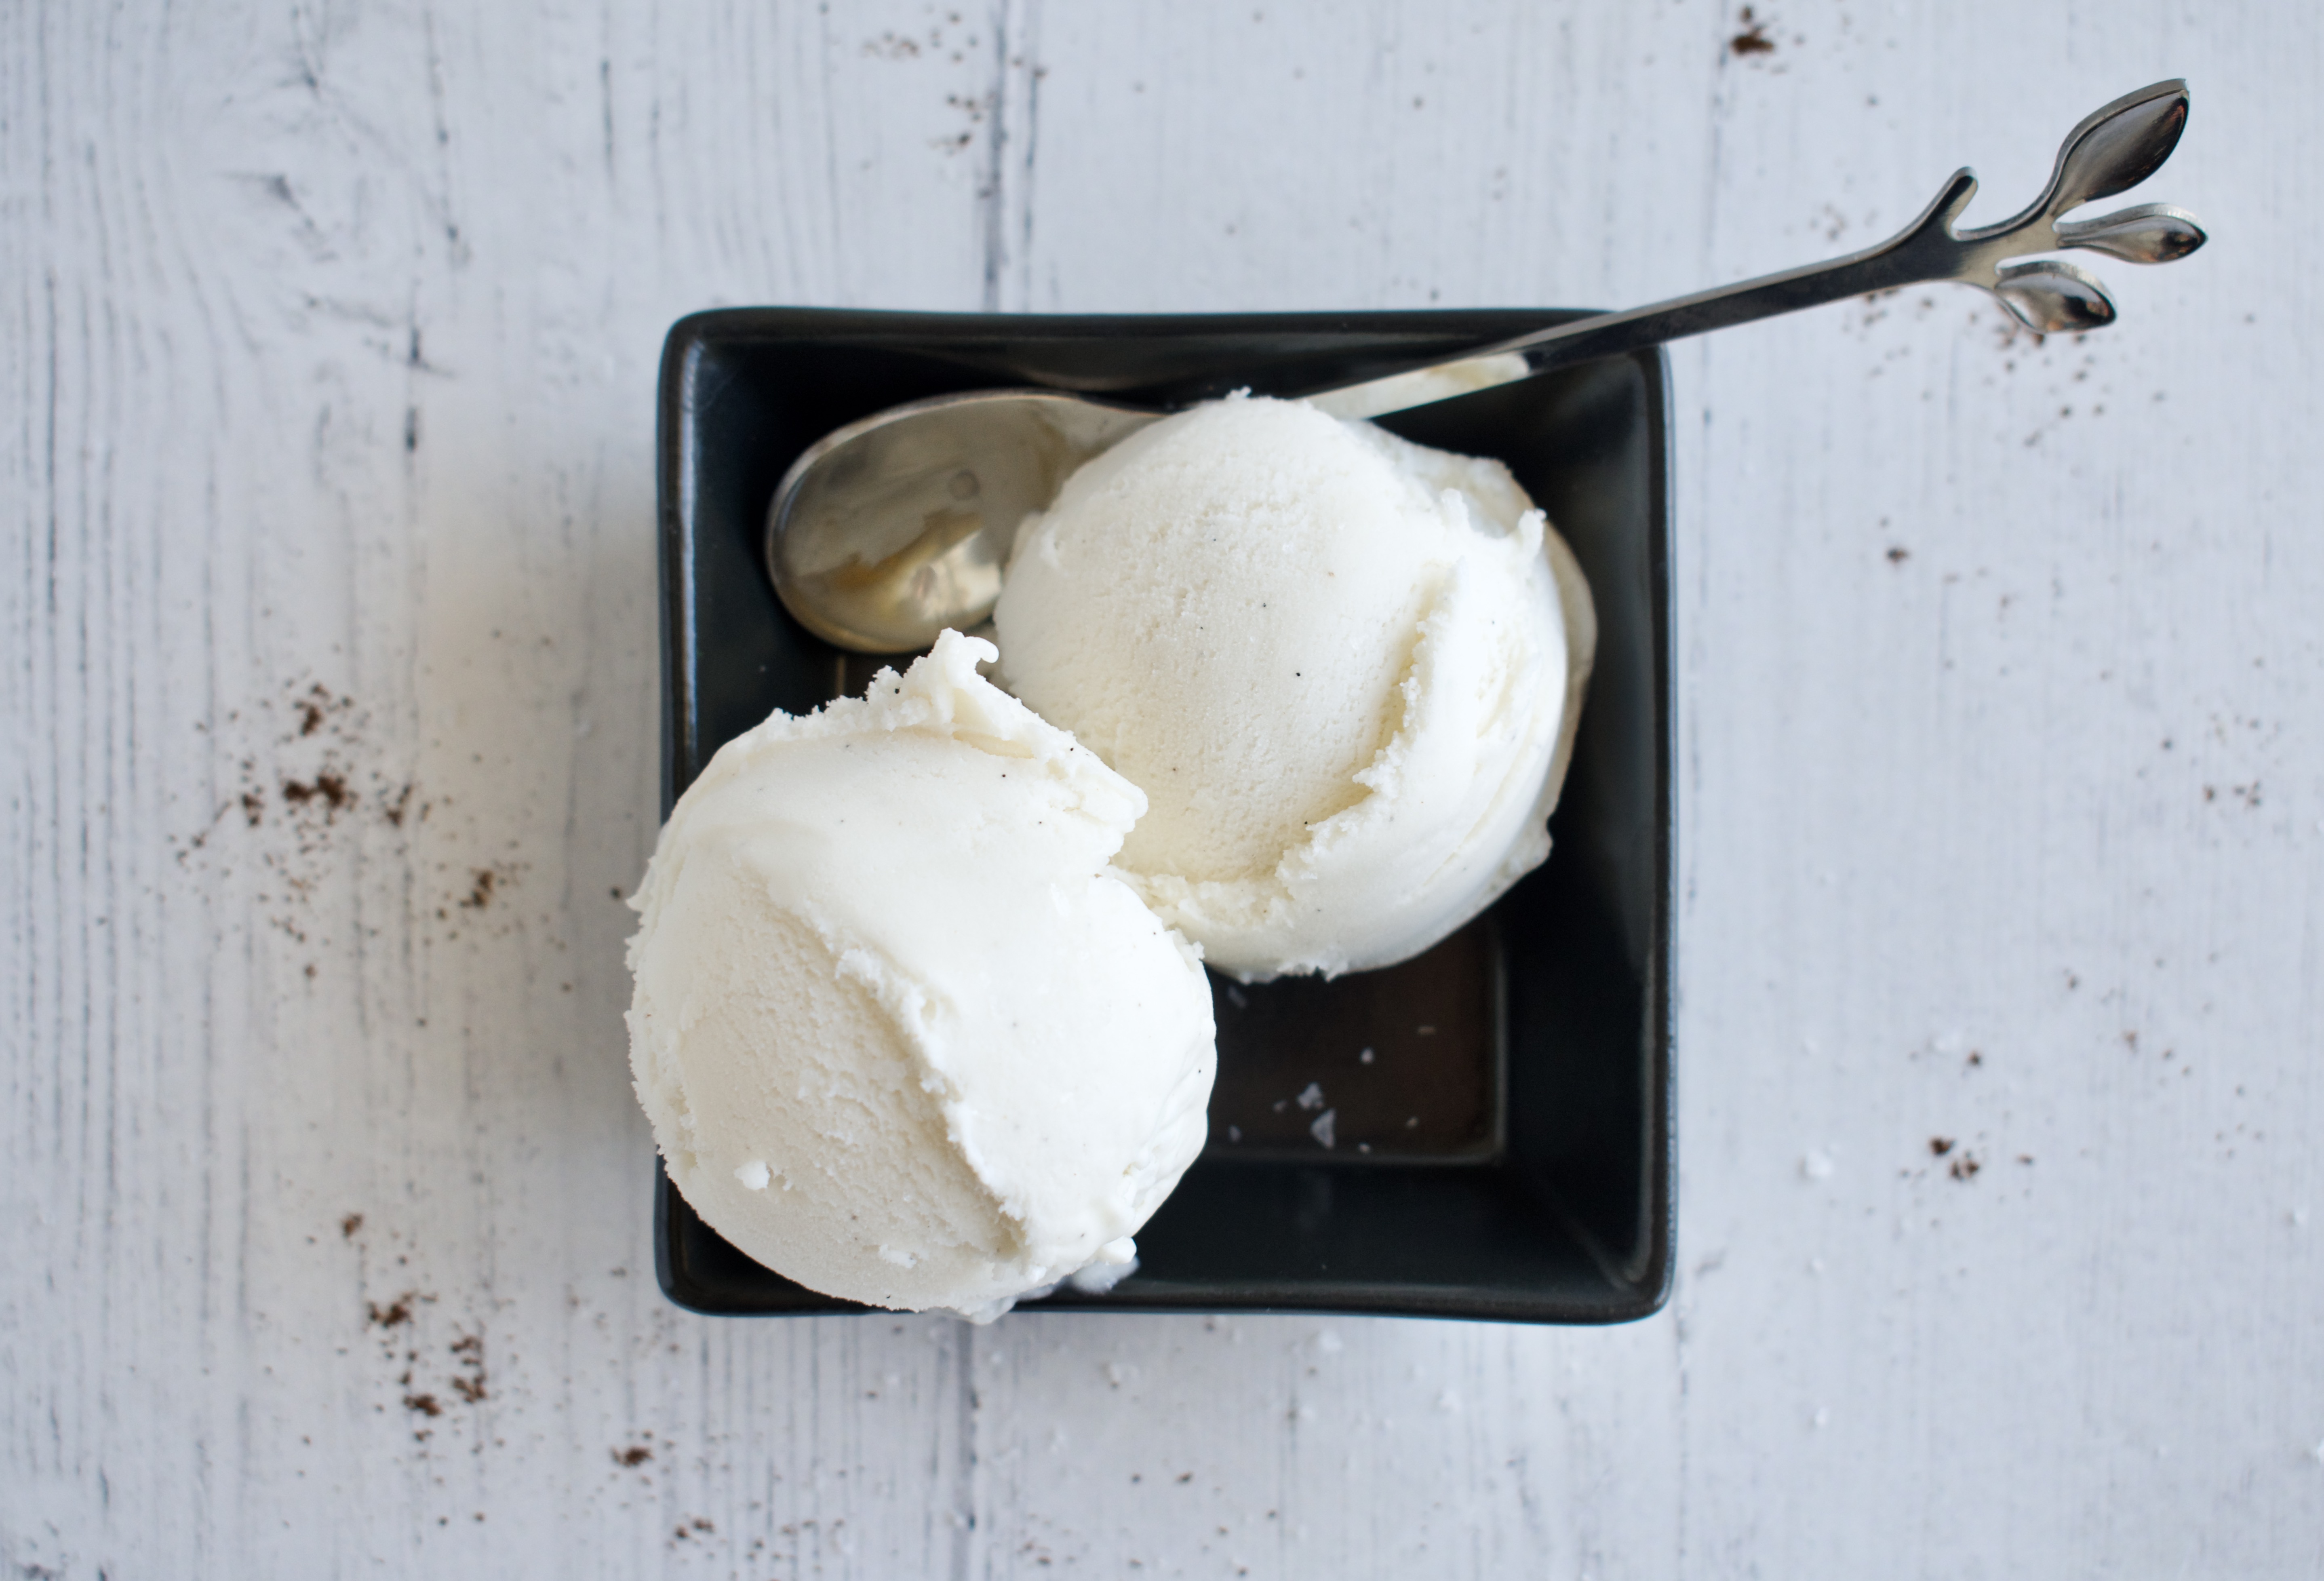
dairy free vanilla ice cream
Dairy Free Ice Cream Notes
Ingredients:
This recipe uses coconut milk as the base to provide that creamy, milky flavor.
To create more a custard, you can use egg yolks in this recipe, but to keep it completely vegan, I provide an alternative with tapioca starch.
I use a combination of coconut sugar and maple syrup to sweeten this ice cream, but you can always use just one. Since both of these sweeteners are brown, they can add a bit of color to the ice cream. If you want a more pure white, use white sugar!
What if I don’t have an ice cream maker?
If you don’t have an ice cream maker, you can always put the base into a freezer safe dish and whisk it every 30 minutes until it freezes. It won’t be quite as smooth, but it works in a pinch. This method is a little more time intensive as you do want to keep stirring the ice cream.
Why use egg yolksor starch?
Egg yolks or starch help the ice cream get that smooth, creamer texture without just being a frozen solid milk cube. They allow the ice cream to have some give and softness to it. Homemade ice cream is never quite as soft as store bought due to all the additives and gums they add, but we can at least soften it up a bit at home.
Blend the coconut milk, maple syrup, sugar, and seeds from the vanilla bean in a blender until combined. Or whisk them well in a saucepan.
Transfer the mixture to a saucepan and heat over medium-low heat. While your base begins to heat, whisk together the egg yolks in a small bowl. When the base is warm to the touch, but not hot, add 1/4 cup to the egg yolks OR to the starch and whisk to combine. Add this back to the base in the saucepan.
Stirring occasionally, heat your entire ice cream mixture until it starts to thicken slightly. It should coat the back of a spoon when ready. This will take about 10 minutes, depending on your stove.
Turn off the heat and let the mixture cool for about 20 minutes at room temperature before transferring to the fridge to cool off completely.
Once your base has cooled, add it to your ice cream maker following the manufacturers directions. I’ve found that it takes 15-20 minutes for my ice cream to churn, at which point you usually have a soft serve consistency. Transfer to an ice cream container, freezer safe glass dish, or loaf pan lined with parchment paper (top with wax paper or plastic wrap pressed against the ice cream) and leave in the freezer for several hours or overnight to harden completely.
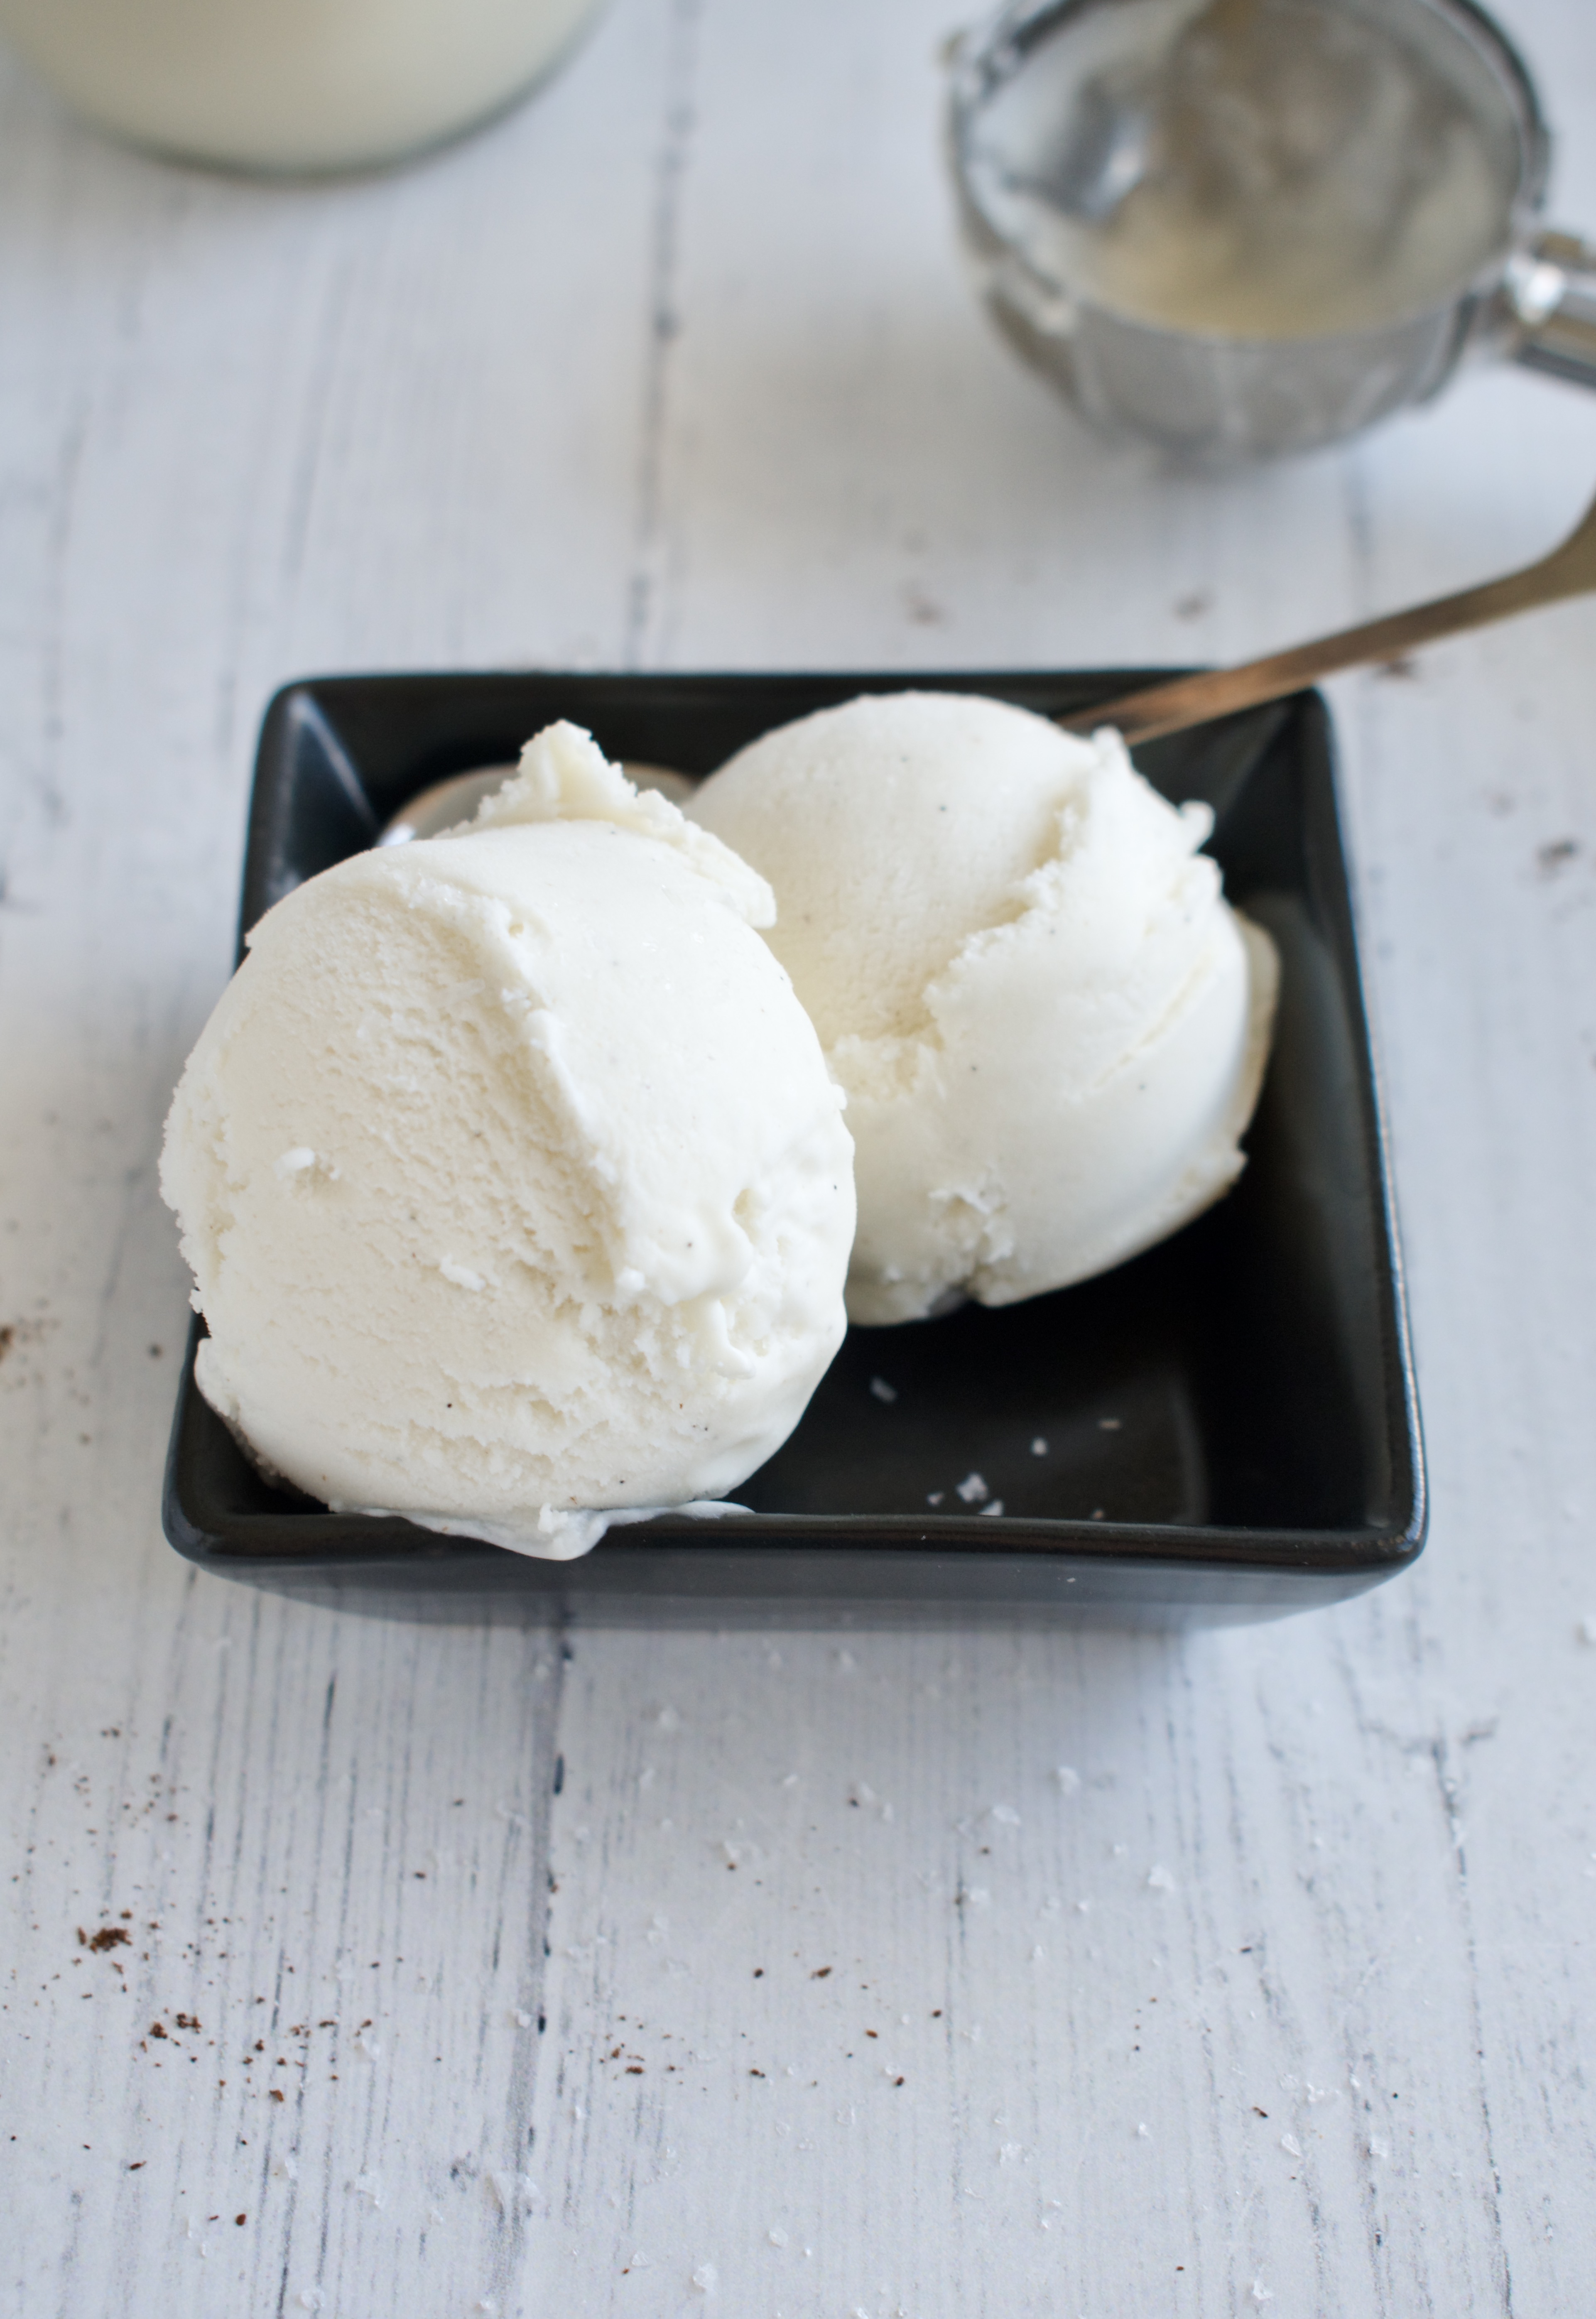
I suggest taking the ice cream out 5-15 minutes (depending on the temp in your house and how soft you like your ice cream) before serving so it can soften enough to scoop.
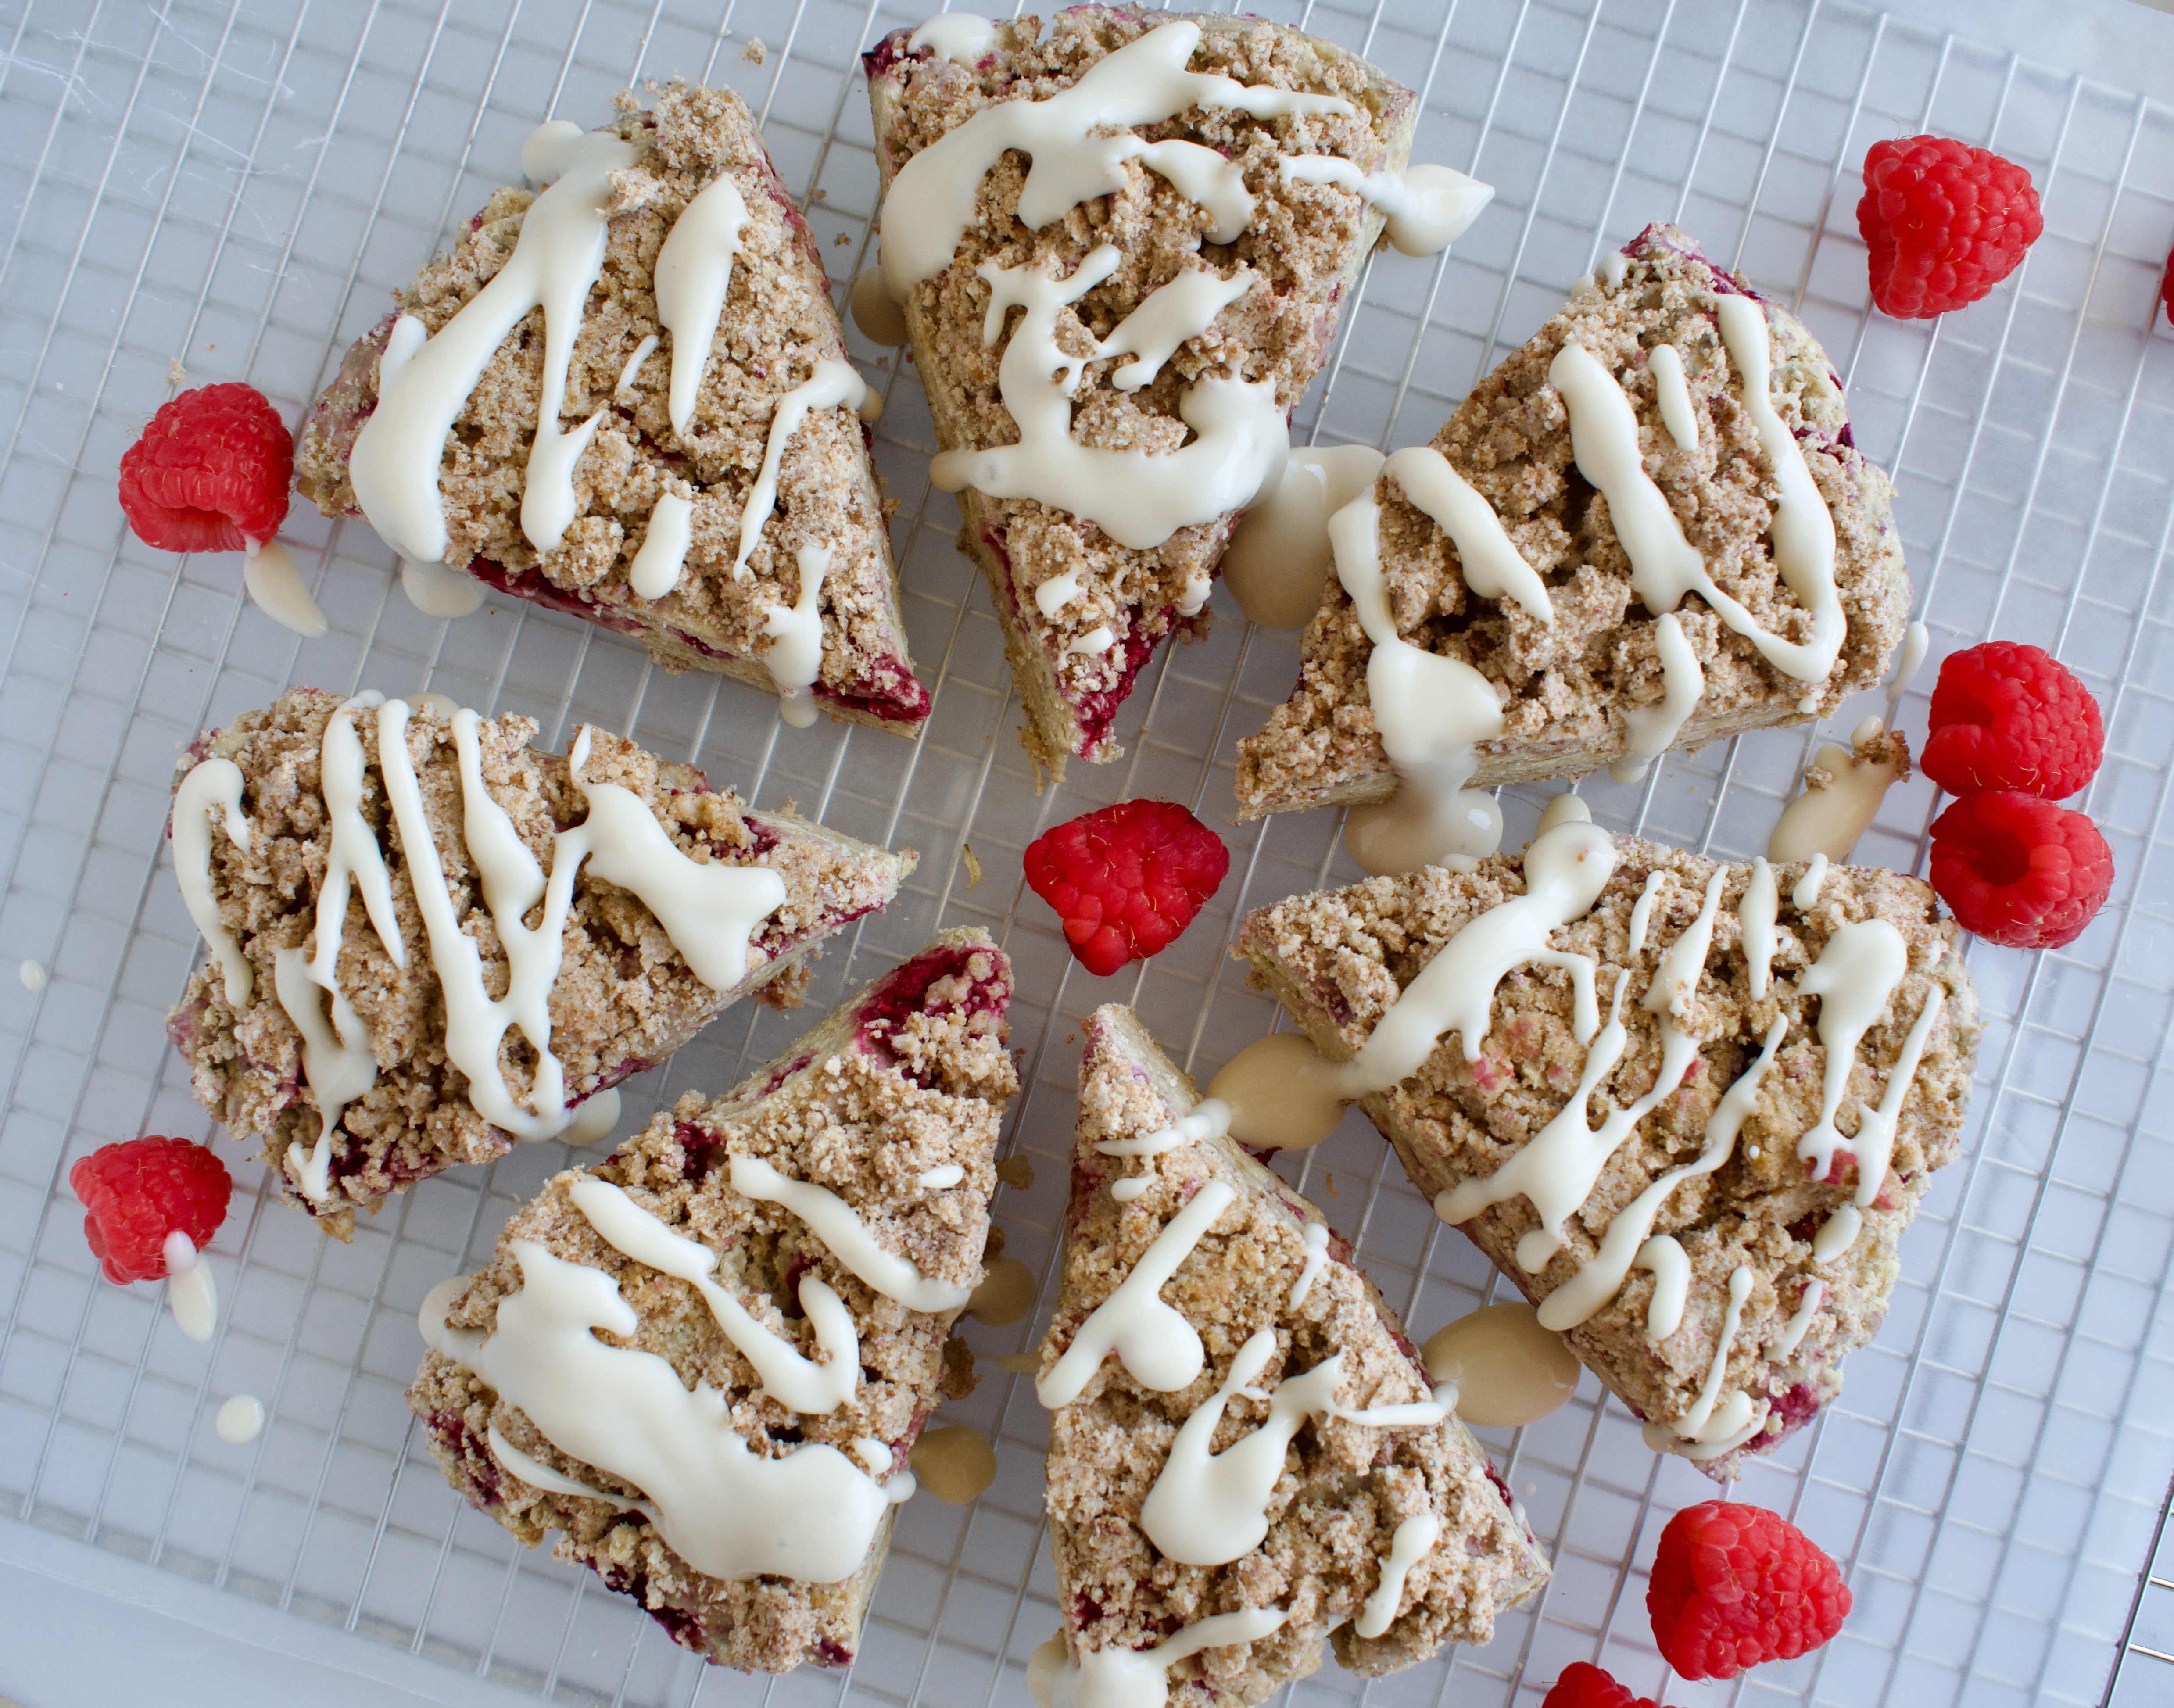
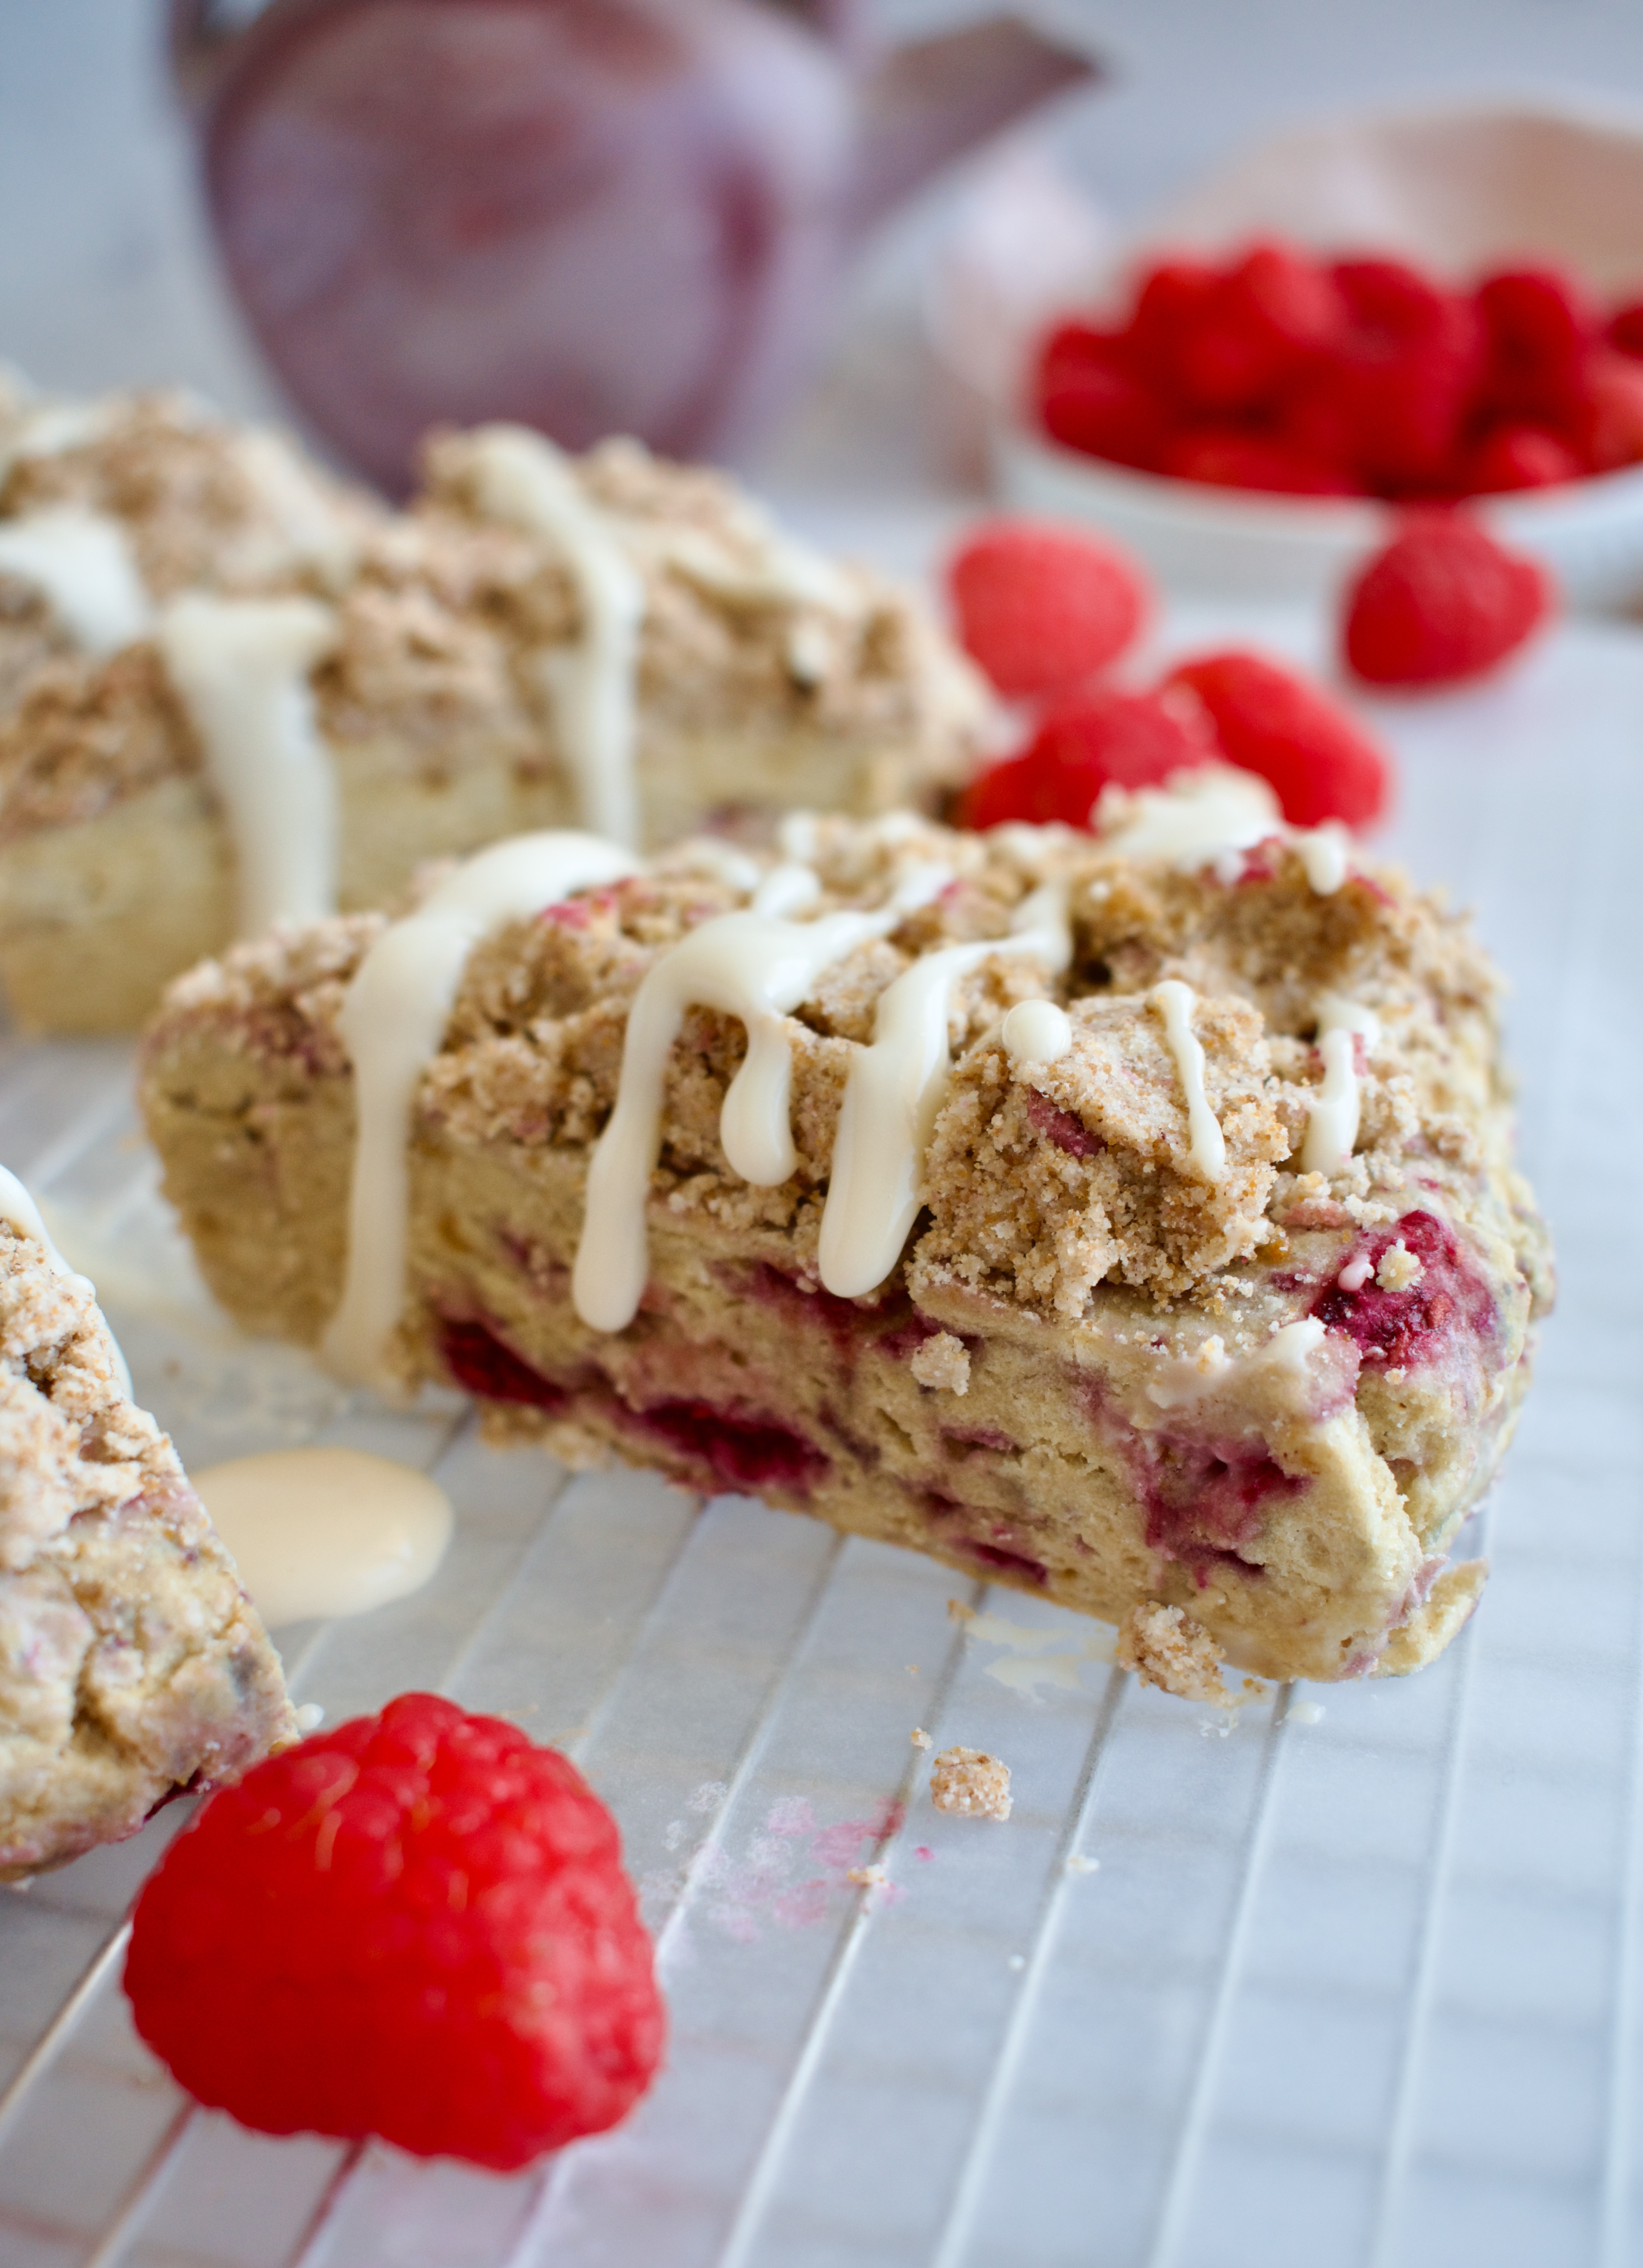
Delicious Gluten Free Raspberry Scones with a crumble topping and sweet cream drizzle. You’ll love this healthier and allergy friendly scone recipe!
gluten free raspberry scones
I think this is my favorite scone recipe I’ve made to date! First of all, I love berries. Second of all, I love a good crumble. Lastly, add a sweet glaze? I’m sold! These healthier scones are perfection with a cup of tea. They are completely gluten free, dairy free, and refined sugar free.
gluten free raspberry and cream scones
Gluten Free Raspberry and Cream Scones
Gluten Free Scone Ingredients:
Scones
1:1 gluten free flour
Baking powder
Salt
Coconut sugar
(Vegan) butter
egg
(Vegan) yogurt or coconut cream
Vanilla extract
Frozen raspberries, tossed in 1 Tbsp of flour
Crumble Topping
1:1 gluten free flour
Coconut sugar or white sugar
Cinnamon
Butter or coconut oil
Sweat Cream Drizzle
Powdered sugar
Yogurt or coconut cream
Instructions:
Whisk together the flour, baking powder, sugar and salt for the scones.
Whisk together the egg, vanilla extract, and yogurt/coconut cream and set aside.
Cut butter into flour mixture until you have a sand-like texture.
Add the remaining wet ingredients and use a fork to combine the dough until it holds together.
Mix in your raspberries then form the dough into a disk on a parchment lined baking sheet. The disk should be about 8-9 inches in diameter and about an inch thick. Place the dough in the fridge for 30 minutes.
While dough rests, make your crumble topping by mixing all crumble ingredients together with a fork.
Preheat the oven to 350F.
When ready to bake, top the scones with the crumble topping, pressing down gently. Slice the dough into 8 scones and separate them on the baking sheet. They will expand during baking.
Bake for ~30 minutes until golden.
Let cool for 10 minutes on the baking sheet before transferring to a wire rack to finish cooling.
When ready to serve, mix together 1/4 cup of powdered sugar with 1 Tbsp of yogurt/coconut cream until you have a thin mixture. Add more yogurt if it is too thin. Drizzle over the scones and enjoy!
gluten free raspberry scones
Gluten Free Scone Recipe Notes
Can I make this recipe Paleo? I have not tested a Paleo version of this recipe. I have a feeling cassava flour would work well as a substitute, but cannot guarantee that. If you try it, leave a comment with how it went!
Can I make this recipe vegan? I have not tested an egg substitute for this recipe, but I do use vegan butter and yogurt to keep these scones dairy free.
Can I use fresh raspberries? Frozen berries are preferred for this recipe as fresh berries tend to be too fragile and will get squished when mixing the dough,
Can I use other berries? Yes! Diced strawberries would work and any other frozen berry should be fine.
What if I don’t have powdered sugar? You can make your own! Just blend 1 cup of sugar (I use coconut sugar to keep it refined sugar free) and 1 tbsp. of starch (arrowroot, tapioca, corn) until you have a fine powder.
gluten free healthy raspberry and cream scones
More Scone Recipes
If you are looking for more delicious scones, I’ve got a few recipes for you. The first recipe is for my cinnamon lovers. The second is for my autoimmune paleo babes who still need a fully grain free option.
Gluten free raspberry scones are topped with a crumble topping and finished off with a sweat cream drizzle. These delicious scones are also dairy free, nut free, and refined sugar free. They make a delicious snack, breakfast, or dessert!
1/4cuppowdered sugar*see notes above for making your own with coconut sugar
1-2Tbspyogurt or coconut cream
Instructions
Whisk together the flour, baking powder, sugar and salt for the scones and place in the fridge.
Whisk together the egg, vanilla extract, and yogurt/coconut cream and set aside.
Cut your butter into cubes and add it to the flour mixture. Use a pastry cutter or fork to cut in the butter until you have a sand like texture, with little pea-sized bits of butter (the butter should be mostly broken down, but not melted).
Add the remaining wet ingredients and use a fork to combine the dough until it holds together. If it is not coming together, add more yogurt/coconut cream 1 Tbsp at a time.
Mix in your raspberries then form the dough into a disk on a parchment lined baking sheet. The disk should be about 8-9 inches in diameter and about an inch thick. Place the dough in the fridge for 30 minutes.
While dough rests, make your crumble topping by mixing all crumble ingredients together with a fork.
Preheat the oven to 350F.
When ready to bake, top the scones with the crumble topping, pressing down gently. Slice the dough into 8 scones and separate them on the baking sheet. They will expand during baking.
Bake for ~30 minutes until golden.
Let cool for 10 minutes on the baking sheet before transferring to a wire rack to finish cooling.
When ready to serve, mix together 1/4 cup of powdered sugar with 1 Tbsp of yogurt/coconut cream until you have a thin mixture. Add more yogurt if it is too thin. Drizzle over the scones and enjoy!
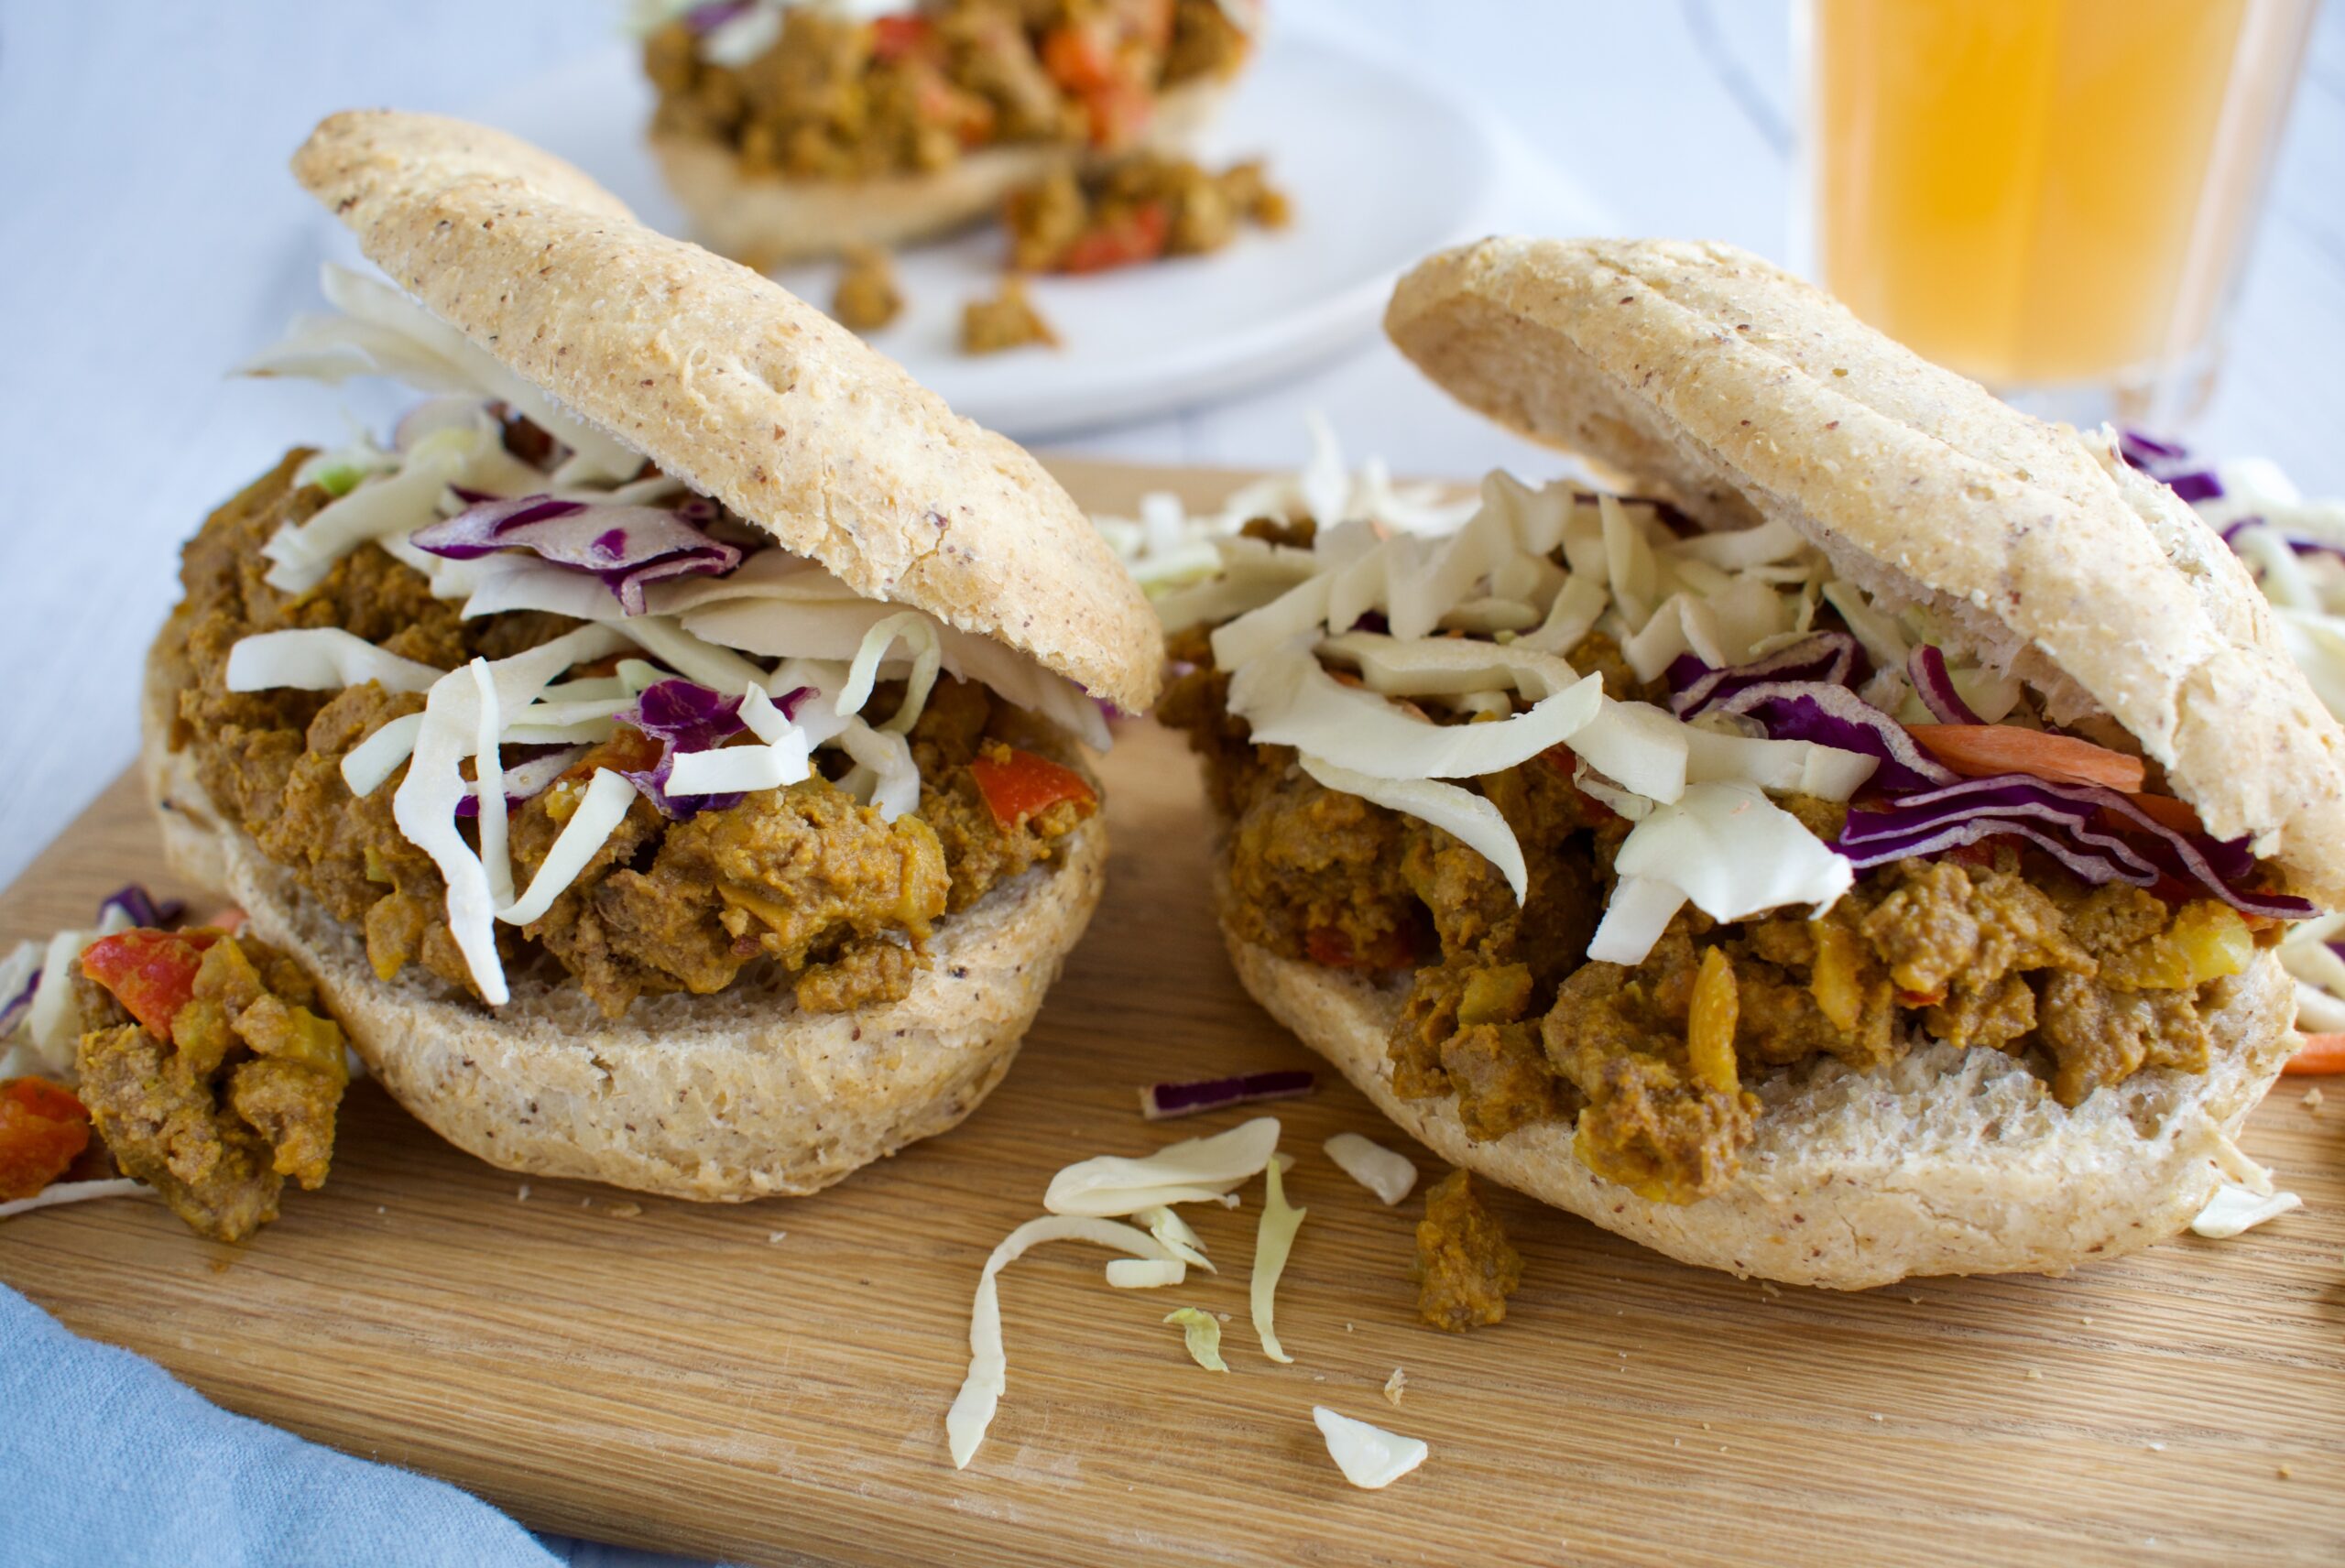
These healthy Tomato Free Sloppy Joes are packed with flavor, but without the tomato. Made in one pan and served on gluten free buns, this is busy weeknight and family friendly dinner.
healthy sloppy joes
Although these tomato less sloppy joes aren’t completely nightshade free, they are tomato free for my tomato allergy babes. This healthy sloppy joe recipe uses lots of delicious spices to bring out the flavor, while utilizing sweet potato puree as the base. I’ve also packed in more veggies with the use of fennel (or onion) and bell pepper. We keep it nutrient packed over here!
Easy, Healthy Meals
These healthy sloppy joes are made in one pan and are super easy to make. This recipe comes together in under 30 minutes, making it the perfect weeknight meal. If you’re looking for more easy dinner ideas, check out these recipes…
Red bell pepper: to sneak in some extra veggies without anyone noticing!
Ground beef: the base of these sloppy joes
Sweet potato puree: instead of tomato paste, we’re using sweet potato puree. I promise it’s delish!
Coconut aminos: this adds some tang and flavor to make up for the tomato
Salt
Cayenne pepper
Turmeric
Dijon mustard: a little mustard really boosts the flavor in this recipe.
Gluten free buns
Tomato Free Sloppy Joes Instructions
First, cook the veggies. Heat olive oil in a large skillet over medium heat. Add the fennel and cook for a few minutes, until starting to soften. Then add the bell pepper and cook for 5-7 more minutes until veggies are cooked through and soft. Set veggies aside.
Next, brown your ground beef in the same pan over medium heat.
Once beef is cooked, turn heat to low and add the veggies back in along with the remaining ingredients Mix to combine well and cook over low until everything is warm.
Serve in gluten free buns and enjoy!
healthy tomato free sloppy joes
Substitutions and Variations
Ground beef: ground turkey would be a great sub!
Fennel: if you don’t have an issue with FODMAP’s, feel free to use white onion.
Make this recipe vegan: if you’re plant based, try using lentils instead. Cook up 1 cup of dry red or brown lentils to sub. I’ve use red lentils before and it’s delicious!
Make this recipe nightshade free: I have not tested a fully nightshade free version as the cayenne adds a lot of flavor, but try adding some garlic powder and apple cider vinegar for the kick. you can also leave out the bell pepper or sub in some shredded carrots.
Make this recipe paleo: sub out the gluten free buns for a grain free bread alternative.
Toppings and Servings
Sloppy joes are great on their own, but I like to add some shredded cabbage to my no tomato sloppy joes!
You can also serve these healthy sloppy joes with coleslaw or a big salad on the side.
Storage
Store leftover sloppy joe mix in an airtight container in the fridge for up to 3 days.
These healthy sloppy joes are still packed with flavor, but without the tomato. Serve on gluten free buns for the ultimate allergy friendly comfort meal!
Course Main Course
Cuisine American
Keyword dairy free, gluten free, tomato free
Servings 4servings
Author Victoria Faling
Ingredients
1-2Tbspolive oil
1fennel or small white onion, diced
1smallred bell pepper, diced*
1lbsground beef**see notes for vegan option
3/4cupsweet potato puree
2Tbspcoconut aminos
1/2tspsalt
1/4-1/2tspcayenne pepper
1/4tspturmeric
2tspdijon mustard
4gluten free buns
Instructions
First, cook the veggies. Heat olive oil in a large skillet over medium heat. Add the fennel and cook for a few minutes, until starting to soften. Then add the bell pepper and cook for 5-7 more minutes until veggies are cooked through and soft. Set veggies aside.
Next, brown your ground beef in the same pan over medium heat.
Once beef is cooked, turn heat to low and add the veggies back in along with the remaining ingredients Mix to combine well and cook over low until everything is warm.
Serve in gluten free buns and enjoy!
Notes
*try using shredded carrot for a nightshade free option (or add carrots for even more nutrients!) and sub the cayenne for some garlic powder and a splash of apple cider vinegar.*Feel free to use ground turkey or red lentils (one cup of dried red or brown lentils, cooked)
These gluten free scones are topped off with a delicious cinnamon crumble. They are dairy free, refined sugar free, and nut free. The perfect treat!
gluten free scones
I’ll be honest, scones are not my favorite baked good, but sometimes they hit the spot. I really wanted to make gluten free scones that had more oomph to them. I love anything with a crumble (see below) and thought, why not put that on scones? These scones are packed with cinnamon flavor and loaded with a delicious cinnamon crumble topping.
cinnamon scones
How to Make Gluten Free Cinnamon Crumble Scones
Ingredients:
Scones
tigernut or almond flour
1:1 gluten free flour
tapioca starch
baking powder
salt
coconut sugar
cinnamon
cold (vegan) butter
egg
vanilla extract
coconut yogurt or coconut cream
Crumble topping
1:1 gluten free flour
coconut sugar
cinnamon
(vegan) butter or coconut oil
Process:
Scones are pretty easy to make, the biggest thing is just keeping the dough cold so the butter doesn’t melt before it hits the oven.
You will start by mixing your dry ingredients and sticking them in the freezer for a few minutes so that everything stays cold.
Then you cut in the cold butter and add the remaining wet ingredients, mixing the dough until it comes together.
Form the dough into a disk and pop in the fridge (remember, cold butter!).
While the dough chills, you’ll make the crumble topping and preheat the oven.
When ready, add the topping, cut the scones, and bake!
gluten free and dairy free scones
Gluten Free Scone Substitutions
Gluten free flour: I have not tested a paleo option for these, but cassava flour might work well!
Tigernut flour: I love using tigernut flour because it is nut free and adds a lovely sweet nuttiness that compliments the cinnamon perfectly in this recipe. Almond flour is a great alternative, just make sure it is finely ground.
Butter: I use a vegan butter to keep these scones dairy free, but regular butter is also fine if you tolerate dairy. I have not tried this recipe with coconut oil, but I think it would work fine!
Coconut yogurt: you can use coconut cream instead or Greek yogurt.
If you love scones or crumble recipes, check these out!
As mentioned above, I love a crumble recipe, as evidenced by all of these recipes I’ve created. If you love a crunchy, crumble topping too, you’ll also love these
These gluten free scones are also completely dairy free, refined sugar free, and nut free. A not-to-sweet scone base is topped off with a delicious cinnamon crumble. You'll love one of these with your coffee or tea!
Mix together the flours, baking powder, salt, and cinnamon and place in the fridge for 10 minutes.
Cut the butter into cubes when ready to use, then add to the flour mixture and cut in with a fork or pastry cutter until you have a sand-like mixture and butter is evenly distributed.
In a small bowl, whisk together the egg, yogurt, and vanilla extract. Add to the flour-butter mixture and use a fork to combine everything into an even dough. If it's too dry and not coming together, add in more yogurt/cream 1 Tbsp at a time.
Shape the dough into a disk about 8-9inch in diameter on a parchment lined baking sheet and place the dough in the fridge for 30 minutes.
While the dough is chilling, preheat the oven to 350F.
Mix together the crumble ingredients in a small bowl and set aside.
When ready to bake the scones, gently press the crumble on top of the scones then cut your scones into 8 and spread them out on the baking sheet. They need some room to expand!
Bake for 25-30 minutes. Let cool on the baking sheet before serving!
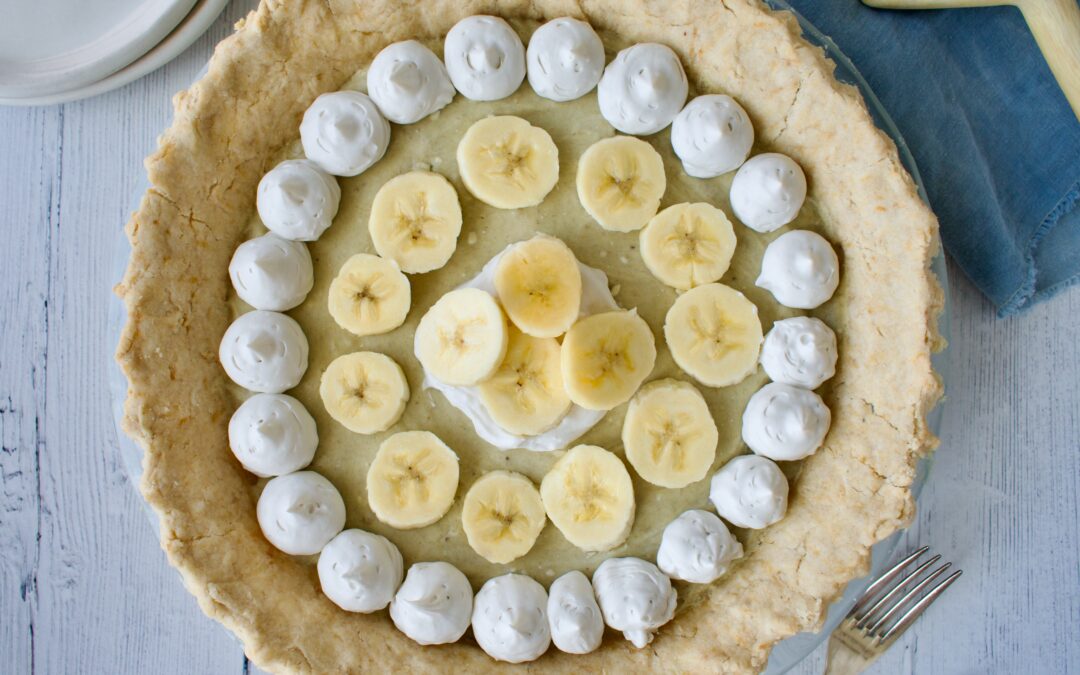
This delicious and healthier banana cream pie is completely gluten free, dairy free, vegan, and refined sugar free. A flakey, butter crust is filled with fresh bananas, banana pudding, and whipped coconut cream.
gluten free banana cream pie
I have a confession… I’d never had banana cream pie before I attempted baking it myself! I had banana pudding as a kid, but never banana cream pie. So I was really excited to attempt making my own version. And I think it turned out pretty good, if I do say so myself.
dairy free banana cream pie
I’ve seen banana cream pie made a few different ways. Crust wise, the options seem to be with a cookie crust, graham cracker curst, or with a more traditional pie crust (like I did). The filling tends to be a creamy pudding, topped with whipped cream and layered with bananas. I felt like for something called BANANA CREAM PIE, it needed to be made with banana pudding! So that is just what I did. My version is a gluten free crust, layered with fresh banana, vegan banana pudding (for all that extra banana flavor!), and topped with coconut whipped cream. The entire pie is also refined sugar free, utilizing coconut sugar and maple syrup as the sweeteners. I tried to rely on the natural sweetness of the banana, so this pie isn’t overly sweetened or too sweet in general.
gluten and dairy free banana cream pie
This healthy vegan banana cream pie isn’t all that labor intensive, but it does take time as you have to cook and set the individual components. Be sure to read the recipe in advance so that you make sure to have enough time to actually make and assemble the pie. This can be done in one day, but to plan in setting time, you’ll want to start in the morning.
This delicious and healthier banana cream pie is completely gluten free, dairy free, and refined sugar free. A flakey, butter crust is filled with fresh bananas, banana pudding, and whipped coconut cream. Enjoy this healthy, refreshing dessert this summer!
2canscoconut milkmake sure it is the canned coconut milk and you chill these cans in the fridge 24 hours before hand.
2Tbspmaple syrup
1tspvanilla extract
Assembly
1-2morebananas
Instructions
First, make sure you chill your coconut milk in the fridge for 24 hours before starting. You want to separate the cream from the liquid.
Crust
You will make the crust first. In a food processor, combine the flour, salt, and coconut sugar. Pulse a few times to mix everything together.
Add the cold, cubed butter and pulse until you have little pebbles. Add the apple cider vinegar and pulse until just combined.
Pour the dough into a bowl and use your hands to bring it together. If the dough is too crumbly and not coming together, add ice cold water 1 Tbsp at a time, gently working the dough until it holds together. You do want to work quickly so the butter doesn't all melt.
Form the dough into a disc, wrap in parchment paper, and place in the fridge for at least 30 minutes.
While the dough chills, make the banana pudding below.
When ready to bake the crust, preheat the oven to 350F. Roll it out on a piece of parchment paper until it is about 2 inches larger in diameter than your pie dish. The dough should be about 1/4 inch thick.
Transfer the crust to the pie dish (I do this by placing the pie dish upside down over the crust then sliding my hand under the parchment paper and flipping everything). Shape the dough to the dish and use cold water on your finger to fix any cracks. You can flute the edges if desired. Poke the bottom of the crust a few times with a fork.
Fill your crust with pie weights and bake for 20 minutes. Increase oven temperature to 375F, remove the weights, and bake another 5 minutes until crust is just beginning to golden on the edges and is baked.
Remove the crust and let it cool.
Banana Pudding
Combine the bananas, 1 cup of the milk, and maple syrup together in a blender and blend until smooth. Add this mixture to a saucepan and heat on medium-low heat.
Whisk together the other 1/2 cup of milk and the starch then add it to the banana mixture on the stove. Whisk frequently until the mixture thickens. It should look like pudding.
Remove the pudding from the heat and whisk in the vanilla extract. Let the mixture cool to room temperature then place in the fridge for 3 hours, while crust cools.
Place a medium size bowl in the freezer at this time- the one you will use to beat the coconut cream.
Coconut Cream
An hour before you are ready to assemble your pie, you'll make the whipped cream.
In your cold bowl, add the coconut cream from the cans of coconut milk (the solid, white part that has risen to the top of the can. Keep the coconut water for smoothies or drinking). Beat on medium speed with an electric mixer until you get a nice, whipped cream consistency and it holds peaks.
Add the maple syrup and vanilla and whip to combine.
Place the coconut cream back in the fridge for the last hour.
Assembly
When ready to assemble, take 1 cup of the coconut cream mixture and fold it into the banana pudding mixture. Set aside.
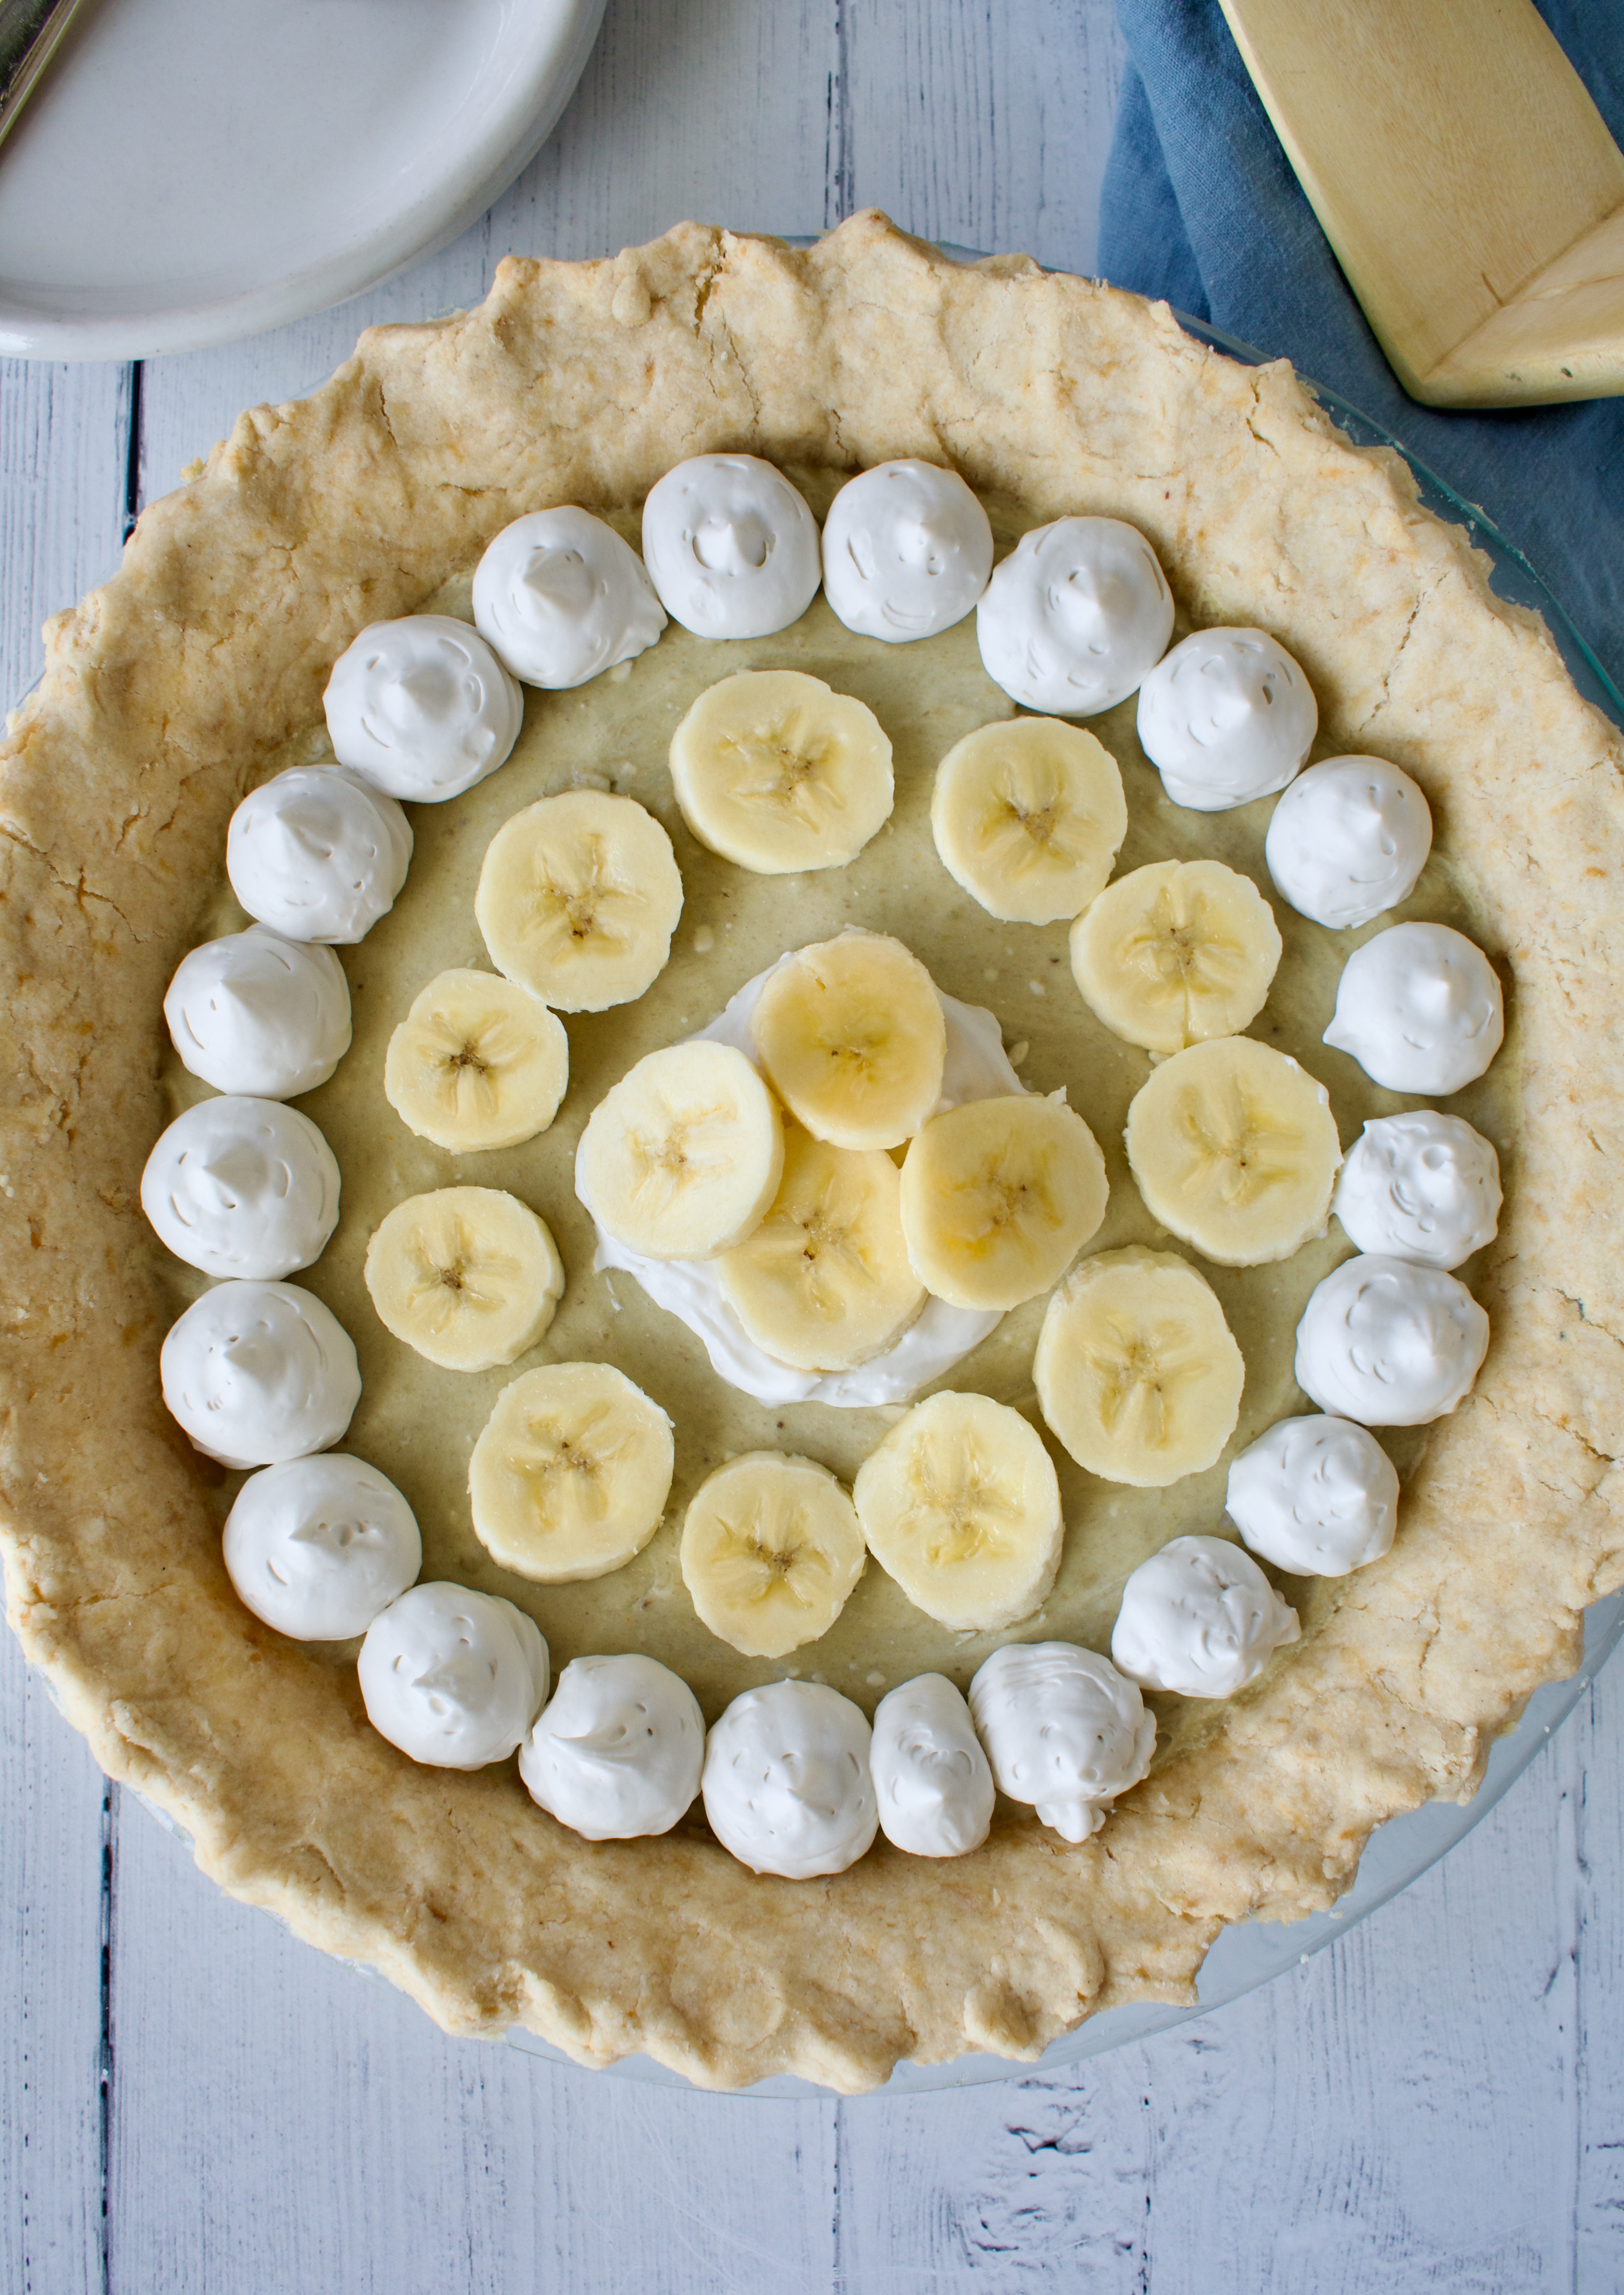
Line the bottom of your pie crust with sliced bananas then evenly spread the banana pudding mixture on top.
You can using a piping bag to top the pie with the remaining coconut cream or however you desire.
Decorate with more bananas and enjoy! I do suggest letting the pie set for another hour or so, but it is not mandatory.
This pie can keep in the fridge for up to 3 days.
Notes
*This crust should work find with cold coconut oil, as well!
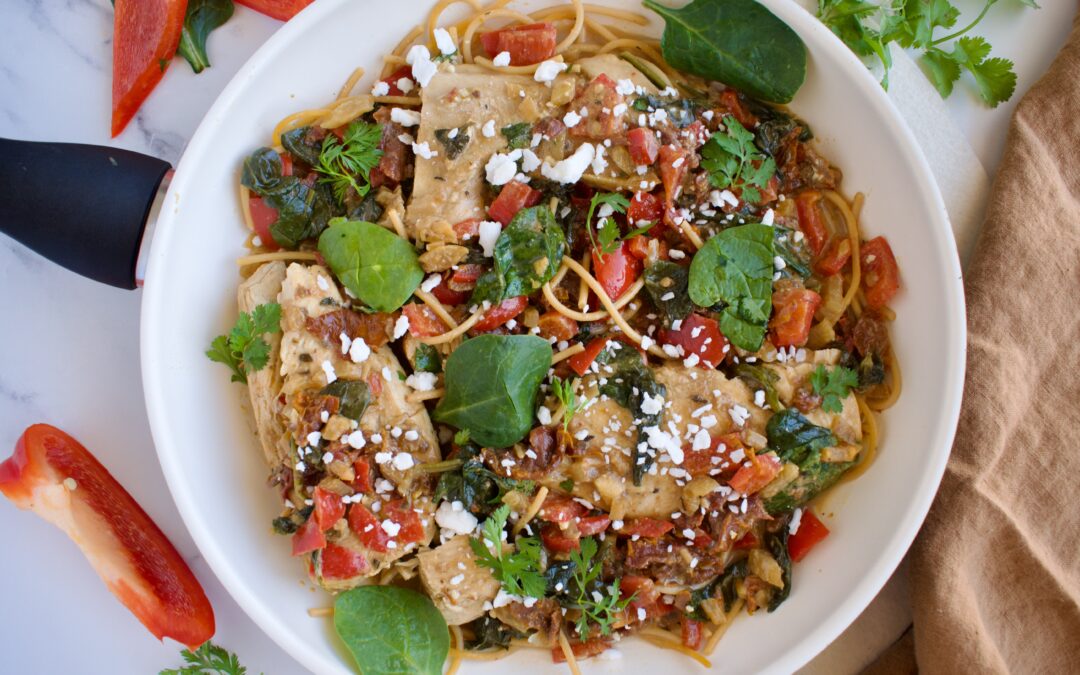
This delicious and healthier take on Marry Me Chicken is gluten free, dairy free, and lower FODMAP. The perfect easy, allergy friendly dinner option!
healthy marry me chicken
Marry Me Chicken is a classic, but if you have food allergies, you may not have ever been able to try it. Traditional Marry Me Chicken is filled with dairy, onions, and garlic, and if it’s served over pasta, then it’s also not gluten free. My version is allergy friendly while still packing all that delicious flavor! My goal is always to show you that you can eat your favorite dishes even if you have food allergies and this classic chicken meal is proof that allergy free food can still taste amazing.
healthy marry me chicken
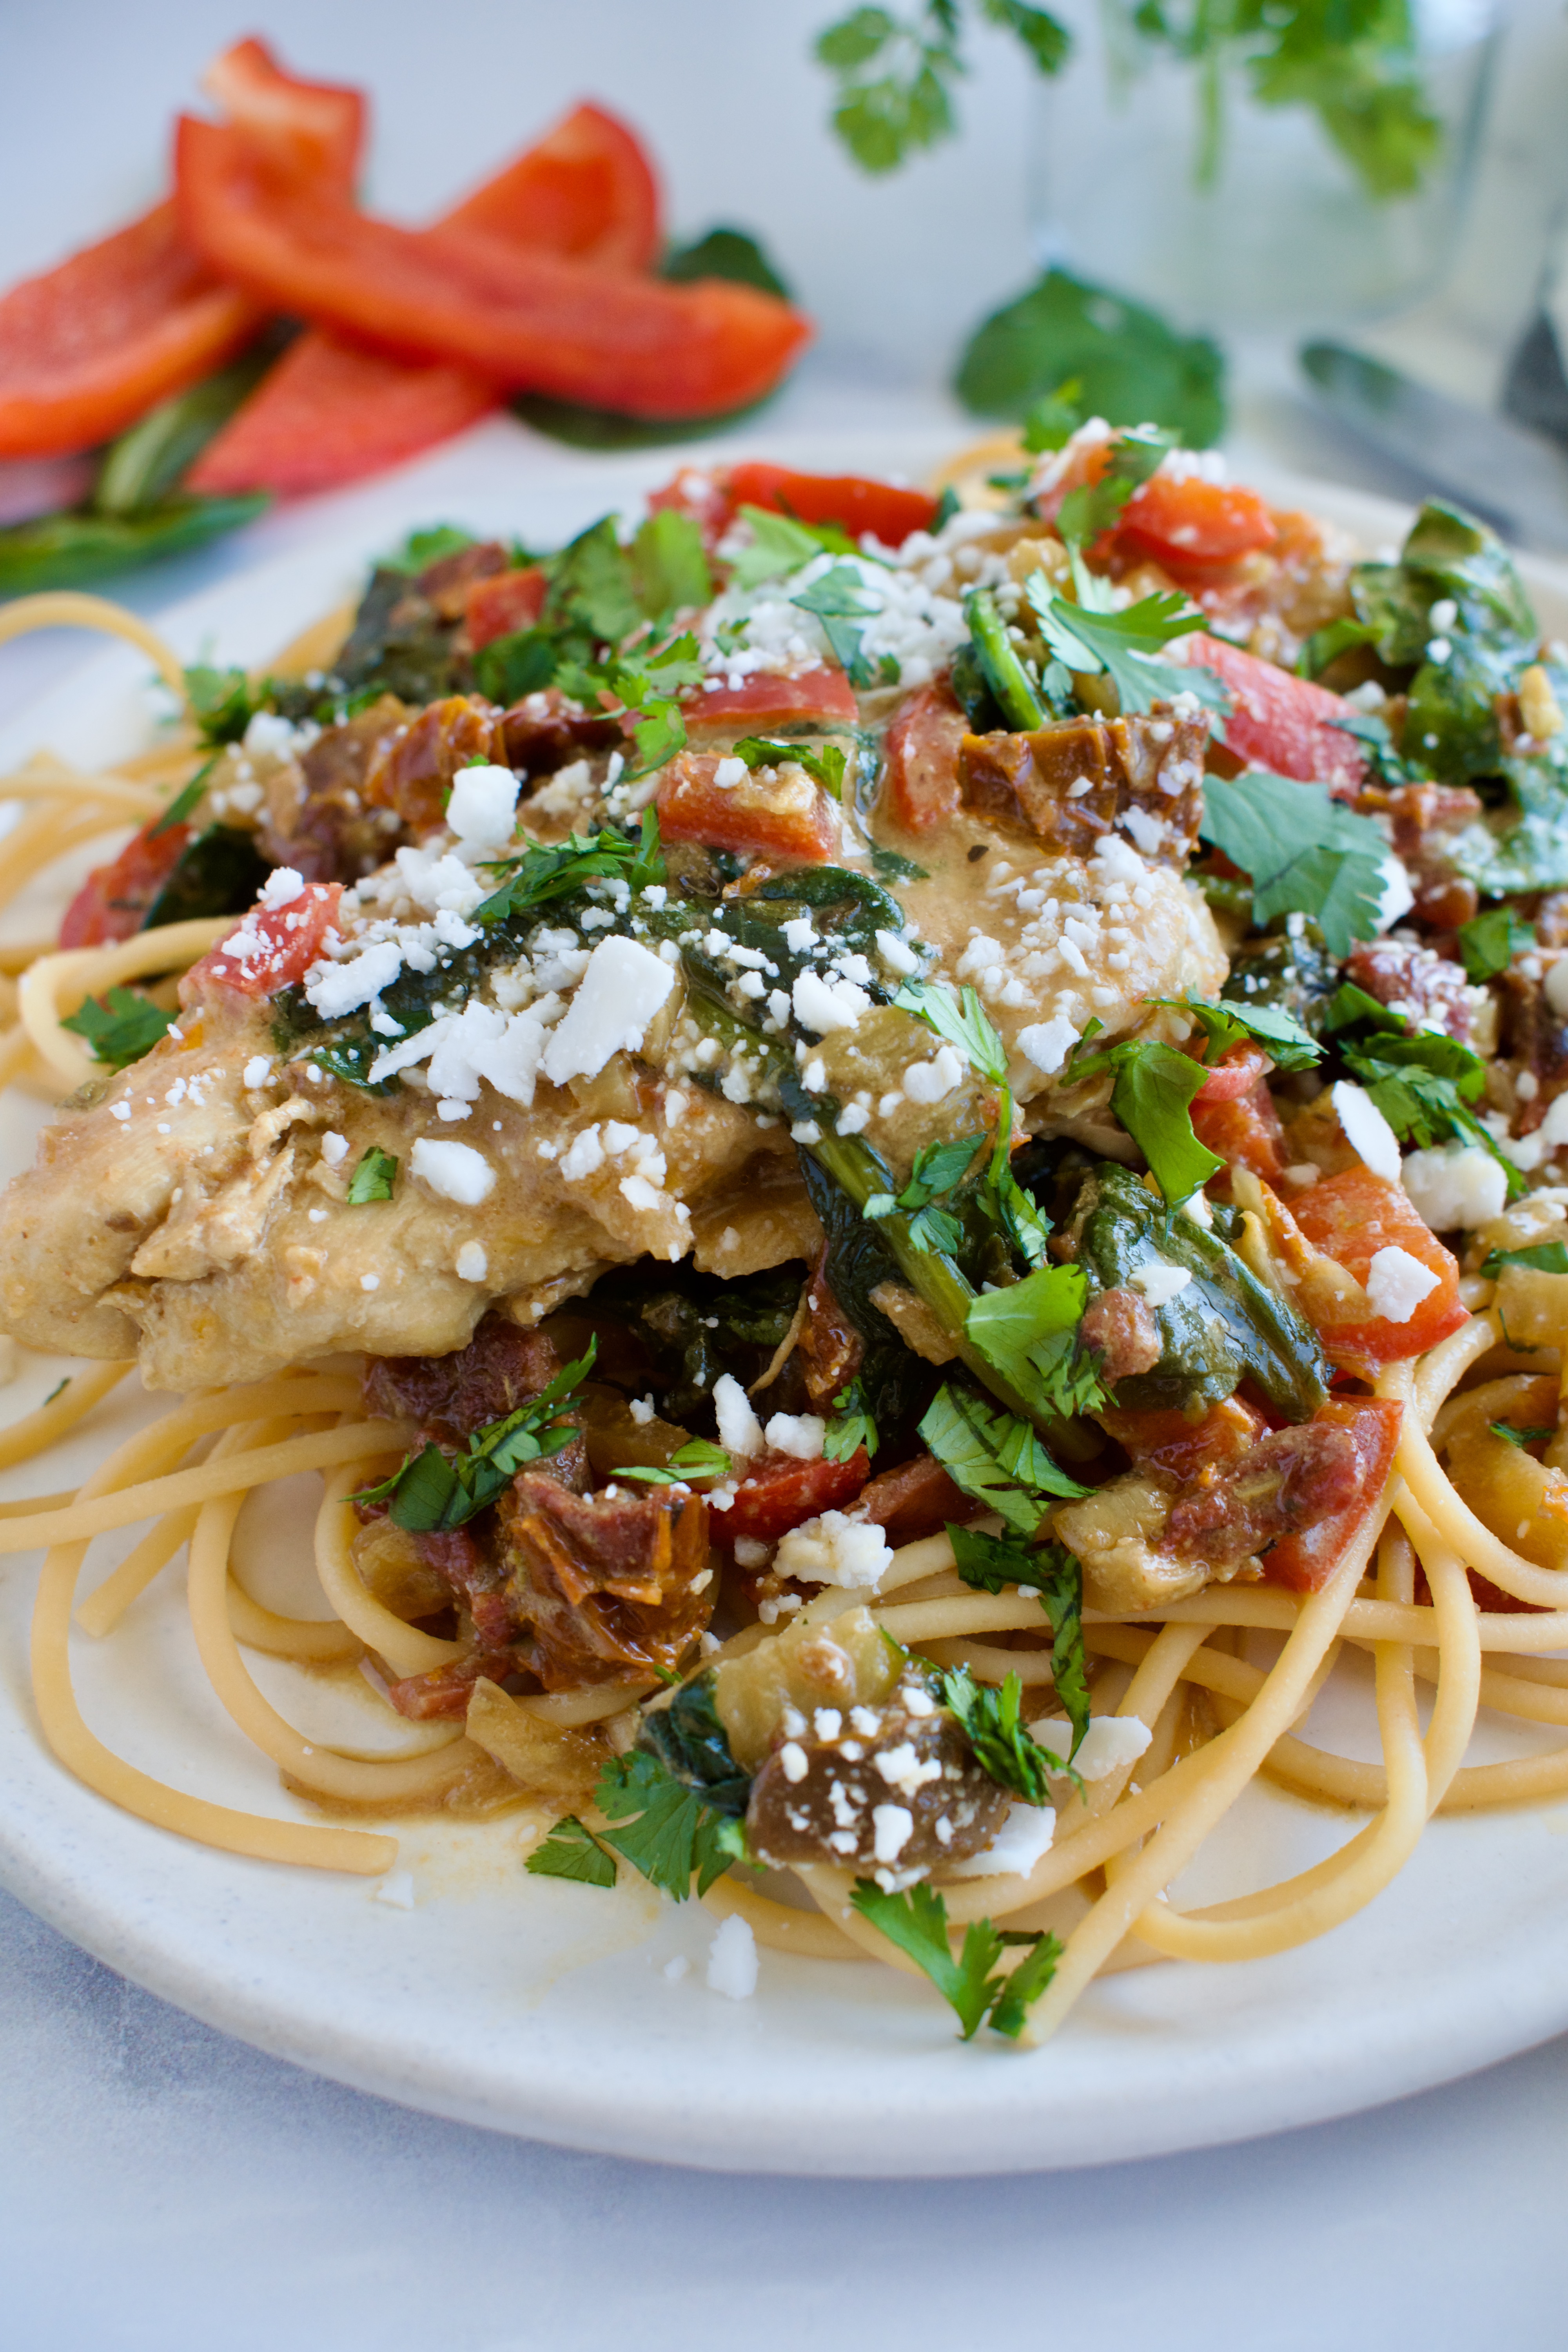
In my dairy free Marry Me Chicken, we sub out the dairy for nutritional yeast and full fat coconut milk to still achieve that creamy, cheesy flavor. I top it off with vegan feta, which I think tastes so much better than parmesan in this recipe! Instead of high FODMAP garlic and onion, I sub in fennel (my favorite onion substitute!) and garlic infused olive oil. Lastly, this creamy-tomato based dish is served over gluten free pasta (use a grain-free pasta to keep this recipe completely Paleo).
One of the best things about this gluten free dinner is that it’s fairly quick! For how elaborate this dish looks and for how flavorful it is, it’s actually easy to make and is done in about 30 minutes. This allergy friendly Marry Me Chicken is the perfect weeknight dinner or dinner party option.
gluten free and dairy free marry me chicken
Allergy Friendly Marry Me Chicken
Ingredients:
chicken breast
garlic olive oil
fennel
red bell pepper
red pepper
Italian seasoning
salt
chicken broth
full fat canned coconut milk
sun-dried tomatoes in oil
nutritional yeast
spinach
fresh basil
(vegan) feta
Cilantro
gluten free pasta
This entire dish is made in one pan! First you cook the chicken then set it aside while you cooke the bell pepper and fennel.
Add in the chicken broth, coconut milk, herbs and spices, and nutritional yeast. Let everything simmer for a few minutes before adding the spinach, chicken, and basil.
Serve over your favorite pasta with fresh cilantro and feta!
This delicious and healthier take on the classic Marry Me Chicken is gluten free, dairy free, and lower FODMAP. My recipe is still packed with flavor, but allergy friendly! This recipe is also quick and easy to make, so it's the perfect weeknight meal.
1Tbspgarlic olive oil*see notes if you don't have access to garlic infused oil
1fennel, diced
1largered bell pepper, diced
1/2tspred pepper, to taste
1tspItalian seasoning
1tspsalt
1cupchicken broth
1/2cupfull fat canned coconut milk
1/2 cupsun-dried tomatoes in oil, thinly sliced
1/4cupnutritional yeast
2-3largehandfuls of spinach
1/4cuppacked fresh basil, thinly sliced
1/2cupfetaI used a vegan variety
Cilantro
4servingscooked pasta of choice
Instructions
Heat one tablespoon of the sun-dried tomato oil in a large skillet over medium heat.
While oil is heating, season chicken breast with salt and pepper on both sides. If your chicken breast is really thick, I highly suggest filleting it.
Add the chicken to the hot pan and cook on both sides for about 5-7 minutes, until chicken is cooked through and temperature registers 165F.
While chicken is cooking, begin cooking your pasta separately according to package directions.
When chicken is done, remove and set aside.
Add the garlic oil oil to the pan along with the fennel and cook for 2-3 minutes. Add the bell pepper and cooking another 5-7 minutes until veggies are soft and browning.
Add the red pepper, Italian seasoning and salt to the veggies and stir to combine. Then add int he broth, coconut milk, sun-dried tomatoes, and nutritional yeast. Bring to a boil then reduce to simmer for 5 minutes.
Once the sauce has cooked and thickened some, stir in the spinach and basil then add your chicken back in and cook on low until chicken is warmed through.
Sprinkle with feta and serve over pasta with fresh cilantro.
Hi! I'm Victoria. I was diagnosed with Lyme in 2012 and have been on a healing journey ever since. I love helping others on their road to healing through allergy friendly recipes, exercise, and overall well-being.