Lemons N Lyme

  • Recipes
  • Shop
  • Lyme Disease
  • About
  • Contact
menu icon
go to homepage
  • Recipes
  • Shop
  • Lyme Disease
  • About
  • Contact
    • Facebook
    • Instagram
    • Pinterest
    • TikTok
    • YouTube
  • search icon
    Homepage link
    • Recipes
    • Shop
    • Lyme Disease
    • About
    • Contact
    • Facebook
    • Instagram
    • Pinterest
    • TikTok
    • YouTube
  • ×
    Home

    Easy Chickpea Veggie Burgers (Gluten Free, Nightshade Free)

    April 24, 2020 by Victoria Faling Leave a Comment

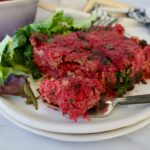
    Enjoy these delicious Gluten Free Chickpea Veggie Burgers made from chickpeas, cauliflower, and sweet potato. This healthy veggie burger recipe is packed with protein and fiber for the ultimate vegetarian option on burger night. 

    chickpea veggie burgers

    This was my first time ever making homemade veggie burgers. I always thought they were hard and time consuming, but it turns out it's actually really easy to make your own veggie burgers! They came out delicious and don't require a lot of ingredients. Most of the ingredients are pantry staples (chickpeas, sweet potatoes, dried herbs/spices).

    If you're not a meat eater, these gluten free veggie burgers will be your new go-to. And even if you are a meat eater, you're sure to enjoy these chickpea patties. They are the perfect vegetarian option for summer cookouts. If you're looking for more beef-free burger recipes, try my Zucchini Feta Turkey Burgers.

    sweet potato and chickpea patties

    What Makes These Chickpea Veggie Patties Healthy

    • Gluten free, vegetarian and dairy free, nut free and nightshade free, these easy chickpea burgers are allergy friendly. 
    • They are also grain free and contain no oats/oat flour, brown rice, or gluten-free flour for those sensitive to grains. These veggie burgers are made with wholesome veggies instead!
    • These homemade veggie burgers are nutrient dense! They're packed with plant-based protein from chickpeas and fiber from beans, sweet potatoes, and cauliflower.
    • Many store-bought veggie burgers contain weird ingredients and binders, even ingredients to try and give them a meaty taste. These chickpea patties are made with whole food, simple ingredients that you can pronounce.

    chickpea burger patties

    Gluten Free Chickpea Burger Ingredients:

    • Cauliflower: the base of these vegetarian burgers is made of roasted veggies including cauliflower.
    • Sweet potato: roasted sweet potato adds lots of delicious flavor!
    • Chickpeas: also known as garbanzo beans, you'll need one can of chickpeas. Just be sure to rinse and drain them well before using.
    • Egg: egg helps bind the ingredients together for a solid burger that doesn't fall apart.
    • Dried oregano and cilantro, ground ginger, lemon juice, sea salt, black pepper: the herbs and spices used in these sweet potato and chickpea burgers.
    • Olive oil: used for both the burgers and the cooking, be sure to use a high quality olive oil for the best outcome.

    How to Make Gluten Free Veggie Burgers

    1. Preheat oven to 425 F. Chop the cauliflower and sweet potato into cubes and toss with olive oil. Roast for about 30 minutes until golden and easily pierced with a fork. Let cool.
    2. Blend all ingredients together in a food processor.
    3. Divide the burger mixture and form into 5 patties and place on a plate in the fridge for 10-30 minutes.
    4. You can cook these chickpea patties three ways:
    5. Air fry: cooking these burgers in the air fryer is my preference as you will get a crisp outside edge and soft middle. Air fry at 350F for 12-14 minutes, flipping halfway through.
    6. Bake at 425F for 25 minutes. Line a baking sheet with parchment paper and place chickpea patties on top. Burgers will be slightly golden and hold together, but not as crisp as air frying.
    7. Stove top: Heat a little oil over medium heat in a frying pan. Add the patties without crowding the pan and fry for about 3 minutes on each side until golden brown then bake at 425F for 15 minutes.

    chickpea patty recipe

    Substitutions and Variations

    • If you're out of sweet potato, try carrots or butternut squash instead. Another starchy veggie is a great substitute.
    • Add extra veggies like chopped onion, fennel, zucchini, or carrots. You can really make this chickpea veggie burger recipe your own by using up whatever vegetables you have on hand. That's what makes it such a great recipe- it's super versatile. 
    • Amp up the flavor by adding curry powder, ground cumin, cayenne pepper, or harissa. Again, make these burgers your own!
    • Use fresh herbs if you prefer like finely chopped fresh cilantro or fresh parsley for my cilantro haters.
    • Add tomato paste. I left this out to keep this recipe nightshade free, but you can add 1-2 tablespoon of tomato paste the patty mixture for a flavor boost.

    Serving and Storage

    • Storage: Store leftover patties in an airtight container in the fridge for up to 3 days. Reheat in the air fryer at 350F for 5-10 minutes or in the oven at 300F for 30 minutes.The burger patties also freeze well. If you'd like to freeze them, wrap each chickpea patty tightly in plastic wrap then place in a freezer bag and store in the freezer for up to 3 months.
    • Serving: These veggie burgers go great on a lettuce wrap or with gluten-free buns. They would be delicious in pita bread, too, for a twist! 
    • Serve with:
      • Avocado, tomato, sliced red onion, pickles
      • Ketchup, mustard, bbq sauce
      • Any other favorite toppings! Whatever you love on a traditional beef burger will taste great on these gluten free veggie burgers too.

    gluten free chickpea burgers

    What if I don't have a food processor?

    If you don't have a food processor, use a potato masher to mash all of the ingredients together. This will take some effort and be your arm workout for the day, but should work just as well!

    Can these veggie burgers be made vegan?

    I have not tested a vegan version myself, but I think you could make vegan chickpea patties with an egg substitute like a flax egg. You could also try leaving out the egg altogether, although I think the burgers will be more flimsy that way. Let me know in the comments if you try that.

    Can I make these ahead of time?

    You can make the burgers ahead of time by 24-48 hours, keep them covered in the fridge, and then cook them when you are ready to eat. Feel free to roast the veggies up to 3 days in advance! These veggie burgers are simple to make, but do take a little bit of time to prep as you have to roast the vegetables and prep the burgers for cooking.

    How do I make veggie burgers that don't fall apart?

    ​Be sure to chill the formed patties before cooking. Adding a binder like an egg helps a lot which is why it's used in this recipe. See above for notes on vegan chickpea burgers.

    vegetarian chickpea burgers

    More Delicious Chickpea Recipes

    Brussels Sprouts Salad with Apples and Chickpeas

    Sage Roasted Butternut Squash with Chickpeas

    Healthy Chocolate Chip Pumpkin Blondies

    If you tried these gluten free chickpea burgers, leave a comment and review or tag me on social media!

    chickpea veggie burgers
    Print Pin

    Chickpea Veggie Burgers

    Delicious gluten free veggie burgers made from sweet potato, cauliflower, and chickpeas. Packed with flavor, nutrients, protein, and fiber, even meat eaters will love these vegetarian burgers!
    Course Main Course
    Cuisine American
    Keyword dairy free, gluten free, grain free, healthy
    Prep Time 1 hour hour
    Cook Time 15 minutes minutes
    Total Time 1 hour hour 30 minutes minutes
    Servings 5 burgers
    Author Victoria Faling

    Equipment

    • Air Fryer optional

    Ingredients

    • 1 large sweet potato about 1.5 lbs
    • 1 small-medium head cauliflower
    • 1 15 oz can chickpeas rinsed and drained (I like to remove the skins for better texture too)
    • 1 egg whisked
    • 1 tablespoon dried oregano
    • 1 tablespoon dried cilantro
    • 1 teaspoon ground ginger
    • 1 teaspoon salt
    • 2 tablespoon lemon juice
    • 2 tablespoon Olive oil

    Instructions

    • Preheat oven to 425 F. Chop your cauliflower and sweet potato into cubes and toss with olive oil to coat. Roast for about 30 minutes until golden and easily pierced with a fork. Let cool down for at least 30 minutes or bake ahead of time and keep in the fridge.
    • Blend all ingredients plus 1 tablespoon of olive oil together in a food processor. I suggest pulsing it and blending most of the way, but to a point where you still have some chunky bits.
    • Divide the dough and form into 5 patties and place on a plate. Refrigerate uncovered for at least 10 minutes if you are using cold veggies (roasted ahead of time) otherwise refrigerate for at least 30 minutes. It's easy to make the dough ahead of time and keep in the fridge until ready to cook.
    • You have 3 options for cooking: Air fryer, oven, or stove top.
    • Air fry at 350F for 12-14 minutes, flipping halfway through. Patties should be golden and crunchy.
    • Bake at 425F for 25 minutes. Patties will be slightly golden and hold together, but not as crisp as air frying.
    • Stove top: Heat a slight layer of olive oil over medium heat in a frying pan. Add the patties (don't crowd the pan, may need to do in batches) and fry for about 3 minutes on each side until golden then bake at 425F for 15 minutes.
    • Top burgers with your favorite toppings and serve in lettuce wraps or gluten free buns.

    Paleo Spaghetti Squash Casserole with Nomato Sauce (AIP, Nightshade Free)

    March 18, 2020 by Victoria Faling Leave a Comment

    This Paleo spaghetti squash casserole is veggie packed, high protein, and completely allergy friendly! AIP friendly, gluten free, and dairy free. A delicious and nightshade free nomato sauce brings this dish together. It is the perfect meal prep or family dinner option.

    paleo spaghetti squash casserole
    paleo spaghetti squash casserole

    With what's happening in the world right now, I have, like others, stocked up on food and am prepared to self isolate for a few weeks. During this time, I'm focusing on making large meals/bulk cooking, so I can freeze portions and have food for awhile. A casserole was first on my list! This recipe was inspired by A Squirrel in the Kitchen, but with some tweaks.

    If you are not following me on Instagram, hop on over there! I'm sharing all about what I'm meal prepping, food ideas, and more during this time. This recipe is completely AIP compliant, lower FODMAP, and utilizes a nomato sauce to keep it nightshade free. I was hesitant the sauce wasn't going to be very good or too beet-y tasting, but honestly it was delicious and went so well with the entire dish!

    spaghetti squash casserole
    Spaghetti squash casserole

    I love that this casserole is completely grain free and packed with all the veggies! You can use vegetables you have on hand or what you can access at this time. The sauce is made of beets, butternut squash, coconut milk, and herbs. You can use fresh cooked, pre-packaged, or frozen beets. Grab some canned butternut squash puree and coconut milk, you don't need to make this from scratch!

    This paleo casserole is a great meal prep option as it does freeze well. It is a complete meal on its own, so just serve up a big slice and you're good to go! I like to include a side salad for extra greens and micronutrients, though.

    AIP casserole
    Print Pin

    Paleo Spaghetti Squash Casserole

    This spaghetti squash casserole is AIP compliant, nightshade free, and completely allergy friendly! It's the perfect nutrient dense meal prep or family dinner option.
    Course Main Course
    Cuisine American
    Keyword AIP, allergy friendly, autoimmune paleo, dairy free, gluten free, meal prep, nutrient dense
    Prep Time 1 hour hour
    Cook Time 35 minutes minutes
    Total Time 1 hour hour 1 minute minute
    Servings 4 servings
    Author Victoria Faling

    Ingredients

    • 1 large spaghetti squash
    • 1 lbs ground beef
    • 1 bunch of kale washed, de-stemmed and finely chopped
    • 1 package of button mushrooms chopped
    • 1 large fennel bulb diced
    • 1 teaspoon salt
    • 1 tablespoon olive oil or garlic infused oil (great low FODMAP option to still get garlic flavor)

    Nomato Sauce

    • ½ cup cooked red beets about 1 medium beet
    • 1 cup butternut squash puree you can use canned
    • ½ cup coconut milk
    • ½ teaspoon salt
    • 1-2 tablespoon nutritional yeast
    • 1 teaspoon dried basil
    • 1 teaspoon dried oregano

    Instructions

    • First, cook your spaghetti squash by placing the squash on a baking sheet in the oven while it preheats to 425 F. Then remove the squash and cut it in half (this makes it so much easier to cut!) and place it face down on a baking tray, baking for about 30-45 minutes until done (easily shreds).
    • You can cook the squash ahead of time or turn down oven to 400F when it is done.
    • While squash is cooking, blend all sauce ingredients together in a blender for a smooth nomato sauce.
    • Sauté the fennel in olive oil over medium heat until softened and beginning to brown, then add in the mushrooms and cook for a minute or two until beginning to soften. Finally, add in the kale and sauté until wilted.
    • You can either brown your ground beef in a different pan while cooking the veggies or set veggies aside in a bowl and then cook your ground beef.
    • Combine the ground beef and veggies together when cooked and season with salt.
    • When spaghetti squash is done, shred into "noodles" and place in a large bowl.
    • Now mix the ground beef and veggies with the spaghetti squash and the nomato sauce and combine everything thoroughly so sauce and beef is evenly distributed with squash. Spread everything into a glass baking dish (I used a 8x12 dish) and bake at 400F for 30 minutes. Broil for 5 more minutes then remove and let sit for 5 minutes before cutting and serving. This freezes well!

    Paleo Chicken Pot Pie (AIP, Nightshade Free, lower FODMAP, Gluten Free, Vegan Option)

    February 10, 2020 by Victoria Faling 2 Comments

    This allergy friendly Chicken Pot Pie has my heart. It's fully gluten free and AIP. With a versatile filling, the easy crust steals the show!

    paleo chicken pot pie
    paleo chicken pot pie

    Chicken pot pie is a classic! I remember eating the Marie Callender's pot pies as a kid with my dad when my mom was out of town. The creamy chicken and veggie filling, the delicious and buttery crust... mmm! Well, I re-created this childhood favorite into a completely paleo and allergy friendly version. There is no gluten, corn, dairy, or eggs. It's completely nightshade free and AIP (autoimmune diet friendly).

    Paleo Chicken Pot Pie Filling

    The filling is easy to make and you can use fresh, frozen, or leftover veggies. This is a fantastic option after a holiday like Thanksgiving for using up leftover veggies and turkey.

    You'll sauté the veggies if using raw/frozen ones then add herbs for flavor, broth, and coconut milk for the creamy consistency. Using coconut milk keeps this recipe dairy free and AIP friendly. Stir in some cooked, shredded chicken or turkey then pour everything into a baking dish.

    Chicken Pot Pie Crust Ingredients

    • Cassava flour
    • Coconut flour
    • Baking soda
    • Salt
    • Pumpkin puree
    • Coconut oil 
    • Ice water

    The crust is also easy to whip up and uses pumpkin puree instead of an egg to keep this poor pie autoimmune diet friendly.

    You'll mix together the dry ingredients then cut in the pumpkin and oil. Use some cold water to bring the dough together as necessary before rolling it out and shaping it over the filling.

    Bake until golden and enjoy!

    allergy friendly paleo chicken pot pie
    allergy friendly paleo chicken pot pie

    Can I freeze this chicken pot pie?

    I love making this dish for meal prep as it does freeze and reheat well! Once cooked, portion and freeze in freezer save containers for up to 3 months. When ready to heat, thaw and then warm in the oven at 300F for 30-45 minutes.

    More delicious paleo dinner recipes

    Paleo Beef Stir Fry

    Paleo Popcorn Chicken

    Tomato Free Paleo Stuffed Peppers

    AIP and low fodamp allergy friendly chicken pot pie
    Print Pin

    Paleo Chicken Pot Pie

    A comfort meal classic, made healthy and allergy friendly! These completely paleo, AIP, and dairy free version of chicken pot pie is so delicious, you won't miss the gluten filled and artificially flavored version.
    Course Main Course
    Cuisine American
    Keyword classic, comfort food
    Prep Time 30 minutes minutes
    Cook Time 35 minutes minutes
    Total Time 1 hour hour 15 minutes minutes
    Servings 4 servings
    Author Victoria Faling

    Ingredients

    Filling

    • 2 tablespoon oil of choice, for cooking
    • 1 large or 2 smaller heads of broccoli finely chopped
    • 4-6 carrots diced
    • 3 stalks of celery diced
    • Optional: ½ cup peas OR use any veggie combo you want! Pot pie is great for using up leftovers
    • 1 lbs. chicken, cooked and shredded I usually just make this in my instant pot or you can boil the chicken or used any leftover cooked chicken you have
    • 1 cup chicken broth
    • 1 cup coconut milk
    • 1 tablespoon thyme
    • 1 tablespoon rosemary
    • ½ teaspoon salt
    • 2 tablespoon arrowroot starch

    Crust

    • ¾ cup cassava flour
    • ¼ cup coconut flour
    • ½ teaspoon baking soda
    • ¼ teaspoon salt
    • 2 tablespoon pumpkin puree
    • 3 tablespoon coconut oil not melted
    • 1 cup of cold water

    Instructions

    Filling

    • Preheat oven to 400F.
    • Heat 2 tablespoon of oil over medium heat in a large pan. Add all the chopped veggies and cook, stirring occasionally, for about 10 minutes until they have softened some and broccoli is a darker green.
    • Add broth, coconut milk, herbs, and salt and reduce to a simmer for another 10 minutes until veggies are cooked through.
    • Mix in the chicken and arrowroot starch until everything thickens.
    • Pour filling into a 9x9 baking dish

    Crust

    • Mix the flours, salt, and baking soda together in a bowl. Cut in the pumpkin and coconut oil until well mixed. Add the water, starting with ½ a cup, and mix until dough comes together. Add water 1 tablespoon at a time, you may not need all of it.
    • Roll out the dough between two pieces of parchment paper sprinkled with some extra flour. The dough should be about ¼ inch thick and large enough to cover the top of your dish.
    • Lay the dough over the filling (if it cracks or breaks, that's fine! Just patch it up- it's rustic) and use your hands to adjust it and make sure it covers the filling. Poke some holes in the top with a fork.
    • Bake for about 30-35 minutes, until crust is golden brown. Let cool for 5-10 minutes before serving.

    Notes

    *You could make this recipe completely vegan and plant-based by using a can of chickpeas instead of the chicken!

    nightshade free paleo chicken pot pie
    nightshade free paleo chicken pot pie

    My Tulum Mexico Trip (December 2019)

    December 20, 2019 by Victoria Faling Leave a Comment

    I recently went on a family vacation to Tulum, Mexico. This was my first major vacation in over 10 years and since getting sick! It was absolutely great and truly needed. The sunshine, heat, and ocean make my soul super happy.

    IMG_9991IMG_0021

    Many people were curious about my trip with health conditions and I wanted to be able to share about my experience for others traveling to Tulum. I'll only be sharing my experience IN Tulum, not general travel tips. If you would like a post on general travel tips with chronic illness, let me know in the comments!

    A few important notes before we dive in: 1) I was there for 4 full days and did not get to do everything. I'll simply be sharing what I did without an ability to compare, 2) I'll share some "what I want to do/eat/see next time" things throughout, 3) I think it's important to discuss Tulum and Mayan culture first.

    IMG_0083

    So, first of all, if you've never heard of Tulum it is a small town about 2 hours south of Cancun. In the last 5-10 years, it has exploded into a touristy beach town (the next Cancun one day some might say). Although it's still quite small relative to Cancun, it's becoming a major beach trip destination in the Yucatan peninsula. It's absolutely gorgeous, but as I began to learn about the area I felt torn about visiting. It's sad to see the jungle being destroyed by humans with no care for the environment in the area. The local Mayans are also paid very little while big money internationalists come in to open large resorts. The cartels are slowly but surely moving into the area as it becomes more popular and the crime is steadily rising. There's also been confusion over the land in the area with several raids over the last 10 years to reclaim land that some resorts are built on. You can read more about this here. I think all of this is just important to note if you are considering a trip to Tulum.

    Some other key things to note about Tulum. I did not stay in town or visit town at all, we stayed in a hotel by the beach so I can't speak to town at all (staying there, eating there, etc). Tulum is technically off the grid. All hotels are powered by generators, you can't flush toilet paper (you throw it in a waste basket- takes a moment to get used to), and the infrastructure is not done well. They didn't think ahead about the area growing and have just tried to adapt as the area has exploded. Most restaurants are mainly candlelit as the area tries to minimize electricity use as much as possible. While we were there, they had begun construction on the road to put in water and electricity. So that should be coming soon!

    Also, you cannot drink the water in Tulum. You have to get bottled or filtered water only. Despite my best efforts to be extremely careful not to get water in my mouth while showering and avoid any sources of possible contamination, I still managed to get something while down there and returned home with horrible Montezuma's Revenge (as it's often called... and let me tell you, that name is accurate!).

    There is only one small road into and out of the main hotel area of Tulum along the water. Since there is only one road where all the cars travel, people bike and walk it gets VERY crowded with a lot of traffic during peak hours. It's honestly something you can't even imagine until you see it.  Everything is built right up to the road. I would say that generally Tulum is not accessibility friendly if you are using medical devices or mobility aids like a wheelchair. The road is very uneven and not suitable for wheelchair use (no sidewalks either). Everything is right on the sand, but I know some places you can rent those sand wheelchairs. Staff is incredibly helpful and would probably be willing to help carry your wheelchair if needed and I'm sure some hotels are more accessible than others, but generally it's not ideal for mobility aids.

    IMG_0267

    Quickly regarding travel, you fly into the Cancun airport and must drive the 2-2.5 hours down to Tulum. We used Canada Transfers. I did a lot of research on what transfer service to take. You can take the general bus service (I believe it's called ADO bus), but that only leaves at certain times and you have to stop at the various bus stops. We chose a private transfer to make things easier and more efficient (highly recommend with chronic illness). Canada seemed the most affordable because they also provide cold towels and water bottles free of charge (which ends up being really nice when you land in a hot, humid climate). They meet you at the airport and take you directly to your hotel.

    Now onto the more fun stuff. We stayed at Sanara Tulum because it is home to The Real Coconut restaurant, a completely allergy friendly eatery. This saved us a lot of time, energy, and stress because we knew I could just eat at The Real Coconut and not worry about constantly finding food for me.

    IMG_0005IMG_0012

    I highly recommend Sanara for several reasons. Generally, it is in a great location. It's further down the beach which gets more gorgeous as you go down it. The first part of the beach is rockier and seemed to have more seaweed, but it's breathtaking as you get further south. It's all close by to some of the best restaurants in Tulum, all walking distance from the hotel. Second, it obviously has a wonderful restaurant that is completely allergy friendly and accommodating for those of us with chronic health issues. Third, Sanara is built on the idea of health. Their toiletries are natural and non-toxic, they reuse bottles and jars as much as possible, and they provide you with everything you could need. They have 3 yoga classes a day and offer other weekly or seasonal healing classes. Their spa is also filled with healing based offerings and packages that are sure to boost your health!

    The staff at Sanara is incredible! Everyone is so friendly and helpful. Everyone speaks English, as well. Basically everyone in Mexico does. They offer beach towels and anything needed for beach activities. If you decide to go on excursions, they provide the needed gear at no extra cost. Now, the rooms do not have fridges or TV's, but otherwise they have everything you could need and are beautiful + comfortable (including wifi and AC, not all of the resorts have these).

    IMG_0008fullsizeoutput_224a

    I wanted to be able to explore other restaurants outside of our hotel. I did quite a bit of research and there seem to be a number of places able to accommodate gluten free eaters in Tulum. We ate at both Mur Mur and ARCA.

    Mur Mur was suggested by one of the hotel staff and it did not disappoint! They use local and fresh ingredients and cook everything over an open wood fired grill. The place is cute and atmosphere laid back. Their bar has swing seats which are a unique feature. They were more then happy to accommodate my food allergies. I did take an allergy card written in Spanish to all restaurants just to make sure they understood what I could/couldn't eat. Hartwood is the famous restaurant in Tulum and it's right next door. You have to make reservations months in advance. When I tried to do so, they told me they couldn't accommodate food allergies. But I learned that Mur Mur is secretly better and far less crowded (no res needed). Hartwood turns tables over as quick as possible to get people in and out ($$$) while other restaurants in the area are calmer. I highly suggest Mur Mur.

    We also at at ARCA. I'd heard good things about this place, but hadn't made a reservation. When a different dinner plan fell through, we stopped by ARCA to see if they could fit us in. They did and were incredibly helpful and accommodating about my food allergies. They were happy to help and the hospitality in Mexico was unlike anything I've experienced elsewhere. ARCA's atmosphere is much more pumped up than Mur Mur. It's much more hip and modern- food included!

    Next time I want to make sure to grab a smoothie bowl or vegan ice cream at Raw Love. We didn't get any authentic taco's either, but there are plenty of yummy places, including Charly's Vegan Tacos. I know there are a number of cute coffee shops in town, as well.

    In terms of activities, we mainly spent time on the beach relaxing. I did a couple yoga classes at Sanara as their yoga studio is gorgeous and overlooks the ocean. If you are in Tulum, you have to do at least one yoga class!

    IMG_9942

    I did spend one day visiting a couple cenote's, as well. Cenote's are basically sink holes that are filled with fresh water. Some of them are underground in caves and some are open. They are really fun for diving and snorkeling because you get to see some amazing aquatic life. There are thousands of them in the area, but I just visited two. We used a private taxi to take us since it's hard to get a ride back once you're out there. Our driver was super sweet and shared a lot of knowledge about the area with us.

    IMG_0169

    Sac Actun Cenote is an underground cave cenote. You go through it on a guided tour and pay a small fee for entry. I did get a wet suit, but I could have survived without it.

    Nichte-Ha is the second cenote we visited. This is a small open cenote. It's not popular so it's far less crowded (we basically had it to ourselves). Some cenotes can get VERY crowded and it's advised to go first thing in the morning. We went in the afternoon and had no issues.

    IMG_0193

    On our next trip (*fingers crossed* ha), I'd really like to take the full day tour of the preserve that is just south (at the end of the beach road into Tulum). It sounds absolutely amazing and you see both jungle life and aquatic life on the tour. I'd also like to spend some time in town and drive out to some of the smaller, historic surrounding towns.

    Since we weren't there super long, we mostly just laid around on the beach, swam in the ocean, and went for walks along the water. It would be fun to do some of the water activities next time like stand up paddle boarding and kite surfing.

    This trip reminded me how much more there is to life than my sick bubble. I've spent many years needing to focus solely on my health and healing and although that is still a priority, it's sort of taken over my life. I need to start branching out again and slowly dipping my toe back into the pool of living to get out of my constant treatment routine. It also reminded me how much I absolutely LOVE warm weather and the ocean and how good I makes me feel. The cold and mountains are not for me. So I'm more motivated then ever to figure out how to move closer to the water now.

    Anyway, I hope this little guide/review of my trip was helpful! If you have any other questions about my trip or details of where I stayed and what I did, don't hesitate to comment or reach out and ask! Happy Holidays!

    IMG_0069

    Thanksgiving 2019

    December 13, 2019 by Victoria Faling Leave a Comment

    I know I'm a little behind on this post. I've documented our family Thanksgiving the last few years and honestly wasn't planning to write a blog post about it this year. But I got a few requests, so here we go! Since my parents live in New Mexico we decided to do a bit of a Latin-themed Thanksgiving this year.

    fullsizeoutput_2221

    First, I made turkey pasteles. These are basically Puerto-Rican tamales. We love tamales, but I don't do great with corn. Pasteles are corn free so this was the perfect compromise. I used The Curious Coconut's recipe from her Latin American Paleo Cooking cookbook (which is excellent, by the way). For the filling, though, we used shredded turkey breast that I marinated in olive oil, lemon juice, lime juice, and salt. We also used some capers, olives, and garbanzo beans. They were so delicious! And we still have leftovers in the freezer to pull out and cook :).

    fullsizeoutput_2223

    I also made my favorite Preserved Lemon Green Beans and Kale-Persimmon Salad which I added roasted butternut squash to (pro tip!).

    IMG_9846

    My mom made some Beer Braised Beans for her and my dad along with some blue corn muffins. And for dessert I made Fed and Fulfilled's Pumpkin Caramel Apple Upside Down Cake.

    fullsizeoutput_2222

    Everything was absolutely delicious, per usual! We don't feel around with holiday cooking and always have amazing meals, if I do say so myself. I hope you all are having a wonderful holiday season!

    AIP Coconut Date Cookies ("Oatmeal Raisin") (Vegan)

    April 12, 2019 by Victoria Faling 2 Comments

    *This post may contain affiliate links

    Who doesn't like cookies? I mean, really, if you don't like cookies what is wrong with you? Okay, it may not be everyone's favorite dessert, but who says no to cookies? That's what I thought.

    So I was originally going to call these AIP Oatmeal Raisin Cookies, which they definitely could be, but I used dates so they obviously ended up not being so raisin-y. BUT, you could definitely use raisins instead of dates and they would resemble a grain free version of the classic oatmeal raisin. I happen to love a good oatmeal raisin cookie (yes I love a good chocolate chip cookie, too). I very much miss oats, but my body does not.

    Let's get on to the recipe shall we?

    AIP coconut date cookies
    healthy gluten free and dairy free coconut date cookies

    AIP Coconut Date Cookies

    Makes 12

    Ingredients:

    -½ cup cassava flour

    -¼ cup tiger nut flour

    -¼ cup coconut flour

    -1 tsp. cinnamon

    -½ tsp. baking soda

    -½ tsp. cream of tartar

    -¼ teaspoon salt

    -½ cup softened coconut oil

    -¼ cup maple syrup

    -½ a medium mashed banana (about ¼ cup)

    -1 tsp. vanilla extract

    -⅓ cup coconut flakes

    -⅓ cup chopped dates or raisins

    Preheat oven to 350 F.

    Whisk all your dry ingredients together in a small bowl, making sure there are no lumps.

    Use a mixer to whip the coconut oil, syrup, banana, and vanilla extract together in a large bowl until light and fluffy.

    Mix the dry ingredients into the wet ingredients then fold in your coconut flakes and dates/raisins.

    Drop tablespoon fulls of dough on a parchment lined baking sheet and press down gently. The cookies won't spread much so flatten them as much as you like (I like mine to be probably about ¼-1/2 inch thick). You should get about 12 cookies.

    Bake for 18 minutes, until just beginning to golden around the edges. Let cool for 10 minutes on the baking sheet before transferring to a wire rack to finish cooling.

    These store for up to a week in an airtight container. I think they store best in the fridge and then pull some out about an hour before eating to bring to room temperature.

    AIP coconut date cookies
    healthy gluten free and dairy free coconut date cookies
    healthy gluten free and dairy free coconut date cookies

    My Health Journey: An Update

    April 7, 2019 by Victoria Faling Leave a Comment

    About 2 years ago I posted a video on my YouTube channel relaying my entire Lyme disease/Health journey up until that point. I share a short version of my health journey up until getting diagnosed on my About page. The other week I posted an updated Health/Lyme disease journey video on my channel recounting what the two years since that original video has looked like. I had several people ask if I could put that video into a blog post, so here we go!

    IMG_4549

    I'm going to summarize the second half of that first video (because the lead up is on my About page) in a few bullet points and then go more in depth with the last couple of years.

    -Diagnosed with chronic Lyme disease plus a host of co-infections Spring 2012

    -Started on antibiotics, herbals, and supplements

    -Got a picc line placed and started IV antibiotic therapy summer of 2013 for 7 months

    -During the end of that 7 months I tested positive for high mold levels and began mold treatment (IV anti-fungals and lots of binders)

    -Stopped antibiotics and switched to the herbal Cowden protocol. Also began treating heavy metals

    -Summer of 2014 was spent on herbals, learning all about detoxing, and moving from CO to NM

    -I essentially stopped treatment in the Fall of 2014 once moving because I felt I had plateaued  and was doing better overall. I began working and things started to flare again, so I found some new doctors in NM.

    -One doctor had me do IV ozone and after my first one I ended up in the ER due to peeing blood. We believe the ozone busted a cyst and I ended up being just fine.

    -I was working 2 jobs and totally over did it thinking I was "better" and crashed HARD. Major relapse.

    -I started seeing a new Lyme doctor in NM who does a lot of alternative therapies. I eventually got a port-a-cath placed and started heavy duty IV's of ozone, silver, vitamin C, some other detox IV's, and attempted antibiotics again (which didn't go well- my body was so done with them!). I honestly tried quite a few treatments while living in NM and there are probably a couple nuanced things that I didn't mention. If not mentioned it's because they didn't work.

    -I also started bee venom therapy while in NM which I did for about 2 years (I have a whole video on that here).

    -I found an AMAZING chiropractor in NM who was spot on with muscle testing and helped me a lot with my digestive issues, especially SIBO.

    -I started working with a nutrigenomics specialist who provided supplements based on my genetics. This helped for the first six-ish  months.

    IMG_E8257

    Then I moved to CO to start grad school....

    When I moved, I had a seizure and passed out in a coffee shop which resulted in a concussion. This really threw off my body and nervous system. The supplements the nutrigenomic specialist was providing stopped working. I ended up withdrawing from grad school because my health could not handle the intensity of it all.

    I started seeing an LLND here in CO who was Klinghardt trained in ART (autonomic response testing, a type of muscle testing). I saw the PA first who provided some herbals and referred me to a cold laser therapy specialist and my current immunologist. I did laser therapy for a few months and noticed no difference, sadly. Lasers have a lot of efficacy and some amazing benefits, but they didn't work for me.

    I returned to that Lyme clinic to see the head doctor several months later. I didn't feel like the herbals I was put on were helping, but this follow up visit was a disaster. The doctor and I clashed and I felt like the clinic wasn't a good match and they couldn't' handle my case. I ended up stopping Lyme treatment completely at this point which was the end of 2017.

    I started working exclusively with my immunologist and found an amazing primary care. Both diagnosed me with mast cell activation syndrome and dysautnomia. My immunologist began running advanced testing to determine if I was a candidate for IVIG. I've spent the last year and a half focused on getting and starting IVIG, which I finally started in the summer of 2018.

    fullsizeoutput_1962

    I have still dealt with a lot of GI symptoms. Fatigue and GI are my worst symptoms! I traveled to LA to see a top GI doctor in March 2018. He is very integrative and amazing! He retested mold and Lyme, both of which were negative. He did some other extensive testing and we determined that I'm not actually absorbing nutrients and utilizing them in my cells. I was placed on several supplements for that. I've done several drug trials with him in the last year, as well, to try and aid in my gut healing. We have figured out that I have damage to the nerves that innervate my GI system and that is what needs to be repaired. Although IVIG is meant to repair nerve damage, it hasn't seemed to help my gut at all. My GI feels the next best step is trying stem cell therapy, but there is no guarantee with that and it is very expensive so I haven't made a decision around this yet.

    So, the last two years have consisted of a lot of repair and rebuilding after the damage that Lyme and extensive treatment has done. My current treatment consists of:

    -Myer's cocktail and glutathione IV followed my IV fluids one week, IVIG the following week (I get this every 3 weeks), one week off of IV's

    -In terms of IVIG, I started to feel better over the last 6 months of 2018. But 2019 as been a bit harder and we are still working through what could be causing all my insane fatigue. Part of that includes figuring out my hormones as I do have Hashimoto's and we want to make sure my hormones are in balance

    -MCAS and dysautonomia managing medications along with my other medications needed (like thyroid, motility meds, etc)

    -Supplements tailored to my specific needs

    -My usual detoxing (FIR sauna, epsom salt baths, dry brushing, green juices, etc) as this helps me feel best since I deal with chemical sensitivities

    -Lots of rest and just taking care of my body the best I can

    -I've also been working a lot on mindset! This has made a difference and I will continue to work on this plus working through trauma and limiting beliefs

    CSED7671

    A question I get asked often is "what treatment worked best?" and  "should I do X treatment?" and my answer is yes/no/maybe. I literally can't answer that. I'm sure almost every treatment I've tried has helped me in some way and they've each built off each other. I'm not 100% yet and still have a lot of healing to do, but would I be where I am today if I hadn't tried everything I've done or done things in a different order? Who knows! The way I move forward is on gut instinct. I research treatments and then go with my gut reaction on how I feel about a treatment. I'm VERY intuitive and my true gut reactions have never steered me wrong, so I trust my gut instinct with everything I have (even though it's hard sometimes).

    I get asked a lot about gut health and gut healing. This is such a complicated topic and I discuss it a lot more in depth on my Instagram, which I encourage you to check out and follow me on if you don't. The short answer is that treating SIBO is what has helped me the most, although gut issues are still a big problem for me. Everybody's gut issues have a different root cause and you have to figure out what the issue is for you (is it Candida or SIBO or celiac or something else) and treat that. Just changing my diet or just adding in a certain supplement has never done much for me, but that may be the thing for you. We are all so different!

    I know the above two answers are a bit frustrating because we all just want that magic bullet, but everyone is so bio-individual that the way we got sick and the way we are going to heal is going to be completely different for each person. There is no one size fits all treatment or answer.

    This entire health journey has been quite the roller coaster, which, if you deal with chronic illness too, know. I've been through some really rough times (still have them, still more to come, I'm sure) and I've also learned a lot and gotten a lot out of this experience. I wouldn't be the person I am today if I didn't go through what I have. The things that have been most helpful in my journey are connecting with others on social media who can relate and I can speak my truth with, having/creating a really good support system (thanks mom and dad and two of my best friends!), and having faith that this is all for a reason. Sharing my story has been immensely helpful for me. It makes me feel less alone, but I've realized it helps others which in turn helps me because it makes it feel like this isn't all for nothing. Knowing I can support others in their journey or be the voice that I didn't have when I first got sick means a lot.

    If you don't know, my friend Derek and I started a podcast called Beyond Your Diagnosis where we share all about living life with chronic illness. We discuss various topics related to chronic illness life and have guests on to share their stories, too. It's been so fun and we've gotten a ton of positive feedback. If you haven't checked it out, please do. You can find us on iTunes, Spotify, Stitcher, and Google Play.

    IMG_5096

    I've been spending a lot more time on YouTube sharing my journey and have mostly just been posting recipes here. I'm happy to try and do more blog posts like this with updates and not just on YouTube if that is better for those of you who still read my blog :). Just let me know in the comments!

    Paleo Fig Cinnamon Rolls (Vegan option)

    March 1, 2019 by Victoria Faling Leave a Comment

    *This post may contain affiliate links

    Looking for healthy cinnamon rolls? Look no further than these Paleo cinnamon rolls made with sweet potato and filled with chopped figs. Gluten free and nut free, they can also be made vegan!

    gluten free and dairy free healthy paleo cinnamon rolls
    gluten free and dairy free healthy paleo cinnamon rolls

    I was in San Diego, California recently and my best friend and I went to this amazing bakery, Starry Lane Bakery. They are completely gluten free, vegan, nut free, soy free, and corn free. Basically an allergy friendly dream! I had the most delicious cinnamon roll and haven't been able to stop thinking about it since.

    I wanted to make an even healthier and paleo version when I got home. It's not quite the same gooey stickiness of your traditional cinnamon roll, but it's pretty darn good for a healthy version. I liked to fill mine with chopped figs, but you can leave those out or use the more traditional raisins instead.

    This recipe utilizes Japanese sweet potato to create the dough. Japanese sweet potato is so versatile and can be used to create an amazing and delicious gluten free and paleo dough. You can also keep this recipe completely vegan by using an egg substitute. The icing is made of coconut butter and honey for a naturally sweet, lower sugar take on the classic!

    gluten free and dairy free healthy paleo cinnamon rolls
    Print Pin

    Figgy Cinnamon Rolls

    These healthier cinnamon rolls are made with Japanese sweet potato for a nutrient dense, lower sugar version that is completely paleo with a vegan option!
    Course Breakfast, Dessert
    Cuisine American
    Keyword Easy, healthy, Low Sugar, No Yeast
    Servings 8 rolls
    Author Victoria

    Ingredients

    Dough

    • 1 medium Japanese or white sweet potato peeled, steamed, and mashed (about 300 g or 1.5 cups mashed)
    • 2 tablespoon softened coconut oil
    • 2 tablespoon maple syrup
    • 1 egg or egg substitute
    • ½ cup tigernut flour
    • ¼ cup cassava flour
    • ½ teaspoon baking soda
    • ¼ teaspoon salt
    • 1 teaspoon cinnamon

    Filling

    • 8 dried figs soaked in warm water and chopped (alternatively you can use raisins)
    • 1 tablespoon coconut or maple sugar
    • 1 tablespoon cinnamon

    Icing

    • 1 tablespoon coconut butter
    • 2 tablespoon full fat coconut milk
    • 1 tablespoon raw honey

    Instructions

    • Preheat oven to 350F.
    • Beat your sweet potato, oil, maple syrup, and egg in a large bowl until smooth.
    • Combine all dry ingredients in a small bowl and whisk together. Add dry ingredients to wet and mix well until combined.
    • If you used freshly steamed sweet potato that was still warm, let your dough sit in the fridge for 10 minutes at this point.
    • Sprinkle some flour on a large piece of parchment paper. Place your dough on it then another piece of parchment paper on top. Roll out your dough to a rectangle that is about ¼ inch thick (it will be about 8x12 inches). The easiest way to do this is to roll out the dough most of the way, then use your hands to shape it and press it out the remainder of the way.
    • Mix your sugar and cinnamon for the filling then sprinkle over the entire surface of the dough. If using figs or raisins, sprinkle them over the dough at this point, as well.
    • Using the bottom layer of parchment paper to help you roll the dough into a log.
    • Place dough in the fridge for 15 minutes.
    • Remove your dough and slice into 8-10 pieces. Place your cinnamon rolls on a parchment lined baking sheet.
    • Bake for 40-45 minutes (if at lower altitude, check earlier). They should be golden brown, have puffed up slightly, and be fairly firm.
    • Let cool on baking sheet most of the way before transferring to a wire rack.
    • To make your icing, combine all ingredients in a small saucepan and warm on low heat until everything is melted together. Drizzle over your cinnamon rolls and enjoy!

    Gluten Free Sweet Potato Scones (AIP, Vegan)

    January 30, 2019 by Victoria Faling Leave a Comment

    [et_pb_section admin_label="section"] [et_pb_row admin_label="row"] [et_pb_column type="4_4"][et_pb_text admin_label="Text"]

    These gluten free scones are made from sweet potatoes, giving them a naturally sweet and soft texture. Slightly different than your typical scone, this recipe packs a nutrient punch. These delicious sweet potato scones are gluten free, fully paleo and autoimmune paleo friendly, and are vegan!

    paleo scones
    paleo scones

    These paleo scones are a fun, healthy alternative to traditional scones that are lovely as dessert or as a quick breakfast. Paired with some protein, they are the perfect morning addition when you're missing out on a pastry for breakfast.

    gluten free scones
    gluten free scones

    Recipe Notes

    Why sweet potatoes? Japanese and white sweet potatoes are great for making into a dough. Once cooked and mashed, they mix well with flour to form a sweet, malleable dough. This makes them a fun addition to baking for more nutrient dense recipes.

    What kind of sweet potato should I use? Japanese sweet potatoes or white sweet potatoes are ideal for this recipe. They both offer a creamy, sweet flavor that can't be beat. Japanese sweet potatoes are my favorite in general and for this recipe, but either variety will work.

    Flours used: this recipe uses a combination of cassava flour and coconut flour to keep this recipe paleo. I have not tested these healthy scones with any type of 1:1 gluten free flour blend. If that is something you'd be interested in, let me know in the comments!

    Wet ingredients: besides the sweet potato, these scones call for a mix of maple syrup, coconut butter, and coconut oil. I've found the mix of coconut butter and oil create a better texture than just coconut oil alone. Coconut butter is a little drier, which is perfect for scones. I think it could work to substitute the coconut butter and oil for ¼ cup of cold butter of choice, but I have not tested this.

    gluten free scones
    Print Pin

    Sweet Potato Scones

    These gluten free and paleo scones pack a nutrient punch. Softer than your typical scones, they are still delicious, aren't too sweet, and make for the perfect snack, dessert, or breakfast addition.
    Servings 8 scones
    Author Victoria Faling

    Ingredients

    • 1 cup cooked and mashed Japanese or white sweet potato at room temperature about 225-250 grams
    • ¼ cup maple syrup
    • 3 tablespoon melted coconut butter
    • 2 tablespoon melted coconut oil
    • 1 teaspoon vanilla
    • ¾ cup cassava flour
    • 3 tablespoon coconut flour
    • 1 teaspoon cinnamon
    • 1 teaspoon cream of tartar
    • ½ teaspoon baking soda
    • ¼ teaspoon salt

    Instructions

    • Line a baking sheet with parchment paper and set aside.
    • Make sure your sweet potato is at room temperature, not cold. Beat all wet ingredients together in a large bowl until smooth.
    • Mix the dry ingredients together in a small bowl.
    • Pour dry ingredients into wet and get ready to get your hands dirty! Use your hands to mix the dry ingredients with the wet until you get a thick dough.
    • Place the dough onto the baking sheet and press the dough into a circle about ½ inch thick. Place in the fridge for 15-30 minutes, until cool to the touch and firm.
    • While dough is cooling, Preheat your oven to 350F.
    • Remove the dough from the fridge and cut into 8 triangles. Gently separate the scones on the baking sheet and bake for 30-35 minutes until just beginning to brown on top (over cooking will result in them being too dry).
    • Cool for 5 minutes on the baking sheet before removing to cool on a wire rack.
    • I love these drizzled with coconut butter and topped with fruit!

    aip scones
    aip scones
    [/et_pb_text][/et_pb_column] [/et_pb_row] [/et_pb_section]

    IVIG Update

    November 30, 2018 by Victoria Faling Leave a Comment

    In this video a talk about my progress with IVIG, switching brands, and give a little overall health update!

    LivLyme Conference

    October 24, 2018 by Victoria Faling 5 Comments

    This past September (Sept. 2018) I had the chance to attend the LivLyme Foundation Lyme Conference. This was a two day conference consisting of a variety of doctors, researchers, advocates, and more who spoke regarding Lyme disease. It was really quite an amazing experience for me in so many ways, but this post is going to be sharing all the information I learned.

    IMG_0538

    The post is divided up based on speaker. I provide notes on the information they shared plus references and links to articles as necessary. I also provide my own interpretations or conclusions of what they said and attempted to translate all the "scientific speak" into lay person language so it is easier for you to understand.

    I took notes on 14 different speakers and have shared a lot of the key points on my Instagram already (all stories are saved to the Lyme Disease highlights on my page). I wanted to comprehensively put ALL the notes together in one spot and felt a blog post would be the best and easiest way to share. So, let's get into it!

    Disclaimer: I AM NOT a medical professional. I am NOT providing medical advice in this post. I am simply recounting the information presented at the conference. Please always speak with your healthcare provider to determine the best course of action for you!

    A few points emphasized by the doctors or other general points made during discussion periods:

    -At this point, there is no known cure for Lyme disease, but remission is possible. Due to the elusiveness of the Borrelia Burgdorferi (Bb) bacteria and challenge to treat biofilms, doctors can't at this point conclude that patients are completely cured of the infection.

    -Patients must be careful re: sex. Although all the research isn't there or known, there is evidence to suggest the ability of Lyme to be passed sexually. Your best safety option is using a condom!

    -Dr. Horowitz answered the question of having kids if you have had Lyme disease and his answer was also emphasized by other doctors. It is possible to have healthy kids but both parents MUST be in remission before trying, sperm can carry Lyme so it's not only the mother who needs to be treated, and the mother must be on treatment during the pregnancy. [They discussed antibiotic treatment, but I did not write down specifics]

    Dr. Eva Sapi: BIOFILMS

    Dr. Sapi is a researcher and professor at the University of New Haven. She's recovered from Lyme herself and does a ton of research on Lyme and biofilms now.

    As most of you with Lyme disease know, Borrelia Burgdorferi has 3 forms: spirochete, cyst/round body form, and biofilm. The biofilm is what is the most resistant to antibiotics and what allows the bacteria to hide and persist.

    Biofilms are not unique to Lyme by any means. They are something produced by many microorganisms as a way to protect themselves and provide "housing" so to speak. A biofilm produced by one organism may end up housing a variety of other microorganisms, as well. Which is how we can end up with so many hard to treat, persistent infections at once. Something key to note about biofilms is that although they can form anywhere, they prefer to settle on collagen. This is why many with Lyme disease are prone to muscle injury, collagen deterioration, and pain.

    Dr. Sapi has devoted much of her current research to biofilms and how to eradicate them in Lyme so that we can heal! She, herself, has recovered from Lyme. The research she presented discussed the evidence of chronic Lyme and the ability of the Borrelia Burgdorferi bacteria to persist after the typical 2-4 weeks of antibiotics. This is a great study discussing the presence of Lyme bacteria up to 8 weeks post treatment with a resurgence at 12 MONTHS! You can read more studies demonstrating the persistence of Lyme bacteria here, here, here, here, here, here (Have I linked enough studies yet for the doubters? Because I could keep going...). Lastly, this study demonstrates the presence of biofilms in vivo.

    In her lab, Dr. Sapi has studied:

    1. The effects of temperature on biofilms, finding that biofilms prefer to live and grow at 37C, which is body temperature (what a surprise!). My interpretation was that this meant that biofilms become less stable/more easy to target when we change our temperature (heat ourselves up or cool ourselves down- whether that be mildly with saunas or ice baths or medically with procedures like hypothermia). You can read the study here.
    2. The effects of mutating the Borrelia and how it formed biofilms. It was found that stressing the bacteria (by mutation) still allowed the borrelia to produce biofilms, but some forms were slightly more sensitive to antibiotics. This shows the potential of stress response to aid in the ability to target Bb with treatment. You can read the study here.

    Dr. Sapi took time to discuss how although the typical treatment with Doxycycline may eliminate some of the bacteria and some of the forms, there are still other forms that survive and persist. Later I'll discuss the positive results Dr. Zhang and Dr. Horowitz are having with certain antibiotic combinations.

    Dr. Sapi has also spent a lot of time studying more natural, herbal treatments for Lyme disease (something she used for her recovery). Stevia has been a big trend in the Lyme community over the last few years for treatment and rightfully so! Stevia combined with antibiotics has shown to help reduce Bb biofilms! This is Dr. Sapi's study.

    Although she didn't discuss it at the conference, I spoke with her after regarding the Cowden Protocol. Her studies on various Cowden herbs have shown them to be more effective then traditional antibiotics in eliminating persister forms of Lyme.

    Lastly, Dr. Sapi has done some research on bee venom in Lyme disease. Again, this was not discussed at the conference, but here is a great article you can read.


    Dr. Ying Zhang: TREATMENT FOR PERSISTENT LYME DISEASE

    Dr. Zhang is a professor and researcher at Johns Hopkins University. His area of study is on persistent bacterial infections and developing more effective treatments.

    Dr. Zhang started off by discussing the basics on persistent Lyme infection and the current controversies surrounding treating post-treatment Lyme disease syndrome (PTLDS) or chronic Lyme. He used the term PTLDS to be politically correct (so I'll be using it here), but made it clear at the beginning of his talk that PTLDS is synonymous with a chronic Lyme infection. First of all, most patients aren't even aware they were infected until Lyme reaches the persistent form. Second, the infection can alternate between being active and inactive (laying dormant). How? Biofilms!

    IMG_0541

    A CDC survey found that 56% of doctors currently treat Lyme longer than the IDSA recommendations because the current, short treatment cycle of doxycycline does not seem to help patients (a big duh, right?!). So how does a disease become so controversial?

    1. Due to the visible vs. invisible, objective vs. subjective issues that come along with an invisible illness. Doctors struggle to treat (and judge patients) based off their looks and the fact that blood work may not reflect symptoms.
    2. Studies on treating PTLDS patients with antibiotics have had mixed results. Dr. Zhang discussed 5 studies (see image below). Why are results mixed? Because each patient is uniquely different and the same treatment won't work for everyone. The patients may have needed longer treatment or a different combination of antibiotics then were used in the study. The last study he presented (the one most often referenced by those who argue against long term antibiotic use) was a Dutch study that concluded there is no improvement with antibiotic use, yet the study used no control, invalidating the results.
    3. There are a number of theories about the cause of PTLDS, including that it's due to a persister infection, but no matter what, there is currently no FDA-approved treatment for it. This leaves patients (whether they believe in chronic Lyme or not) sick and in pain with no answers.

    IMG_0539

    Dr. Zhang then discussed that there are 2 forms of persister infection:

    1. Type I: This is an early development of persister. When the tick bites you, you are immediately infected with biofilm (remember biofilm is what is so hard to treat and makes Lyme persistent).
    2. Type II: This is late development of persister. This is when you get a tick bite and are not treated in time, which allows the infection to grow and develop into late stage Lyme.

    Here is some of his research discussing the persister method in Bb.

    Dr. Zhang's latest research focuses on using Tuberculosis (TB) treatment as a model for treating persistent Lyme. In case you didn't know, TB treatment was originally a 2-4 year mono-treatment due to the persisting aspect of the infection. Patients would become antibiotic resistant, though, so treatment evolved to rotating various drugs and got treatment down to a 24 month treatment. Now, TB treatment is 6 months (2 months of phase 1 to kill active infection, 4 month continuation phase for persisters) with 4 different drugs, one of them being a persister drug (Rifampin). Dr. Zhang emphasized that infectious disease doctors will have no idea what persisters are, only TB doctors!

    This TB model is how Dr. Zhang believes we need to approach Lyme treatment- an initial 30 day treatment for active spirochetes and then a longer term, persister regimen. Dr. Zhang has published several studies on daptomycin drug combination therapy for Lyme (treatment methods Dr. Horowitz is using- Horowitz seems to be doing the clinical analysis while Zhang is doing the in-lab research). You can read those studies here and here.

    Dr. Zhang has also studied the efficacy of Essential oils in persister Bb treatment, with a lot of positive findings! The top 5 essential oils to use against persisters are oregano, cinnamon bark, clove bud, citronella, and wintergreen. The top 3 essential oils to use against biofilms are oregano, cinnamon bark, and clove bud. You can read the study here. He also has another study that has not yet been published finding that garlic, allspice, myrrh, hedychium, litsea cubeba are more active against persisters than any known persister drug at the moment!


    Dr. Kim Lewis: DEVELOPING TREATMENTS

    Dr. Lewis is a professor and researcher from Northeastern University. Some of what he presented is currently unpublished research, so I can't share in great detail. I will provide a general overview of the information he presented, though.

    Dr. Lewis works in a drug discovery lab, looking into natural options that may be able to be turned into treatments for disease. In the lab, they use mice with a knocked out immune systems (aka they don't respond to Doxycycline), which is comparable to a human with a compromised immune system from Lyme. They have found one compound so far that hits spirochetes and are looking into it's development as a drug therapy for Bb.

    The most exciting thing Dr. Lewis presented, though, was his research on the gut microbiome in PTLDS patients. So far, they've found that chronic Lyme patients have a high level of a certain bacteria that is often associated with autoimmune disease and low levels of a different, beneficial bacteria as compared to control groups. What this means is that the makeup of the gut in chronic Lyme patients differs from healthy individuals. The chicken or the egg question was not addressed.

    Now that they have identified specific bacterial strains that are altered in PTLDS patients, they can formulate proper replacement therapies. Dr. Lewis and his team are about to run a study in which they do fecal microbiota transplants (FMT) in these PTLDS patients to see how it affects treatment and symptoms. Should be exciting to see the outcomes soon!


    Dr. Debbie Hamilton: PEDIATRIC LYME

    Dr. Hamilton is a pediatrician who mainly treats children with complex cases, autism, and Lyme disease. Dr. Hamilton's talk was mostly about how Lyme can present in children and since pediatric care is not of my interest I didn't take a ton of notes. I will share a few key things I found of interest, though.

    Dr. Hamilton was one of the main doctors to emphasize this next point, but almost all of the doctors brought this up to some degree: whenever she has a patient come in who has been diagnosed with POTS or some form of dysautonomia she immediately tests them for Lyme disease. She has found the two to be almost synonymous. Since Lyme loves the electrical systems of the body, the Autonomic Nervous System (ANS) is often greatly impacted by the infection, thus leading to POTS. She discussed how 50% of POTS patients develop POTS after having an infection! You can read two studies that discuss the connection of POTS post-Lyme infection here and here.

    Dr. Hamilton discussed how ENT symptoms are most often Lyme. This study discusses how common ENT symptoms are in patients with Lyme and Bartonella. This study by Peltomaa discusses how "The prevalence of positive levels of antibodies against Borrelia burgdorferi was sixfold higher in patients with sensorineural hearing loss."

    IMG_0551IMG_0552

    Autism was the next topic discussed. 22-80% of children with Autism have tested positive for tick born infections. Dr. Hamilton mentioned that if symptoms of Autism were present since birth, it's possible you are dealing with a congenital case of Lyme disease and need to take a look at the mother's health and medical history. If the child goes through a classic regression phase, trace back to when that regression phase began to see if there was a trigger, like a tick bite. I found all of this quite interesting because it means there is potential to minimize Autistic symptoms or possibly reverse by treating the root cause in certain patients.


    Dr. Jayakumar Rajadas: DRUGS FOR TREATING PTLDS/CHRONIC LYME

    Dr. Rajadas is a professor at UCSF and the founding director of the Stanford bioADD, a drug research laboratory. To be honest, I didn't take many notes for Dr. Rajadas speech. He mainly discussed various compounds they are researching to use in the killing of persister cells in Lyme disease. What felt most important to me was to hear, again, that there are some amazing doctors and researchers working hard to understand the mechanisms of Bb and the persister forms plus how to potentially treat persisting infection to help patients!


    Holly Ahern: INACCURACIES OF LYME TESTING

    Holly Ahern is a professor and microbiologist at SUNY Adirondack. She co-founded Lyme Action Network and has created a biorepository in NY to study those with chronic Lyme disease. Unfortunately, I missed Holly's talk. I was able to get notes from a friend, but please be aware these are not my direct notes so I do not have direct study references.

    The first thing to discuss is the inaccuracies of the current CDC testing for Lyme disease (Western blot and Elisa). Many on the anti-Lyme side tend to argue that there are too many false positives. Holly has found that there is a false positive 1% of the time while there is a false negative 50% of the time in an acute Lyme infection and 80% of the time in chronic infections. You might want to take a moment to re-read that sentence again. Yeah, okay good, you read that right.

    IGG vs. IGM testing is essentially totally bogus with Lyme disease. First, let's review what each of those means. IgM is a marker for current infection while IgG indicates past exposure. Bb is able to manipulate innate (immediate response) and adaptive (antibodies created for future reinfection) immunity (review this study for the science) to disable the IgG response. For those whose IgG (chronic) response has been disabled, they will only test IgM positive when infection is active. Since Bb is a persister, it can essentially always be a current infection. Therefore, a person could have been bit years ago but test IgM positive today. This is why the 2 week course of antibiotics is not going to work. [Victoria note- I've seen a number of people only have IgG positives which, based on everything I learned at the conference put together, I assume also can indicate the persister nature of Lyme. Essentially it caused an initial reaction in your body and allowed you to produce some antibodies, but now is hiding in biofilm so you aren't getting the IgM response. You may still have a very severe and current Lyme infection though!]

    Something else of importance to note is that many of us are probably familiar with the HLA mutation for mold. A mutation of HLA-DR basically means that you don't produce antibodies to mold and therefore don't clear the toxins from your system when exposed- allowing a build up in your body that produces a very serious illness. Well, what has also been discovered is that this mutation relates to Lyme disease, as well. AKA You genetically won't produce antibodies to Lyme! No wonder so many don't test positive or don't get better after one round of antibiotics. Dr. Shoemaker discussed two great studies regarding this in this article he wrote about Lyme and CIRS, you can read the studies here and here.


    Susan Green:  LEGISLATION

    Susan is a lawyer out of Maryland who has done a lot of work on Lyme-related legislation. Her talk wasn't anything too interesting, as it was really geared towards doctors and other lawyers in learning how to navigate the legislative system.

    Many patients get involved in legislation, though, as we ask for changes in the treatment of chronic Lyme. In doing so, we need to remember to keep it simple when contacting our legislators, don't be intrusive, and have one consistent message. Letter writing campaigns are a great way to raise awareness with our legislators.

    I am working with Susan to create a template letter that Lyme patients can send to their legislators to ask for funding on Lyme disease research. Stay tuned!


    Sue Visser: CDC REPORT

    Sue Visser works for the vector-borne disease research division of the CDC in Colorado. It was challenging to welcome here to this conference and many people walked out during her talk, but she discussed a few points I'd like to share with you. Sue did stay for the entire conference and spoke with several of the doctors to learn more and understand the controversy around chronic Lyme and how many patients are truly suffering. I know that those of us in the Lyme community have a lot of issues with the CDC and rightfully so, but there do seem to be a couple good people within the organization even if the CDC as a whole is BS at the moment when it comes to Lyme.

    Sue shared some statistics the CDC has/is using on tick-borne illness. Firstly, one of the major issues in CDC statistics is that they can only discuss what has been reported to them. Many doctors don't report. Obviously we are aware why many Lyme doctors don't report in the first place, but also many doctors who have CDC positive patients don't report. Some states as a whole have given up on reporting, as well, because the process is complicated with too much paperwork and an overload of sick patients. The CDC estimates that about 1/10 of tick-borne cases are actually reported... so take the CDC's numbers and multiply by 10. There ya go, a more realistic number of Lyme cases (which we as patients are already aware of!).

    From 2004-2016, tick borne illness cases have doubled with Lyme accounting for 82% of all tick borne disease. The CDC is aware it is a growing epidemic and stated that the US was not prepared for this growth, tick-borne disease in general, or the amount of illness that it has caused.

    Currently only $10.7 million is allocated for Lyme research. If you don't know, this is pennies compared to the money funneled into other disease. [Sue was not able to comment on this, but it was made clear by Holiday and other speakers that the best thing to do is reach out to your representatives who are in charge of budgeting! That is why I'm working on the letter with Susan Green].

    I asked Sue this question: "You've been here all day listening to all these doctors and researchers present the science on chronic Lyme, so why is the CDC still so resistant to the diagnosis and helping suffering patients?"

    Her answer: "That is the million dollar question. I don't have an exact answer but my best guess is due to poor diagnostic tools."

    I'll let all of you take that as you will.


    Dr. Richard Horowitz: DATA MINING IN PATIENTS/LATEST RESEARCH

    If you don't know who Dr. Horowitz is, you probably don't have Lyme disease! Dr. Horowitz has made a name for himself in the Lyme community by fighting HARD for patients, constantly researching and trying the latest treatments on patients, and has written two books with everything you could ever want to know about treating, what he calls, MSIDS (Multiple Systemic Infectious Disease Syndrome).

    IMG_1079.JPG

    His presentation discussed his latest research. His research has been focused on using dapsone combination therapy in the treatment of Lyme disease. His first study was published in 2016 utilizing 100 patients. This new study was based on the MSIDS model of 200 patients.

    Dr. Horowitz spent a large chunk of his talk discussing how Lyme causes numerous downstream health affects and the high numbers of co-morbidities or infections (including mold, viruses, dysautonomia, etc) in Lyme patients. I don't want to sit here and provide all the statistics, as I believe they will be in his final study, but I do want to touch on a few.

    72% of patients had immune system issues. Most had a positive ANA with no lupus or other discernible illnesses. He found a majority had either low IgG, IgM, or IgA levels with 85% having low IgG subclasses 1 and 3. These subclasses affect phagocytosis, a process to clear out pathogens and dead or defective cells in the body. Dr. Horowitz said that a future question to investigate is whether low IgM with low IgG subclasses 1 and 3 could be a marker for Lyme.

    Dr. Horowitz then mentioned that a large chunk of patients did require IVIG therapy to ultimately heal, since they presented with low immunoglobulin levels. He briefly addressed the fact that these patients need IVIG due to an underlying immune deficiency issue. I will address this further in the next speaker's notes.

    So how do we treat these patients?

    1. First, biofilms need to be addressed and hard! Using Dr. Zhang's protocol findings, like stevia and essential oils, in combination with dapsone is a great option
    2. Dr. Horowitz uses a Dapsone combination therapy (Dapsone + 1-2 other antibiotics which will be discussed in the published research study). The importance of dapsone is that it is also anti-inflammatory, penetrates the central nervous system, stops RNA and protein production in the bacteria, and hits all 3 forms of Bb.
    3. The goal is to decrease inflammation, increase detox, and repair damage. He uses the 4 R's: Replace hormones, Repair mitochondria, Rebalance the autonomic nervous system, and Reinoculate the GI tract.

    A couple notes:

    -Dr. Horowitz's dapsone research is on Bb itself. For dapsone combo therapy to be successful, co-infections must be addressed first!

    -Dapsone is an incredibly challenging drug to tolerate. He said the best ways to get patients to tolerate it is by utilizing methyline blue, tegamet (I believe this is the drug he mentioned), and increasing glutathione (like MAJOR glutathione use to help detox).


    Dr. Isaac Melamed: ALZHIEMER'S OF THE IMMUNE SYSTEM

    Dr. Melamed is an immunologist in the Denver area. He is actually my immunologist and I was excited to see he was speaking at the conference. Although not a LLMD, he has seen an increasing number of Lyme patients come through his office over the last 10 years that he can't ignore it anymore. He apparently has spent a lot of time working with Dr. Horowitz now to learn  more about Lyme, advance Lyme-related immune system research, and help patients heal.

    He addressed the chicken or the egg question that my family and I are always discussing: is it the Lyme infection that wreaks so much havoc (destroying the immune system) or is it an underlying malfunctioning immune system issue that allows people to get so sick in the first place?

    I'm going to address a few things he discussed before getting to his answer to that question. First, he discussed how he believes there is an important genetic component to these types of chronic, mysterious illnesses, but that there are other- environmental- factors that truly allow the disease to progress so intensley.

    "Genetics load the gun, epigenetics pull the trigger"

    New cancer treatments are aimed at immunotherapy treatments. Aka treatments to modulate the immune system to regulate the cancers rather then going in and killing everything with chemo. Dr. Melamed believes this is the approach that needs to be taken with Lyme treatment.

    He's found pretty much all of his Lyme patients deal with neurological manifestations. Interestingly enough, failure of apoptosis (the natural death of cells- aka a way to clean out old cells!) leads to an increase in inflammation contributing to many neurological illnesses (like alzheimer's, autism, and more). But, this is also true of other disease in the body including skin issues.

    In his research, Dr. Melamed has found that ADHD is often an inflammatory disease and that by decreasing inflammation in these kids helps tremendously. One way he has done this is by utilizing Zyrtec to decrease allergic reactions.... decrease histamine! Essentially, the allergic triggers induce neuro-immune inflammation. He's finding similar patterns in Autistic children- that it may be the result of an inflammatory reaction or pathway due to immune system dysregulation. Since IVIG can reduce inflammation and modulate the immune system, it may reduce symptoms in Autistic patients.

    IMG_0565

    Dr. Melamed has also found that patients with CVID (common variable immune deficiency) AND low C1 levels all have been positive for Epstein-Barr virus, mycoplasma, Lyme, strep, and parvovirus. Essentially, these patients develop "Alzheimer's of the immune system" where their systems aren't able to recognize or react properly to infection (they forget how!).

    1. Since your innate and adaptive immune system talk to each other to react to pathogens appropriately, there becomes a major issue when this communication is interrupted. This is often the case in CVID patients.
    2. C1 is important for controlling inflammation and plays a role in autoimmune disease. Those patients with CVID and low C1 end up with brain autoimmunity and neuro-cognitive symptoms as a result of inflammation.

    So, I know that felt like a lot and went way off topic, but it was basically the background for Dr. Melamed to answer the chicken or the egg question. He believes the sickest patients who aren't able to recover from serious infections (like Lyme) with standard treatments are suffering from underlying immune system dysfunction (Alzheimer's of the immune system) that can be regulated again utilizing IVIG. Essentially, we can modulate the immune system to respond to infection accordingly with IVIG therapy.

    He said many of these types of patients also have Mast Cell Activation Syndrome and EDS (Ehler's-Danlos Syndrome). So what is the link here? Well MCAS is also due to an immune system dysfunction. EDS on the other hand is the genetic component that isn't well understood yet. The big question is what genetics make someone so susceptible to this whole cascade of issues. There is certainly a genetic component because many of these patients aren't getting better despite throwing all the darts at the dart board. This is where we refer back to "manually" modulating the immune system with IVIG.

    One of the big questions a lot of people have asked me is if I am afraid of getting re-infected from IVIG. My short answer is no. Both Dr. Melamed and Dr. Horowitz have calmed my fears around this. If you didn't know, the process of collecting IVIG for patient use is very extensive. The plasma sits for 6 months to watch for anything growing in it. It then goes through a 12-step cleaning process and is PCR tested throughout the entire process. Neither Dr. Melamed nor Dr. Horowitz have seen reinfection with patients and find the benefits for healing outweigh the current known con's. Plus, IVIG consists of the immunoglobulins which are what should be fighting the disease in the first place!

    IMG_0570


    Dr. Phillip DeMio: LYME SYMPTOMS

    Dr. DeMio is a doctor specializing in Lyme and Autism. He spent his talk reviewing all the different systems (aka every part of your body) that Lyme disease can affect and the accompanying symptoms, especially what he sees regularly. Since many of us with Lyme already know most of this, I am not going to repeat it all here. I do want to highlight a few points, though.

    IMG_0572

    First of all, Dr. DeMio showed a brain MRI of a patient with white spots on their brain who had been diagnosed with MS. He tested and treated this patient for Lyme, re-did the MRI and the spots were gone. This is actually very common in Lyme patients. Oddities on brain MRI's can be an indication of Lyme and it's important to get proper testing and treatment if you are dealing with neurological and cognitive symptoms.

    IMG_0573

    He talked very seriously about pain in Lyme patients. He emphasized that even though pain is an invisible illness for patients and they are turned away from many doctors as "just trying to get the hook up" they truly need proper care and medication. Their pain is real and it can be anywhere!

    He sees a lot of patients with false malnutrition AKA patients wasting away despite eating and getting proper nutrient intake (this is because the bacteria are eating up those nutrients and wreaking havoc on hormones). Lyme acts as a false mitochondria. It gets into the cell, taking all the nutrients from your actual cells mitochondria, and using them to fuel themselves. This leads to mitochondrial dysfunction which is why so many patients deal with chronic fatigue.

    IMG_0574

    Lastly, Lyme loves the electrical systems in the body (which I wrote in another speakers notes as this point was emphasized many times). It especially loves to attack the GI tract and co-infections love to sit in the GI lining. This is why so many Lyme patients suffer with a multitude of GI symptoms and issues, including motility issues due to damaged GI nerves (Hi, my names Victoria, have we discussed my GI symptoms enough?!).


    Dr. Ricardo Maggi: BARTONELLA

    Dr. Maggi is a researcher out of North Carolina State University. He has spent much of his research on Bartonella, specifically developing better diagnostic tools. His talk was about the development and growth of various strains of Bartonella over the years and the challenges that surround testing methods. This was the only talk on a specific co-infection.

    First of all, Bartonella divides every 22-24 hours, can survive in any type of cell in the body, and isn't always in the blood. This makes it very challenging. Since 1993, we have gone from knowing about 3 species to discovering 36 species of Bartonella! Over 17 of these species are associated with human disease but only 2 have been used for commercial testing methods. And to make matters more confusing, different strains of each species can be transmitted differently (by tick vs. fleas for example).

    Bartonella is considered a relapsing bacterial disease. Since Bartonella divides so slowly and has a 5 day cycle, it can be challenging to get a positive test. You can test on one day and it could be negative but test on another and it could be positive. This adds to the "fun" of nailing down a positive Bartonella test for patients.

    IMG_0576

    Dr. Maggi has reviewed all the various types of testing out there for detecting disease. He's found different tests yield different results. For example, 50% of patients whose blood was drawn and grew Bartonella (aka they could see the patient had Bartonella- it was growing in their blood samples!) tested negative with IFA (indirect immunoflouresence antibody testing). On the other hand, 50% of IFA positive patients were seronegative! Blood testing has yielded 32% accuracy while culture is 80%, so testing for Bartonella is very dependent on the type of test done, when, and sample drawn.

    Something else of importance to note is that Bartonella is transmitted by ANY VECTOR (flea, bed bugs, ticks, etc). And if you don't know, Bartonella is also called cat scratch fever. This is one reason why I will never have a pet cat, ha!


    Dr. Jyotsna Shah- IGENEX

    Dr. Shah is the President and lab director of IgeneX, the leading laboratory in Lyme disease testing. Her talk was VERY technical and I missed part of it so I am not going to share many notes from her. Although, I do want to share a few further points about testing that I haven't addressed already in previous speakers notes.

    First of all, when people ask me what test they should do for Lyme, I always suggest Igenex or DNAConnexions. Armin Labs is another popular lab out of Germany that more doctors are using. To be honest, I don't know enough about Armin and I hear mixed things. I've heard they may be better for co-infection testing or for determining current activity of the infection (vs. whether you have it in your body or not).

    I believe both Igenex and DNAConnexions are CLIA licensed and Armin is not. I was told Armin doesn't have the same oversight and test validity as Igenex. Also, different types of tests look for active infection vs. antibodies vs. DNA. Please speak with a Lyme literate physician to determine the best testing for you.


    Dr. Omar Morales- PLASMAPHERSIS

    Dr. Morales is the Founder of the clinic Lyme Disease Mexico in Puerto Vallarta, Mexico. They provide a variety of treatments at their clinic for Lyme disease, their main one being various types of Aphaeresis. They also have become well known for what patients have dubbed the "Lyme Vaccine" which is not what you think.

    The goal of aphaeresis is to target several stages of the disease. With aphaeresis, you are able to separate specific cells so you can increase or decrease specifics in the patient based on what they need. It is a very targeted therapy based on the patient with virtually no herx reaction, according to Dr. Morales. It also has the ability to aid in immune modulation, activate naive leukocytes, and remove toxins. Aphaeresis treatments help in a variety of diseases and most that IVIG helps treat since it is immune modulating.

    IMG_0584

    There are several types of aphaeresis:

    1. Plasmapheresis: Plasmapheresis is the process of replacing someones plasma with a synthetic version (I believe you can replace with other peoples plasma, but they use a synthetic version at Lyme Mexico). It decreases the density of the blood and plasma by removing toxins. This allows the right cells to do their job with less barriers in the way. Plasmapheresis has shown to decrease inflammation and provide autoimmune symptom relief. Studies show it's benefit in a variety of disease including PANDAS, Lyme Neuroborreliosis, Neuropathy, and infectious and inflammatory disease. IMG_0585IMG_0587
    2. Erythropheresis: This is red blood cell exchange. Red blood cells are pulled out allowing for the removal of blood-borne diseases like parasites. It's been shown to benefit in the treatment of Babesia. Dr. Morales addressed concerns about red blood cell exchange and re-infection stating they have a full pathogen inactivation protocol and also utilize UV light and ozone. IMG_0588
    3. Extracorporeal Photopheresis (ECP): This is the process of running the blood exchange through a UV light exchange while infusing
    4. Granulocyte/Monocyt Aphaeresis (GMA): This is the process of selectively removing disease mediators in the blood which allows for the production of new granulocytes and monocytes. Overall this reduces inflammation and increases apoptosis! This procedure has been found to most helpful in PANDAS cases. IMG_0590

    Lyme Mexico is also known for their "Lyme Vaccine" which is essentially the process of using dendritic cells as an autologous vaccine to trigger the correct immune response. Dendritic cells are messengers between the innate and adaptive immune system. As we know, Lyme messes with the innate and adaptive immune system and their abilities to communicate. This vaccine essentially works to correct that communication so the body can respond to the bacteria appropriately. This Lyme vaccine is a big immune modulation technique used by Lyme Mexico.


    I hope you found this information as interesting and helpful as I did. Although much of it I already knew from years of dealing with Lyme, it was very calming and reassuring to know that so many doctors and researchers care and that the research is being done! If you have any questions, please comment below and I will answer the best I can.


    Stretching Routine for Healing

    July 22, 2018 by Victoria Faling 2 Comments

    This is a great stretching routine for any level. I've talked many times before about the importance of movement, but it can be hard when you have a chronic illness. Doing even some basic stretches daily can help aid in your healing. This is an easy, short routine you can do to get blood flow in the morning or even help calm you down for sleep in the evening. It can be done from bed, too, so even on your worst days you can aid your healing process.

    Give it a try and let me know how it goes! Aim to build up to doing this routine several times a week and up to daily. I'd love to hear your thoughts, so don't forget to leave a comment and let me know 🙂

    The Blessing and Curse of a Diagnosis

    May 24, 2018 by Victoria Faling Leave a Comment

    We all want to get the proper diagnosis right? When we are sick we want to know what is wrong. We want a concrete name so we can better comprehend what is happening. Even if it's just a broken bone- name it! Name it so I can understand it, so I can treat it. Right? Right.

    But, there's a dark side to finally getting a diagnosis, too....


    ...Read the rest of my guest post on Chronic Love Club!

    IMG_8257

    Exercise with Chronic Illness

    April 20, 2018 by Victoria Faling 1 Comment

    In this video I'm sharing about WHY movement is important with chronic illness and HOW to incorporate it, even if you are bed bound!


    Day of Meds + Supplement Update

    April 7, 2018 by Victoria Faling Leave a Comment

    In todays video I'm sharing every pill, tincture, treatment I take/do in a day to raise awareness around how much we go through as those with chronic illness. Many of us are constantly taking something throughout the day and much if it has to be timed with each other and food. It's a full time job! I'm also sharing a full supplement update.

    Curried Chicken & Veggie Stir-Fry (AIP, Paleo, Nightshade Free)

    April 2, 2018 by Victoria Faling Leave a Comment

    This cross between a curry and stir fry is the ultimate comfort meal. Warming spices, hearty chicken and veggies, and creamy coconut milk make this paleo and AIP dish the perfect dinner option.

    paleo chicken curry stir fry
    paleo chicken curry stir fry

    A curried stir fry, that's quite the name, isn't it? I'm aware that is a bit confusing, but this recipe is most definitely a cross between a stir-fry and a curry! This chicken and vegetable dish contains coconut milk and curry spices, but everything is stir-fried before adding the creamy sauce. This chicken stir fry situation is completely autoimmune paleo friendly, nightshade free, and low FODMAP. It is the perfect example of how allergy friendly food can still be flavorful and delicious!

    tip and dairy free chicken and vegetable curry
    aip and dairy free chicken and vegetable curry

    How to Make Curried Chicken and Veggie Stir Fry

    To make this delicious paleo dinner, you'll stir fry a host of vibrant vegetables (this dish is very veggie heavy to pack in the nutrients and fiber!). Then you'll add some chopped chicken breast, along with plenty of ginger and turmeric. The sauce comes together with a mix of coconut milk and coconut aminos. And just like that, you have curried stir fry!

    autoimmune paleo chicken and veggie stir fry curry
    autoimmune paleo chicken and veggie stir fry curry

    autoimmune paleo chicken and veggie stir fry curry
    Print Pin

    Paleo Curried Chicken & Veggie Stir-Fry

    This cross between a curry and stir fry is the ultimate comfort meal. Warming spices, hearty chicken and veggies, and creamy coconut milk make this paleo and AIP dish the perfect dinner option.
    Course Main Course
    Keyword AIP, autoimmune paleo, dairy free, gluten free, paleo
    Prep Time 20 minutes minutes
    Cook Time 30 minutes minutes
    Servings 4 servings
    Author Victoria Faling

    Ingredients

    • 2 tablespoon coconut or olive oil
    • 2 tablespoon fresh grated ginger root
    • 1 large head of broccoli chopped into florets
    • 1 can of water chestnuts
    • 4 yellow zucchini sliced into rounds
    • 4 baby bok choy or 1 bok choy, chopped
    • 1 lbs. chicken breast chopped into bite size pieces
    • ½ teaspoon himalayan salt
    • ½ cup coconut aminos
    • 1 ½ cups chicken or bone broth
    • 1 cup full fat coconut milk
    • 1-2 teaspoon turmeric powder depending how much you like it
    • ½ teaspoon cinnamon
    • 1 teaspoon ground ginger

    Instructions

    • Heat your oil and grated ginger in a large, heavy bottom frying pan over medium high heat for about 1-2 minutes, until ginger becomes fragrant.
    • Add broccoli and water chestnuts, sautéing for about 10 minutes until broccoli becomes darker in color and softens slightly. Add ½ cup of broth as veggies start to stick to the pan.
    • Add the yellow squash and cook for 5 more minutes before adding the chicken, coconut aminos, and salt.
    • Cook for 7-10 minutes, until chicken is almost cooked through (outside is white). Then, add the bok choy, coconut milk, remaining broth, turmeric, cinnamon, and ginger. Mix everything together and bring to slow boil, then reduce to simmer and cover. Simmer for 10 minutes until the chicken is cooked through and veggies have softened/cooked completely.
    • Serve over rice if desired and enjoy!

    Shifting Exercise for Healing: Guest Post by Andrea Wool

    March 30, 2018 by Victoria Faling Leave a Comment

    I'm excited to bring you a guest post from a fellow autoimmune and chronic illness warrior and personal trainer, Andrea Wool! We've connected over social media after I listened to her episode on the Unbound Healing podcast. Today she shares a bit about her story and discusses how she shifted her exercise routine to HELP her heal.

    Andrea Wool is the founder of Autoimmune Strong, an online fitness membership service designed for people living with chronic pain conditions like autoimmune, fibromyalgia and Lyme disease. Her mission is to spread the word that not all exercise is created equal for all bodies- and that we need to find exercise that works with our bodies rather than against. To learn more about Autoimmune Strong, or to get access to the 7 day free trial, go to www.getautoimmunestrong.com. You can also find Andrea on Facebook @autoimmunestrong, on Instagram @getautoimmunestrong, and via email [email protected]


    Guest Post by Andrea Wool

    IMG_9510

    Exercise is good for you, no matter what, right?

    And the more you exercise, the healthier you are, right?

    No pain, no gain. In order to get stronger, you must push harder, faster, longer… right?

    Hey there, I’m Andrea, founder of Autoimmune Strong. I have been an athlete all my life and this is what I used to believe. But, not anymore. And today I am going to tell you why.

    Now, let me be clear, let’s define “athlete” here. I wasn’t an Olympic athlete or anything. I ran cross country in high school and I was pretty good, even coming in 4th at the regional state championship (but let’s be honest here- it was in RI, the smallest state in the country). Regardless, I loved to move my body. I loved to run, and would regularly go for long 2 hour runs, which made me feel great. I even trained for multiple marathons (even though I got injured before the race every time). I loved going to the gym, doing yoga, and going to spin classes. The harder, the sweatier, the longer, the better. I loved that feeling of pushing myself to my limit, to see just how far my body could go. I loved the feeling afterwards where my legs felt like jelly, my mind was empty, and I was exhausted but happy.

    And then, I got sick. It wasn’t a sudden sickness- it came on slowly. I lived my life like my runs- I pushed myself in my work and in my social life. I worked hard and played hard. I worked long hours and traveled frequently for my corporate job. Then I got married and had 2 babies, all while trying to maintain this fast pace.

    After the birth of my second son, I knew something was wrong. I was exhausted to the bone, so tired it was hard to get out of bed. My body hurt, like I was on fire. My hair was falling out and I was gaining, not losing, weight. I was struggling to maintain even a tiny bit of my previous life, where I was such an avid go getter, an overachiever. Now, I was barely an achiever. And I had two teeny tiny people who needed me. I had to find a way to get better.

    IMG_9508

    It took me 2 years to figure out that I had a number of conditions that were affecting my health- Hashimoto’s, Celiac, and Fibromyalgia. I learned that what I ate played a big part in how sick I felt and as I transitioned to a real food, nutrient dense, chemical free diet, I started to feel better. But, during this healing period, I kept on trying to exercise- in the same way that I used to- pushing my body to the max. And every time I would start a cycle that looked like this: I would feel ok, then go to the gym, work out and leave feeling great. Next day, same thing. Continue for a week… until… the next week when I would wake up feeling so tired and weak and exhausted, like my body was on fire… and I would then proceed to skip the gym until I recovered, which could take weeks. Then, when I felt better, I would go back to the gym and begin again.

    And here’s what I learned: that style of exercise did not work for me. In fact, it worked against me. By stressing my body out with intense exercise, I was aggravating my autoimmune disease and causing a symptom flare-up. I was making myself sicker and weaker, rather than healthier and stronger. I knew I had to find another way.

    That’s when I had an idea. For someone as type A like myself, what if what I actually needed was to slow down, and move my body more gently? So, I tried that. I started with a few core strengthening exercises at home for 5 minutes every day. It felt like nothing, and was so hard for me to consider it “exercise”. But I kept going and introduced a foam rolling routine into my short, at home workout. Slowly but surely, I kept adding in one exercise at a time, increasing my 5 minutes a day to 10 minutes a day. And guess what? I found that I was stronger and healthier than ever. These short mini workouts gave me more energy for my day and helped me feel strong while doing everyday things like carrying my groceries, doing housework, and lifting my little ones.

    IMG_9503

    The best part is that I no longer had the cycle of flare-ups! By choosing a shorter, more targeted exercise routine I was able to be more consistent in my exercise, which actually helped reduce my pain and inflammation. The exhaustion disappeared and my body no longer felt like it was on fire. Instead, it felt nimble and strong and flexible.

    So for those of you living with chronic disease who feel like the only way to exercise properly is to crush it at the gym, I encourage you to consider another way. Daily movement that is short in duration, targets the full body, focuses on both strengthening and stretching, and builds in difficulty and intensity slowly over time- this is the type of program you want to look for. Trust me, it changed my life. Now, I am able to lift heavy at the gym and go for long runs without experiencing flare-ups. And you can too.

    If you want to see what a program that takes these tips into consideration looks like, check out the 7 day free trial of Autoimmune Strong. You get access to all the exercise videos and the nutrition information, and you can try for yourself the program that changed my life.


    Paleo Pop Tarts (AIP & Vegan)

    March 26, 2018 by Victoria Faling 10 Comments

    These Healthy Paleo Pop Tarts are fully AIP and vegan. You'll never guess they are made from sweet potato and contain no refined sugar! Enjoy this healthier version of a classic 90's treat this weekend.

    Paleo pop tarts

    I'm a 90's kid, so I grew up on Pop-Tarts and Toaster Strudels. In all honesty, I wasn't really a Pop-Tart kid, they never quite did it for me. As much as I loved sugar growing up, I always thought real pop tarts tasted too sweet and artificial. So I have to say, I think my healthy pop tarts are far better than the original! With no weird additives, fake ingredients, and insane amounts of sugar, my AIP Pop Tart recipe is one you can feel good about. 

    Dealing with an autoimmune disease is hard and doing the full AIP diet is even harder. Something I wasn't going to let happen while completing AIP, was missing out. Whenever I've completed an elimination diet, I refuse to miss out on delicious food and just eat boring, bland options the whole time. My goal has always been to create fun and yummy recipes for every diet and allergy type, and I think I really nailed it with these Paleo Pop Tarts. This recipe has consistently been a popular recipe on my website!

    AIP pop tarts

    Why You'll Love This Paleo Pop Tart Recipe

    • They aren't just paleo, they are fully Autoimmune Paleo compliant which means they are grain free, gluten free, nut free, vegan, and refined sugar free. These pop tarts also work if you are on a low FODMAP diet. These homemade pop tarts will fit almost every diet.
    • This healthy pop tart recipe is made from white or Japanese sweet potato! Not only would you never know, but it adds a nutrient boost to this sweet treat. The perfect paleo dessert does exist.
    • The filling is made with real fruit.
    • They are customizable. I love berries, so I made berry pop tarts, but you can make them to suite your preference. Make a blueberry pop tart, strawberry flavor, brown sugar pop tarts, or chocolate ones.

    Gluten free berry pop tarts

    Paleo Pop Tart Ingredients

    • Japanese sweet potato: this is the base for our dough. You'd be surprised how versatile sweet potato is. When mixed with flour, mashed Japanese sweet potato becomes a pliable dough that can be used for many different recipes!
    • Cassava flour: a mix of paleo flours is used for the best texture. There is no almond flour to keep this recipe AIP.
    • Coconut flour: mixed with the cassava flour, this helps keep the dough from being gummy.
    • Coconut butter: used in both the dough and as the icing on top. This is a healthy addition that adds some sweetness.
    • Maple syrup: the main, unrefined sweetener in the dough. Be sure to use real maple syrup!
    • Non-dairy milk: I love using coconut milk, but any milk will do.
    • Coconut oil: we just need a little bit of coconut oil to get the pop tart edges to crisp up in the oven.
    • Berries: for the filling. I use mixed berries, but feel free to pick one type or see below for other options. You can use fresh or frozen berries, but if using frozen, be sure to thaw and drain off any excess juice.
    • Coconut sugar: mixed with the berries for the filling to keep things refined sugar free!

    How to Make Gluten Free Pop Tarts

    1. Mix together the cooked and cooled sweet potato with the flours, coconut butter, maple syrup, milk, and coconut oil until you have a smooth dough. You can use a hand mixer, high speed blender, or food processor to do this.
    2. Cut in the coconut oil then form the dough into a ball and wrap in plastic wrap. Pop dough it in the fridge for 30-60 minutes until it's easier to work with.
    3. While dough rests, make your filling by mashing the berries and coconut sugar together. Drain off any excess liquid and save it for the icing.
    4. When ready to bake, preheat the oven to 350F.
    5. Roll the dough out between two pieces of parchment paper until it's about ⅛-1/4 inch thick. Use a sharp knife or pizza cutter to slice dough into 3x4 inch rectangles, making sure you have an even number. If you don't have a huge work space, you can work with half of the dough at a time.
    6. Place half of the rectangles on a parchment lined baking sheet and add 1 tablespoon of filling, leaving at least ½ an inch around the edges. Add the other piece of dough soon top and use a fork to crimp the edges of the pop tart together. Since this recipe is vegan, we aren't adding an egg wash, but you can use olive oil instead.
    7. Bake for 35-40 minutes, until golden brown. 
    8. Let cool before icing with coconut butter or a homemade icing of choice.

    Substations and Variations 

    Sweet potato: Sometimes Japanese sweet potato can be hard to find. If you are unable to find it, white sweet potato will work. If you really want to use Japanese, try checking at your local Asian, Caribbean, or Mexican market.

    Filling: If berries aren't your jam, you can certainly personalize these vegan pop tarts to fit your preferred flavor. Try using Nutella (or a healthy chocolate spread of choice). For a brown sugar pop tart, you can make a coconut or maple sugar mixture like in this recipe.

    Icing: I love using melted coconut butter for the icing. I make a mix of coconut butter and leftover berry juice. This doesn't make for the smoothest icing, but it's very clean with no extra added sugars. Another option is to mix ½ cup of powdered sugar with 1-2 teaspoon of milk of choice until you get a smooth glaze. Add some berry juice or spices like cinnamon depending on the flavor you are going for. 

    Shapes: Feel free to to cut the dough into any shapes you want! For example, if it's Valentine's Day, use a large heart shaped cookie cutter to cut the dough. I haven't attempted to make pop tart bars with this dough, but that could be a fun idea. Let us know if you try it!

    paleo pop tarts

    Tips and Tricks

    • The dough can be a little finicky to work with if it gets too warm. The texture should be like sugar cookie dough when you roll it out- able to work with it, but not sticky. If it becomes too hard to work with, just scoop any leftover dough into a ball and pop it back in the fridge for 30 minutes. You can place any already cut pieces on a baking sheet and back in the fridge too.
    • Use a clean spatula to gently lift the cut pop tarts onto a baking sheet.
    • This recipe is meant to be fun. Take your time, but make these pop tarts your own!

    Storage

    Store leftover pop tarts in an airtight container for up to 5 days. I prefer to keep these in the fridge, as they will get soft at room temperature. These gluten-free pop tarts taste best fresh, so I do suggest eating them within 1-2 days and don't suggest freezing them.

    gluten free and vegan pop tarts

    More Fun Recipes

    My Gluten Free Raspberry Vanilla Cake has a sweet potato icing!

    If you want more AIP desserts, my Sweet Potato Scones are always popular.

    Looking for savory? Try my Mashed Sweet Potato and Rutabaga for a delicious side dish. Or my Skillet Herbed Japanese Sweet Potatoes which are my all time favorite side!

    cassava flour
    cassava flour

    paleo and vegan pop tarts
    Print Pin

    AIP Pop Tarts

    A healthier take on an American classic, these Paleo Pop Tarts are completely gluten-free, AIP, and vegan. Fill your pop tarts with whatever your heart desires and enjoy a healthier version of a nostalgic treat.
    Course Breakfast, Dessert, Snack
    Cuisine American
    Keyword AIP, autoimmune paleo, classic, comfort food, dairy free, gluten free, healthy, vegan
    Prep Time 20 minutes minutes
    Cook Time 40 minutes minutes
    Total Time 2 hours hours
    Servings 6 -8 pop tarts
    Author Victoria Faling

    Equipment

    • mixing bowls
    • hand mixer
    • Spatula
    • Baking sheet

    Ingredients

    Dough

    • 1 cup cooked and mashed Japanese sweet potato white fleshed sweet potato will also work
    • ¼ cup cassava flour
    • ¼ cup coconut flour
    • ¼ cup melted coconut butter
    • ¼ cup maple syrup
    • 2 tablespoon non-dairy milk
    • ¼ cup softened coconut oil

    Filling

    • 1.5 cups berries mashed*
    • ¼ cup coconut sugar

    Icing

    • ½ coconut butter optional
    • Or see above for alternative icing options

    Instructions

    • First, cook your sweet potato either by steaming or roasting. Let cool before mashing the flesh with a fork so that you have 1 cup of mashed sweet potato.
    • Blend the sweet potato, flours, coconut butter, maple syrup, and milk in a blender or food processor or with a hand mixer until smooth.
    • Transfer batter to a bowl and cut in the coconut oil until it is combined in the dough (don't over mix). You should have a pretty soft dough at this point. Form it into a ball and place plastic wrap over the top of the bowl.
    • Place dough in the fridge for an 30-60 minutes so that the dough can firm up some. It should be like sugar cookie dough- firm but malleable. If you leave it in the fridge longer or it becomes too hard, just leave it at room temperature for a little bit until it begins to soften and become easier to work with.
    • While dough rests, make the filling by mashing the berries with a fork in a small bowl. Pour of any excess liquid and reserve. Mix in the coconut sugar until well combined and set aside.
    • Preheat oven to 350F.
    • Sprinkle the dough with some cassava flour then roll it out between 2 sheets of parchment paper to be about ⅛-1/4 inch thick. You can split the dough in half and work in batches if needed. Cut rolled dough into the shapes you want for the pop tarts (mine were 3x4 inch squares). Make sure when you cut a shape, you cut two matching ones so you have the top and bottom of the pop tart.
    • Using a spatula, gently transfer one cut shape (bottom of the pop tart) to a parchment lined baking sheet and transfer the other shape (top of the pop tart) to a holding tray (another baking sheet or a cutting board.
    • Scoop up the scraps of dough and repeat the same process until you've used up all the dough. If the dough becomes too soft to work with, just place it back in the fridge for 30 minutes. This may apply to the cut shapes, as well. If dough begins to soften too much on the baking sheet, just place it in the fridge (you don't want it to get too hard that it crumbles when working with it though).
    • You should end up with a total of 12-16 squares.
    • Take about one tablespoon of the filling and place it in the middle of a pop tart that is on the baking sheet. Spread the filling slightly on the dough, leaving about a ½ inch around the edges. [See image]
      how to fill gluten free pop tarts
    • Dip your finger in cold water and run it along the edges of the bottom crust, place the top crust piece overtop so edges line up and gently press the two pieces of crust together with your fingers. Repeat with all the pop tarts.
    • Use a fork dipped in water to crimp the edges of the pop tarts together. Brush the tops of the pop tarts with olive oil (or an egg wash) if desired.
    • Bake for about 35-40 minutes until golden brown. Remove from the oven and let cool for 10 minutes on the baking sheet before transferring to a wire rack.
    • Ice with melted coconut butter or your favorite icing. You can also mix some of the reserved berry juice with the coconut butter for a colored icing.

    Notes

    *I used frozen since it is winter, just thaw and pour off excess juice. You can also use fresh. Alternatively, you can use whatever filling you want, like a chocolate spread!

    Health & Treatment Update March 2018

    March 20, 2018 by Victoria Faling Leave a Comment

    It's been awhile since I've updated you all about what is going on with my health and treatment and let me tell you, it's a lot! Below are all the details including:

    -Working with my immunologist and neurologist to try and get IVIG- all the testing (blood work, spinal tap, eeg) I have to do to try and build a case for insurance

    -My diagnosis of mast cell activation syndrome

    -Traveling to LA to see two new doctors, an endocrinologist and holistic GI. Plus, all the rounds of testing they are putting me through!

    Let me know if you have any questions and how you all are doing lately. Be sure to follow me on YouTube for more updates and other video series. And also on Instagram, so you don't miss out on any recipes, food pics, or other fun updates!

    3-Minute Pumpkin Mug Muffin (Paleo, Vegan, Nightshade free, Sugar Free)

    February 26, 2018 by Victoria Faling Leave a Comment

    I've been making this quick and easy pumpkin mug muffin for a couple years now, but I've never shared it. Mostly because I always make it at 10 pm at night for dessert and there isn't exactly quality lighting at that time. I finally got myself together and made this during the day so I could take some pictures and share the full recipe with all of you.

    healthy gluten free and dairy free pumpkin mug muffin

    By now, you probably know that I can't go to sleep without dessert at the end of the day. And if I haven't had time to bake something that week, this is my go-to! It's quick, easy, and healthy. It does the job! There is no added sugar or nasty ingredients and you can top it with whatever you like to really make it your own.

    It is made in the microwave (I know, I know, THE MICROWAVE!), but, honestly, sometimes convenience for the sake of a meal is more important.

    healthy paleo and dairy free pumpkin mug muffin

    3-Minute Pumpkin Mug Muffin

    Serves 1

    Ingredients:

    -1 tbs. coconut flour

    -1 tbs. tapioca or arrowroot starch or cassava flour

    -1 tbs. vanilla protein powder (I use Nuzest, but other varieties should work)*

    -⅛ tsp. baking soda

    -1 tsp. apple cider vinegar

    -1 rounded tbs. canned pumpkin puree or half a small mashed banana

    -¼ cup non-dairy milk or water

    -Optional toppings: coconut cream, coconut butter, berries, shredded coconut, nuts or seeds/butters, chocolate chips

    *If you don't have protein you can use tiger nut flour for an AIP version or you could try almond flour, although I can't vouch for this variation

    Mix all dry ingredients together in a bowl or mug.

    Add the apple cider vinegar and gently mix so that mixture bubbles slightly

    Add the remaining ingredients (pumpkin and liquid of choice) and mix well to combine.

    Using the back of the spoon, smooth out the top of the "muffin" then microwave for about 3-3.5 minutes until cooked through.

    Top with whatever you like and enjoy this easy, healthy treat!

    healthy paleo and sugar free pumpkin mug muffin

    3 Mindset Shifts to Make when Healing Diets are Triggering Old or New Disordered Eating habits, Thoughts & Fears (GUEST POST)

    February 20, 2018 by Victoria Faling 1 Comment

    If you've been following me on Youtube or Instagram, you know I've been talking a lot about "healing diets" and eating disorders lately. I've noticed that for many, myself included, "healing diets" like AIP, low FODMAP, and even paleo (any "diet" with restriction) can be triggering in either bringing up past disordered eating issues or developing new ones. This can be a huge problem, for many reasons.
    So, I've begun to talk about. I've made two Youtube videos around this topic so far (you can watch them here and here) and talked extensively about it on my Instagram through posts and stories. I've connected with lots of others (both women AND men) who feel passionate about this or are dealing with it, as well.
    One of those people I've connected with is an amazing lady named Chelsea. She not only intimately understands this issue on a personal level, but works with women to help them through this, as well. I know I'm being rather vague, but that is because today I have a guest post by Chelsea and she explains it in a lot more detail below. I don't want my intro to be too long, so let's just get into her post, okay?!
    -----------------------------------------------------------------------------------------------------------------------------------------
    Guest Post by Chelsea Gross
    Much of our modern society is divided into two groups greatly affected by their relationship to food - The first being an obesity, diabetes and an addiction to overly processed and poor quality food epidemic, and the second being a group of people who are struggling with a diagnosed eating disorder. But where do those of us who struggle with disordered eating fall? Yo-yo dieters, restricters, calorie counters, restrictive/binge cyclers, ect.? And where do those of us who have a primary focus of healing chronic disease, insane digestive distress, pain, and many more issues who are having discorded eating/eating disorders reignited or developing NEW unhealthy thoughts and patterns due to following a healing protocol fall?
     
    How do we separate a protection of our mental health and emotional well-being with our strong desire to reduce health symptoms by following a strict way of eating?
     
    Why do I care so much about this topic? For nearly a decade I struggled with disordered eating. I was everywhere from underweight, to overweight, and for many years was stuck in a cycle of restriction, binging and purging, desperate to lose weight and regain the self-worth I told myself came entirely from being in a thin body. I was always dieting, always trying to eat less, do more cardio and absolutely at war with my body. I ate diet food, artificial sweeteners, counted calories and battled with being on and off the wagon constantly losing weight, gaining weight, and never finding peace or balance. I felt totally imprisoned and lost and, frankly, exhausted from my obsession around food and hate for my body.
     
    4 years ago after a back injury turned into chronic pain, I went back to school for holistic nutrition. I studied at the Institute of Transformational Nutrition which specifically covers the science of nutrition but also the psychology and spirituality of eating. I was drawn to the program largely to heal my own issues with food but also to gain the skills, tools and knowledge to pay it forward and work with women who struggled just like I did. I learned that I could make my mess my message and that’s exactly what I did.
     
    The program was the catalyst to my change. I worked on my nutrition, lifestyle, and mindset and slowly but surely I broke my disordered eating cycle. It was not overnight and I’m still not perfect but I know I will never go back. I made the crucial shift from eating (or not eating) out of punishment and self-hate to eating well and caring for my body out of self-love and self-respect. You can read even more on my about page.
    thumbnail_new NWC laughing balcony hands held
     
    But here’s the caveat… I also struggle with chronic illness. 3 years ago I woke up one day bloated and distended and have been on healing protocols and specific ways of eating off and on ever since. I have yet to find ultimate relief but after many many doctors I was finally diagnosed with Lyme and bartonella disease 7 months ago. THIS is why I’m so passionate about helping this new group of the population who is on healing diets, but has a past of discorded eating, because that’s me. And I KNOW how difficult it is.
     
    So do take everything with a grain of salt and work through this process at your own  pace - always being kind to yourself. I work a lot on mindset with my clients in my 1:1 coaching practice so below I’d like to give my best tools in managing this difficult to navigate process if you are identifying with what I’m talking about. Knowing you are not alone is one of the best pieces of advice I can possibly offer. You are NOT alone. Please reach out if you would ever like to talk. I also have an ebook, How to Break Free From Disordered Eating (mindset, tools & resources to find freedom from the dieting and depriving cycle for GOOD so you can create a healthy relationship with food + a life you LOVE) and a 1:1 signature coaching program: make peace with food.
    1. Resist the label even if you’re following a certain way of eating 
     
    There is most certainly a time and a place for categorizing your way of eating under a specific label, but I think it’s important to approach that with caution. Labeling ourselves can be a positive thing for clarity, direction and community, but it can be a slippery slope when it feels like a box with rules and yes’s and no’s and we get farther away from our own intuition (which is such a gift to our healing.) 
     
    When we put ourselves in a box and under a label we then run the risk for beating ourselves up or feeling like a failure when we go outside that label. Having nightshades when you’re AIP, grains if you’re paleo or onion or garlic when you’re low-fodmap. We beat ourselves up for going against the rules but we’re forgetting the main focus is a healing, nourishing diet and stressing out about having something on the “no” list is far from healing. Stress absolutely plays a role here and I really do believe that stress can override an actual physical reaction to a certain food. Protecting your mindset needs to be #1 even if you have food rules for a healing reason. Allowing yourself to mess up and allowing yourself to forgive and move forward is key. 
     
    Resist labeling yourself to give yourself the freedom to move out of that way of eating if you so desire whether that be in the near or distant future. 
     
    I always just say I’m a real-food eater. I eat high-quality protein, healthy fats and nutrient-rich carbs. This is an abundant way of eating and if I have to avoid certain things from that point on (like AIP or low-fodmap) I’m doing it out of self-respect and even curiosity and evaluation. 
     
    Allowing yourself to create your own rules is empowering and use healing diets and protocols as your base- exploring the idea that maybe there are things on the no list that work for you and things on the yes list that don’t. It takes time to grasp and accept this concept but I’ve found it to be freeing.
    thumbnail_new NWC slicing lemons
     
    2. Focus on inclusion vs. exclusion.
     
    This ties in perfectly with the first mindset tip. If you’ve experienced discorded eating or an eating disorder or have ever dieted (which is almost every single person right?) then it’s always been about the “can’ts” “won’ts and “shouldn’ts.” Healing diets are the same way. This of course feels overwhelming, restrictive and anxiety-producing. But what if we simply focused on what we CAN have, instead? 
     
    Even trying new things, new recipes, new ways of cooking old favorites. Instead of roasting veggies maybe you spiralize them, rice them, or blend them into soups. Play around with different textures, tastes and spices. Try new cuts of meat or types of seafood. Make meal prepping fun by watching a show, listening to a podcast or music while you cook. Treat yourself to a new beautiful cookbook, watch youtube videos, follow some new inspirational people on Instagram. Open your eyes to what you CAN have and ditch the limiting idea of what you can’t. 
    thumbnail_new NWC sitting on tableside look
     
    3. It’s not about what you do one time, it’s about what you do most of the time 
     
    All of these totally go together!! This is my favorite tip of all time no matter what you’re going through. It completely aligns with the idea of treating yourself with respect and grace. My goal as a practitioner is get people away from everything being so black and white and existing in the grey zone- and letting that be ok. Get off the wagon and away from “good” and “bad”. 
     
    It’s so much more important to focus on what you do most of the time. If you ate something outside of your healing diet and protocol- move forward. Drink some water, go for a walk, eat some greens during your next meal, but above all else FORGIVE YOURSELF. Your body will forgive you too, as long as you don’t stress out about it and try to punish yourself for messing up. That just makes things worse. 
     
    Look at your way of eating as a way to nourish yourself and just simply focus on high-quality, real foods. Allow yourself to be up and down and focus on forgiveness and experimentation vs. perfection. Yes sometimes we have to stick to a certain way of eating for health purposes but be super kind to yourself during that tough process. Make the choices because you want to feel well, not because you feel like you SHOULD. In fact, eliminate that “should” word from your vocab entirely. Don’t call foods “good” or “bad” and remember you’re not “good” or “bad” for eating that way. You’re worthy and lovable and good enough despite your diet and you will figure it out if you just keep moving forward and make your well being a #1 priority.
     
    Love,
    Chelsea
    To reach out to Chelsea or learn more:
    Website: https://www.nutritionwithchelsea.com/
    Email: [email protected]
    Instagram: https://www.instagram.com/nutritionwithchelsea/

    AIP Meatloaf with Hidden Veggies (Low FODMAP)

    February 13, 2018 by Victoria Faling Leave a Comment

    You'll never guess this AIP Meatloaf is packed with veggies and fully autoimmune paleo compliant! There's no gluten, dairy, or nightshades, but plenty of flavor and nutrients.

    AIP meatloaf

    This paleo meatloaf recipe is also AIP compliant and has been a staple for me ever since doing the full autoimmune protocol to help manage my own struggle with autoimmune conditions (I deal with both an inflammatory autoimmune disorder and Hashimoto's disease). I still love this recipe to this day! If you're working on healing your gut or an autoimmune disease and doing an elimination diet, it can get boring and flavorless when you're eating limited foods. That's truly why my website started, to share the delicious recipes I was developing while on my healing journey and going through multiple elimination diets. I've always wanted to show others that you don't have to give up your favorite foods or just delicious food in general due to allergies and restrictions, you just have to get a little bit creative!

    Meatloaf can make life so much easier. Throw a bunch of meat in a loaf pan, cook it, and you have food for days to come. It's the ultimate meal prep option. But plain 'ol meatloaf (especially a plain 'ol AIP meatloaf) is so boring, so of course I had to jazz it up, specifically with loads of veggies to make it more filling and nutritious. 

    AIP meatloaf with hidden veggies

    What Makes This Meatloaf Healthy 

    • This AIP meatloaf recipe is high-protein, a key macronutrient for overall health, but especially when healing! We need lots of healthy proteins to help rebuild our bodies, and red meat is also packed with iron for energy!
    • We sneak in some hidden veggies to amp up the nutrient content and pack in gut healthy, heart healthy, and immune supporting benefits. Add a complex carb on the side and you've got a complete and simple meal.
    • This hidden veggie meatloaf recipe is only 5 ingredients and fully gluten free, dairy free, nightshade free, and low FODMAP. It's also Whole 30 compliant. If you don't tolerate nightshades like tomatoes or are healing from SIBO and can't eat onion or garlic, then this recipe is for you and will be gut supportive.

    hidden veggie meatloaf

    AIP Meatloaf Ingredients

    • Ground meat: I love to use a mix of proteins! Usually ground beef plus something else like lamb, ground turkey, or pork. Use your favorites, the higher fat content the more flavorful.
    • Kale: I suggest using green curly kale, but any variety will work. Since the kale is minced and mixed in, you can't even taste it. Kale is high in fiber, packed with vitamins, and great for your gut, heart, immune system, and hormones.
    • Zucchini: a simple, tasteless veggie that adds bulk and nutrients. Zucchini is also high in fiber, vitamins, and minerals.
    • Sage, thyme, sea salt: to keep this recipe AIP compliant, we are using plenty of delicious herbs for flavor.
    • Bacon: bacon makes everything better, right? It adds delicious flavor to this simple meatloaf recipe.

    How to Make AIP Meatloaf

    1. Preheat oven to 425 F. Line a loaf pan with parchment paper and set aside.
    2. Wash, de-stem, and finely chop your kale.
    3. Shred the zucchini in a food processor.
    4. Heat some water in a frying pan and add the shredded zucchini and kale. Sauté/steam for about 7 minutes, until kale is darker and cooked down.
    5. Mix the veggies with the seasonings and ground meat in a large bowl. I like to use my hands to combine everything well in the mixing bowl.
    6. Press the meatloaf mixture into the loaf pan. Lay the strips of bacon over the top, tucking ends in.
    7. Bake for about 40-45 minutes, until inside is just barely pink and the internal temperature is about 145 degrees. Pour off the excess liquid and broil the meatloaf for another 10 minutes until the bacon is crisp.

    How to Store Meatloaf

    Store any leftover gluten free meatloaf in the fridge for up to 4 days. You can also freeze leftovers by slicing and wrapping each portion in plastic wrap and placing the wrapped slices in a freezer safe container.

    paleo meatloaf with hidden veggies

    What to Serve AIP Meatloaf with

    This healthy meatloaf will go great with any number of sides and I've got some delicious AIP friendly recipes for you:

    • Roasted regular or sweet potato fries
    • Yucca fries
    • Mashed Rutabaga and White Sweet Potato
    • Skillet Herbed Japanese Sweet Potatoes
    • Cinnamon and Ginger Roasted Rainbow Carrots

    AIP meatloaf

    More AIP Main Dishes

    • AIP Beef Stew
    • Air Fryer Paleo Popcorn
    • AIP Beef Stir Fry

    AIP meatloaf
    Print Pin

    AIP Meatloaf with Hidden Veggies

    Easy and nutritious, this AIP Meatloaf contains no gluten, dairy, grains, or nightshades and it's also low FODMAP. This is the perfect dinner recipe if you're following an elimination diet, but need a delicious and healthy meal.
    Course Main Course
    Cuisine American
    Keyword AIP, autoimmune paleo, dairy free, gluten free, low fodmap, nightshade free
    Prep Time 15 minutes minutes
    Cook Time 50 minutes minutes
    Total Time 1 hour hour 20 minutes minutes
    Servings 6 -8 servings
    Author Victoria Faling

    Equipment

    • Loaf pan

    Ingredients

    • ½ bunch green kale
    • 1 large zucchini
    • 2 lbs ground meat I used a combo of beef and lamb but pork or turkey thigh along with beef would also be great
    • 1 tablespoon sage
    • 1 tablespoon thyme
    • 1 teaspoon sea salt
    • 3-4 slices bacon

    Instructions

    • Preheat oven to 425 F. Line a loaf pan with parchment paper and set aside.
    • Wash, de-stem, and finely chop the kale.
    • Cut the zucchini into chunks then shred it in a food processor.
    • Heat 1-2 tablespoon of water in a frying pan and add the shredded zucchini and kale. Sauté/steam for about 7 minutes, until kale is darker and cooked down.
    • Mix the veggies with the seasonings and ground meat in a large bowl. Make sure everything is combined well
    • Press the meatloaf mixture into a loaf pan.  Lay the strips of bacon over the top, tucking ends in.
    • Bake for about 40-45 minutes, until inside is just barely pink and the internal temperature is about 145 degrees.
    • Broil the meatloaf for another 10 minutes until the bacon is crisp.
    • Let sit for 10 minutes before using the edges of the parchment paper to lift the meatloaf out of the pan and slice.

    Berry Crisp Bars (Paleo, AIP, Vegan, low-FODMAP, Nightshade Free)

    February 9, 2018 by Victoria Faling Leave a Comment

    IMG_5959

    These bars are BOMB.com, if I do say so myself! They are perfect for Valentine's day with the red berry filling, plus they are low sugar so you won't have to worry about a sugar overload from too much chocolate instead.

    IMG_6019

    These bars utilize tiger nuts, which aren't actually a nut, but a tuber. Tiger nuts are rich in anti-oxidants, pre-biotics, and fiber. The bars also contain my favorite protein powder, Nuzest. Although Nuzest is a pea protein, which may be eliminated on the AIP protocol, I provide some substitutions. I love this protein because it's the only one I've found that is easily digestible (no tummy side effects from weird proteins). It's also extremely versatile and great for baking with.

    IMG_6023

    I used a combination of raspberries and blackberries for the filling, but using just one berry would be totally fine. The recipe works with both frozen and fresh berries, so you can make this recipe any time of the year! Hence making berry bars in the middle of winter ;).

    Head on over to my friend Ali's blog to get the complete recipe!

    IMG_6013

    IMG_5968

    IMG_6030


    Crispy "Lebanese" Chicken Thighs (AIP, Low-FODMAP, Nightshade Free)

    February 6, 2018 by Victoria Faling Leave a Comment

    This recipe is based off of one posted by Grazed & Enthused. It is quite similar, so I don't want to take credit here, but I adjusted it to be low-FODMAP and nightshade free. That is why the Lebanese is in quotes... there is no garlic! I wasn't sure what else to call this though.

    This chicken turned out SO delicious. It is a relatively simple recipe that would be great to serve at a dinner party. I've fallen in love with chicken thighs over the last year, especially skin on so I can get that delicious crispy chicken.

    UHDZ0732

    Crispy Lebanese Chicken Thighs

    Serves 3-6

    Ingredients:

    6 bone-in, skin-on chicken thighs

    Juice of 1 lemon

    1 tbs. of olive oil plus another 1 tsp- 1tbs for cooking

    1 tbs. dried oregano

    ½ tsp. cinnamon

    ½ tsp. turmeric

    ½ tsp. salt

    Mix 1 tbs. of olive oil and all of the other ingredients, except the chicken, in a small bowl. Place the chicken in a ziplock bag and pour the marinade over it. Zip the bag closed and rub the chicken around in the marinade, making sure everything gets covered.

    Let sit in the fridge for AT LEAST 30 minutes.

    Heat ½ tbs. olive oil in a nonstick, large skillet over medium heat. Once oil sizzles when you flick some water onto it, place the chicken thighs skin side down. Cook for about 10 minutes, until skin is nice and crispy.

    Flip the chicken over and cover the pan. Cooking for another 5-8 minutes until chicken is almost done. Remove the cover and let cook until chicken is completely done. You may flip the chicken at this point again to get a nice fresh crisp on the skin before serving.

    Serve immediately.

    DSC_0100IMG_5902IMG_5842

    My Favorite (Pre-Packaged) AIP Snacks & Treats

    January 22, 2018 by Victoria Faling Leave a Comment

    *This post may contain affiliate links. Learn more here.

    Yes, I'm sharing PRE-PACKAGED food ideas! Shocker? Sometimes we just don't have time to make EVERYTHING from scratch! It's not always feasible and we need easy, healthy on-the-go snacks. Or hey, we are just too tired and want someone else to make our food! I make a lot of my food and snacks from scratch with whole foods, but I've found some great companies that make healthy AIP/paleo approved snacks and treats made from whole foods, as well.

    I figured I'd share my favorites with you today in case you need some new snacks in your life or easy alternatives. There are actually a lot of AIP pre-packaged snacks on the market these days, but I'm sharing my top favorites. Almost all are vegan and they are all nightshade free.

    Snacks

    1. Artisan Tropics Plantain & Cassava Strips- Miss your chips? Not anymore! This company is AWESOME! It's a family owned business. Not only are their chips AIP approved they are also non-GMO and vegan. They make plantain and cassava strips and each flavor has only 3 main ingredients. They have plantain chips in sea salt, naturally sweet, cinnamon, and cayenne. They also make cassava strips, which will have you questioning whether you are eating real potato chips or not.

    IMG_5449

    2. Dang Coconut Chips- I LOVE coconut chips as a snack. They are filling due to the high (healthy) fat and a great healthy alternative for that crunchy chip you may be missing. I also have a great recipe on my site for Salt & Vinegar Coconut Chips that I make all the time (I know, I know this post is about NOT having to cook!)

    3. Rhythm Superfoods Beet Chips- I love the Naked flavor because you get the sweetness of the beet and there is NO other ingredients but beets! These are a fun vegetable chip snack.

    IMG_5452

    4. Artisana Coconut Butter- I love coconut butter! It satisfies my sweet tooth without all the processed sugar. I eat this by the spoonful or drizzle over fruit for dessert. This company is wonderful because their products are raw, organic, and pure with no added oils or sugars. They also sell them in single-serving packets for on the go or portion control.

    5. Paleo Angel Power Balls- This company makes AIP protein balls, essentially. They have a bunch of different flavors to choose from and since they are high protein they are quite filling and a great snack!

    6. The Real Coconut Grain Free Tortilla Chips- Okay, I guess these aren't FULLY AIP since they do contain xanthum gum, but they are completely grain free tortilla chips and I wanted to share them! The infamous Siete tortilla chips (my absolute fav) contain chia seeds as the binder so if you really don't handle nuts/seeds well, I suggest trying The Real Coconut's chips. They have several flavors, but of course the plain old sea salt is my number one choice.

    7. Jackson's Honest- Most chips are fried in canola, vegetable, or safflower oil. All of which are extremely inflammatory. I LOVE Jackson's Honest Chips because they are all fried in coconut oil! They have a bunch of different flavors, including your traditional potato chip, but I really love their sweet potato and purple potato. They also make tortilla chips with non-GMO corn and fried in coconut oil.

    (Have ya'll figured out I'm a chip fan yet?!)

    Treats:

    1. Laughing Giraffe Organics Salted Caramel Macaroons- Macaroons are such a delicious snack and dessert! The salted caramel is the only flavor from this company that is AIP (the other flavors contain nut flours), but I love salted caramel so I'm not complaining.
    2. Jack's Paleo Cookies- I'm obsessed with Jack's cookies! Not all flavors are AIP but they have several that are 100% complaint, otherwise all flavors are paleo. Their cookies are soft and delicious. They can also be frozen if you like a harder cookie. These are amazing for when you want a sweet treat that is still healthy or don't have the time and energy to bake... especially paleo/aip baking which is quite difficult with alternative flours and no eggs. They've really nailed down their recipes and the cookies are fantastic (even my mom approved, and that's saying a lot ;)!).

    IMG_5450

    3. Eat Pops- These are fruit and green juice popsicles! Not all of them are AIP, but my favorite flavor is the Restore. I found these at Whole Foods when I had the stomach flu after New Years as I couldn't keep much down. These are a great treat when you really miss popsicles. I've found that they are quite sweet (with just fruit!) so I only need a couple bites, this means one box lasts me awhile.

    img_5475.jpg


    There's Comfort in Illness

    December 18, 2017 by Victoria Faling 3 Comments

    I think most people are familiar with the idea that change is scary.

    Change happens where fear lies. And growth happens where change transpires.

    Have you ever thought that maybe you fear getting well because it's change? Because you are familiar with your illness, you know how it operates, you've become used to feeling ill, you've made friends somewhere deep inside your body with sickness?

    IMG_4419.jpg

    It dawned on me about a year and a half ago that I actually hold fear around health. It's a concept I've been working through for awhile now. Albeit, an odd one. One you may be afraid to admit. One you may not understand. Why would I (or anyone else) hold fear around getting healthy?

    Well, let me explain. I've been sick for a very long time and I've had symptoms for even longer. I know what it feels like to be sick. It sucks, don't get me wrong, it's horrible and I hate it, but I understand how it feels and how it controls my life. Being healthy is something I don't know and since I don't know it, it scares me. Who will I be? What will my personality be like? What will I do with my life? How many things will I have to take on because I have energy for it?... Are you starting to see where I'm coming from now? Becoming healthy should be a POSITIVE change, but even positive changes are scary because all change is UNKOWN. It is fear of the unknown that holds us back. The unknown has always been a huge, terrifying thing for me.

    IMG_4333

    I think of it in the same way as someone who is an abusive relationship. Why don't they just leave? Because they fear what leaving holds- they'll be alone, they'll have to do things by themselves, will someone ever "love" them again? They stay in the relationship because it's familiar. There is a sense of safety and comfort in the relationship, even if it isn't healthy. The same holds true for chronic illness, even though I can't just up and leave it behind.

    So, I can't just leave illness behind that easily. But is it holding be down because... or rather, am I holding on to it in some desperate, subconscious way? Perhaps. How do I let go then? To be honest, I'm not sure. That is what I'm working on. I'm working to embrace the fear, embrace the change. And for me, that doesn't just start with embracing the fear and change around health, it starts with learning to embrace (or let go of) the fear around change in general.

    I hate change. I've always hated change. For all the reasons I've discussed above. Change is scary. The Unknown is scary. So for me, I have to begin to learn and accept that change happens where fear lies and that it isn't a bad thing. Change is positive because that is how and where we grow. That is how and where we learn.

    changequotes7
    Healing IS brave

    I believe that, for me, part of my healing journey, or lack thereof, is a result of a fear of health. A fear of change. As I work on that fear and embrace the change, there will be nothing for illness to hold on to within me and it will slowly begin to let go. I will slowly begin to embrace the change of healing and start to feel better.

    Have you ever considered this in your chronic illness journey? What are your thoughts? I'd love to hear them!

    Purple Sweet Potato Macaroons (AIP, Vegan, Nightshade Free, Medium FODMAP)

    December 12, 2017 by Victoria Faling 3 Comments

    Purple sweet potatoes have recently become one of my favorite foods. It's probably safe to say I'm a little obsessed. They're pretty sweet tasting and they are my favorite color. They get their purple color from the same anti-oxidants that provide blueberries with their color!

    IMG_4374

    Anyway, I was making macaroons last weekend and roasting some purple sweet potatoes for lunch. When I went to check if the sweet potatoes were done, I had a mouthful of macaroon in my mouth. I popped the sweet potato chunk in anyway because I wanted to make sure it was cooked enough. The flavor bomb that took place in my mouth was AWESOME! The coconut from the macaroon mixed with the sweetness of the purple sweet potato was absolutely delicious. It was at this moment that the idea of combining the two into a macaroon took over my brain.

    And that is how this unusual, but totally delicious, combo was born! Purple isn't exactly a holiday color, but I still find these beautiful and festive. They would be great to take as a healthy and simple treat to upcoming holiday parties!

    IMG_4385

    These aren't overly sweet, which makes me love them even more, but you can feel free to add a little extra maple syrup if you want a sweeter treat.

    Purple Sweet Potato Macaroons

    Makes 9 macaroons

    Ingredients:

    ½ cup steamed purple sweet potato*

    2 tbs. maple syrup (add another tablespoon if you like your treats extra sweet)

    1 tsp. vanilla extract

    2 tbs. melted coconut oil

    1 cup shredded coconut

    1 tbs. coconut flour

    ¼ tsp. pink himalayan sea salt

    Extra shredded coconut for rolling, if desired


    *Peal and chop a purple sweet potato. Steam it and then use ½ a cup for this recipe

    Preheat oven to 350F.

    Blend the sweet potato, maple syrup, vanilla extract, and melted coconut oil in a food processor.

    Mix all the dry ingredients (shredded coconut, flour, sea salt) in a small bowl. Add the dry mixture to the food processor and pulse until JUST combined with the wet ingredients (you don't want to totally emulsify the coconut flakes).

    Pour the mixture back into the bowl and make sure everything is mixed well.

    Take tablespoon size amounts of the dough and roll into a ball with your hands. Roll in extra shredded coconut, if desired. Place on a baking sheet lined with parchment paper.

    Bake for 10 minutes. Remove from oven and let cool for 1 hour (THIS IS AN IMPORTANT STEP!).

    Enjoy!

    IMG_4379IMG_4392IMG_4375


    Tutorial: How To Dry Brush

    December 8, 2017 by Victoria Faling Leave a Comment

    Dry brushing is part of my full detox protocol. It helps get lymph flowing to remove toxins from your body. It can also get your digestive juices flowing and reduce cellulite. I've gotten several questions lately about HOW to actually dry brush so I put together a video, since visuals are much easier in this situation then trying to verbally explain it. Check out todays video where I explain all the benefits of dry brushing and show you exactly how to do it!

    Cinnamon & Ginger Roasted Rainbow Carrots (AIP, Vegan, Low FODMAP, Nightshade Free)

    November 13, 2017 by Victoria Faling 5 Comments

    Thanksgiving is coming up in America, which means holiday recipes! But this time of year can be stressful and many are burnt out by the end of the year, so easy holiday recipes means more time to enjoy family, friends, and the actual holidays themselves. This recipe is only four ingredients (okay five if you count the salt) and very simple to make.

    allergy friendly cinnamon and ginger roasted carrots
    allergy friendly cinnamon and ginger roasted carrots

    I utilize ginger and cinnamon not only because they go fantastic with the sweetness from the carrots and are two of my favorite spices, but also for their health benefits. Check it out:

    Did you know cinnamon is great for balancing blood sugar? The perfect spice to include on a day where you'll be eating a lot. It's also great for fighting infections and lowering inflammation.

    I've talked about ginger quite a bit because it's my all time favorite, but it's also a great anti-inflammatory, fantastic for digestion, and has been shown to help balance blood sugar and cholesterol.

    Utilizing these two spices during the holiday season is fantastic with all the heavy food this time of year!

    allergy free cinnamon and ginger carrots
    allergy free cinnamon and ginger carrots

    allergy friendly cinnamon and ginger roasted carrots
    Print Pin

    Cinnamon & Ginger Roasted Rainbow Carrots

    This simple, easy side dish will make holiday or weeknight cooking easier! This recipe is only five ingredients, but packed with flavor, fiber, and gut healthy benefits.
    Servings 4 people
    Author Victoria Faling

    Ingredients

    • 2 lbs. rainbow carrots
    • 2 tablespoon coconut oil
    • 1 teaspoon ground ginger
    • 1 teaspoon ground cinnamon
    • ½ teaspoon pink himalayan salt

    Instructions

    • Preheat the oven to 425F
    • Line 2 baking sheets with parchment paper.
    • Trim your carrots then cut in half lengthwise and lay in one even layer on the baking sheets.
    • Toss carrots in oil to fully coat.
    • Mix the ginger, cinnamon, and salt in a small bowl then sprinkle the carrots with the mixture.
    • Roast for about 35-45 minutes, flipping half way, until the carrots are fork tender and just beginning to crisp.
    • Serve warm as a perfect, easy holiday side dish!

    Why Movement IS Important EVEN When You Have a Chronic Illness

    November 12, 2017 by Victoria Faling 7 Comments

    In case you didn't know, I have a degree in Exercise Science and I've been a Certified Personal Trainer through the National Academy of Sports Medicine for 7 years now. I have speciality certifications in kettle bells and TRX. I don't often talk about the fitness side of things because, well, let's face it, food is amazing. But, we can't forget about the importance of movement and that is exactly what todays post is all about :).

    So, let's talk about movement. Not just walking to your bathroom and everyday life movements. But extra movement. Fitness if you will. I've met a lot of spoonies who, like me, used to be fitness freaks- in amazing shape, always on the go, loved working out! They feel lost and hurt (I could make a whole post on just that! For another day...) that they can't incorporate fitness into their life anymore. Or they feel at a loss about how to healthily incorporate movement to positively impact healing rather then slow it. Now, I've also met a lot of people who could care less about exercise but I'm going to be explaining to EVERYONE why movement is important and how to incorporate it when you're dealing with a chronic illness.

    IMG_3190

    When you're sick with a chronic illness- in pain, exhausted, depressed- the last thing you probably want to do or have energy for is exercise. But that's probably when you should be making time for it the most. Why? Because it's healing.

    I'm not talking about going and deadlifting 300 lbs, squatting twice your body weight, and running sprints around the track. I mean, if you can do all that, great! I once could (okay maybe not THAT much weight) and hopefully one day I'll get back to it. I'm talking about something as simple as walking for 10 minutes or stretching for 5. Yes, even just stretching counts when you're chronically ill.

    When I feel my worst, the last thing in the whole world I want to do is get out of my bed and stretch. But 9 times out of 10 it actually helps me feel better, at least a little bit. I explain why that might be below. Let's first talk about WHY movement is important and then about WHAT KIND of movement you should be doing.

    images

    So why is movement important?

    1) Movement gets your blood flowing which increases oxygen to vital organs and tissues that are keeping you alive. Moving increases heart rate which increases the rate of blood moving through your system. Your red blood cells carry oxygen around your body and we all know we need oxygen to survive. So more blood flowing through your system=more oxygen flowing through your system! Increased blood flow also helps reduce pooling of blood and blood clots due to sitting/laying all the time.

    2) Movement also gets your lymph system flowing. Your lymphatic system is like the sewer system of your body, collecting junk, toxins, and bugs that need to be cleaned out. BUT your lymph system contains no pumps. Movement is what gets it flowing and out of you. Therefore, movement is important for detoxing!

    3) On a similar note, increasing heart rate increases the temperature of your body. If you deal with Lyme, this can actually help kill off the bad bugs, which is great but is also why you need plenty of rest if doing harder physical activity (more on that below). Increased heart rate also means *possibly* getting a sweat going, depending on how hard you workout, which can help with detoxing your system from junk, bugs, or even a herx!

    4) Exercise may boost your immune system, overall. This one gets tricky though. The type of exercise matters. Chronic or intense exercise can harm your immune system, but proper, moderate training can increase immunity. Exercise can increase hormones that have a positive impact on our immune systems (Brooks, 2007). Some research has shown that for about the first 12 hours post-exercise, your immune system actually decreases as your body recovers from the stress on it from exercise, then over the next ~24 hours, your immune system increases to slightly stronger then before. But this means that the 12 hours post exercise are crucial for instilling recovery tips. We will discuss this more below.

    5) Movement, depending on the type, will help reduce muscle wasting, pain, and reduce (risk of) injury. If you are VERY sick and never leave your bed, I'm sure you are already aware of muscle loss. But muscle atrophy can have negative consequences. It can negatively impact your metabolism, increase the risk of osteoporosis or weakening of your bones, and more. Movement also has the ability to reduce pain and injury. I know this can seem counter-intuitive if you deal with pain but pain can stem from lack of movement due to stiffening of muscles from remaining in a seated or laying position. Injury can also result from this lack of movement/stiffening for various reasons.

    6) Exercise releases endorphins, which can be EXTREMELY helpful if you deal with any sort of depression or anxiety (either on it's own or in relation to another chronic illness). Endorphins are those "feel good" hormones people always talk about. They are what result in the "runner's high". Endorphins are essentially natural morphine, releasing positive feelings and reducing pain levels. Studies have shown that exercise can be just as effective or MORE effective then anti-depressants!

    I could go on for days about the benefits of exercise. The list goes on, but I wanted to list some of the main few above, especially as they relate to illness.

    Version 2

    So what kind of exercise should you be doing?

    The TYPE of exercise will depend on your illness/condition/health state. For the sake of this post, I'll be using Lyme disease and similar autoimmune diseases as my reference and speaking highly to those who are still quite ill.

    First things first, rest is number one. We are not here to push past all the pain and workout 5 days a week for the sake of the positive science behind movement. If you are ill, your body is using all it's resources and energy to try and heal. We are simply here to add some movement into your routine that may INCREASE healing.

    A general rule of thumb is that once you complete a workout, you should have enough energy to complete the whole thing again without feeling completely dead. If you finish a workout and feel totally exhausted, you probably did too much. Take AT LEAST 1 day off between workouts to allow for proper recovery when your health is already comprimised.

    We also don't want to do workouts that instill intense soreness (you know, that muscle recovery pain). Why? I know that pain can actually feel good (my workout fiend friends out there will understand) because then you know you got a good workout, but it also means you worked your muscles very hard. The more post-workout soreness you get, the more energy and resources it takes for your body to recover. The more energy and resources your body is using to repair those muscles instead of sending energy to vital organs and systems that already need repair when you are ill.

    Again, depending on health level, it's best to stick to workouts that are no longer then 20-30 minutes. This time frame helps prevent over-exertion and increased fatigue from prolonged activity.

    Unknown-1

    Now, in terms of types of exercise, we generally want to avoid intense routines like HIIT (high intensity interval) training, prolonged cardio, or HEAVY lifting. Cardio is great for your cardiovascular system and if you can handle low impact cardio (like walking, slow bike rides, calm swims), fantastic, but try to avoid long or intense cardio sessions (like running, spin classes, etc). Weight lifting or yoga is your best choice, for many reasons. Lifting can be easily tailored to both your fitness and health level. Stick to body weight or light weight exercises. Modify exercises as needed and choose between 4-8 exercises, 10-15 repetitions, 1-3x times. Weight training is great for muscle building, bone support, and even your cardiovascular system. Yoga is excellent for still building strength but also for stretching and for mental health. It is low impact and can be extremely easy, for lack of a better word. Yoga can also be as challenging as you want to make it once your fitness and health improve.

    One last thing... stretching. This is important for EVERYONE! If you aren't at a point where you can do much, or any, physical activity, try and implement a stretching routine.  We already discussed why some type of movement is important and guess what? Stretching counts! It prevents that extreme tightening of muscles that can lead to injury (yes, you can get injured just from laying in bed all day! Who knew?!). Implementing a stretching routine may also be the thing to help you leave your bed, even if it is just moving 5 feet to the floor, a few times a week (preferably daily). But, if all else fails, you can stretch in your bed!

    Unknown

    Let me tell you a little story to nail this point home. The summer of 2016, I was very sick again. I physically couldn't do much. I could hardly sit up in bed long enough to eat something. Obviously I wasn't stretching or exercising by any means at this time. I started to develop pain in my left hip and SI joint. I had previously had an injury in that area about 5 years ago. It seemed to be flaring up despite the fact that I wasn't doing anything. But that is exactly why it flared up! The muscles in my hips had begun tightening up so much and weakening that my hips couldn't handle it. I began to do 2-5 minutes of stretching just a couple of times a week when I felt able and my hip slowly began to heal. And I began to ever so slowly feel better overall because I was getting blood flowing.

    Trust me, I KNOW how hard it can be to move when you think you are dying and barely have the energy to lift your hand to your mouth, but if you can manage just 30 seconds of stretching when you have a *good* moment it may actually contribute to overall body healing from chronic illness!

    IMG_9672
    Throwback to when I was in good shape! 😉

    I hope you found this post useful and helpful in your movement and healing journey. If you have any questions or want me to elaborate more on any piece of the movement puzzle (or a specific piece from this post), let me know by commenting below!


    Brooks, G. A., Fahey, T. D., & Baldwin, K. M. (2007). Exercise physiology: human bioenergetics and its applications. Boston, Md.: McGraw-Hill Higher Education.

    Slow Cooker AIP Beef Stew (Nightshade Free, Low Fodmap)

    November 1, 2017 by Victoria Faling 3 Comments

    This easy AIP Beef Stew is perfect for when you need a hearty, nourishing meal but don’t have time for complicated cooking. It’s simple, flavorful, low FODMAP, and completely nightshade free, and can be made in either the slow cooker or Instant Pot for maximum convenience.

    AIP beef stew

    This AIP beef stew recipe is for all my IBS and digestive-issue babes. When you’re avoiding FODMAPs, nightshades, and spices, finding satisfying meals can feel impossible. For years, I followed a low FODMAP, nightshade-free AIP diet while healing my gut, and this stew was one of my go-to meals for packing in nutrients without triggering symptoms.

    Unlike traditional beef stew, this recipe contains no tomatoes, garlic, onion, or spices. Instead, it relies on fresh herbs and naturally flavorful vegetables to create a comforting, gut-friendly meal without digestive distress.

    slow cooker paleo beef stew


    What Makes This Beef Stew Recipe Different

    • Allergy friendly: this beef stew is fully autoimmune protocol compliant meaning it's also paleo, gluten free, corn free, and dairy free.
    • Supports digestion: Because this stew is low FODMAP and nightshade free, it’s gentle on sensitive digestion. There’s no tomato paste, garlic, or onion, and the combination of root vegetables provides diverse fiber to support gut health.
    • Easy to make: Many beef stew recipes require browning the meat or multiple cooking steps. While you can braise the beef if you want, this recipe is designed to be dump-and-go without extra steps. Simply add everything to the slow cooker or Instant Pot and let it do the work.

    Instant Pot Beef stew

    AIP Beef Stew Ingredients

    • Beef stew meat: I love buying pre-cut beef stew meat at the store to make life easier. Otherwise boneless chuck roast cut into 1-2 inch pieces tastes best.
    • Fennel: a great low FODMAP alternative to onion, it adds flavor and supports digestion.
    • Carrots: this root veggie is packed with vitamins to support immune, eye, and heart health.
    • Parsnips: a hearty root vegetable that adds fiber without using potatoes.
    • Sweet potato: another great root veggie for fiber and micronutrients.
    • Celery: we only use a couple stalks of celery to keep this recipe low FODMAP.
    • Broth: vegetable, chicken, or beef broth will work in this recipe. Regular broth or bone broth will work, whatever your preference is.
    • Thyme, rosemary, sea salt: we are sticking to delicious herbs to flavor this stew, no spices.

    How to Make AIP Beef Stew

    1. Dice the fennel, then peel and chop the remaining vegetables into 1-inch pieces.
    2. If using chuck roast, cut into 1½-inch cubes.
    3. Add all ingredients to the slow cooker or Instant Pot and stir to combine.
    4. Slow Cooker:
      Cook on low for 8 hours.
    5. Instant Pot:
      • Use the slow cooker function or
      • Pressure cook for 30 minutes, then allow a 10-minute natural release before a quick release of the pressure.
    6. For a thicker stew:
      Mix 2 tablespoons tapioca or arrowroot starch with ¼ cup water, then stir into the finished stew.
    how to make AIP beef stew
    how to make easy paleo beef stew
    how to make slow cooker AIP beef stew

    Substitutions and Variations

    The best part about beef stew is that you can really use whatever veggies you have on hand. 

    • Use white potatoes instead of sweet potatoes if tolerated.
    • Swap in white sweet potatoes for a milder flavor.
    • Add turnips or additional root vegetables if desired.
    • Use onion instead of fennel if FODMAPs aren’t an issue.
    • Add 1–2 bay leaves while cooking for extra depth (remove before serving).
    • For more flavor without nightshades, add 2–4 tablespoons coconut aminos.
    • The AIP diet allows FODMAPs, so you can add garlic or onion if tolerated.
    • If following low FODMAP, be sure to use a broth without onion or garlic.

    Serving and Storage

    Serve this paleo beef stew as is or with some compliant bread per your diet. You could also serve it over cauliflower rice, but it's a hearty and delicious meal on it's own already.

    Store leftovers in an airtight container in the fridge for up to 3 days. Portion and freeze for up to 3 months in freezer safe, airtight containers. 

    Optional: Braising the Beef

    If you have extra time and want deeper flavor, you can braise the meat first.

    Heat 1 tablespoon olive oil in a large pan or the Instant Pot on sauté mode. Add beef in batches (don’t overcrowd) and sear for 3–5 minutes per side until browned. Transfer the browned beef to the slow cooker and proceed with the recipe.

    easy beef stew recipe
    slow cooker AIP beef stew

    FAQ

    Can I make this AIP beef stew in the Instant Pot?

    Yes, you can make Instant Pot beef stew! You can either use the slow cooker function or pressure cook for 30 minutes with a 10 minute natural release.

    Is this slow cooker beef stew Whole30 compliant?

    This beef stew is Whole30 compliant as is.

    Can I freeze AIP beef stew?

    Absolutely. This stew freezes very well. Let it cool completely, portion into airtight, freezer-safe containers, and freeze for up to 3 months. Thaw overnight in the fridge and reheat gently.

    What cut of beef is best for AIP beef stew?

    Boneless chuck roast is the best cut for AIP beef stew. It becomes tender during slow cooking and has enough fat to stay juicy. Pre-cut stew meat also works.

    Can I make this paleo beef stew on the stovetop?

    Yes. Add all ingredients to a large pot or Dutch oven, bring to a gentle boil, then reduce heat and simmer 2–3 hours, stirring occasionally, until the beef is tender.

    What cut of beef is best for AIP beef stew?

    Boneless chuck roast is the best cut for AIP beef stew. It becomes tender during slow cooking and has enough fat to stay juicy. Pre-cut stew meat also works.

    More Hearty AIP Recipes

    AIP Beef Stir Fry

    Low FODMAP AIP Shepherd's Pie

    Lamb and Sweet Potato Curry

    AIP Meatloaf with Hidden Veggies

    If you try this AIP Beef Stew recipe, please let me know how you liked it by rating and reviewing below. Drop any questions in the comments and tag me on social media!

    slow cooker aip beef stew
    Print Pin

    Slow Cooker AIP Beef Stew (Nightshade Free, Low Fodmap)

    This AIP beef stew is low FODMAP and nightshade free, flavored with herbs instead of spices, and easy to make. It's the perfect gut-healing stew to warm you up on those cold winter days!
    Course Main Course
    Cuisine American
    Keyword AIP, autoimmune paleo, dairy free, gluten free, low fodmap, nightshade free, slow cooker
    Prep Time 20 minutes minutes
    Cook Time 8 hours hours
    Total Time 8 hours hours 30 minutes minutes
    Servings 4 servings
    Author Victoria Faling

    Equipment

    • Slow cooker or
    • Instant Pot

    Ingredients

    • 1 fennel diced
    • 4 large carrots or 6 medium, peeled and chopped
    • 3 large parsnips peeled and chopped
    • 4 sticks celery chopped
    • 1 medium sweet potato chopped into cubes
    • 1 lbs. Beef stew meat or chuck roast
    • 6 cups broth of choice
    • 1 tablespoon thyme
    • 1 tablespoon rosemary
    • 1 teaspoon Salt more to taste

    Instructions

    • Dice the fennel, then peel and chop the remaining vegetables into 1-inch pieces.
    • If using chuck roast, cut into 1½-inch cubes.
    • Add all ingredients to the slow cooker or Instant Pot and stir to combine*

    Slow Cooker

    • Cook on low for 8 hours.

    Instant Pot

    • Use the slow cooker function or
    • Pressure cook for 30 minutes, then allow a 10-minute natural release before a quick release of the pressure.

    For a thicker stew:

    • Mix 2 tablespoons tapioca or arrowroot starch with ¼ cup water, then stir into the finished stew.

    Notes

    *See post above for optional braising of meat for more flavor along with variations.

    Salted Caramel Bliss Balls (Paleo, Vegan, Nightshade Free)

    October 23, 2017 by Victoria Faling Leave a Comment

    Salted caramel is one of my favorite flavors. That mix of sweet and salty.... I'm drooling. Bliss balls/power balls/whatever you want to call them are always a popular thing but I had never seen salted caramel ones so I thought to myself "Victoria, you better nail these bites!" And I think I did, if I do say so myself.

    These bliss balls only have 6 ingredients, take no time at all, and are a great snack on the go. They also make for a healthy treat with the holidays coming up. People will think they are much more decadent then they are, which is perfect :).

    IMG_2873

    Salted Caramel Bliss Balls

    Makes 12

    Ingredients:

    8 dates, pitted

    1 cup of cashews

    ½ cup shredded coconut

    1 tbs. Nuzest Vanilla Protein (or vanilla protein of your choice)*

    1 tbs. full fat coconut milk

    ½ tsp. himalayan pink sea salt

    ⅓ cup hemp seeds or more shredded coconut, for rolling the balls in

    *If you don't have protein powder, you can use almond flour or even ½ tbs. of coconut flour (I have not tried the coconut flour version)

    Soak the dates in hot water for 5 minutes.

    While dates are soaking, blend cashews, coconut, and protein in a food processor or high speed blender until crumbly.

    Add the dates, coconut milk, and sea salt. Blend until a dough forms. You may have to stop and scrape down the sides to make sure everything blends together. The dough should be slightly sticky but not so much that you can't work with it at all. If it is, add a little more protein or shredded coconut.

    Take rounded tablespoonfuls and roll into a ball with your hands. Roll the balls in your hemp seeds or shredded coconut.

    Store the balls in the fridge until ready to devour.

    IMG_2880IMG_2868IMG_2852

    Updates, Updates, Updates

    October 22, 2017 by Victoria Faling 2 Comments

    I know I promised you all a full update a couple months ago and that never happened. Well, here we are, I'm finally making it happen!

    First things first, blog updates. You may have noticed I updated the look of the blog. I also added a page called 'Affiliate/Discount Links'. This page contains all my affiliate links and discount codes to different brands. I'm became an Amazon affiliate recently which means that if you go through my link to purchase your Amazon orders, I will make a small percentage. This is at NO extra cost to you but it helps me pay for Lyme treatment. So, it would mean A LOT if you'd take the time to go through that one extra step before ordering. I'll be updating this page periodically as I try and get discount codes for you all to some of my favorite products :). Keep checking that page regularly! And make sure you follow me on Instagram because that is where I can keep you all updated quickly and easily.

    Also, be sure you are email subscribed to my blog so you never miss a post or recipe! You can do this by scrolling down on the right hand side of the page to where it says Follow Blog via Email and sign up. You can also catch all posts, recipes, and extra articles or fun things I post by following Lemons 'N Lyme on Facebook.

    ~~~~~~~~~~~~~~~~~~~~~~~~~~~~~~~~~~~~~~~~~~~~~~~~~~~~~~~~~~~~~~~~~~~~~~~~~~~~

    Alright, on to ME. If you missed my post on Instagram about what has been going on the last few months... well, you shouldn't have because you should be following me on IG ;). Anyways, in early August I moved to Denver to settle in and begin graduate school. I started seeing a new Lyme doctor in the area and began a herbal protocol. I discussed this whole protocol in a YouTube video if you are interested in learning a little more.

    IMG_2953

    Well, two weeks into school I had to withdraw because my health just couldn't handle it. It was an extreme blow and a huge loss for me. Another loss I had to try and grieve and it hasn't been easy. I decided to try and start working part time and again, on the second week I had to quit. My fatigue, digestive issues, and anxiety have been pretty debilitating. It was another hit to the gut (figuratively and literally!).

    I'm now back, almost, to square one trying to figure out what to do and what is going on with my body. I have been continuing on the herbal protocol for now until I see my doctor again in November. I've been testing out laser therapy which is supposed to increase the production of stem cells, increase mitochondrial function, and help heal the brain. I've only had 3 sessions so I haven't noticed much yet.

    I also saw an immunologist recently who is doing a whole slew of tests to try and figure out what is going on with my immune system, if he can help, and to see if I qualify for IVIG. Many of you may already know what that is but for those who don't it's essentially like getting a donor immune system! You do IV's of immunoglobulins, which are the cells that comprise your immune system. If I end up doing IVIG I can talk much more about it.

    I've been focused on finding answers, doing some mental/emotional healing, and working on lots of fun recipes and projects for you all! Definitely be sure to follow me on Instagram because I have a few giveaways coming up for the holiday season and I wouldn't want you to miss out on any of them.

    Let me know what you want to see and if there are certain recipes you are keen on me making (a remake of your favorite pumpkin bread? holiday dishes?). I hope all of you are hanging in there and, as always, I'm sending lots of love your way <3

    Vegan & Paleo Chocolate Chip Cookie Dough (Medium FODMAP, Nightshade Free)

    October 9, 2017 by Victoria Faling Leave a Comment

    One of my favorite things as a child was eating raw cookie dough. Whether that was licking the bowl when making cookies from scratch or eating it out of the tube at a sleep over. Raw eggs where never a concern in my family but I recreated my favorite (totally unhealthy) cookie dough into a vegan and paleo healthy version! Get excited.

    IMG_2418

    I've been using Nuzest protein in a lot of recipes lately because 1) I like it 2) it adds a protein boost and 3) It works really well as a flour substitute! I haven't tested this recipe using anything but the Nuzest as the flour but you can try subbing about 3 tbs. of almond flour, gluten free flours, or 1-2 tbs of coconut flour (if using coconut flour, use way less because it absorbs more liquid then your average flour). If you do oats, you could mix in oats to make an oatmeal raisin/chocolate cookie dough.

    These recipe is also quite versatile and you can add in whatever you like, it doesn't have to be chocolate chips. You could do nuts, dried fruits, coconut, etc. How fun?!

    IMG_2422

    Vegan & Paleo Chocolate Chip Cookie Dough

    Ingredients:

    1 small white sweet potato or 1 cup chopped and steamed white sweet potato

    ¼ cup almond butter (use tiger nut butter for AIP option)

    1 scoop nuzest vanilla protein powder (or your favorite vanilla protein)

    2 tbs. maple syrup

    1 tsp. vanilla extract

    ¼ tsp. salt

    3 tbs. chocolate chips or cacao nibs

    Peel and chop your sweet potato into chunks. Steam until soft then let cool completely before moving on. You should have 1 cup once done.

    Combine everything but the chocolate chips in a food processor or small blender until smooth. Fold in the chocolate chips.

    You can eat it straight away but it won't be quite as hard as cookie dough. I suggest storing it in the freezer, which also allows it to harden. To do this, roll the dough into a log in a piece of plastic wrap.

    It will take about 2 hours for the dough to reach a more solid cookie dough consistency in the freezer.

    You can also bake these cookies. Once your dough has sat in the freezer, you can cut cookies from the log (talk about portion control! another point for this recipe ;)). Bake at 350F for 20 minutes, flipping the cookies over halfway through baking. They won't bake quite like regular cookies, they'll get brown and harder on the outside while maintaining a gooey, slightly undercooked middle. But they still taste fantastic! And the chocolate chips will get melty, which is the best part.

    IMG_2426IMG_2436IMG_2420IMG_2440


    My Top Tips for Chronic Illness Newbies

    October 6, 2017 by Victoria Faling Leave a Comment

    I constantly get emails and messages from people recently diagnosed with Lyme about what to do, what are my tips, do I have any suggestions on treatments, etc. I decided to make a video sharing my top tips and advice for someone recently diagnosed with Lyme or other chronic illness. Many of these tips are actually useful for those who have been sick awhile, as well, so no matter what stage of diagnoses or treatment you're at, I encourage you to watch this video.

    What advice would you give someone recently diagnosed with a chronic illness?

    Lyme Update September 2017

    September 20, 2017 by Victoria Faling Leave a Comment

    I know I promised you all a full update post, but some life stuff happened and I don't feel ready to share it all, yet. For now, I've moved back to Colorado, I'm seeing a new Lyme doctor, and I've recorded a video detailing my latest Lyme disease treatment plan.

    I'm finally working on some new recipes that will get posted in the coming weeks. And when I feel ready I will be providing a full life update. I am going to keep up with Lyme treatment updates, either monthly or when my treatment changes dramatically enough. Health wise, I've been on a plateau for quite some time. One that my family and I sort of just hoped would shift on it's own, I think. We've finally realized I haven't been proactive enough and that some real changes needed to be made. So, we will see how things with this new doctor go.

    My main symptoms still include (what can sometimes be completely debilitating) digestive issues and chronic fatigue. I also still deal with ear ringing and brain fog. I'm super sensitive to stress, which is fairly common in the chronic illness world. And lately I've been having more joint/muscle pain/stiffness, which could also be a result of herxing.

    I have some upcoming appointments that I'm looking forward to. I'm seeing an immunologist, I have a follow up with my geneticist, and then exploring options for my support system here in Denver (therapists, chiropractors, etc).

    How have you all been feeling? The change in seasons always gets me on top of everything else. Have you found a treatment that's been helping you? Let me know, I love staying connected with everyone <3

    Why I DON'T Eat Bone Broth to Heal my Gut

    August 2, 2017 by Victoria Faling 22 Comments

    I don't eat bone broth, fermented foods, collagen, or take glutamine or folate/5-MTHF supplements. WHAT?! Many of you may be surprised given that bone broth, fermented foods, and glutamine are very popular in both the gut healing arena and chronic illness world. Folate (or 5-MTHF, methylfolate supplement) has also been hyped up a lot recently as a helpful supplement to combat mutations on the MTHFR gene and it's sister genes.

    I've never liked bone broth or fermented foods and both have always bothered my stomach rather then helped it. I kept trying to eat those foods because everyone said I should to heal my gut. I'd force bone broth down and attempt bites at sauerkraut on occasion. I then started added hydrolyzed collagen to my smoothies, baked goods, or tea. It never felt right and it certainly didn't make me feel good.

    Then, the other week, I had my genetics properly and thoroughly analyzed by a nutrigenomics specialist and some serious light was shed! I should always know to go with my gut because it has yet to let me down...

    IMG_1287

    Woah woah woah, let's back up a little, shall we? Let me drop some knowledge. This is about to get a bit scientific, but I'm going to try and keep it as simple and straightforward as I can. There are four similar sounding words I need you to keep straight first. They are:

    Glutamine

    Glutamate

    Glutamic acid

    Glutathione

    Glutamate is essentially the same thing as glutamic acid, for your reference and the purpose of this post, so in this post I'll just be using the word glutamate. Glutamine is a PRE-CURSOR to glutamate. Let's just worry about remembering those two for now, glutamine vs glutamate, okay? And glutathione is an anti-oxidant that helps with detoxification and inflammation. Many of you probably already know what glutathione is.

    Glutamate is a neurotransmitter. An excitatory one. It's VERY important for proper brain function and isn't something to hate on... unless in excess. Glutamate is also praised for it's ability to help with healing in the body, including the gut. Glutamate is the pre-cursor to GABA which is an inhibitory neurotransmitter. GABA can then be recycled to glutamate. Essentially, glutamate and GABA balance each other out (one excites, one calms). Imbalances in the body (due to many things, which we will get into in a moment) can cause imbalances in glutamate vs. GABA, leading to high glutamate levels.

    High glutamate levels can cause a number of issues from neurological disorders, aversions to certain clothing (fabrics and feels), paranoia, chronic fatigue, and more. Although glutamine helps produce glutathione, increased glutamate can put a demand on glutathione, reducing glutathione levels in the body which in turn increases inflammation. Sounds fun, huh?

    Ever heard of glutamate? Probably, it's a supplement, it's found in foods, and it's the component of MSG. MSG= monosodium GLUTAMATE. Many processed foods contain free glutamate. Many health foods contain bound glutamate because it is an essential amino acid. We do need it for our health! Bound glutamate tends to be good because your body is able to digest it slowly and use it properly. We need all 20 amino acids (proteins) in our diet and in meals (meat contains all 20, vegans need to eat rice WITH beans to get them all at once), but consuming just one, and in excess, can cause a lot of issues. Gluten and casein also contain high levels of glutamate, another reason to cut gluten and dairy from your diet.

    No Msg-stamp

    Well, glutamine is a pre-cursor to glutamate, like we mentioned above. We all know how bad MSG and other processed foods are (is it now making sense why MSG has been linked to neurological disorders?). But, you probably didn't know glutamine supplements and natural, even healthy, foods high in glutamine or glutamate can cause issues. So what foods are high in glutamine? Bone broth, fermented foods, collagen supplements... 3 foods that are all the rage in the paleo and gut healing community! Many doctors also prescribe glutamine supplements on top of all that for gut healing, not surprisingly given what I said above about it's ability to convert to glutamate and accelerate healing. I AM NOT SAYING THESE FOODS ARE BAD! But in excess and for those susceptible to glutamate issues, they are. My genetics make me highly susceptible to glutamate uptake and not recycling it into GABA properly.

    Like I said, glutamine rich foods and supplements are popular in the gut healing community, but if you have leaky gut then this allows glutamine to leak into the blood stream, cross the blood-brain barrier, and turn into glutamate... uhh?! You're essentially just dumping this excitatory neurotransmitter into your poor little brain and it soon becomes toxic leading to all the negative consequences I mentioned above. That's a real problem isn't it?

    FullSizeRender

    So how does folate fit into this mix? Folate, also known as B-9, can increase glutamate and it also helps convert another amino acid into glutamate. So, you're taking a folate or 5-MTHF supplement to help with your MTHFR mutation, you're downing bone broth and fermented foods to help heal your gut, and maybe you added a glutamine supplement to it all, as well. All of this increases the pool of FREE GLUTAMATE in your body. Ay carumba! Are you feeling like crap yet?

    One more thing about folate and glutamate, both stimulate mTOR. mTOR is the process in your body that creates new cells while autophagy is the cleaning up of old, dead or bad cells (including viral cells, bad bacteria, etc). These phases can't be on at the same time. Either mTOR is on or autophagy is on. If mTOR is constantly on, then your body isn't cleaning up any of the bad guys and your left with all those viral, bacterial, and dead cells sitting in your system! Talk about NOT healing...

    LEM1608mTOR-PATHWAY700

    Are you taking all the steps you think you're supposed to be taking to help heal your gut and body yet still feeling bad or even worse? This could be why. Especially the folate supplementation issue. Many doctors see MTHFR, MTRR or another sister mutation and immediately think METHYLFOLATE SUPPLEMENT NOW! Without looking at or knowing about other genetic issues a person may have that don't allow them to use folate properly. That's my issue, but I'm not going to get into all the genetic mutation issues related to folate in this post. I'm just going to leave things where they are for now and hopefully you'll take my word on it (I mean don't, do your research, but for now know that I have ;)). And don't blame your doctor right away, genetics are very complicated and much of this is just coming to light.

    I think this is a very important topic to share about given the popularity of the foods and supplements mentioned in this post and the lengths many of us go to find healing. Healing, especially for those chronically ill with something like Lyme disease, can be EXTREMELY complex. I know I just added another layer to the onion, but your genetics play a paramount role in both your illness and health. They aren't something to be ignored. Yes, we can actually alter gene expression but you need to know what genetic issues your dealing with first to either have your genes express in a positive manner or know how to compensate for the bad ones.

    Be sure to talk with your doctor or a trained genetic specialist (I suggest a nutrigenomics specialist who understands all the genes related to gut and detox) to find out what genetic issues you may be having and how to address them. Remember, I am not a doctor. I am simply sharing my experience and knowledge that I gain along my healing journey.


    Sources

    My knowledge from biochemistry classes in college

    My nutrigenomics specialist

    http://www.jstor.org/stable/pdf/2882673.pdf?seq=1#page_scan_tab_contents

    https://www.ncbi.nlm.nih.gov/pubmed/12481981

    Glutamate Excitotoxicity: The Brain, The Nervous System & Nutritional Solutions

    Beyond MSG: Could Hidden Sources of Glutamate Be Harming Your Health?

    Glutamate – One More Piece in the Chronic Fatigue Syndrome (ME/CFS) Puzzle? The Neuroinflammatory Series Pt. II

    http://science.sciencemag.org/content/276/5319/1699

    http://digitalcommons.wayne.edu/oa_theses/388/


    Picc Line vs. Port-a-Cath

    July 21, 2017 by Victoria Faling 5 Comments

    I get loads of questions asking me about picc lines and port-a-caths so I decided to just make a video talking all about them! I discuss what they're for, the differences, how to prepare and recovery from the placement procedure of each, long term care tips, and just some overall tips & tricks.

    I hope this video is helpful for some of you!

    AIP Beef Stir-Fry with Vegetables (Paleo, Nightshade Free)

    June 20, 2017 by Victoria Faling Leave a Comment

    This AIP Beef Stir Fry is easy and delicious. Loaded with delicious veggies and tender beef, this beef and veggie stir fry is healthier than takeout!

    AIP beef stir fry
    AIP beef stir fry

    A couple of weeks ago my chiropractor (who is also my applied kinesiologist) said I was clear of mold, heavy metals, and SIBO. For now, anyway. I've been sticking to a paleo low-fodmap diet and it was getting boring, so I was excited to hear no SIBO because it meant I could start slowly trying to reintroduce higher FODMAP foods.

    I started to crave a beef and broccoli stir fry but I didn't want to eat just a bunch of broccoli given it's FODMAP level, so I incorporated it into a stir fry with lots of other veggies. This way I would be satisfied while only starting out with a little broccoli to test the waters. This recipe also has mushrooms which are considered medium FODMAP but I've handled them fine in the past, in moderation, and on occasion. Just something to be aware of if you are following a low FODMAP diet.

    Of course, if FODMAPs are a no go for you right now, you can feel free to leave out the broccoli or substitute it with another vegetable that you handle.

    paleo beef stir fry with veggies

    AIP Beef Stir Fry Ingredients

    • Olive or avocado oil: if not AIP, feel free to use sesame oil
    • Stir-fry beef: you can use sliced stew meat, sirloin, or flank steak works
    • Broccoli
    • Green beans
    • Water chestnuts: these add a crunchy and slightly sweet hit to the stir-fry that is so delicious! Don't skip these
    • Baby bella mushrooms
    • Coconut aminos: this is a gluten free alternative to soy sauce
    • Ginger root: plenty of ginger goes into this recipe for flavor and it's anti-inflammatory benefits
    • Apple cider vinegar: this adds depth of flavor to the sauce
    • Salt

    This gluten free stir fry is easy to whip up. Once your veggies and meat are prepped, you'll brown the beef on both sides and set aside. Then you'll sauté the veggies in a delicious coconut aminos and ginger sauce, before adding the beef back in to finish cooking. It is that simple!

    Paleo Beef Stir Fry Substitutions and Variations

    Veggies: I love stir-fry because you can really use whatever vegetables you have on hand. Got some carrot you want to use up? Toss those in! Hate mushrooms? Leave them out! Feel free to use a combination of vegetables you love. I've kept this beef stir fry nightshade free by not adding peppers, but you can certainly add bell peppers if you tolerate them.

    Beef: This is a beef stir-fry, but you can also use thinly cut slices of chicken breast if you prefer a chicken stir-fry!

    Coconut aminos: Coconut aminos are a gluten free and soy free alternative to soy sauce, but if you tolerate either of those you can feel free to use tamari or soy sauce. Coconut aminos are a little sweeter though, so I suggest adding a tablespoon of coconut or brown sugar to the mix.

    Leftovers and Storage

    I love making this at the beginning of the week and then having leftovers for lunches/dinners. This AIP beef stir fry is a great meal prep option! Just keep leftovers stored in the fridge for up to 3 days. Reheat on low in the oven at about 300F for 30-40 minutes. I like to add a little extra coconut aminos to keep the meat and veggies moist.

    More Paleo Dinner Recipes

    Curried Chicken and Veggie Stir Fry

    Healthy Paleo Popcorn Chicken

    Tomato Free Paleo Stuffed Peppers

    nightshade free paleo beef stir fry
    Print

    Paleo Beef & Veggie Stir-Fry

    This delicious paleo beef stir fry is packed with nutrients and flavor! You can't go wrong with this easy weeknight meal that can be made completely AIP friendly. Add this to your list of healthy and nutrient dinner options that are gluten free and allergy friendly!
    Course Main Course
    Cuisine American, Chinese
    Keyword AIP, autoimmune paleo, beef, dairy free, gluten free, nut free, paleo, vegetables
    Prep Time 20 minutes minutes
    Cook Time 30 minutes minutes
    Total Time 1 hour hour
    Servings 4 servings
    Author Victoria Faling

    Ingredients

    • 2 tablespoon toasted sesame oil, divided use olive or avocado oil for AIP
    • 1 lbs stir-fry beef sliced stew meat, sirloin, or flank steak works
    • 1 head of broccoli chopped
    • 3 cups green beans trimmed and cut in half
    • 1 8 ounce can of water chestnuts
    • 1 cup sliced baby bella mushrooms
    • White sesame seeds optional- omit if AIP

    Sauce

    • ⅓ cup coconut aminos
    • 1 tablespoon heaping fresh grated ginger root
    • 1 teaspoon apple cider vinegar
    • salt to taste

    Instructions

    • Make sure your veggies are chopped and prepared before starting.
    • Heat 1 tablespoon of oil in a large pan over medium heat. Add the beef strips and brown on both sides, about 3 minutes each. Remove from the pan and set aside.
    • Add the other tablespoon of oil and add the broccoli and green beans. Let cook for 5-7 min, until they become more colorful and slightly softer.
    • While the broccoli and green beans are cooking, mix the coconut aminos, ginger, and apple cider vinegar together.
    • Add the aminos mixture to the pan then add in the water chestnuts. Stir to combine and cook for 5 min. Next, add the mushrooms and cook for another 3 minutes, stirring occasionally.
    • Add the beef back in and mix well. Cook for about another 10 minutes, mixing occasionally, until beef is done.
    • Let rest for 5 minutes before serving. Serve and sprinkle with sesame seeds if desired.

    IMG_0589

    Lyme Treatment and Supplement Update June 2017

    June 16, 2017 by Victoria Faling 3 Comments

    I know I haven't written a real blog post in a while. I've been much more active on Instagram and YouTube lately. I have a recipe coming soon for the blog, though, so don't worry (too much)!

    I posted a video earlier this week on my YouTube channel with a full treatment and supplement update for June 2017. Watch below if you are interested in what sorts of treatments I'm doing as of late.


    Lyme Disease Awareness Month

    May 1, 2017 by Victoria Faling Leave a Comment

    Today is the first day of May which means it's the first day of Lyme Disease Awareness Month! I spent April working on a video project for this month. I wanted to flip the script on chronic illness and share some positives people had gotten out of being ill. I truly believe everything happens for a reason and that we even get sick for a reason, so I wanted to find out what others had gotten out of their healing experience so far. I was super inspired and motivated by everyones contributions and I hope you will be too!


    Toxin-Free Mattress Review: Tuft & Needle

    April 28, 2017 by Victoria Faling 2 Comments

    Last fall I was in need of a new mattress. A new non-toxic one. But it also needed to be affordable because well, Lyme costs a lot of money! So I needed an affordable, new, non-toxic mattress. I did a lot of research and there are some great non-toxic and organic mattresses out there... but at a much heftier cost. So, I ended up getting one from Tuft & Needle.

    IMG_7222

    They've designed their own adaptive foam aimed at being breathable and heat wicking. The mattresses are made in the USA and certified by 3rd party CertiPUR-US (you can review the details of that certification online).

    I'm going to provide a review of this mattress based on 6 things: cost, customer service, toxicity, comfort, support of mattress, overall rating. I'll be rating each category out of 5 (1 being the worst, 5 being the best).

    Cost: ⅘

    Let's get right down to it. I got a full size mattress and it cost about $500. Yes, you read that right. What a great deal for a mattress in general let alone a non-toxic, American made one! Of course, things could always be cheaper so it's hard for me to give something a 5 but you get my point ;). You can review all the pricing on their website but the most expensive mattress is the California King for $750 (again, you read that right).

    Customer Service: 5/5

    Tuft & Needle's customer service is ON POINT. When you go to their website there is a chat option right there to get answers from A REAL PERSON (no robot!) almost immediately. I used that when I was first reviewing mattresses. The person provided links to their certifications and other pages on their website that would be helpful for answering my questions and they were very friendly.

    Once you decide to order and put your order in, someone from their team emails you with details of your order and to find out if you have any questions. They stay in touch for a bit to make sure you like your new mattress and remind you how long you have until your 100-day sleep trial is up (more info below). AND if you have ANY issues you can email them and they reply quickly and thoroughly. They work very hard to make sure you're happy with your purchase.

    The delivery was quick (arrives in 2-5 days). The mattress comes in a box that you open, unroll the mattress, and it expands (it was air sealed). They have a 100 night sleep trial, so if you don't like it you can get your money back within those first 100 nights (if you order from them directly, it's only 30 days through Amazon). They also have a 10-year warranty.

    I had an issue towards the end of my trial period, they helped me immediately and extended my trial period because of the situation. That is how accommodating they are. So props for customer service T&N!

    The only thing to note is that the mattress is ordered online. They have a couple stores where you can test the mattress out but otherwise you are sort of ordering blind. That's why I'm providing this review and why they have a 100-day trial period.

    Toxicity: ⅘

    I'm not going to go into major detail on this because you can review all the details online but they are CertiPUR-US certified, which is a 3rd party green certification. They've designed and use their own foam that isn't filled or lined with your typical fire-retardant chemicals and other chemicals in normal mattresses.

    I opened the mattress in a separate room and let it air out for a few days for any potential off-gassing. The off-gassing is minimal since the mattress is non-toxic but it is a NEW product so I wanted to be safe since I'm highly sensitive. After off-gassing for a few days, I slept on it fine with no negative effects from off-gassing.

    Comfort: ⅗

    I'm the type of person who likes a nice fluffy pillow to sleep on. I prefer softer, fluffier mattresses and I've always hated memory foam. BUT I decided to give this one a try since all the non-toxic mattresses seemed to be foam (or cost a bazillion dollars). This mattress does feel memory foam-esque TO ME, although not quite as conforming and stiff. Although many reviewers say otherwise, remember this is my personal opinion and review.

    I expressed my concern to T&N and they immediately shipped me one of their toppers FREE of charge (hello customer service!!!). Their topper is made of their foam to add an extra layer between you and the base layer of the mattress, which is harder. I found the topper SUPER comfortable but for some reason seemed to react to it on a chemical level. I'm not sure why as I off-gassed it and it's made of the same material as the mattress, but that's the case. So, unfortunately, I had to remove the topper.

    Although T&N claims their mattress is heat wicking, I find otherwise. The mattress feels quite hot to me and I usually have to sleep with my fan on to keep myself cool.

    I have to say, it's not the most comfortable mattress I've ever been on but it's certainly not the worst. I'm quite picky so that plays into things. I wish it was softer/fluffier and slept cold but I'm happy with the low-toxicity and safety of the mattress.

    Support: ⅗

    I know lots of people are super concerned about the support a mattress offers as to keep pressure points, bed sores, and pain at bay. I guess since I'm 26, I'm not super concerned with that. So take this part of the review with a grain of salt (and research other reviews if this is an important issue for you). Since the mattress feels harder for me then I would like, I don't feel like my body sinks into it as much as I want and therefore doesn't feel as supportive. I know that may seem weird to some, because if you sink you aren't getting support, but what I'm saying is if you lay on a hard floor, you aren't getting any support! Not to say this mattress is like a board, far from it, I was just trying to make my point ;). Hopefully I did and that makes sense (feel free to leave a comment if you need me to clarify).

    It just doesn't feel quite as supportive on my hips and back as I would want and I occasionally wake up with a sore lower back (which could be a result of Lyme and not the mattress).

    Overall Review: 3-3.5/5

    I'm sure there are some better mattresses out there that are organic, non-toxic, and beyond comfortable but they also cost wayyyy more. So overall, for the quality of this mattress and the price, I'd say it's a pretty darn good deal!

    It took me a few months to really get comfortable with the mattress, and T&N will tell you that. You have to wear it in a little (for most it's only about 30 days) and let it adjust to your body since it is foam. But if you are looking for something non-toxic and affordable, T&N is a good option.

    I reviewed other non-toxic mattresses around the same price-point and although those looked good, too, T&N seemed more well known, with more reviews, and I ultimately just had to make a decision.

    I hope this review was helpful for you if you are in the market for a new, non-toxic mattress. Let me know if you have any questions below and I'll be happy to answer what I can!

    • « Previous Page
    • 1
    • …
    • 3
    • 4
    • 5
    • 6
    • Next Page »

    I’m Victoria!

    I create delicious and healthier recipes to aid in your healing journey. I believe you can eat and enjoy amazing food that still supports your health. All of my recipes are allergy friendly, so everyone can eat here!

    More about me

    Social Links

    • Facebook
    • Instagram
    • YouTube
    • Pinterest
    • TikTok

    Popular Posts

    • gluten free blueberry streusel bread
      Gluten Free Blueberry Streusel Bread (Dairy Free, Refined Sugar Free)
    • gluten free raspberry cream cheese muffins
      Gluten Free Raspberry Cream Cheese Muffins (Dairy free)
    • ninja creami mango sorbet
      2-Ingredient Ninja Creami Mango Sorbet (with Coconut Water)
    • gluten free cinnamon chocolate chip bread
      Gluten Free Cinnamon Chocolate Chip Bread (Dairy Free)

    Footer

    Find out what's cooking right in your inbox!

    ↑ back to top

    About

    • Privacy Policy
    • Terms & Conditions
    • Contact

    Newsletter

    • Sign Up! for emails and updates
    • Facebook
    • Instagram
    • YouTube
    • Pinterest
    • TikTok

    Contact

    • About
    • Shop
    • Lyme Diseas

    Copyright © 2025 lemonsnlyme