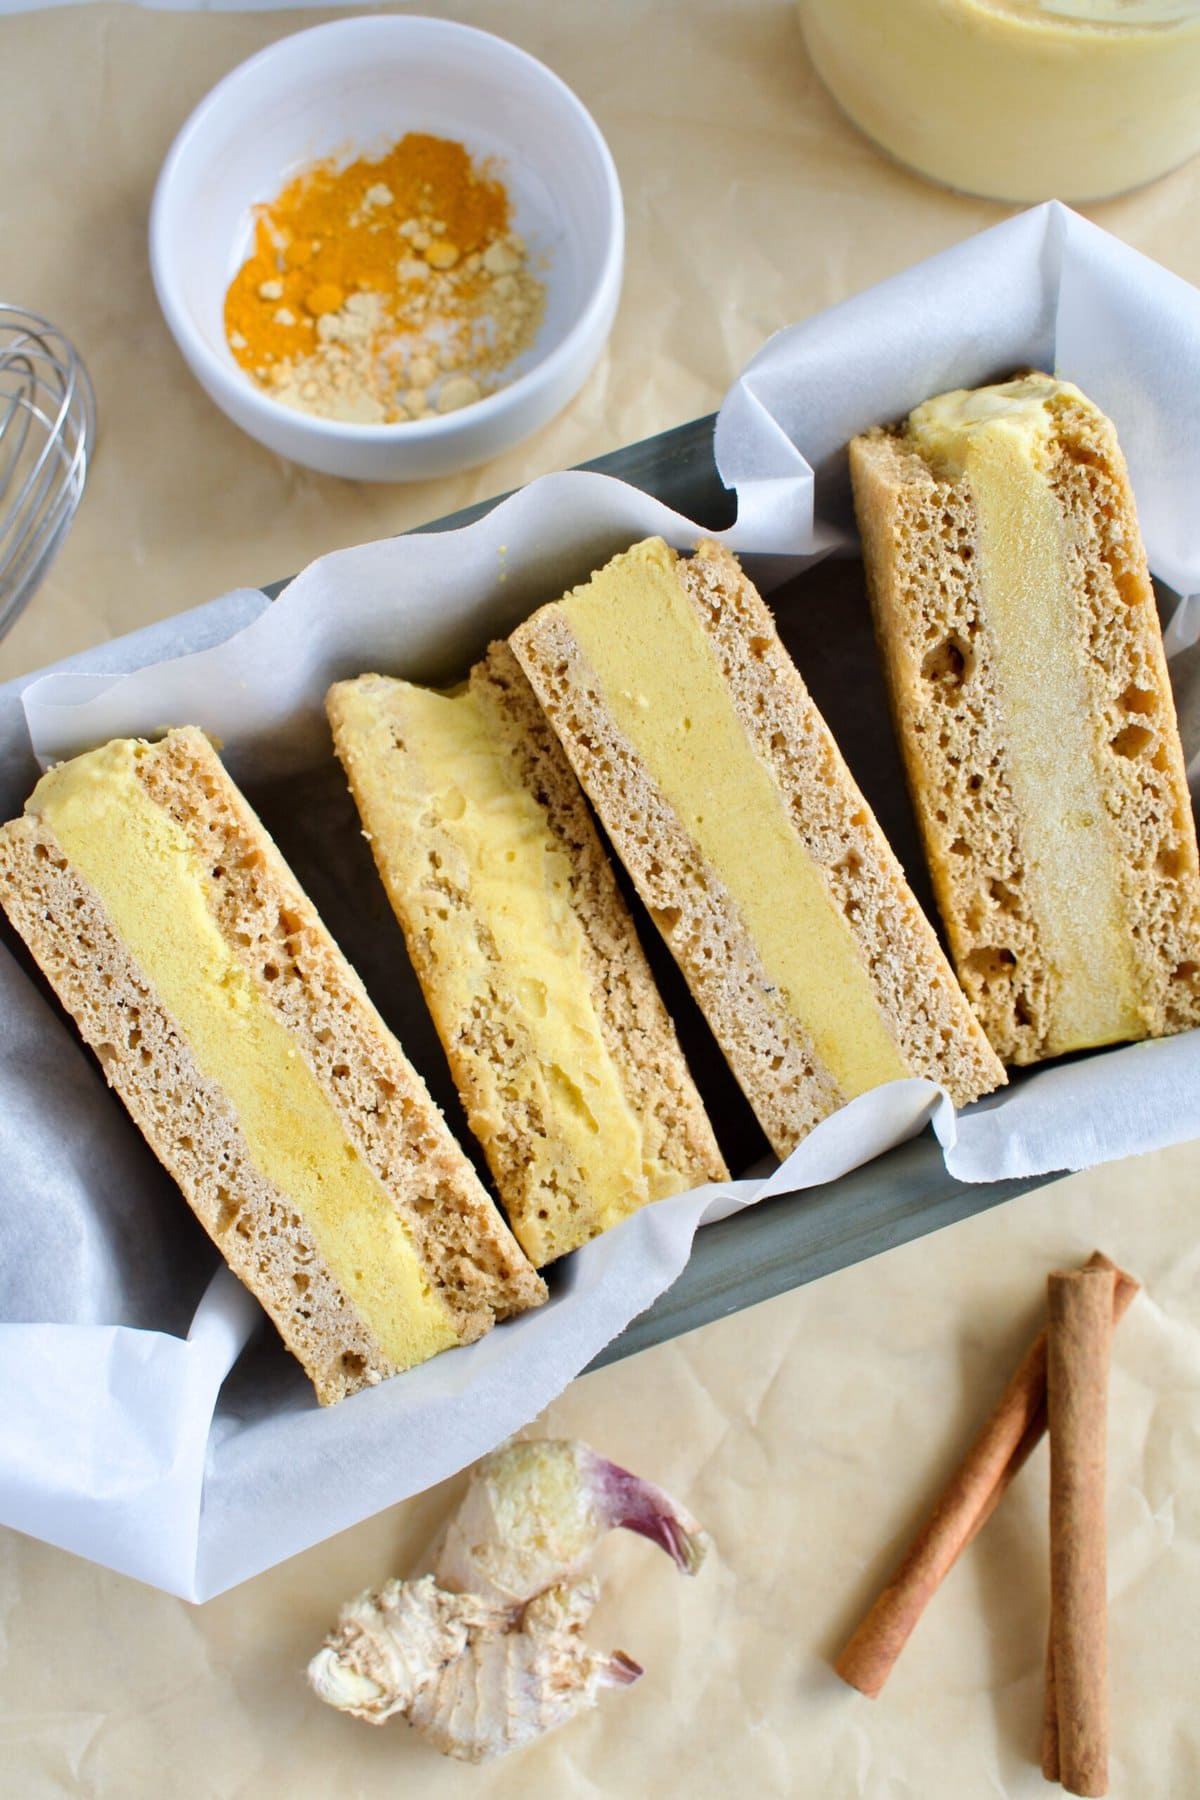
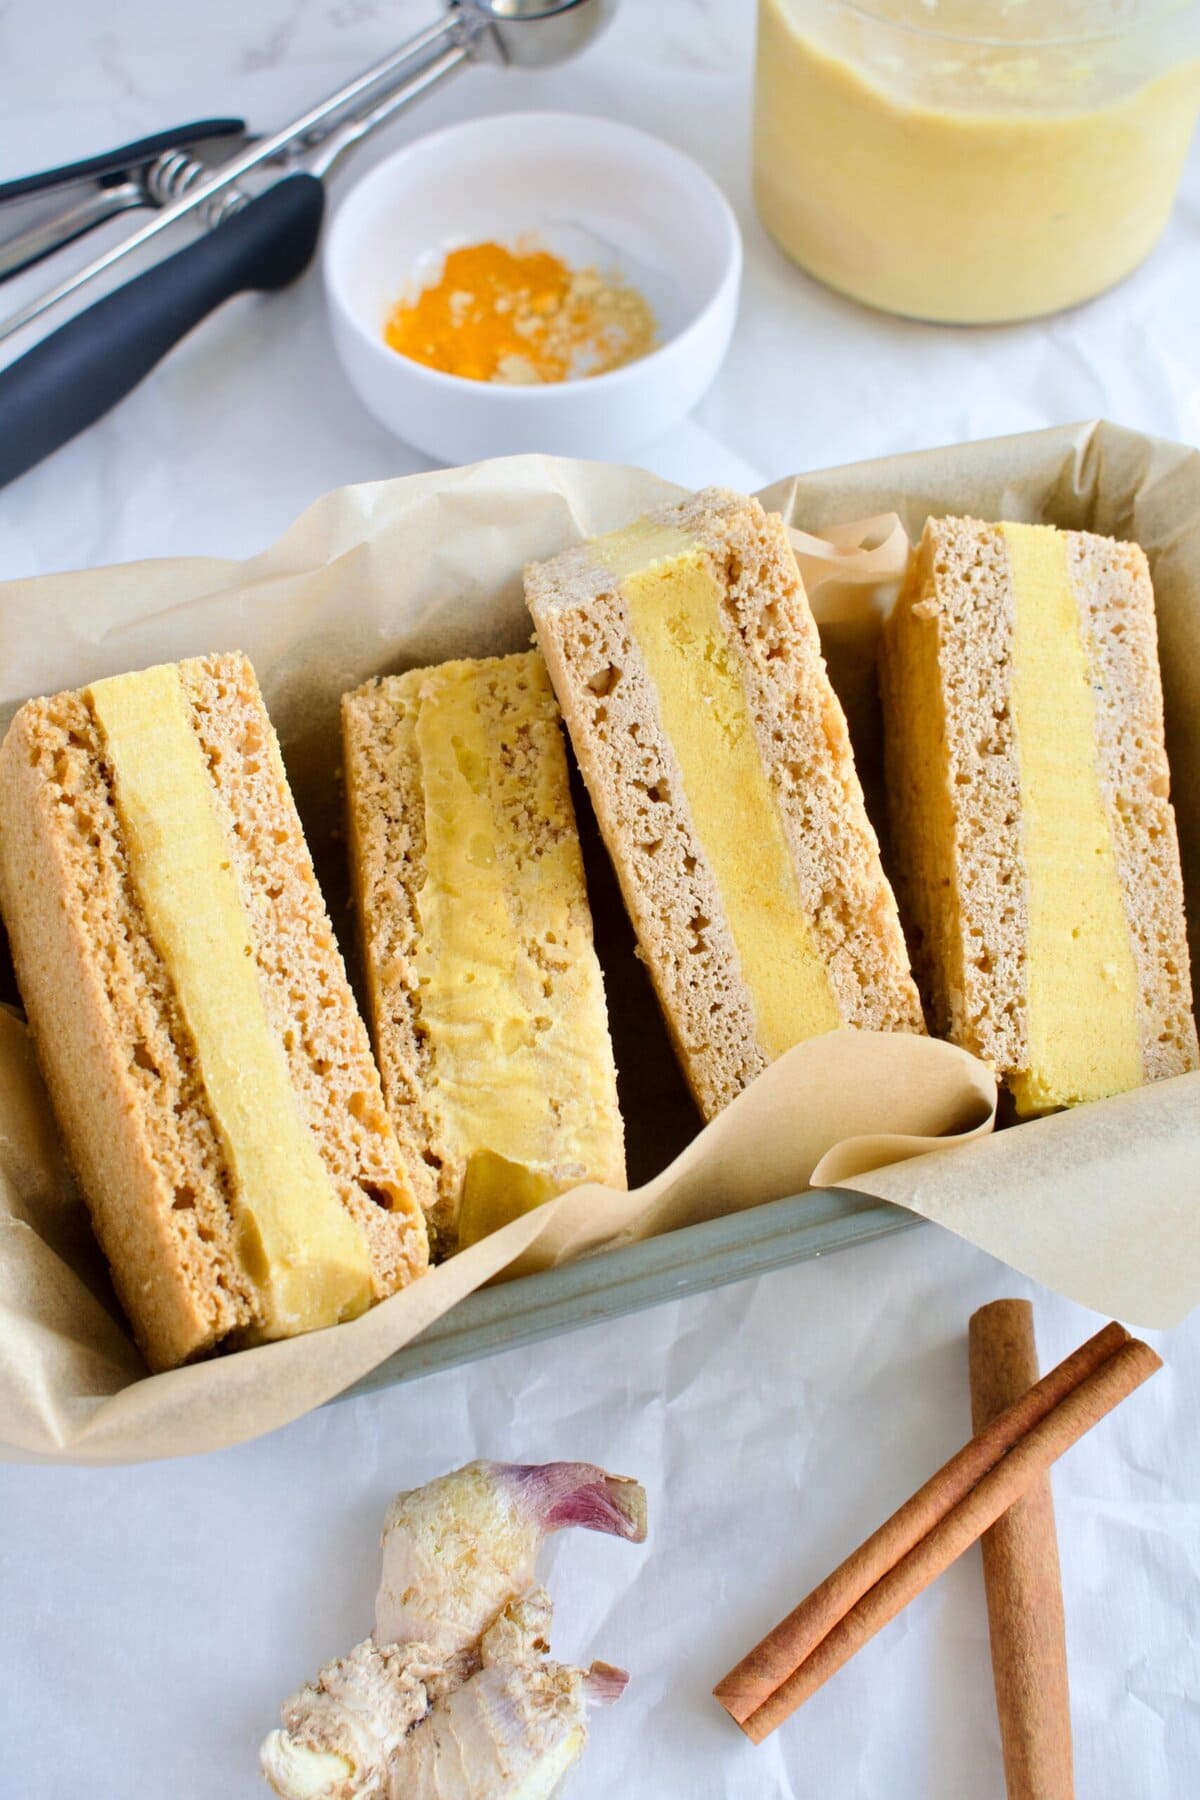
If you are a fan of a golden milk latte, then you are going to love these Golden Milk Ice Cream Sandwiches. Dairy free creamy golden milk ice cream, soft gluten free cookies, plenty of delicious spice... it sounds unusual until you take the first bite. And then it makes complete sense!
These Golden Milk Ice Cream Sandwiches are the most unexpectedly delicious thing I've made all summer and I say that as someone who makes a lot of ice cream sandwiches. My best friend texted me a photo of a golden milk ice cream sandwich she found at a health food store in California (how very California) and I knew immediately I had to make my own version.
Last summer, I started a homemade ice cream sandwich series where I made lots of different flavor gluten free and dairy free ice cream sandwiches (they are all linked at the bottom of this post). I'm continuing to add to that series every year and this is one of my favorite gluten free dairy free ice cream sandwiches of 2025.
What do Golden Milk Ice Cream Sandwiches Taste like?
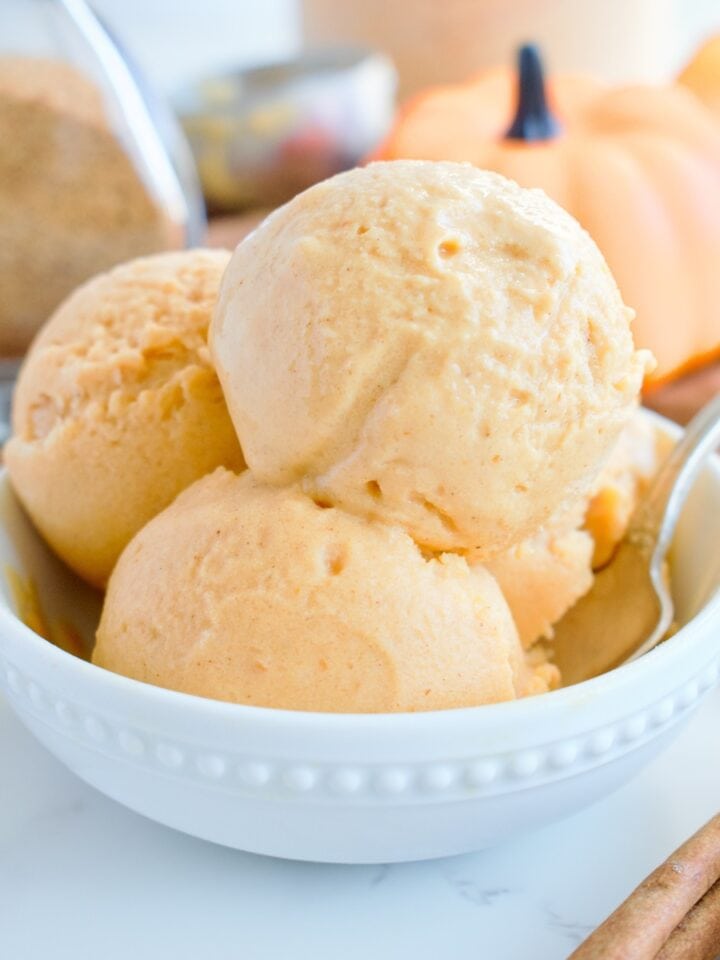
Golden milk, turmeric milk, or Haldi Doodh in Hindi, is an Ayurvedic drink of milk infused with the turmeric. You can read more about the history and cultural relevance of golden milk here.
It's common to make it with coconut milk, so I knew it would taste delicious in ice cream form. Golden milk tastes warm, fragrant, and subtly spiced. The turmeric is not strong and you get a good balance of sweet and spice from the cinnamon and ginger. These gluten free ice cream sandwiches taste completely different from any other ice cream sandwich you've had.
Why You'll Love These Golden Milk Ice Cream Sandwiches
- Golden milk meets ice cream sandwich: turmeric, cinnamon, and ginger in ice cream form between two soft cookies. Unexpected, but genuinely delicious.
- Allergy friendly: these homemade ice cream sandwiches are gluten free, dairy free, and refined sugar free.
- Anti-inflammatory dessert: golden milk spices are powerfully anti-inflammatory, supporting heart health, blood sugar regulation, and gut health. Cinnamon, ginger, and turmeric are absolute powerhouses for your health. Talk about a healthy ice cream sandwich!
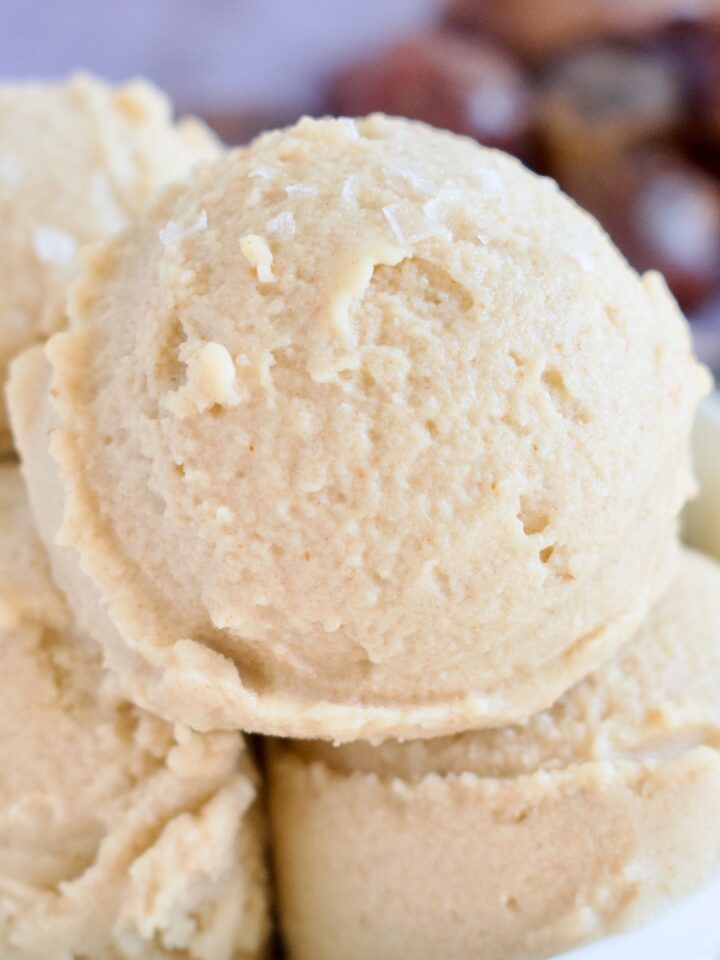
- Easy to make: we start with my golden milk ice cream that's easy to make in the Ninja Creami or traditional ice cream maker and the easiest cookies for the base. Make the components separately and assemble when ready. These ice cream sandwiches are perfect for a summer gathering.
Golden Milk Ice Cream Sandwich Ingredients
- Coconut milk: the base of the golden milk ice cream is made from creamy coconut milk, for a rich and delicious flavor. You'll end up with a pint of ice cream which is the perfect amount for this recipe.
- Coconut sugar: the unrefined sweetener used in both the cookie base and ice cream.
- Turmeric, ginger, cinnamon: I used dried herbs and did not test fresh ginger or turmeric. We do skip the traditional black pepper since it strongly affects the ice cream flavor.
- Pea protein: this is optional but adds a protein boost without even tasting it. I use the Sprout Living Pea Protein as it's only 1-ingredient with no additives. You can use my code LEMONSNLYME20 for 20% off your order.
- Gluten free flour: be sure to use a 1:1 gluten free all purpose flour blend with xanthan gum for best results.
- Tapioca starch: using a little bit of starch helps keep the cookies soft.
- Coconut oil: you can also use (dairy free) butter.
- Applesauce: we swap half the fat for applesauce for a healthier, lower fat treat.
- Eggs: you'll need one egg and one yolk for the cookie base.
- Vanilla extract, baking soda, baking powder, sea salt
How to Make Golden Milk Gluten Free Dairy Free Ice Cream Sandwiches
- First, make the ice cream using a Ninja Creami (see FAQ below for alternative options if you don't have one). You'll need to make this ahead of time so it has time to freeze
- Whisk or blend all of ice cream ingredients together.
- Pour the ice cream base into a Ninja Creami pint container and freeze for 12-24 hours.
- While ice cream mixture freezes, make your cookie base. Line a baking sheet with parchment paper and set aside.
- Whisk together the dry ingredients in a medium bowl.
- With a hand mixer, beat together the sugar and coconut oil in a large bowl then add the applesauce, eggs, and vanilla extract. Beat to combine.
- Fold in the dry ingredients then spread the cookie dough evenly over the sheet pan.
- Bake for 10 minutes at 350F until outer edges are golden brown, then let cookies cool to room temperature before assembling.
- Once cookies are cooled, spin the ice cream on the lite ice cream setting. Re-spin as needed.
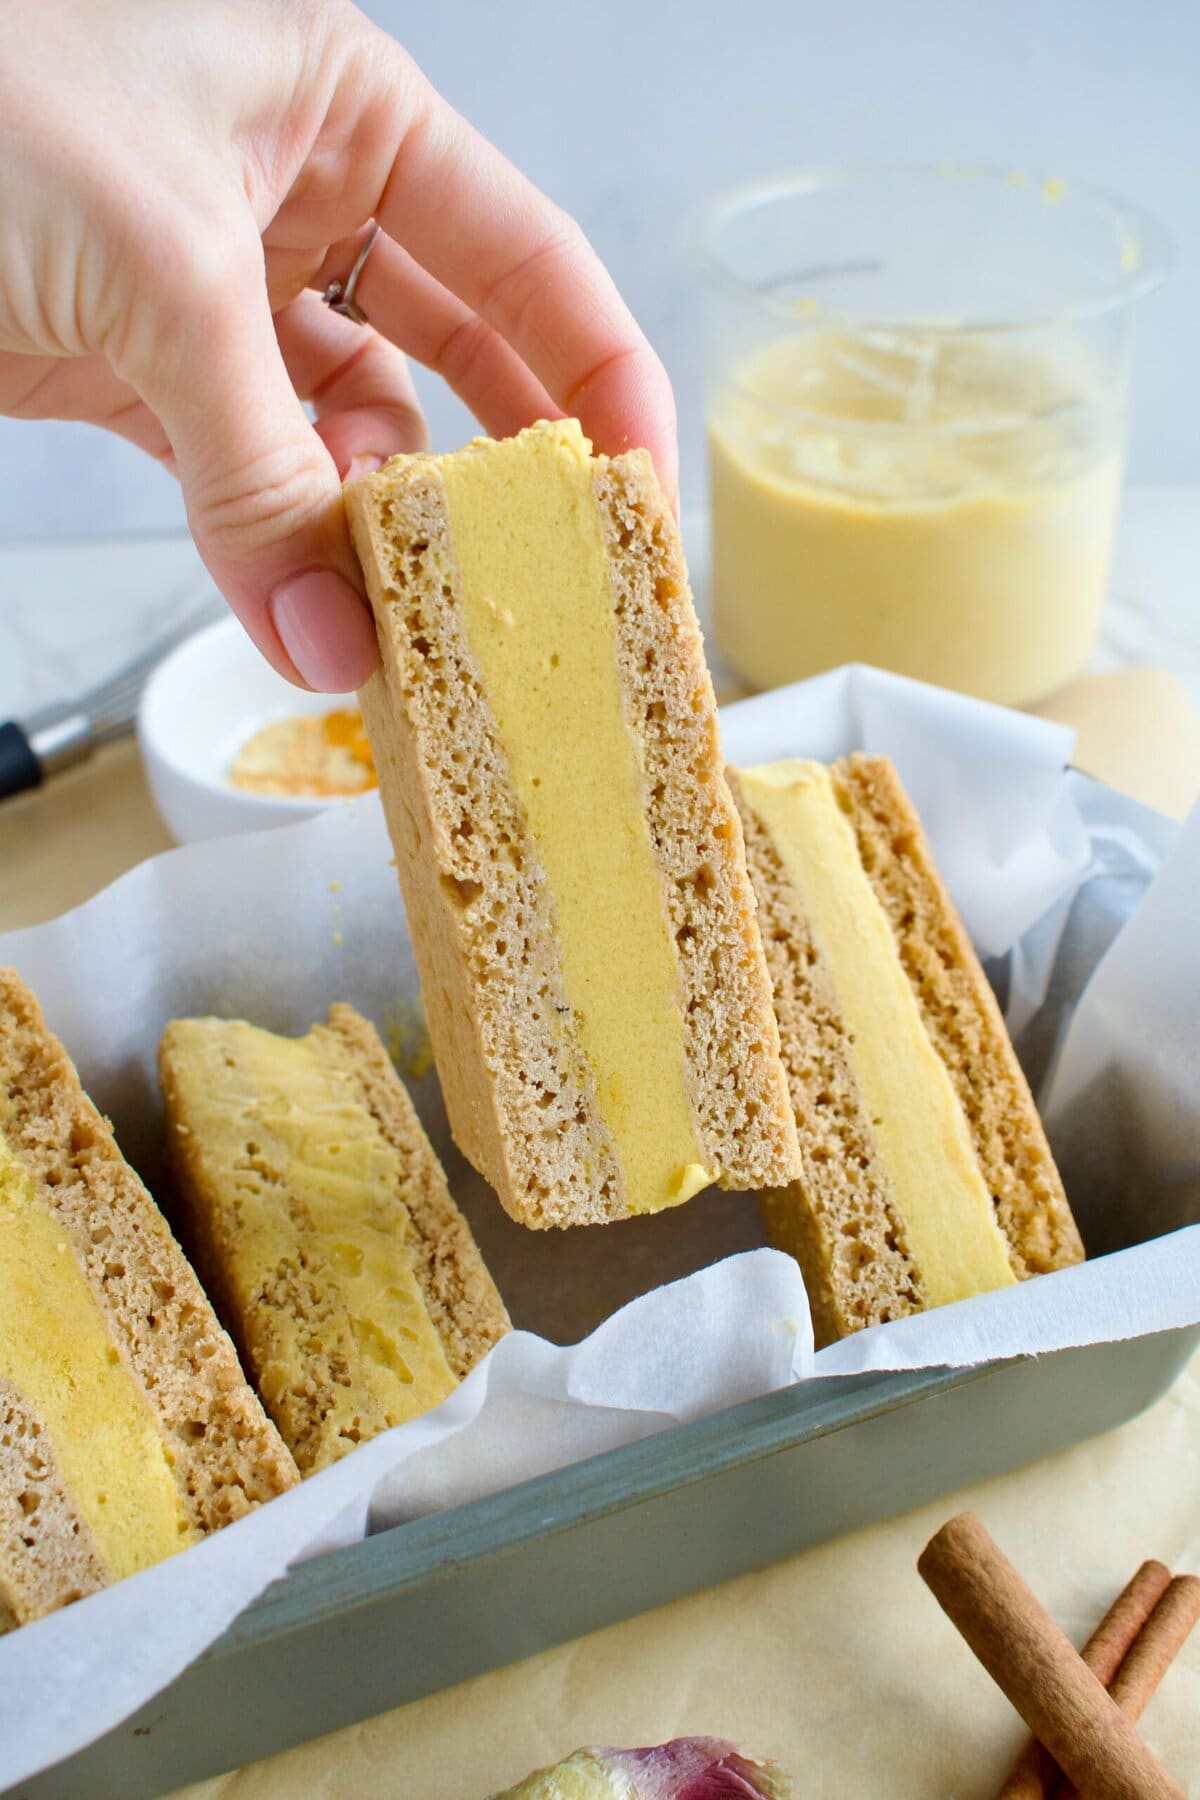
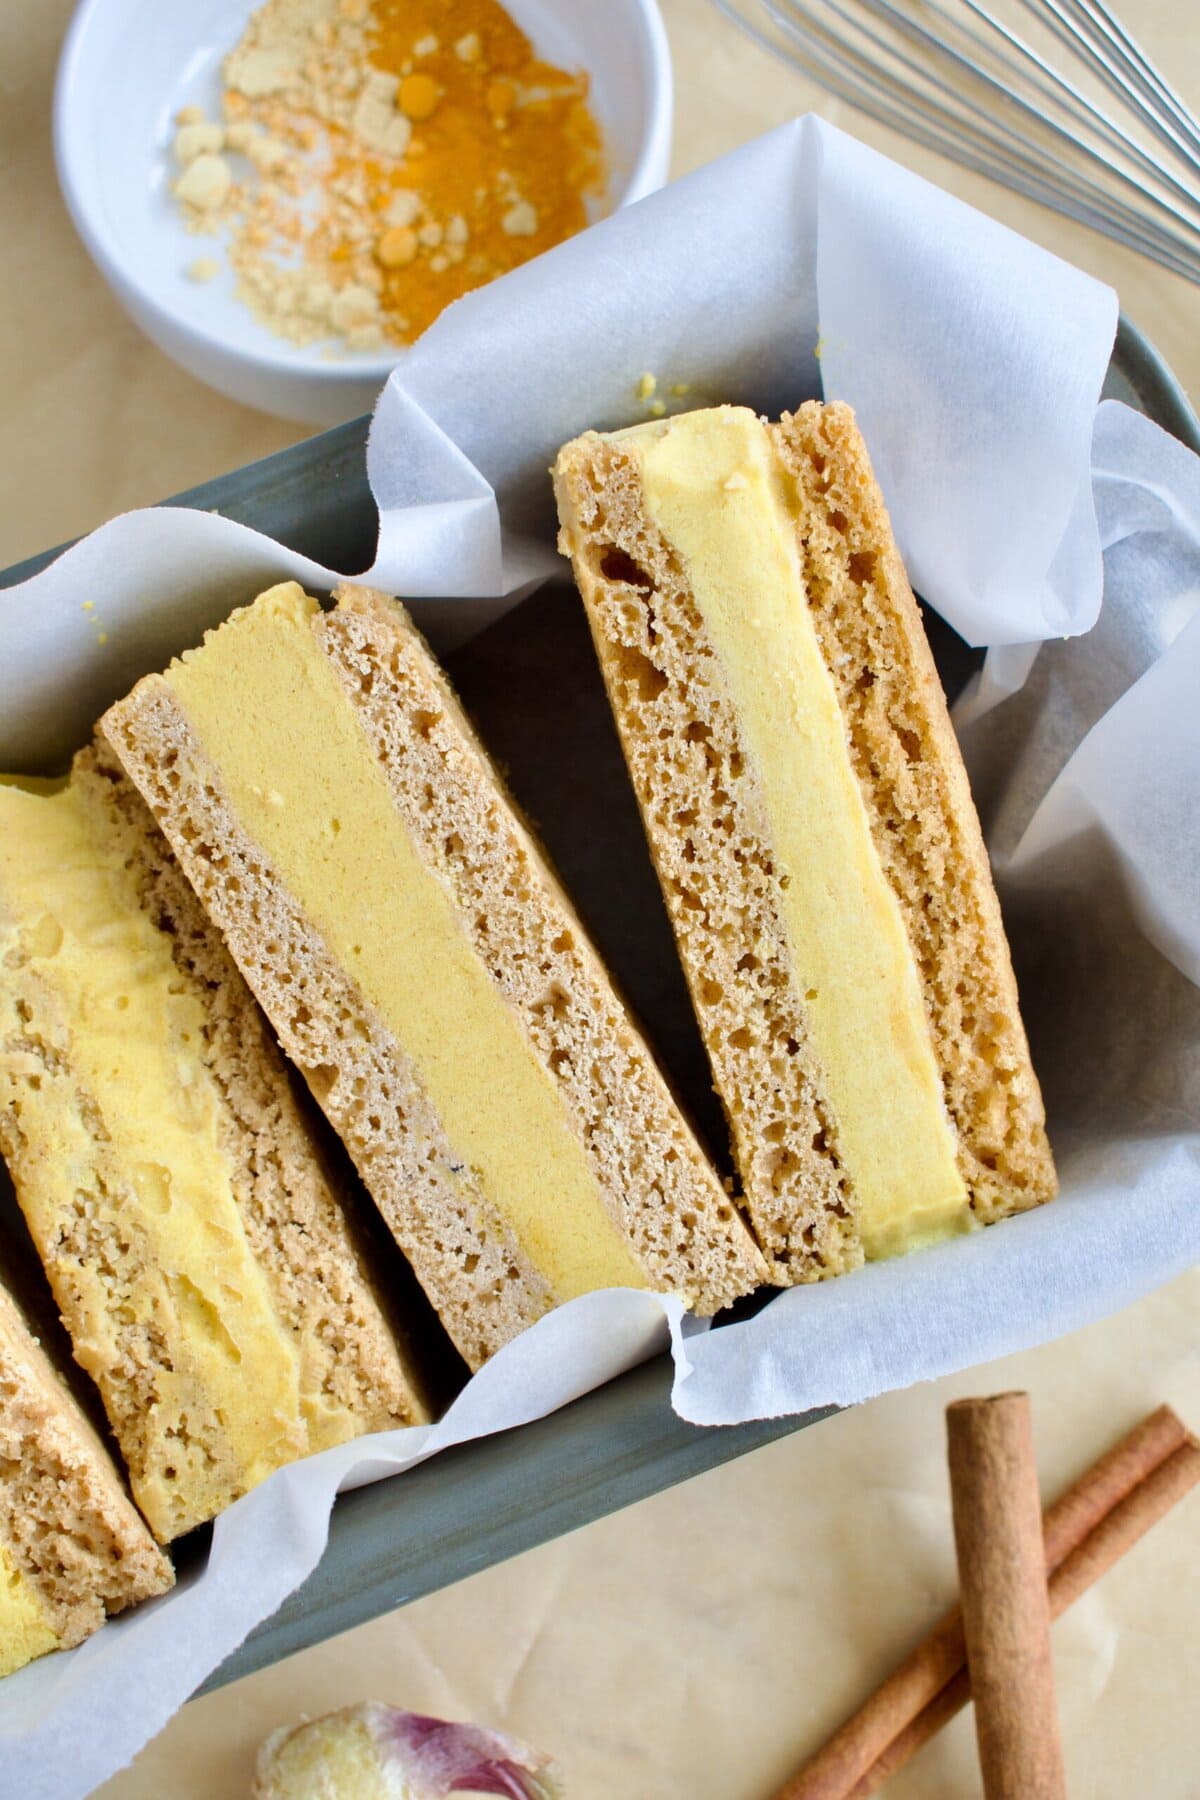
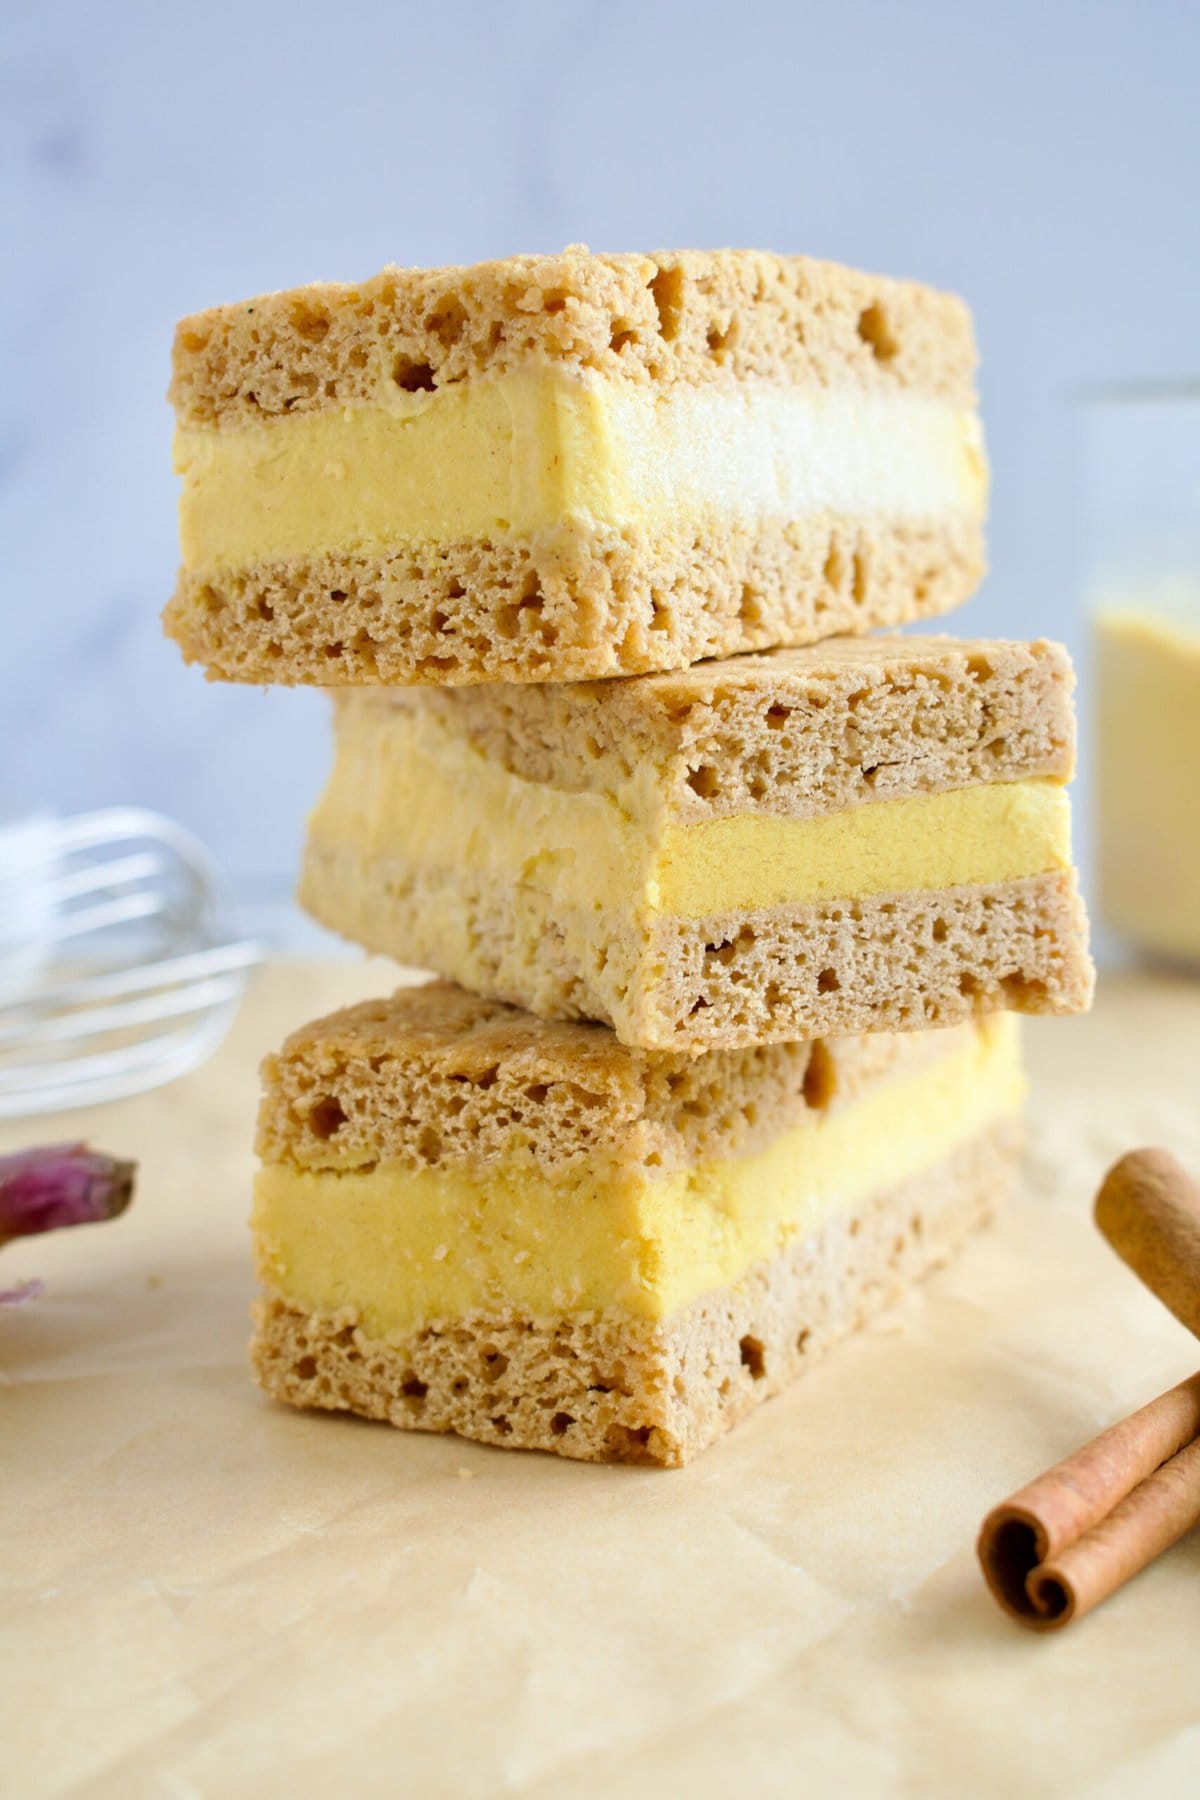
- Cut the cookie base in half and spread ice cream in an even layer over one half. Gently add the other half on top of the ice cream. Even out the edges of the ice cream layer as desired. Tightly wrap in plastic wrap and place the whole thing in the freezer until solid.
- Cut ice cream sandwiches into individual bars and enjoy!


Substitutions and Variations
- Ice cream: try maple syrup instead of the coconut sugar. Use a dry golden milk mix to substitute for the spices.
- Coconut oil: butter or dairy-free butter will work in place of the coconut oil for the cookie base.
- Applesauce: the applesauce keeps the cookies light, but if you're out, you can use extra coconut oil or (dairy free) butter.
Tips for the Best Golden Milk Ice Cream Sandwiches
- Don't over bake cookies. The cookie base dries out easily so even if they don't seem quite done at 10 minutes, take them out.
- Don't overspin the ice cream. You don't want it to be crumbly, but don't add extra liquid if you need to re-spin. This will make it too soft and melty to work with. Of course, if that happens, just pop it back in the freezer for a bit before assembly.
- Get prepped before assembly! Make sure you have a cutting board or plate that will fit in your freezer and space in your freezer with a flat surface. Lay plastic wrap over the surface and assemble your ice cream sandwiches directly on there so you can work quickly and get them back in the freezer before the ice cream melts.
- Cool cookies before assembling. A warm cookie will melt the ice cream immediately and you'll have a golden puddle instead of a sandwich.
- Use a hot knife for clean cuts. Run your knife under hot water, wipe dry, and slice in one smooth motion. Repeat between cuts for clean, photogenic edges.
How To Serve and Store These Gluten-Free Ice Cream Sandwiches
Serve: I like to let my ice cream sandwiches sit for a couple of minutes at room temperature to soften the ice cream, but that is a personal preference. Just don't let them sit out too long or they'll melt!
Store: Once you have sliced the ice cream sandwiches, wrap each individually in plastic wrap, parchment paper, or wax paper. You can then place all of the ice cream bars into a large ziplock bag or freezer safe airtight container and store in the freezer until ready to eat. They freeze well for up to 2 months.

FAQ
Yes! Both the cookie base and the golden milk ice cream are completely gluten free and dairy free as written.
Although the ice cream is vegan, I have not tested a vegan version of the cookie base.
That's okay! Double the ice cream recipe and use a traditional ice cream maker. You'll only need half of the turmeric ice cream for this recipe, but then you'll have leftovers to eat later!
I have never seen golden milk ice cream in stores. Of course, if you find it, you can use that instead! Another option is to buy some creamy vanilla ice cream, soften it up and then stir in the spices (or blend it all together) and re-freeze. But if you can, I suggest making your own ice cream as that is best and healthiest.
Up to 2 months when individually wrapped. Pull them out 5-10 minutes before eating to soften slightly.
More Gluten Free Dairy Free Ice Cream Sandwiches
Banana Pudding Ice Cream Sandwiches
Strawberry Shortcake Ice Cream Sandwiches
Blackberry Swirl Ice Cream Sandwiches
If you try this recipe, leave a rating and review or tag me on social media. Comment your favorite ice cream flavor below to inspire more gluten-free ice cream sandwich recipe ideas!

Golden Milk Ice Cream Sandwiches (Gluten Free and Dairy Free)
Ingredients
Cookie base
- 1 cup gluten free flour
- 2 tablespoon tapioca starch
- ½ teaspoon baking powder
- ¼ tsp salt
- ½ cup coconut sugar
- ¼ cup coconut oil
- ¼ cup applesauce room temperature
- 1 egg room temperature
- 1 egg yolk room temperature
- 1 teaspoon vanilla extract
Instructions
- Make the ice cream base the night before so it has time to freeze.
Cookie Base
- Preheat oven to 350F. Line a 9x13 or 10x15 baking tray with parchment paper.
- Whisk together all the dry ingredients in a medium bowl.
- Cream together the coconut oil and sugar. Add the remaining wet ingredients and beat until combined.
- Fold in the dry ingredients. Don't over mix.
- Spread the cookie base on the lined tray.
- Bake for 10 minutes. Let cool completely before assembling.
Assembly
- Spin the golden milk ice cream in the Ninja Creami. If crumbly, re-spin once (without adding liquid) until it holds together but isn't too soft. If it gets too soft and melty, freeze until set but scoopable.
- Take a cutting board (that will fit in your freezer) and place 2 long pieces of plastic wrap in a cross over the cutting board.
- Cut the cookie base in half and gently transfer one half to the center of the cutting board.
- Scoop the ice cream onto the cookie base and spread evenly. Gently transfer the other half of the cookie base on top. Wrap the giant sandwich tightly with plastic wrap and place in the fridge for 4-6 hours, preferably overnight.
- Once frozen, slice into 6 sandwiches (or smaller squares). Serve immediately or wrap individually and keep frozen until ready to eat.

Leave a Reply