
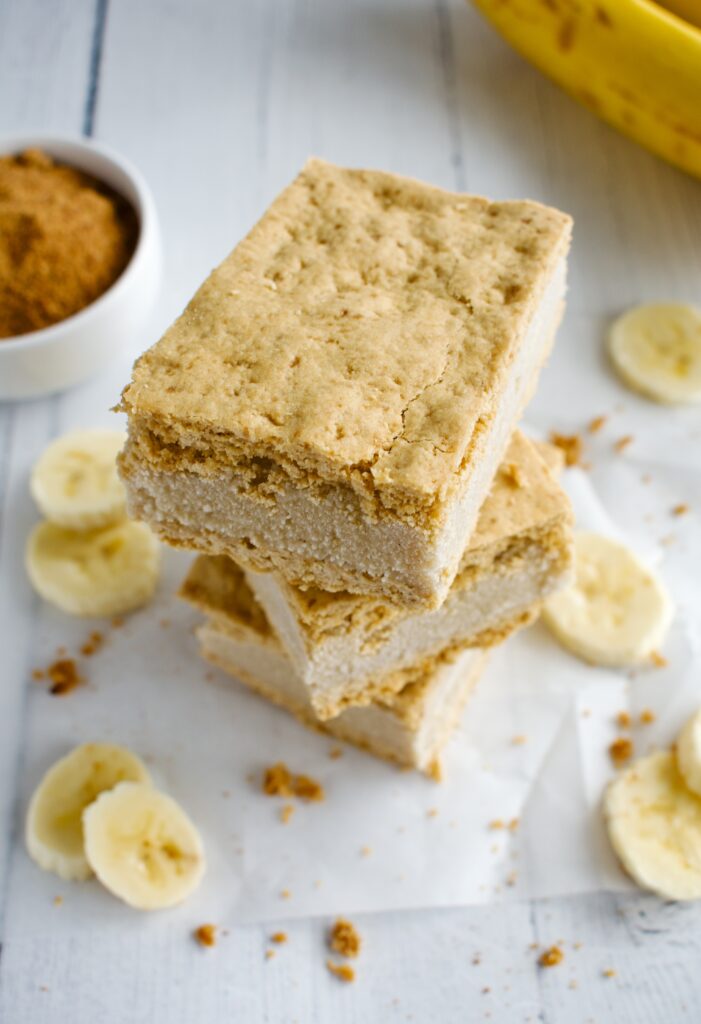
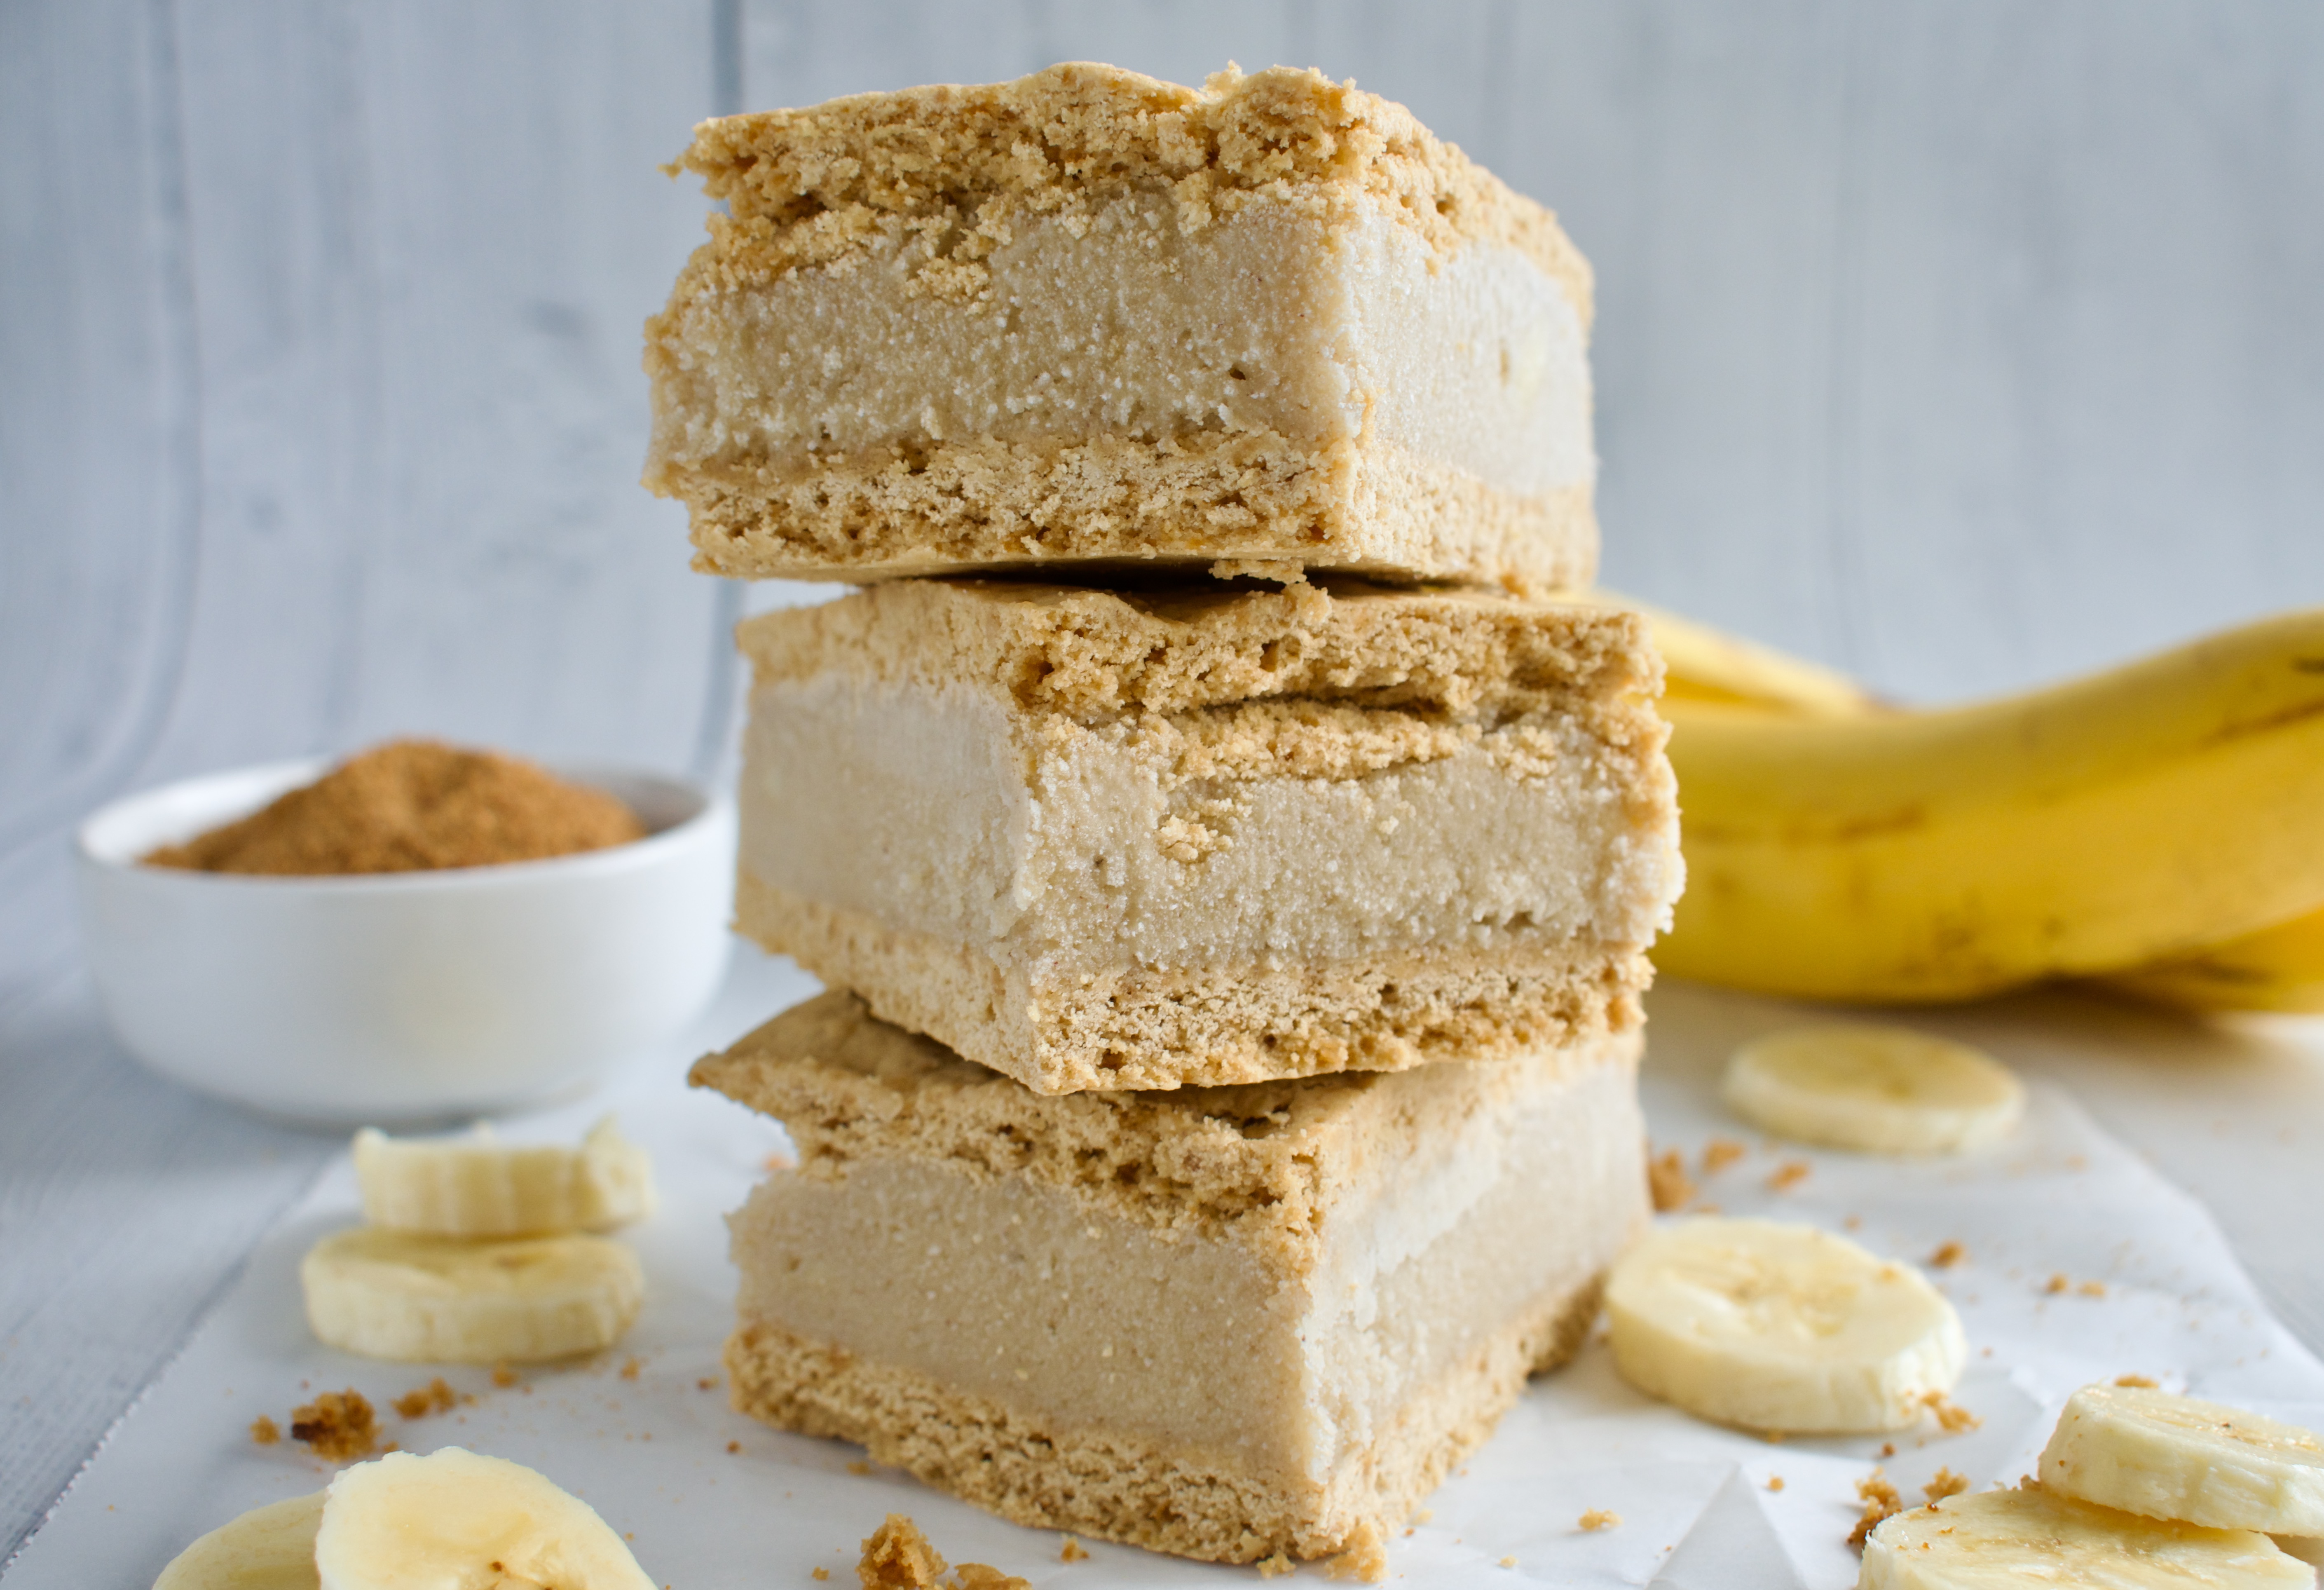
Dairy free banana pudding ice cream is sandwiched between gluten free brown sugar cookies for the ultimate banana lover Banana Pudding Ice Cream Sandwich.

Welcome to part 2 of my summer ice cream series! If you missed part 1, be sure to check out my recipe for gluten free and dairy free Classic Ice Cream Sandwiches. I’m teaching you how to make healthier and allergy friendly ice cream sandwiches this summer and you don’t want to miss out! I have a lot more delicious and unique recipes coming, so make sure you are subscribed to my newsletter or following me on Instagram, TikTok, and/or Pinterest so that you don’t miss a flavor. I can’t wait for you to make some of these healthy ice cream sandwiches. Make sure to share a photo on social media and tag me if you do make these!
These Banana Pudding Ice Cream Sandwiches are for my banana lovers. I’ll be honest, they have a strong banana flavor, so if that’s not for you, make these for someone who is a banana fan. I highly suggest reading the recipe notes below before diving into the recipe, as I share a lot of helpful information about how to adjust these sandwiches to your liking.
Banana Pudding Ice Cream Sandwich Recipe
Ingredients:
Banana Pudding Ice Cream
- 2 cans full fat coconut milk
- 3 bananas
- 1/2 cup maple syrup or sugar of choice
- 1/4 tsp cinnamon
- 1/4 cup tapioca starch OR 4 egg yolks
- 1 tsp vanilla extract
- 1/4 tsp salt
Sugar Cookie Base
- 1/2 cup butter melted
- 1/2 cup coconut sugar or brown sugar
- 1 tsp molasses (leave out if using brown sugar)
- 1 egg
- 1 egg yolk
- 2 tsp vanilla extract
- 1 1/4 cup 1:1 gluten free flour
- 2 Tbsp tapioca starch or arrowroot
- 3/4 tsp baking powder
- 1/4 tsp salt
Instructions:
Ice Cream
- Blend the coconut milk, 2 bananas, cinnamon, and maple syrup in a blender until smooth.
- Add the ice cream base to a sauce pan and heat over low heat until warm to the touch.
- Take 1/2 cup of the base and whisk it with the egg yolks or the tapioca starch. Add this mixture back to the base in the sauce pan and warm on low until it begins to thicken and mixture coats the back of a spoon.
- Remove from heat and whisk in the salt and vanilla. Let mixture cool at room temperature before transferring to the fridge to fully cool. Then use your ice cream maker to make the ice cream.
Sugar Cookie Base
- Beat together the melted butter, sugar, and molasses until combined. Add the eggs and vanilla and mix until just combined.
- Add the dry ingredients to the wet and mix until just combined.
- Spread the batter out evenly over the baking pan and bake cookies for 10 minutes.
- Let the base completely cool for at least an hour before assembling the sandwiches.
Assembly
- Line a cutting board with plastic wrap and place half of the cookie base on top. Spread your ice cream evenly over the base.
- Flip the other cookie half on top of the ice cream.
- Line everything up then tightly wrap up the sandwiches in the plastic wrap.
- Place the sandwiches in the freezer for AT LEAST 3 hours, preferably overnight to allow the ice cream to fully set.
- When ready, slice into 8 sandwiches and enjoy!
Important Recipe Notes
Cookie Base
If you prefer a thick cookie with less ice cream, feel free to either spread the cookie base into a smaller pan before baking OR double the recipe for some very thick cookies! I wanted to highlight the banana pudding ice cream in this recipe since that is the star of the show, but if you want a more subtle flavor, try one of those adaptations.
Can I Make Vegan Ice Cream Sandwiches?
Although you can make and use a vegan ice cream in these gluten free ice cream sandwiches, I have not tested a vegan version of the cookie base. I share in the recipe that you can use tapioca or arrowroot starch instead of egg yolks to keep the ice cream vegan. The gluten free cookie does require eggs, though. If you try making a vegan version, please leave a comment and let us know how it went!
What If I Don’t Have an Ice Cream Maker?
Although an ice cream maker helps with consistency, you can always put the base into a freezer safe dish and whisk it every 30 minutes until it freezes. It won’t be quite as smooth, but it works in a pinch. This method is a little more time intensive as you do want to keep stirring the ice cream.
How To Serve and Store These Ice Cream Sandwiches
Serve: I like to let my ice cream sandwiches sit for a couple of minutes at room temperature to soften the ice cream, but that is a personal preference. Just don’t let them sit out too long or they’ll melt!
Store: Once you have sliced the ice cream sandwiches, wrap each individually in plastic wrap, parchment paper, or wax paper. You can then place all of the sandwiches into a large ziplock bag or freezer container and store in the freezer until ready to eat.


Banana Pudding Ice Cream Sandwiches (Gluten & Dairy Free)
Equipment
Ingredients
Banana Pudding Ice Cream
- 2 cans full fat coconut milk
- 3 bananas
- 1/2 cup maple syrup or sugar of choice
- 1/4 tsp cinnamon
- 1/4 cup tapioca starch OR 4 egg yolks
- 1 tsp vanilla extract
- 1/4 tsp salt
Sugar Cookie Base
- 1/2 cup (vegan) butter, melted I use the Miyokos brand
- 1/2 cup coconut sugar or brown sugar
- 1 tsp molasses (leave out if using brown sugar)
- 1 egg
- 1 egg yolk
- 2 tsp vanilla extract
- 1 1/4 cup 1:1 gluten free flour
- 2 Tbsp tapioca starch or arrowroot
- 3/4 tsp baking powder
- 1/4 tsp salt
Instructions
Ice Cream
- Blend the coconut milk, 2 bananas, cinnamon, and maple syrup in a blender until smooth.
- Add the ice cream base to a sauce pan and heat over low heat until warm to the touch.
- Take 1/2 cup of the base and whisk it with the egg yolks or the tapioca starch. Add this mixture back to the base in the sauce pan and warm on low until it begins to thicken and mixture coats the back of a spoon. DO NOT let the mixture boil or heat too quickly, especially if using egg yolks (this will scramble the eggs).
- Remove from heat and whisk in the salt and vanilla. Let mixture cool at room temperature before transferring to the fridge to fully cool. This takes 2-3 hours, but it is preferable if you can leave it overnight.
- When ice cream base is cooled, add to your ice cream maker according to manufacturers directions. Near the end, add 1 chopped banana and allow it to mix in. Transfer ice cream to a freezer safe container and place in the freezer until ready to use.
Sugar Cookie Base
- Beat together the melted butter, sugar, and molasses until combined. Add the eggs and vanilla and mix until just combined.
- Add the dry ingredients to the wet and mix until just combined. The batter will be sticky.
- Line a 9×13 or 10x15inch baking pan with parchment paper. Spread the batter out evenly over the baking pan, trying to get even edges and a nice thin layer. You will probably need to use your hands to help spread the batter out. Dip them in oil or cold water to help with sticking.
- Bake the cookie base for 10 minutes. It might seem like it needs one more minute, don't do it. Over baking will lead to dry and crumbly cookies.
- Let the base completely cool for at least an hour before assembling the sandwiches.
Assembly
- Pull your ice cream out of the freezer 10-30 minutes before ready to assemble if it has been fully frozen. You don't want it to be melted, but it should be very soft and spreadable.
- Place a medium cutting board or flat plate that is freezer safe (and fits into your freezer- check this before starting!) on the counter. Next, place two long pieces of plastic wrap in a cross over the cutting board.
- Trim the edges of your ice cream sandwich cookie base if desired then cut in half. GENTLY slide one half into the middle of your cutting board/plastic wrap. Spread your homemade ice cream over one half of the cookie base. Work gently and use as much or as little ice cream as you want. I used a thick layer of ice cream to highlight the banana pudding flavor!
- Adding the top part of the cookie is a little hard since it is fragile, but do your best to flip the other half of the cookie base onto the top of your ice cream.
- Line everything up then tightly wrap up the sandwiches in the plastic wrap. Wrapping tightly holds everything together while the ice cream is soft. The plate/cutting board provides a sturdy support as the sandwiches freeze.
- Place the sandwiches in the freezer for at least 4-6 hours, preferably overnight to allow the ice cream to fully set.
- When ready, slice into 8 sandwiches. I like to wrap each sandwich individually in plastic wrap or parchment paper then store in a freezer safe bag or container until ready to eat. Pull one out on a hot summer afternoon and enjoy!

Как выбрать винтовые сваи 57 мм для вашего проекта
винтовая свая диаметр 57 мм https://www.vintovaya-svaya-57-mm.ru/ .
Biohacker Host: ноотропы для повышения умственной активности и ясности ума
Биохакер: ноотропы в Москве
Продвижение сайтов в Google: стратегии для быстрого результата
сео раскрутка сайта https://www.prodvizheniesajtov1.ru .
Ортопедические матрасы: поддержка вашего позвоночника и комфорт
ортопедические матрасы размеры и цены ortopedicheskij-matras-moskva-1.ru .
Теплый флис для зимней одежды: купить по доступной цене
флис купить рулон https://www.flis-optom77.ru .
Купить картонные коробки с доставкой по России
коробка оптом от производителя москва https://kartonnye-korobki77.ru .
Надежный центр суррогатного материнства в Москве: ваш путь к родительству
сурмама цена в москве https://www.surrogatnoe-materinstvo-msk.ru .
Купить флисовую ткань для создания уютных домашних изделий
ткань флис москва http://flis-optom99.ru/ .
Лечение алкогольной зависимости в Самаре: эффективные методы
клиника наркологии самара https://www.narcologicheskaya-clinika-samara-2.ru/ .
Лизинг грузового автотранспорта: как выбрать оптимальные условия
коммерческие автомобили в лизинг kommercheskij-transport-v-lizing0.ru .
Займы без отказа с любой кредитной историей: доступные деньги онлайн
все займы на карту без отказа dengikz.online .
Детский матрас: как выбрать и купить
матрас 160 на 80 детский купить москва https://detskij-matras-moskva.ru .
Vavada Casino: Jūsu Ieeja Aizraujošajā Spēļu Pasaulē
Ja jūs meklējat vietni, kur varat izbaudīt aizraujošus spēļu piedzīvojumus, Vavada Casino ir tieši tas, kas jums nepieciešams!
Šis tiešsaistes kazino piedāvā plašu spēļu automātu un galda spēļu klāstu, sākot ar klasiskajiem augļu spēļu automātiem
līdz pat modernākajiem video spēļu automātiem ar aizraujošiem bonusiem.
Vavada nodrošina arī lieliskas iespējas likmju veikšanai reāllaikā, sniedzot jums autentisku
kazino atmosfēru mājās.
### Kāpēc Izvēlēties Vavada Casino?
1. **Plaša Spēļu Izvēle** – Vavada Casino
piedāvā tūkstošiem populāru spēļu no
vadošajiem spēļu izstrādātājiem, piemēram, NetEnt, Microgaming un Play’n GO.
Jūs noteikti atradīsiet spēles, kas piemērotas jūsu gaumei.
2. **Izdevīgi Bonusi** – Jaunie spēlētāji var izmantot lieliskas iepazīšanās prēmijas un bezmaksas
griezienus, bet lojālie klienti tiek regulāri apbalvoti ar
dažādiem bonusiem un akcijām.
3. **Drošība un Uzticamība** – Vavada rūpējas par
jūsu datu drošību, izmantojot mūsdienīgas šifrēšanas tehnoloģijas.
Jūs varat būt pārliecināti, ka jūsu līdzekļi un personiskā
informācija ir drošās rokās.
4. **Klientu Atbalsts 24/7** – Vavada Casino piedāvā profesionālu un atsaucīgu
klientu apkalpošanu, kas ir pieejama visu diennakti, lai
atbildētu uz jūsu jautājumiem vai atrisinātu jebkādas
problēmas.
### Kā Sākt Spēlēt?
Sākt spēlēt Vavada Casino ir vienkārši. Viss, kas
jums jādara, ir jāizveido konts, jāveic pirmā iemaksa un jāizvēlas
jūsu iecienītākā spēle. Turklāt, pateicoties draudzīgai un intuitīvai vietnes saskarnei,
jūs varat viegli orientēties starp spēlēm un piedāvājumiem.
### Mobilā Kazino
Ja jums patīk spēlēt ceļā, Vavada Casino piedāvā lielisku mobilo versiju, kas ir
pilnībā pielāgota dažādām ierīcēm. Jūs varat baudīt savas iecienītās spēles gan planšetē, gan viedtālrunī bez kompromisiem attiecībā uz kvalitāti.
Pievienojieties Vavada Casino šodien un izbaudiet nebeidzamus izklaides mirkļus, laimestus un piedzīvojumus tieši no savām mājām!
“https://autogenie.co.uk/vavada-lv-9187n/”
Доставка алкоголя 24/7: наслаждайтесь любимыми напитками в любое время
доставка алкоголя москва https://www.dostavka-alkogolya-moskva-msk-1.ru/ .
Онлайн-доставка алкоголя: закажите любимые напитки быстро
доставка алкоголя 24 http://www.dostavka-alkogolya-moskva-world-1.ru .
Купить Cummins M11 с гарантией: мощные двигатели для бизнеса
камминз м11 http://www.dvigatel-cummins-m-11.ru .
Готовые бытовки с доставкой: удобные решения для вашего участка
вагончики бытовки для проживания вагончики бытовки для проживания .
Беспружинные матрасы для всей семьи: качество и надежность
матрасы без пружин ортопедические https://bespruzhinnye-matrasy-kupit.ru .
Купить Kugoo V3 Pro: максимальная скорость и надёжность на дорогах
электровелосипед kugoo kirin v3 pro http://www.kugoo-v3-pro.ru .
Дезинсекция – это комплекс мероприятий,
направленных на уничтожение насекомых,
которые могут причинить вред здоровью человека, сельскохозяйственным культурам
и объектам инфраструктуры. Насекомые,
такие как тараканы, муравьи, клопы,
комары и мухи, не только создают
дискомфорт, но и являются переносчиками различных инфекционных заболеваний.
### Зачем нужна дезинсекция?
Главная цель дезинсекции –
защита здоровья людей и сохранение чистоты жилых и рабочих помещений.
Насекомые, такие как тараканы и мухи, могут переносить опасные заболевания, включая сальмонеллез, дизентерию и
туберкулез. Кроме того, укусы комаров и блох могут вызвать аллергические реакции и
даже быть источником серьезных вирусных инфекций, таких как малярия или лихорадка денге.
В сельском хозяйстве дезинсекция необходима для
защиты растений от вредителей, которые могут
уничтожить урожай или снизить его качество.
Например, тля, жуки и гусеницы
активно повреждают листья и плоды растений,
нанося значительный экономический
ущерб.
### Виды дезинсекции
Существует несколько методов дезинсекции, которые можно
разделить на три основные группы:
1. **Механические методы**. Это физическое уничтожение насекомых
и их мест обитания. Например, использование липких лент, сеток на окна,
пылесосов и других устройств для борьбы с
насекомыми. Этот метод наиболее экологичен, но требует постоянного
контроля и не всегда эффективен для крупных заражений.
2. **Химические методы**. Один из самых распространенных способов – использование инсектицидов,
которые могут быть в виде аэрозолей,
растворов или порошков. Химические препараты позволяют быстро
избавиться от насекомых, однако важно соблюдать меры предосторожности, чтобы
не навредить людям и домашним животным.
Применение химикатов должно проводиться профессионалами, чтобы гарантировать безопасность и эффективность.
3. **Биологические методы**. Этот
подход заключается в использовании
естественных врагов насекомых,
таких как хищные насекомые или микроорганизмы,
которые угнетают размножение вредителей.
Биологический метод особенно эффективен в сельском
хозяйстве, где требуется минимальное вмешательство в экосистему.
### Как проходит дезинсекция?
Процедура дезинсекции начинается с обследования объекта,
чтобы определить виды насекомых, их численность и места обитания.
После этого специалисты выбирают оптимальные методы обработки, учитывая
специфику помещения и возможные риски.
Перед проведением дезинсекции
необходимо подготовить помещение:
закрыть или убрать продукты
питания, посуду, детские игрушки, а также временно вывести людей и домашних животных из обрабатываемого пространства.
После завершения процедуры важно соблюдать рекомендации специалистов:
не входить в помещение до окончания
действия препаратов, проветрить комнаты, провести влажную
уборку и следить за повторным появлением насекомых.
### Профилактика появления насекомых
Чтобы минимизировать вероятность повторного заражения насекомыми, следует придерживаться ряда профилактических мер:
– Регулярно проводить уборку помещения, особенно в труднодоступных местах.
– Устранять источники влаги, такие как протекающие краны и трубы, так как влажность
привлекает многих насекомых.
– Хранить продукты питания в закрытых контейнерах и
не оставлять их на столах.
– Устанавливать сетки на окна и двери, чтобы предотвратить проникновение
насекомых извне.
– Проверять мебель и багаж после поездок, так как клопы могут проникать в дом с вещами.
### Заключение
Дезинсекция – важная мера по поддержанию гигиены и безопасности в жилых и рабочих помещениях.
Своевременное уничтожение насекомых помогает предотвратить распространение заболеваний и сохранить комфортную среду для
жизни.
“https://fkwiki.win/wiki/User:SvenFrye1011”
Дезинсекция – это комплекс мероприятий, направленных на уничтожение насекомых, которые могут причинить вред
здоровью человека, сельскохозяйственным культурам и объектам инфраструктуры.
Насекомые, такие как тараканы, муравьи, клопы, комары и мухи, не только создают
дискомфорт, но и являются переносчиками различных инфекционных заболеваний.
### Зачем нужна дезинсекция?
Главная цель дезинсекции – защита здоровья людей и
сохранение чистоты жилых и рабочих помещений.
Насекомые, такие как тараканы и мухи, могут переносить опасные заболевания, включая сальмонеллез, дизентерию и туберкулез.
Кроме того, укусы комаров и блох
могут вызвать аллергические реакции и даже быть источником серьезных вирусных инфекций, таких как
малярия или лихорадка денге.
В сельском хозяйстве дезинсекция необходима для защиты растений от вредителей, которые могут уничтожить
урожай или снизить его качество.
Например, тля, жуки и гусеницы активно повреждают
листья и плоды растений, нанося значительный
экономический ущерб.
### Виды дезинсекции
Существует несколько методов дезинсекции,
которые можно разделить на три основные группы:
1. **Механические методы**.
Это физическое уничтожение насекомых и их мест обитания.
Например, использование липких лент, сеток на
окна, пылесосов и других устройств для борьбы с насекомыми.
Этот метод наиболее экологичен, но требует постоянного контроля и не всегда эффективен для крупных заражений.
2. **Химические методы**. Один из самых распространенных способов
– использование инсектицидов, которые могут быть в виде аэрозолей, растворов или порошков.
Химические препараты позволяют быстро избавиться от насекомых, однако важно соблюдать
меры предосторожности, чтобы не навредить людям и домашним животным.
Применение химикатов должно проводиться профессионалами, чтобы гарантировать
безопасность и эффективность.
3. **Биологические методы**.
Этот подход заключается в использовании естественных
врагов насекомых, таких как хищные насекомые или микроорганизмы, которые угнетают размножение вредителей.
Биологический метод особенно эффективен в сельском хозяйстве,
где требуется минимальное вмешательство
в экосистему.
### Как проходит дезинсекция?
Процедура дезинсекции начинается с обследования объекта, чтобы определить виды насекомых,
их численность и места обитания.
После этого специалисты выбирают оптимальные методы обработки, учитывая специфику помещения и возможные риски.
Перед проведением дезинсекции
необходимо подготовить помещение: закрыть или убрать
продукты питания, посуду, детские игрушки,
а также временно вывести людей и домашних животных из обрабатываемого пространства.
После завершения процедуры
важно соблюдать рекомендации специалистов: не входить в помещение до
окончания действия препаратов,
проветрить комнаты, провести влажную уборку и следить за повторным появлением
насекомых.
### Профилактика появления насекомых
Чтобы минимизировать вероятность повторного заражения
насекомыми, следует придерживаться
ряда профилактических мер:
– Регулярно проводить уборку помещения, особенно в труднодоступных местах.
– Устранять источники влаги, такие как протекающие краны
и трубы, так как влажность привлекает многих насекомых.
– Хранить продукты питания в закрытых контейнерах и не оставлять их
на столах.
– Устанавливать сетки на окна и двери, чтобы
предотвратить проникновение насекомых извне.
– Проверять мебель и багаж после поездок, так
как клопы могут проникать в дом с вещами.
### Заключение
Дезинсекция – важная мера по поддержанию
гигиены и безопасности в жилых и рабочих помещениях.
Своевременное уничтожение
насекомых помогает предотвратить распространение заболеваний и сохранить комфортную среду для
жизни.
“https://backup.pestguardtermite.com/question/ses-8991s/”
Дезинсекция – это комплекс мероприятий, направленных на уничтожение
насекомых, которые могут
причинить вред здоровью человека, сельскохозяйственным культурам
и объектам инфраструктуры.
Насекомые, такие как тараканы, муравьи,
клопы, комары и мухи, не только создают дискомфорт, но и являются переносчиками различных инфекционных заболеваний.
### Зачем нужна дезинсекция?
Главная цель дезинсекции – защита здоровья людей и сохранение чистоты жилых и рабочих помещений.
Насекомые, такие как тараканы и мухи,
могут переносить опасные заболевания, включая сальмонеллез, дизентерию и туберкулез.
Кроме того, укусы комаров и блох могут вызвать аллергические реакции и даже быть источником серьезных вирусных инфекций,
таких как малярия или лихорадка денге.
В сельском хозяйстве дезинсекция необходима для защиты растений от
вредителей, которые могут уничтожить
урожай или снизить его качество.
Например, тля, жуки и гусеницы активно повреждают листья и плоды растений, нанося значительный экономический ущерб.
### Виды дезинсекции
Существует несколько методов дезинсекции, которые можно
разделить на три основные группы:
1. **Механические методы**. Это физическое
уничтожение насекомых и их мест обитания.
Например, использование липких лент, сеток на окна, пылесосов и других устройств для борьбы с насекомыми.
Этот метод наиболее экологичен, но требует
постоянного контроля и не всегда эффективен для крупных заражений.
2. **Химические методы**. Один из самых распространенных способов – использование инсектицидов,
которые могут быть в виде аэрозолей, растворов
или порошков. Химические препараты позволяют
быстро избавиться от насекомых,
однако важно соблюдать меры предосторожности, чтобы не навредить людям и домашним животным.
Применение химикатов должно проводиться профессионалами, чтобы гарантировать безопасность и эффективность.
3. **Биологические методы**. Этот подход заключается в использовании
естественных врагов насекомых,
таких как хищные насекомые
или микроорганизмы, которые угнетают размножение вредителей.
Биологический метод особенно эффективен в сельском хозяйстве, где требуется
минимальное вмешательство в экосистему.
### Как проходит дезинсекция?
Процедура дезинсекции начинается с обследования объекта, чтобы определить виды насекомых, их численность
и места обитания. После этого специалисты выбирают оптимальные методы обработки, учитывая специфику помещения
и возможные риски.
Перед проведением дезинсекции необходимо подготовить помещение: закрыть или
убрать продукты питания, посуду, детские
игрушки, а также временно вывести людей и
домашних животных из обрабатываемого
пространства.
После завершения процедуры важно соблюдать рекомендации специалистов: не входить в помещение до окончания действия препаратов, проветрить комнаты, провести влажную уборку и следить за повторным
появлением насекомых.
### Профилактика появления насекомых
Чтобы минимизировать вероятность повторного заражения
насекомыми, следует придерживаться ряда
профилактических мер:
– Регулярно проводить уборку помещения, особенно в труднодоступных местах.
– Устранять источники влаги, такие как протекающие краны и трубы, так как влажность привлекает многих насекомых.
– Хранить продукты питания в закрытых контейнерах и не оставлять
их на столах.
– Устанавливать сетки на окна и двери, чтобы предотвратить проникновение насекомых извне.
– Проверять мебель и багаж после поездок, так как
клопы могут проникать в дом с вещами.
### Заключение
Дезинсекция – важная мера по
поддержанию гигиены и безопасности в жилых и рабочих помещениях.
Своевременное уничтожение насекомых помогает предотвратить распространение
заболеваний и сохранить комфортную среду для
жизни.
“https://skkuna.org/board_1/2050668”
Дезинсекция – это комплекс мероприятий,
направленных на уничтожение насекомых,
которые могут причинить вред
здоровью человека, сельскохозяйственным
культурам и объектам инфраструктуры.
Насекомые, такие как тараканы, муравьи, клопы, комары и мухи, не только создают дискомфорт, но
и являются переносчиками различных инфекционных заболеваний.
### Зачем нужна дезинсекция?
Главная цель дезинсекции
– защита здоровья людей и сохранение чистоты жилых и рабочих помещений.
Насекомые, такие как тараканы
и мухи, могут переносить опасные заболевания, включая сальмонеллез, дизентерию и туберкулез.
Кроме того, укусы комаров и блох могут вызвать аллергические
реакции и даже быть источником серьезных вирусных
инфекций, таких как малярия
или лихорадка денге.
В сельском хозяйстве дезинсекция
необходима для защиты растений от вредителей, которые могут
уничтожить урожай или снизить его качество.
Например, тля, жуки и гусеницы активно повреждают
листья и плоды растений, нанося значительный экономический
ущерб.
### Виды дезинсекции
Существует несколько методов дезинсекции, которые можно разделить на три основные группы:
1. **Механические методы**. Это физическое уничтожение насекомых и их мест обитания.
Например, использование липких лент, сеток на
окна, пылесосов и других устройств для борьбы с насекомыми.
Этот метод наиболее экологичен, но требует постоянного контроля
и не всегда эффективен для крупных заражений.
2. **Химические методы**. Один из самых распространенных способов –
использование инсектицидов,
которые могут быть в виде аэрозолей, растворов или порошков.
Химические препараты позволяют быстро избавиться от насекомых, однако важно
соблюдать меры предосторожности, чтобы не
навредить людям и домашним животным.
Применение химикатов должно проводиться профессионалами, чтобы гарантировать безопасность и эффективность.
3. **Биологические методы**.
Этот подход заключается в
использовании естественных врагов насекомых, таких как хищные насекомые или микроорганизмы, которые
угнетают размножение вредителей.
Биологический метод особенно эффективен в сельском хозяйстве, где требуется
минимальное вмешательство в экосистему.
### Как проходит дезинсекция?
Процедура дезинсекции начинается с обследования объекта, чтобы определить виды
насекомых, их численность и места обитания.
После этого специалисты выбирают оптимальные методы обработки, учитывая специфику помещения и возможные риски.
Перед проведением дезинсекции необходимо подготовить помещение: закрыть или убрать продукты
питания, посуду, детские игрушки, а также временно вывести людей и домашних животных из обрабатываемого пространства.
После завершения процедуры важно соблюдать рекомендации специалистов:
не входить в помещение до окончания действия
препаратов, проветрить комнаты, провести влажную уборку и следить за повторным появлением насекомых.
### Профилактика появления насекомых
Чтобы минимизировать вероятность
повторного заражения насекомыми, следует
придерживаться ряда профилактических мер:
– Регулярно проводить уборку помещения,
особенно в труднодоступных местах.
– Устранять источники влаги,
такие как протекающие краны и трубы,
так как влажность привлекает многих насекомых.
– Хранить продукты питания в
закрытых контейнерах и не оставлять их на столах.
– Устанавливать сетки на окна и двери, чтобы предотвратить проникновение насекомых извне.
– Проверять мебель и багаж после поездок, так как клопы могут проникать в дом
с вещами.
### Заключение
Дезинсекция – важная мера по поддержанию гигиены и
безопасности в жилых и рабочих помещениях.
Своевременное уничтожение насекомых
помогает предотвратить распространение заболеваний и сохранить
комфортную среду для жизни.
“http://simplicitywiki.com:80/index.php/User:RoseannShoebridg”
Лучшие автозапчасти для иномарок: заказать онлайн быстро и удобно
сайт для заказа автозапчастей для иномарок сайт для заказа автозапчастей для иномарок .
Займы без отказа онлайн: получите деньги без проверок и лишних документов
займ на карту без отказа http://www.dengikz.ru/ .
Оснащение конференц-залов: комфортные условия для продуктивных встреч
вкс оборудование для конференц залов http://www.osnashcheniye-konferents-zala1.ru/ .
Оснащение ситуационного центра: проектирование и установка систем
оснащение ситуационных центров https://www.osnashcheniye-situatsionnogo-tsentra1.ru .
Комплексное оснащение актового зала: лучшие технологии для вашего зала
звуковое оборудование для актового зала школы http://www.osnashcheniye-aktovykh-zalov1.ru .
Видеостены для выставок и презентаций: Эффективные решения для бизнеса
видеостена 3 3 http://videostena-moskva1.ru/ .
Полный спектр услуг по оснащению актовых залов: Звук, свет и мультимедийные решения
звуковое оборудование для актового зала http://www.oborudovaniye-aktovogo-zala1.ru .
Как обеспечить идеальные условия для переговоров: Оснащение конференц-залов
конференц залы оборудование https://osnashcheniye-konferents-zalov1.ru/ .
Как выбрать оборудование для видеоконференций: Рекомендации по оснащению переговорных комнат
оборудование для переговорной комнаты https://oborudovaniye-peregovornykh1.ru .
Полный спектр услуг по оснащению ситуационного центра: Современные решения для вашего бизнеса
оснащение ситуационного центра http://osnashcheniye-situatsionnykh-tsentrov1.ru .
Как правильно оснастить диспетчерский центр: Всё, что нужно знать
оборудование диспетчерского центра osnashcheniye-dispetcherskikh-tsentrov1.ru .
Оформление временной регистрации через законные пути — быстро и безопасно
нужна временная регистрация спб нужна временная регистрация спб .
Дом престарелых для пожилых людей — помощь, уход и круглосуточная поддержка
дом интернат психоневрологического типа http://doma-prestarelyh3.ru/psihonevrologicheskie-internaty/ .
O site **1x Slots Brasil** oferece uma experiência de jogo online única, com uma vasta gama de slots, jogos de mesa e promoções exclusivas.
Se você está à procura de diversão e a oportunidade de ganhar grandes prêmios, 1x Slots é a plataforma ideal para você.
### Vantagens de jogar na 1x Slots Brasil
1. **Variedade de jogos**: O site apresenta uma extensa coleção de jogos de slots de diferentes temas,
incluindo jogos clássicos de frutas, slots de vídeo, e slots com
jackpots progressivos. Além disso, você pode desfrutar de jogos de mesa como roleta,
blackjack e pôquer.
2. **Bônus e promoções**: Na 1x Slots, os novos jogadores recebem generosos bônus de boas-vindas, e os jogadores recorrentes podem
aproveitar promoções regulares, cashback e rodadas grátis.
O sistema de recompensas permite acumular pontos e trocar por prêmios exclusivos.
3. **Interface amigável**: O site é projetado para
oferecer uma navegação fácil e intuitiva, permitindo que os jogadores encontrem rapidamente seus jogos favoritos e acessem promoções sem complicações.
4. **Segurança e confiabilidade**: A 1x Slots Brasil utiliza as
mais avançadas tecnologias de segurança para garantir
que suas informações pessoais e financeiras estejam sempre protegidas.
Todos os jogos são auditados para garantir justiça e transparência.
### Como começar
É muito simples começar a jogar no **1x Slots Brasil**.
Basta fazer um cadastro rápido no site, escolher seu método de pagamento preferido
e fazer seu primeiro depósito. Você estará pronto para mergulhar no mundo emocionante dos jogos de cassino, aproveitando
todas as oportunidades de diversão e ganhos.
### Suporte ao cliente
Se surgir qualquer dúvida, a equipe de suporte está sempre
pronta para ajudar, disponível 24/7 por meio de chat ao vivo ou e-mail.
O objetivo da **1x Slots** é garantir que você tenha uma
experiência de jogo tranquila e prazerosa.
Explore agora a incrível seleção de jogos e promoções em **1x Slots Brasil** e descubra por que
tantos jogadores escolhem nossa plataforma para diversão e grandes chances de ganhar.
Não perca a oportunidade de participar deste mundo
de entretenimento e recompensas!
“https://horrorfilmbodycounts.shoutwiki.com/wiki/1x-slots-brasil.com_39M”
**1win Togo: Votre Destination de Paris en Ligne Fiable
et Innovante**
Bienvenue sur **1win Togo**, votre plateforme de
paris en ligne de confiance, où l’innovation rencontre la simplicité pour vous offrir
la meilleure expérience de jeu possible. Que vous
soyez un amateur de paris sportifs, un passionné de
casino ou un joueur occasionnel cherchant du divertissement,
1win Togo vous propose une large gamme d’options pour
satisfaire toutes vos envies de jeu.
### Une Plateforme de Paris Sportifs Diversifiée
Chez 1win Togo, nous comprenons l’importance de la diversité pour les parieurs sportifs.
C’est pourquoi nous couvrons un large éventail de sports : football,
basketball, tennis, rugby, et bien d’autres. Vous pouvez parier sur
vos équipes et événements favoris, que ce soit à l’échelle nationale
ou internationale.
– **Des cotes compétitives** : Nous offrons des cotes parmi les plus attractives du marché pour maximiser vos gains.
– **Une interface intuitive** : Notre plateforme est facile à utiliser, que vous soyez un parieur expérimenté ou débutant.
Placez vos paris rapidement et en toute sécurité.
### Un Casino En Ligne Exceptionnel
Si vous préférez l’univers des casinos en ligne, **1win Togo** met à votre disposition une vaste collection de jeux de casino.
Des machines à sous modernes aux jeux de table classiques comme la roulette, le
blackjack et le poker, chaque joueur trouvera quelque chose à
son goût.
– **Machines à sous à jackpot** : Tentez votre chance sur nos
machines à sous à jackpot progressif et décrochez des gains incroyables.
– **Jeux en direct** : Pour une expérience plus immersive, profitez de nos jeux en direct avec des croupiers professionnels.
### Pourquoi Choisir 1win Togo ?
1. **Sécurité et fiabilité** : Nous mettons un point d’honneur à assurer la sécurité de vos données personnelles et de vos
transactions. Nos systèmes sont hautement sécurisés
pour garantir une expérience de jeu sans souci.
2. **Promotions et bonus attractifs** : Chez **1win Togo**, chaque nouveau joueur bénéficie de généreux bonus de bienvenue, ainsi que de nombreuses promotions régulières pour nos membres existants.
3. **Support client réactif** : Notre équipe d’assistance est disponible 24/7 pour
répondre à toutes vos questions et vous aider
à résoudre vos préoccupations rapidement.
### Inscription Facile et Rapide
Rejoindre **1win Togo** est simple et rapide. En quelques minutes,
vous pourrez créer votre compte, effectuer votre
premier dépôt et commencer à jouer. Notre processus d’inscription est conçu pour être fluide
afin que vous puissiez profiter de l’action sans attendre.
**Ne perdez plus de temps !** Rejoignez la communauté 1win Togo dès aujourd’hui et découvrez un monde
de divertissement, de paris sportifs et de jeux de casino, avec des chances de
gagner des récompenses excitantes à chaque instant.
“https://medea.medianet.cs.kent.edu/mediawiki/index.php/1wins-togo.com_16w”
**1win Côte d’Ivoire** est votre destination incontournable pour profiter pleinement des paris en ligne. Que vous soyez passionné de sports ou adepte des jeux de casino, 1win vous offre une plateforme moderne et intuitive qui répond à tous vos besoins. Avec une large gamme d’options de divertissement et des cotes compétitives, vous pouvez parier en toute sécurité tout en profitant de bonus généreux.
### Pourquoi choisir 1win Côte d’Ivoire?
1. **Diversité des paris sportifs**
1win Côte d’Ivoire propose des paris sur une multitude de sports, y compris le football, le basketball, le tennis, et bien plus encore. Que vous soyez amateur des compétitions locales ou des grands tournois internationaux, vous trouverez toujours une opportunité de parier sur vos événements préférés avec des cotes attractives.
2. **Une expérience de casino en ligne exceptionnelle**
Outre les paris sportifs, 1win offre une vaste sélection de jeux de casino. Machines à sous, roulette, blackjack, poker – il y a de quoi satisfaire tous les goûts. Tous les jeux sont développés par les meilleurs fournisseurs pour garantir une qualité de jeu irréprochable.
3. **Bonus et promotions attractifs**
Les nouveaux utilisateurs de 1win bénéficient d’un généreux bonus de bienvenue qui peut multiplier leurs chances de gains. De plus, de nombreuses promotions régulières sont disponibles pour récompenser la fidélité des joueurs.
4. **Sécurité et fiabilité**
La plateforme 1win Côte d’Ivoire est sécurisée et utilise des technologies de cryptage avancées pour protéger vos informations personnelles et financières. Vous pouvez parier en toute tranquillité d’esprit.
### Comment commencer?
S’inscrire sur 1win Côte d’Ivoire est simple et rapide. Il vous suffit de créer un compte, d’effectuer un dépôt et de commencer à parier ou à jouer à vos jeux de casino préférés. L’interface conviviale vous permet de naviguer facilement entre les différentes sections, que vous soyez sur un ordinateur ou un mobile.
Ne manquez pas l’opportunité de faire partie de la communauté 1win et de vivre des moments inoubliables en pariant sur vos événements sportifs favoris ou en explorant l’univers passionnant du casino en ligne. Inscrivez-vous dès aujourd’hui et commencez à gagner avec 1win Côte d’Ivoire!
https://projectblueberryserver.com/index.php/User:SuzannaMarasco0
Нарколог в Самаре: круглосуточный вывод из запоя с гарантией
вывод из запоя самара недорого https://vivod-iz-zapoya-samarskiy.ru/ .
Пропуск на МКАД для грузовых автомобилей: доступное оформление без задержек
пропуск на мкад propuskamos1.ru .
vsehdiplom ru: профессиональные услуги по написанию дипломов и курсовых
Глагольные формы http://www.vsehdiplom.ru/blog/lajfhaki-po-russkomu-jazyku-razbiraemsja-s-chastjami-rechi/ .
Подключить интернет-эквайринг: простые шаги для вашего бизнеса
интернет эквайринг через qr код https://www.internet-ekvayring.ru .
Вован казино регистрация
Методы доступа к виртуальным игровым платформам становятся всё более разнообразными. Сегодня азартные развлечения привлекают миллионы игроков по всему миру. С каждым годом появляются новые механики и функции, которые делают процесс ещё более увлекательным. Игроки ищут быстрые и удобные способы для начала своего пути в мире риска и удачи.
Понимание основных принципов подключения к подобной площадке открывает перед пользователем невероятные горизонты. Это не просто набор процедур; это целая экосистема, наполненная различными акциями, уникальными предложениями и интересными бонусами. Главным образом, каждый желающий должен быть готов к захватывающим приключениям, которые заключают в себе как элемент удачи, так и стратегию.
Важно помнить о некоторых нюансах: от безопасности и надежности агрегаторов до их юридической прозрачности. Каждый шаг может стать решающим в выборе платформы, на которой пользователь проведет время, поддаваясь удаче и наслаждаясь увлекательно проведёнными часами. Ключевым моментом остаётся осознание, что перед тем, как начать играть, необходимо тщательно изучить каждую деталь, предложенную сервисом, для более комфортного и приятного досуга.
В этой статье мы уделим внимание всем аспектам, связанным с началом активного участия в игре на платформе. Здесь каждый сможет найти полезные советы и рекомендации, которые помогут ему стать частью большого игрового сообщества. Добро пожаловать в мир азарта, где ваши мечты могут стать реальностью, если сделать правильный выбор.
Преимущества игры в онлайн-заведениях для новичков
Во-первых, многие из этих платформ предлагают щедрые бонусы для первых пользователей. Это может быть бесплатный набор фишек или увеличенные коэффициенты для успешной игры. Благодаря этому, знакомясь с системой, новичок может значительно экономить. Более того, подобные поощрения создают прекрасную возможность для изучения различных игровых механик без лишних финансовых рисков.
Во-вторых, интерфейсы данных ресурсов обычно интуитивно понятны и просты в использовании, что позволяет быстро разобраться в процессе и наслаждаться игровым опытом. Неважно, какой уровень подготовки у игрока: новичок или опытный персонаж, каждый найдет себе интересное занятие. Такой подход значительно снижает уровень стресса и помогает сосредоточиться на удовольствии от игры.
Кроме того, современные онлайн-платформы обеспечивают безопасность и защиту данных своих пользователей. Это ключевой момент, так как многие новички могут тревожиться о сохранности своей личной информации. Используя новейшие технологии шифрования и надежные платежные системы, виртуальные заведения стремятся создать комфортные условия для своих клиентов, где каждый может быть уверен в надежности своих финансовых операций.
Не стоит забывать и о разнообразии игр. Виртуальные залы предоставляют богатый выбор слотов, карточных игр и других вариантов развлечений. Это позволяет каждому найти что-то по душе. Многие новички могут испытывать трудности с выбором, однако многообразие обычно радует и вдохновляет. Каждая игра имеет свои уникальные правила и стратегию, а это дает возможность экспериментировать и развивать свои навыки.
Таким образом, играть в виртуальных заведениях – это множество интересных, увлекательных и безопасных опытов для всех, кто хочет попробовать свои силы в азартных играх. Благодаря бонусам, понятным интерфейсам и разнообразным развлечениям, новички получают отличные условия для входа в эту захватывающую сферу. И кто знает, возможно, ваше времяпрепровождение станет не просто развлечением, а настоящим хобби!
Преимущества игры в онлайн казино для новичков
Погружение в сферу азартных игр может быть весьма увлекательным. Новички часто интересуются, с чего начать и какие выгоды они могут получить. Виртуальные платформы предоставляют множество возможностей для развлечения и заработка. Важно разобрать все плюсы такого досуга, чтобы сделать осознанный выбор. Давайте вместе рассмотрим основные преимущества, которые могут порадовать каждого новичка.
– Доступность в любое время суток.
– Широкий выбор игр и развлечений.
– Простота процедур входа и участия.
– Бонусы и акции для новых пользователей.
Одним из главных достоинств виртуального игрового мира является его доступность, так как игроки могут наслаждаться любимыми играми из любого места, где есть интернет, без необходимости тратить время на дорогу в физические заведения. Таким образом, вы получаете возможность играть в удобное время, что особенно актуально для тех, кто ведет активную жизнь или имеет плотный рабочий график.
– Свежие игры с уникальными механиками.
– Анонимность и безопасность данных.
– Возможность учиться на практике без риска.
– Интерактивное взаимодействие с другими игроками.
Не менее важным является широкий ассортимент доступных игр: от классических карточных до современных слотов, каждый найдет развлечение на свой вкус и сможет понять, что именно нравится. На таких платформах новичкам предоставляют возможность испытать различные виды игр, что помогает определиться с предпочтениями и развить свои навыки в азартных играх.
– Поддержка различных платежных систем.
– Удобный интерфейс и функционал.
– Регулярные турниры и соревнования.
– Доброжелательное сообщество игроков.
Новички также могут воспользоваться множеством бонусов и акций, которые встречаются в виртуальной среде, ведь именно они создают дополнительную мотивацию для начала игры и помогают скрасить процесс обучения; например, бездепозитные бонусы или фриспины позволяют без риска попробовать различные игры и понять, какие из них приносят наибольшее удовольствие. Более того, игроки могут наслаждаться общением с другими участниками и делиться опытом, что делает процесс еще более увлекательным.
Таким образом, игры, которые предлагает современный сектора азартных развлечений, являются отличным стартом для любого начинающего игрока, и полное понимание всех этих преимуществ поможет освоиться в виртуальном мире быстрее и приятнее.
http://phantastike.ru/
Вован казино сайт
Современные развлечения предоставляют уникальные возможности для любителей приключений. Здесь каждый может найти что-то интересное. Не важно, предпочитаете ли вы стратегию или удачу. Главное – это захватывающее увлечение, которое дает возможность испытать эмоции. Позвольте себе окунуться в атмосферу азарта и напряжения.
За последние годы индустрия развлекательных игр пережила настоящую революцию. Теперь доступ к богатому выбору активностей осуществляется всего лишь в несколько кликов. Существует огромное количество платформ, предлагающих безумные варианты досуга. В таком разнообразии каждый найдет подходящее занятие по своему вкусу, удовлетворив самые различные предпочтения.
Кроме того, особого внимания заслуживает удобство и комфорт, которые обеспечивают пользователям онлайн-форматы. Вы можете наслаждаться игрой в любое время, не выходя из дома. Это открывает двери для использования времени в любое удобное для вас время. Кроме этого, многие из таких мест предлагают щедрые бонусы и акционные предложения, которые делают процесс еще более захватывающим и выгодным.
Таким образом, если вы ищете новое увлечение или хотите проверить удачу, стоит обратить внимание на этот раздел развлекательной индустрии. Каждый может найти здесь что-то для себя, не зависимо от опыта или предпочтений. И не забывайте, что разумный подход к игре – это залог приятного отдыха и интересного времяпрепровождения. Не упустите возможность погрузиться в незабываемую атмосферу азартного мира и испытать себя в роли игрока!
Преимущества и недостатки онлайн-гемблинга
Современные платформы для азартных игр открывают новые горизонты для любителей дозы адреналина. Отыскать игру по душе, сделать ставку и почувствовать азарт можно в любое время и в любом месте. Однако, как и в любом деле, тут есть свои плюсы и минусы. Разберем их подробнее.
Преимущества:
– Доступность: игроки могут наслаждаться игрой из любого уголка мира.
– Разнообразие: широкий выбор игр – от классических до новых форматов.
– Бонусы: многоуровневые предложения и акции для новых и постоянных клиентов.
– Анонимность: возможность сохранять конфиденциальность и не раскрывать личные данные.
Игроки часто отмечают, что возможность доступа к играм круглосуточно значительно увеличивает удовольствие от процесса. Ведь когда уютно устроился на диване или в кафе, можно сделать ставку и забыть о суете. Это дает возможность наслаждаться азартом в привычной обстановке.
Недостатки:
– Риск зависимости: азарт может привести к нежелательным последствиям.
– Неточность: иногда платформы могут быть ненадежными, что ставит под угрозу средства игроков.
– Технические сбои: возможно возникновение проблем с соединением или загрузкой игр.
– Ограничения по выплатам: некоторые операции могут занимать длительное время.
Не стоит забывать о том, что азартные игры – это не только возможность выиграть, но и реальный риск. Например, из-за расстояния и анонимности пользователь может потерять контроль над своими расходами, что в итоге приведет к нежелательным последствиям. Понимание этой тонкой грани между развлечением и зависимостью крайне важно.
Таким образом, онлайн-игры предлагают уникальные возможности и преимущества, но параллельно с этим сопряжены с рядом рисков. Всегда важно действовать разумно, делать осознанный выбор и учитывать все аспекты данного развлечения.
Обзор платформы онлайн-гемблинга
Онлайн-платформы для азартных игр предоставляют пользователям уникальный опыт. Каждый игрок может найти что-то для себя. Это разнообразие форматов развлечений, ставок и шансов на выигрыш привлекает внимание. Удобство и доступность тоже играют немаловажную роль. Теперь многие предпочитают развлекаться, не выходя из дома.
На таких ресурсах представлены различные виды развлечений. Игра на автоматах, карточные игры, настольные развлечения – все это доступно 24 часа в сутки. Удобный интерфейс позволяет легко ориентироваться в контенте. Четкое распределение категорий способствует быстрому поиску нужного развлечения. Более того, интерфейс становится все более интуитивным.
Преимущества|Недостатки
Удобство доступа|Риск зависимости
Разнообразие игр|Качество сервисов
Бонусные предложения
Промоакции|Мошенничество
Для большинства пользователей эти платформы стали настоящим источником развлечений и адреналина. Важно отметить, что выбор надежного заведения – это ключ к позитивному опыту. Перед тем как начать игру, обязательно ознакомьтесь с условиями и отзывами о платформе. Отправляясь в мир азартных игр, помните о мере и разумном подходе к ставкам.
https://borlestorg.ru/
Купить жалюзи и рулонные шторы в интернет-магазине с доставкой
жалюзи http://rulonniye-shtori.ru .
Si has llegado a esta página web, es probable que estuvieras buscando “¿Cómo activar Windows u Office de forma gratuita?”. En este artículo, te proporcionaremos una respuesta detallada a esta pregunta y te presentaremos uno de los mejores activadores del momento: KMSPico 2024.
Antes de proceder con el proceso de activación, te recomendamos que explores todas las características y el funcionamiento de esta poderosa herramienta, además de otros programas útiles disponibles en nuestro sitio.
**AVISO**: Este artículo tiene fines educativos únicamente. No nos hacemos responsables de cómo decidas utilizar esta herramienta.
**Consejo**: Si valoras los productos de Microsoft, considera adquirir versiones legales y originales. Este programa solo está diseñado para probar los productos, y te animamos encarecidamente a que adquieras versiones oficiales de los desarrolladores.
### ¿Qué es KMSPico?
KMSPico es un activador gratuito que permite obtener licencias para Microsoft Windows y Office de forma completamente gratuita, con apenas unos clics. La ventaja es que no necesitas ser un experto en sistemas, ya que esta herramienta está diseñada para que incluso los usuarios menos experimentados de Windows puedan utilizarla sin problemas. El verdadero desarrollador es desconocido, aunque se le conoce bajo el apodo de Team Daz.
### ¿Cómo funciona?
El principio de funcionamiento de este activador es sencillo. A diferencia del activador oficial de Windows que se conecta a los servidores de Microsoft, KMSPico emula temporalmente esta conexión en tu computadora. No se requiere conexión a Internet, ya que la activación se realiza mediante el intercambio de datos entre carpetas en tu disco duro (HDD) o unidad de estado sólido (SSD).
De forma más técnica, la herramienta “emula” el Servicio de Administración de Claves (KMS) y crea un servidor local temporal en tu computadora. Esto permite eliminar las limitaciones de los productos de Microsoft en todos los dispositivos conectados a la red local.
No importa el número de dispositivos ni las especificaciones del equipo. Esta herramienta es compatible tanto con las versiones más recientes de Windows y Office como con las versiones anteriores lanzadas entre 2010 y 2024.
http://kkpline.kr/board/bbs/board.php?bo_table=free&wr_id=132960
Si has llegado a esta página web, es probable que estuvieras buscando “¿Cómo activar Windows u Office de forma gratuita?”. En este artículo, te proporcionaremos una respuesta detallada a esta pregunta y te presentaremos uno de los mejores activadores del momento: KMSPico 2024.
Antes de proceder con el proceso de activación, te recomendamos que explores todas las características y el funcionamiento de esta poderosa herramienta, además de otros programas útiles disponibles en nuestro sitio.
**AVISO**: Este artículo tiene fines educativos únicamente. No nos hacemos responsables de cómo decidas utilizar esta herramienta.
**Consejo**: Si valoras los productos de Microsoft, considera adquirir versiones legales y originales. Este programa solo está diseñado para probar los productos, y te animamos encarecidamente a que adquieras versiones oficiales de los desarrolladores.
### ¿Qué es KMSPico?
KMSPico es un activador gratuito que permite obtener licencias para Microsoft Windows y Office de forma completamente gratuita, con apenas unos clics. La ventaja es que no necesitas ser un experto en sistemas, ya que esta herramienta está diseñada para que incluso los usuarios menos experimentados de Windows puedan utilizarla sin problemas. El verdadero desarrollador es desconocido, aunque se le conoce bajo el apodo de Team Daz.
### ¿Cómo funciona?
El principio de funcionamiento de este activador es sencillo. A diferencia del activador oficial de Windows que se conecta a los servidores de Microsoft, KMSPico emula temporalmente esta conexión en tu computadora. No se requiere conexión a Internet, ya que la activación se realiza mediante el intercambio de datos entre carpetas en tu disco duro (HDD) o unidad de estado sólido (SSD).
De forma más técnica, la herramienta “emula” el Servicio de Administración de Claves (KMS) y crea un servidor local temporal en tu computadora. Esto permite eliminar las limitaciones de los productos de Microsoft en todos los dispositivos conectados a la red local.
No importa el número de dispositivos ni las especificaciones del equipo. Esta herramienta es compatible tanto con las versiones más recientes de Windows y Office como con las versiones anteriores lanzadas entre 2010 y 2024.
https://wolvesbaneuo.com/wiki/index.php/User:CarltonBatts89
Современные каркасные дома под ключ: стильные и функциональные решения
каркасник под ключ https://karkasnye-doma-pod-klyuch-msk.ru/ .
Настенные экраны для проекторов: идеально подходит для офиса и учебных помещений
экран проекционный купить https://www.ehkrany-dlya-proektorov01.ru .
Комфортные бытовки для проживания и офиса на строительных объектах
бытовка цена бытовка цена .
Many thanks. Excellent stuff.
https://vslgaz.ru/
Каркасный дом для дачи и дома: преимущества технологии для комфорта
каркасный дом в спб https://karkasnye-doma-pod-klyuch-v-spb.ru .
Create Custom Stamps Online with Our Stamp Maker Tool
stamp making online stamps-maker-online.com .
Купить электропогрузчик с доставкой по всей России
электропогрузчик цена электропогрузчик цена .
Каркасные дома на заказ: выбирайте индивидуальные проекты и стили
каркасные дома в спб https://karkasnye-doma-pod-klyuch-v-spb.ru .
Металлобаза Юметалл – качественный металлопрокат с гарантией и доставкой по России. Широкий выбор продукции для строительства, ремонта и производства.
Юметалл – металлопрокат Курган
Business Stamp Maker Online: Create Your Company’s Custom Stamps
make stamp online free http://www.stamp-creator-online.com .
Лизинг грузовых автомобилей: безопасное и удобное решение для бизнеса
лизинг на покупку грузового автомобиля https://www.gruzovye-avtomobili-v-lizing.ru .
Best Stamp Maker for Personalized Stamps and Logos
stamp making online https://www.stamps-maker-online.com .
Stamp Maker for Business Needs: Customizable Online Stamps
stamp maker online stamp maker online .
Лизинг оборудования: инвестируйте в развитие бизнеса с минимальными затратами
лизинг оборудования компании oborudovanie-v-lizing.ru .
Оклейка авто винилом для защиты от солнечных лучей и механических повреждений
оклейка бампера пленкой оклейка бампера пленкой .
Каркасный дом под ключ: стоимость, проекты и готовые решения
стоимость каркасного дома http://spb-karkasnye-doma.ru/ .
http://daddys-casino.ru/ казино официальный сайт
Вас манит атмосфера, полная эмоций и неожиданностей? Здесь каждый находит что-то свое. Подобное заведение предлагает не только развлечения, но и шанс испытать удачу. Выбор впечатляющий, и предлагает все необходимое для того, чтобы погрузиться в мир мгновенных побед и легких разочарований. Неудивительно, что многие ищут места, где можно вдоволь поиграть и развлечься с друзьями!
На платформе представлено множество игровых опций, которые удовлетворят любой вкус. От классических автоматов до рискованных настольных забав, каждый сможет выбрать что-то по душе. Обычно уважаемые игроки находят такие места настоящими оазисами для своего досуга. Удобный интерфейс, привлекательные предложения и захватывающее времяпрепровождение – это лишь часть того, что предлагает такая площадка. Здесь каждый сможет испытать свою удачу и насладиться уникальной атмосферой.
Каждый знает, что азартные игры – это не только возможность обогатиться, но и способ расслабиться. Важно помнить, что в таком увлечении нужно сохранять баланс. Опытные игроки находят общий язык с числом удачи и намеренно подходят к своим ставкам. Люди приходят сюда не только за выигрышами, но и за приятными впечатлениями, которые запоминаются надолго. Поэтому не стоит упускать шанса насладиться этой захватывающей атмосферой.
Преимущества игры в онлайн-игровое заведение
Одним из самых значительных преимуществ является комфорт. Вы можете играть в любое время и в любом месте. Не нужно собираться, располагать букеты, гримироваться. Все, что нужно, – это подключение к интернету и устройство. Кроме того, выбор игр просто поражает воображение. От классических карточных игор до современных видеослотов – каждый найдёт что-то по душе.
Что касается бонусов и акций, то они тоже радуют. Часто предлагаются различные поощрения для новых игроков, а также регулярные акции для старых. Это создает дополнительные возможности для повышения шансов на выигрыш. Участие в таких программах – это еще один интересный аспект азартного досуга. Бонусы могут значительно увеличить вашу игровую банкролл, что является важным фактором для многих.
Безопасность и анонимность – важные моменты, о которых не стоит забывать. Большинство платформ применяют современные технологии шифрования, что обеспечивает защиту личных данных. Это позволяет расслабиться и сосредоточиться на игре. Кроме того, у пользователей есть возможность регулировать свои лимиты, контролируя процесс. Это придаёт дополнительную уверенность в том, что всё происходит под контролем.
Не стоит забывать и о социальной составляющей. Множество платформ предлагают режимы с живыми крупье и возможностью общения с другими игроками. Это добавляет элемент взаимодействия в процесс, делая игру ещё более увлекательной; ведь иногда так приятно поделиться эмоциями и тактиками с другими.
Одним словом, у виртуального игрового заведения есть ряд весомых причин, которые делают его привлекательным вариантом для многих. Не упустите возможность познакомиться с этим миром! Каждый найдёт для себя то, что подарит радость и эмоции, а также шансы на удачные выигрыши.
Обзор функционала игрового портала
Здесь можно найти множество особенностей, которые облегчает процесс игрового досуга. Посетителям предоставляется масса возможностей для увлекательного времяпрепровождения. От различных развлечений до удобных инструментов для управления финансами. Все это создает комфортную атмосферу, в которой приятно находиться.
Некоторые параметры особенно выделяются. Например:
– Разнообразие игр – от классических до современных новинок.
– Система бонусов и акций, стимулирующая активность пользователей.
– Интуитивно понятный интерфейс, который не требует особых навыков.
– Кроссплатформенность – играть можно на любом устройстве.
Функции сайта продуманы до мелочей. Приложение обеспечивает быстрое и безопасное выполнение транзакций, а служба поддержки всегда готова прийти на помощь в любое время суток. Благодаря этому, даже новички могут быстро разобраться в механике, начав с простых игр и постепенно переходя к более сложным.
Не оставляет равнодушными и высокое качество графики. Каждый элемент интерфейса прекрасно проработан, а анимация создает живое и захватывающее ощущение во время игры. При этом, элементы управления тщательно продуманы для того, чтобы минимизировать вероятность ошибок. Все это создает позитивные эмоции и улучшает общий опыт.
Таким образом, фронтенд и бэкенд слаженно работают, обеспечивая пользователю плавный и быстрый доступ ко всем возможностям. И, конечно же, это только часть всех преимуществ, которые ждут вас в этом виртуальном заведении.
Рестораны с дегустационным меню: что попробовать
Когда речь заходит о гастрономических открытиях, всегда хочется углубиться в новые вкусы. С каждым укусом возникает возможность узнать что-то особенное. Насыщенные ароматы, изящные презентации и неординарные сочетания в каждом блюде создают уникальную атмосферу. Идеальное сочетание – это когда удовольствие от еды уходит далеко за рамки обычного обеда.
Представьте, как красиво подают порционные шедевры, заставляя вас задерживать дыхание в предвкушении. Искусно подобранные ингредиенты, продуманные акценты и междисциплинарный подход к кулинарии дарят истинное наслаждение.
И знаете, уже давно стало ясно, что хороший ужин – это не просто набор блюд, а целая история, которая unfolds (разворачивается) с каждым поданным угощением. Множество ресторанов предлагают незабываемые обеды, каждый из которых рассказывает свою уникальную сказку о культуре и традициях страны. Погружение в эту атмосферу – это не просто аппетит, это увлекательный опыт, который стоит испытать. Не упустите шанс насладиться этим интригующим путешествием по вкусовым сочетаниям.
Не забывайте, что даже самые простые ингредиенты могут стать настоящими звездами вечера. В некоторых случаях кулинарные мастера превращают их в настоящие изыски, удивляя вас своими творениями. Ваши вкусовые рецепторы ждут, не дождавшись открытия новых горизонтов в мире гастрономии.
Топ-5 блюд для гастрономического опыта
– Фуа-гра – это нежное мясо утки или гусыни, приготовленное с отменным искусством. Его часто подают с фруктовыми компотами или сладкими соусами. Это сочетание делает блюдо поистине невероятным, создавая яркую гармонию вкусов.
– Суши с вяжущими соусами – неповторимые японские закуски манят своим разнообразием. Каждый кусок приносит радость, а свежесть рыбы просто потрясающая. Сочетание различных текстур – от хрустящей нори до мягкого риса – дает возможность прикоснуться к настоящему кулинарному искусству.
– Тартар из говядины – это шикарная закуска для истинных гурманов. Мясо тщательно нарезают и приправляют ароматными специями. С добавлением яичного желтка и каперсов получается идеальное блюдо для настоящих эстетов.
– Паэлья – испанское блюдо, которое собирает множество ярких ингредиентов. С рисом, морепродуктами, курицей и овощами, каждый ингредиент делает его абсолютно уникальным. Поражает не только вкус, но и презентация, поскольку подают его прямо в сковороде.
– Десерт из темного шоколада – настоящий рай для сладкоежек. У него насыщенный вкус, который приятно тает во рту. Часто его дополняют ягодами или кремами, создавая еще более яркие сочетания.
Итак, эти пять блюд обязательно стоит включить в свой список гастрономических открытий. Каждое из них обладает своим уникальным характером и привносит яркость в переживания. Рекомендуется внимательно отнестись к выбору напитков, чтобы подчеркнуть каждый из предложенных вкусов. Не бойтесь открывать новые грани кулинарного мира, ведь это всегда увлекательно и интересно!
Идеальный гастрономический опыт
Когда речь идет о впечатлениях от угощений, важно понять, что на выбор заведения влияет множество факторов. Каждое место дарит уникальную атмосферу и подход к подаче блюд, и именно это делает вечер незабываемым. Обратите внимание на детали: интерьер, обслуживание, освещение. Они создают общий фон, который может как усиливать, так и уменьшать наслаждение от ужина.
Цените разнообразие. Это не только о количестве блюд, но и о оригинальности каждого из них. Разные концепции могут предложить совершенно новые сочетания вкусов. Но как выбрать то самое заведение, где каждая ложка будет настоящим открытием?
Первым делом, исследуйте отзывы других. Отзывы помогут составить представление о заведении. Посмотрите на оценки и комментарии пользователей. Если все счастливы и довольны, это уже хороший знак. Далее, не забывайте о рекомендательных платформах. Туда заведение часто добавляет свои лучшие предложения. Убедитесь, что меню обновляется, и есть время провести время за поисками чего-то нового. Важно, чтобы вы не просто посещали место, а действительно наслаждались им.
И, конечно, направляйтесь в разные районы. Исследуйте гремящие на весь город бутики, но не забывайте про небольшие уютные уголки, где внимание к деталям может быть даже выше. Не бойтесь экспериментировать, пробовать новые кухни. Приготовления с местными продуктами, авторские сочетания, необычные подачи – все это обещает незабываемые моменты.
Топ-5 блюд для гастрономического опыта
Первое, что приходит на ум – это утка с апельсинами. Эта классика французской кухни сочетает в себе хрустящую корочку и нежнейшее мясо. Только представьте, как сочетаются сладкие и кислые нотки! Поверьте, это восхитительное блюдо станет идеальным началом вашего кулинарного путешествия.
Следующий шедевр – это радужная треска, запечённая с лимоном и свежими травами. Она тает во рту, оставляя после себя лишь приятное послевкусие. Здесь важен каждый элемент, от маринада до гарнира. Такой подход позволяет ощутить глубину вкуса.
Не забудьте о ризотто с белыми грибами. Оно порадует вас своей кремовой текстурой и насыщенным ароматом. Каждая ложка – это кусочек Италии, желание вернуться на солнечные площади. Сочетание риса с лесными грибами дополняет атмосферу вашего обеда.
Суп из артишоков с пармезаном – это находка для настоящих ценителей. Он дарит необычайный вкус и непередаваемое ощущение легкости. Эта похлебка прекрасно согреет в холодные дни и скрасит вечеринку. Каждый глоток – это маленькое блаженство.
Завершает наш список восхитительный десерт – тирамису. Гладкий, ароматный и легкий, он прекрасно подходит для того, чтобы завершить серьезную трапезу. Это веселое вещество с кофе и маскарпоне поднимет настроение даже в самый пасмурный день. Вы не сможете устоять перед соблазном этого шедевра.
Каждое из этих блюд подарит вам не только удовольствие, но и новые гастрономические ощущения. Экспериментируйте, пробуйте и открывайте для себя мир уникальных вкусов. Он обязательно удивит вас чем-то новым и прекрасным, ведь вкусная еда – это настоящее искусство.
“https://FoodieBars.ru”; https://FoodieBars.ru,
Лучшие итальянские рестораны в крупных городах РФ
Когда речь заходит о кулинарных шедеврах, трудно не вспомнить об особенностях кухни, которая известна по всему миру. Огромное разнообразие блюд, удивительные сочетания ингредиентов и воздух гастрономической культуры, пропитанный традициями, привлекают гурманов и любителей хорошей еды. В рамках данной статьи мы погрузимся в мир кулинарных изысков, которые можно попробовать вдали от солнечной Италии.
Насколько часто мы ищем идеальное место, чтобы насладиться вечерним ужином? Или просто провести время с друзьями за бокалом вина? В каждом уголке страны можно найти заведения, которые предлагают настоящие кулинарные приключения. По сути, это не просто еда, это целый мир, наполненный ароматами и вкусами, способными перенести нас в галантные времена.
Каждое меню становится произведением искусства, где мастерство шеф-повара и качество продуктов соединяются в каждом блюде. Зачастую такая атмосфера создается благодаря теплому приему и уютному интерьеру. Но стоит помнить, что истинный опыт – это не только гастрономия, но и философия общения и наслаждения процессом.
Мы расскажем о местах, где гастрономическая магия происходит каждый день. Эти заведения привлекают внимание не только местных жителей, но и туристов, которые стремятся открыть для себя что-то новое. В каждом из них таится своя индивидуальность, способная удивить и порадовать.
Необычные заведения с итальянской кухней
Когда речь идет о посещении увлекательных мест, где подают блюда из солнечной Италии, хочется чего-то особенного. Это могут быть скрытые жемчужины или заведения с уникальными концепциями, которые заставят вас забыть о привычных местах. Здесь царит атмосфера, в которой не только вкусно, но и интересно.
В таких локациях часто используют необычные ингредиенты и оригинальные методы приготовления. Например, кто бы мог подумать, что угощения можно подавать на классных арт-выставках? Представьте себе симбиоз кулинарии и искусства. Или заведение, где меню обновляется каждый месяц в зависимости от сезона и местных продуктов. Там вы точно найдете нечто необычное и притягательное.
Большинство таких мест часто располагается в старинных зданиях. Обстановка может быть как современная, так и с историческим шармом. Особенно приятно, когда все это сочетается с изысканными угощениями. У некоторых есть открытые кухни, что добавляет интриги и вызывает ощущение участия в волшебстве приготовления блюд.
Не стоит упускать возможность попробовать блюда, о которых вы и не слышали! Забудьте о стандартных пиццах и пастах. Обратите внимание на авторские вариации, которые могут поразить даже самых требовательных гурманов. Например, это могут быть пасты с дикими грибами или морепродуктами, уловленными за ночь.
Что касается десертов, здесь вас тоже ждут уникальные угощения. Подача может быть столь креативной, что будет казаться, что и сами десерты – это отдельные произведения искусства. И, конечно, никуда не деться от атмосферной музыки и хорошего сервиса. Все это создает неповторимую ауру и заставляет возвращаться снова и снова.
В таких заведениях вас не просто накормят, здесь вы получите целое приключение, полное вкусов, новизны и неожиданных сочетаний. И, возможно, именно в таком месте вы откроете для себя настоящую магию кухни, которая завершит ваш вечер неожиданными приятными эмоциями.
Секреты аутентичных итальянских блюд
Приготовление настоящей пищи из солнечной Италии требует не только точного соблюдения рецептов, но и знания некоторых важных деталей, о которых не догадываются многие гурманы. Замечали ли вы, что порой за простым блюдом скрываются таинственные методы, передающиеся из поколения в поколение? Давайте заглянем в мир кулинарного мастерства, изучим секреты приготовления, которые делают каждое блюдо по-настоящему уникальным.
– Настоящая паста готовится на свежих яйцах и высококачественной муке.
– Томаты, используемые в соусах, должны быть спелыми и ароматными.
– Итальянцы никогда не спешат, поэтому процесс готовки растягивается на несколько часов.
– Чем меньше ингредиентов в блюде, тем выше их качество.
Например, классическое ризотто требует использования специального сорта риса, который способен впитывать бульон, сохраняя при этом свою структуру. Важным элементом является бульон – он должен быть насыщенным и ароматным. Поражает, как за простым ритуалом скрываются годы традиций и культ еды.
– Используйте оливковое масло первого отжима.
– Приправляйте блюда свежей зеленью, такой как базилик или орегано.
– Не забывайте о сыре – выбор должен быть качественным.
Приготовление овощных ингредиентов на медленном огне – еще один секрет, который способен преобразить вкус, раскрывая все насыщенные ароматы. Не стоит забывать о том, что еда – это не просто насыщение, но и праздник для организма, удивительное взаимодействие вкусов и текстур, которое стоит пережить.
Таким образом, внимание к деталям, использование свежих и качественных продуктов, а также любовь к своему делу – это то, что отличает настоящие шедевры от массового производства. Попробуйте экспериментировать с новыми рецептами, добавляя к ним свои фишки, и, возможно, вы откроете для себя новые грани кулинарного искусства.
Необычные заведения с традиционной кухней
Местные ингредиенты используются для создания уникальных комбинаций, при этом уважение к традициям остается на первом месте. Профессиональные шеф-повара часто экспериментируют, добавляя необычные детали в классические рецепты. Иногда кажется, что некоторые заведения – это микро-музеи, где традиция и современность сосуществуют.
Обстановка играет немаловажную роль. От уютного дизайна до душевного обслуживания – все это создает особую атмосферу. Вы можете насладиться вкусом блюда, погружаясь в стильный интерьер, который вдохновлен культурными традициями прошлого и настоящего.
Как правило, такие заведения предлагают не только блюда, но и специальные мероприятия, такие как кулинарные мастер-классы или винные дегустации. Гостям представляется возможность узнать секреты приготовления и увидеть, как создаются настоящие кулинарные шедевры. Каждый визит гарантирует новые открытия и яркие впечатления.
В результате, выбор угощений и атмосфера этих мест создают уникальный опыт, который запоминается на долгое время. Совершая путешествие по ним, вы не только удовлетворяете свой гастрономический интерес, но и погружаетесь в историю, культуру и традиции, которые так любимы многими.
Подводя итоги, нельзя не отметить, что каждый визит в такие заведения – это настоящее открытие. Погрузитесь в вкусовое разнообразие и откройте для себя новые грани кулинарного искусства, восхититесь атмосферой и позвольте себе насладиться каждой минутой. Каждый укус словно рассказывает историю, которую стоит услышать.
“https://DineInsight.ru” (https://DineInsight.ru)
Выигрыш вывел за пару минут, всем советую Вавада!
http://www.dwise.co.kr/bbs/board.php?bo_table=free&wr_id=168872
Professional service and beautiful escorts, couldn’t be happier!
https://www.numeracy.wiki/index.php/Girlvisor.com_57Q
Professional service and beautiful escorts, couldn’t be happier!
https://www.numeracy.wiki/index.php/Girlvisor.com_57Q
Professional service and beautiful escorts, couldn’t be happier!
https://www.numeracy.wiki/index.php/Girlvisor.com_57Q
Professional service and beautiful escorts, couldn’t be happier!
https://www.numeracy.wiki/index.php/Girlvisor.com_57Q
Professional service and beautiful escorts, couldn’t be happier!
https://www.numeracy.wiki/index.php/Girlvisor.com_57Q
Professional service and beautiful escorts, couldn’t be happier!
https://www.numeracy.wiki/index.php/Girlvisor.com_57Q
Professional service and beautiful escorts, couldn’t be happier!
https://www.numeracy.wiki/index.php/Girlvisor.com_57Q
Professional service and beautiful escorts, couldn’t be happier!
https://www.numeracy.wiki/index.php/Girlvisor.com_57Q
Professional service and beautiful escorts, couldn’t be happier!
https://www.numeracy.wiki/index.php/Girlvisor.com_57Q
Service and privacy are the highest priority here, highly recommend!
https://securityholes.science/wiki/User:ClaudeNorcross
Service and privacy are the highest priority here, highly recommend!
https://securityholes.science/wiki/User:ClaudeNorcross
Service and privacy are the highest priority here, highly recommend!
https://securityholes.science/wiki/User:ClaudeNorcross
Service and privacy are the highest priority here, highly recommend!
https://securityholes.science/wiki/User:ClaudeNorcross
Service and privacy are the highest priority here, highly recommend!
https://securityholes.science/wiki/User:ClaudeNorcross
Service and privacy are the highest priority here, highly recommend!
https://securityholes.science/wiki/User:ClaudeNorcross
Service and privacy are the highest priority here, highly recommend!
https://securityholes.science/wiki/User:ClaudeNorcross
Service and privacy are the highest priority here, highly recommend!
https://securityholes.science/wiki/User:ClaudeNorcross
ЭКО по ОМС в Санкт-Петербурге: ответы на самые популярные вопросы
санкт петербург эко http://embryoscopespb.ru/ .
Сдать спермограмму в СПб: все преимущества обращения в современный центр репродуктологии
спермограмма сдать анализ спб https://eggdonorsspb.ru .
Центр репродуктологии в СПб: как подготовиться к ЭКО и что ожидать от процедуры
эко клиника в санкт петербурге https://reproductologyonline.ru .
Запчасти ВАЗ: доступные цены и быстрая доставка по всей стране — заказывайте онлайн
запчасти для ваз http://www.zapchasti-vaz01.ru/ .
Каркасные дома под ключ: надёжные технологии и стильные архитектурные решения
одноэтажный каркасный дом одноэтажный каркасный дом .
Custom Stamp Maker Online: Perfect Stamps for Business or Fun
make stamp online https://www.stamp-online-maker.com .
Модульные дома с ремонтом и коммуникациями: идеальные варианты для всей семьи
модульные частные дома https://modul-stroy-spb.ru/ .
Каркасный дом под ключ: экологичное жильё для вашей семьи
дома каркасные spb-karkasnye-doma1.ru .
Современные каркасные дома: доступное жильё с высоким уровнем комфорта
дом каркасный под ключ http://www.karkasnyi-dom-pod-klyuch-1.ru .
Мобильные экраны для проекторов для путешествий и мероприятий
экран проекционный http://www.ehkrany-dlya-proektorov0.ru/ .
Живые дилеры делают игру в покер и блэкджек особенно увлекательной.
http://www.fursysb2b.com/bbs/board.php?bo_table=free&wr_id=16237
Живые дилеры делают игру в покер и блэкджек особенно увлекательной.
http://www.fursysb2b.com/bbs/board.php?bo_table=free&wr_id=16237
Живые дилеры делают игру в покер и блэкджек особенно увлекательной.
http://www.fursysb2b.com/bbs/board.php?bo_table=free&wr_id=16237
Живые дилеры делают игру в покер и блэкджек особенно увлекательной.
http://www.fursysb2b.com/bbs/board.php?bo_table=free&wr_id=16237
Живые дилеры делают игру в покер и блэкджек особенно увлекательной.
http://www.fursysb2b.com/bbs/board.php?bo_table=free&wr_id=16237
Живые дилеры делают игру в покер и блэкджек особенно увлекательной.
http://www.fursysb2b.com/bbs/board.php?bo_table=free&wr_id=16237
Живые дилеры делают игру в покер и блэкджек особенно увлекательной.
http://www.fursysb2b.com/bbs/board.php?bo_table=free&wr_id=16237
Живые дилеры делают игру в покер и блэкджек особенно увлекательной.
http://www.fursysb2b.com/bbs/board.php?bo_table=free&wr_id=16237
Живые дилеры делают игру в покер и блэкджек особенно увлекательной.
http://www.fursysb2b.com/bbs/board.php?bo_table=free&wr_id=16237
Живые дилеры делают игру в покер и блэкджек особенно увлекательной.
http://www.fursysb2b.com/bbs/board.php?bo_table=free&wr_id=16237
Живые дилеры делают игру в покер и блэкджек особенно увлекательной.
http://www.fursysb2b.com/bbs/board.php?bo_table=free&wr_id=16237
Слоты с прогрессивным джекпотом – моя слабость, всегда жду большого выигрыша.
https://systemcheck-wiki.de/index.php?title=Benutzer:DelmarWoolcock
Бесплатные турниры – отличный способ попробовать свои силы и побороться за призы.
https://jesusforworld.space/tanya-jawab/auf-casino-63t/
На сайте казино всегда доступны бонусы для новых и постоянных игроков.
https://www.adpost4u.com/user/profile/2906448
На сайте казино всегда доступны бонусы для новых и постоянных игроков.
https://www.adpost4u.com/user/profile/2906448
На сайте казино всегда доступны бонусы для новых и постоянных игроков.
https://www.adpost4u.com/user/profile/2906448
На сайте казино всегда доступны бонусы для новых и постоянных игроков.
https://www.adpost4u.com/user/profile/2906448
На сайте казино всегда доступны бонусы для новых и постоянных игроков.
https://www.adpost4u.com/user/profile/2906448
На сайте казино всегда доступны бонусы для новых и постоянных игроков.
https://www.adpost4u.com/user/profile/2906448
На сайте казино всегда доступны бонусы для новых и постоянных игроков.
https://www.adpost4u.com/user/profile/2906448
На сайте казино всегда доступны бонусы для новых и постоянных игроков.
https://www.adpost4u.com/user/profile/2906448
На сайте казино всегда доступны бонусы для новых и постоянных игроков.
https://www.adpost4u.com/user/profile/2906448
На сайте казино всегда доступны бонусы для новых и постоянных игроков.
https://www.adpost4u.com/user/profile/2906448
На сайте казино всегда доступны бонусы для новых и постоянных игроков.
https://www.adpost4u.com/user/profile/2906448
На сайте казино всегда доступны бонусы для новых и постоянных игроков.
https://www.adpost4u.com/user/profile/2906448
Казино онлайн – это удобство, ведь можно играть прямо из дома.
https://test1.tlogsir.com/bbs/board.php?bo_table=free&wr_id=72040
Казино онлайн – это удобство, ведь можно играть прямо из дома.
https://test1.tlogsir.com/bbs/board.php?bo_table=free&wr_id=72040
Казино онлайн – это удобство, ведь можно играть прямо из дома.
https://test1.tlogsir.com/bbs/board.php?bo_table=free&wr_id=72040
Казино онлайн – это удобство, ведь можно играть прямо из дома.
https://test1.tlogsir.com/bbs/board.php?bo_table=free&wr_id=72040
Казино онлайн – это удобство, ведь можно играть прямо из дома.
https://test1.tlogsir.com/bbs/board.php?bo_table=free&wr_id=72040
Казино онлайн – это удобство, ведь можно играть прямо из дома.
https://test1.tlogsir.com/bbs/board.php?bo_table=free&wr_id=72040
Казино онлайн – это удобство, ведь можно играть прямо из дома.
https://test1.tlogsir.com/bbs/board.php?bo_table=free&wr_id=72040
Казино онлайн – это удобство, ведь можно играть прямо из дома.
https://test1.tlogsir.com/bbs/board.php?bo_table=free&wr_id=72040
Казино онлайн – это удобство, ведь можно играть прямо из дома.
https://test1.tlogsir.com/bbs/board.php?bo_table=free&wr_id=72040
Современные онлайн-казино предлагают игры с живыми дилерами, что создает атмосферу реального казино.
https://dokuwiki.stream/wiki/User:GarrettLoughman
Современные онлайн-казино предлагают игры с живыми дилерами, что создает атмосферу реального казино.
https://dokuwiki.stream/wiki/User:GarrettLoughman
Современные онлайн-казино предлагают игры с живыми дилерами, что создает атмосферу реального казино.
https://dokuwiki.stream/wiki/User:GarrettLoughman
Современные онлайн-казино предлагают игры с живыми дилерами, что создает атмосферу реального казино.
https://dokuwiki.stream/wiki/User:GarrettLoughman
Современные онлайн-казино предлагают игры с живыми дилерами, что создает атмосферу реального казино.
https://dokuwiki.stream/wiki/User:GarrettLoughman
Современные онлайн-казино предлагают игры с живыми дилерами, что создает атмосферу реального казино.
https://dokuwiki.stream/wiki/User:GarrettLoughman
Современные онлайн-казино предлагают игры с живыми дилерами, что создает атмосферу реального казино.
https://dokuwiki.stream/wiki/User:GarrettLoughman
Современные онлайн-казино предлагают игры с живыми дилерами, что создает атмосферу реального казино.
https://dokuwiki.stream/wiki/User:GarrettLoughman
Современные онлайн-казино предлагают игры с живыми дилерами, что создает атмосферу реального казино.
https://dokuwiki.stream/wiki/User:GarrettLoughman
Современные онлайн-казино предлагают игры с живыми дилерами, что создает атмосферу реального казино.
https://dokuwiki.stream/wiki/User:GarrettLoughman
Современные онлайн-казино предлагают игры с живыми дилерами, что создает атмосферу реального казино.
https://dokuwiki.stream/wiki/User:GarrettLoughman
Современные онлайн-казино предлагают игры с живыми дилерами, что создает атмосферу реального казино.
https://dokuwiki.stream/wiki/User:GarrettLoughman
Современные онлайн-казино предлагают игры с живыми дилерами, что создает атмосферу реального казино.
https://dokuwiki.stream/wiki/User:GarrettLoughman
Ипотека в Кыргызстане: лучшие программы для частных домов и квартир
ипотека Кыргызстан Ош ipotekakg.ru .
**Почему Вавада Официальный Телеграм – Идеальный Выбор для Любителей Казино**
Сегодня социальные сети стали неотъемлемой частью жизни, и топовые операторы онлайн-казино успешно используют их для общения с пользователями. Одним из таких примеров является **Вавада официальный Телеграм** – канал, который стал настоящей находкой для десятков тысяч подписчиков и новичков. Давайте разберём, почему этот канал заслуживает вашего внимания и какие преимущества он предоставляет.
### Преимущества Вавада Телеграм
1. **Оперативная информация**
В Телеграм-канале вы всегда найдёте свежие новости о бонусах, акциях, турнирах и специальных предложениях. Пользователи получают доступ к актуальной информации без необходимости искать её на сайте.
2. **Эксклюзивные бонусы**
Подписчики канала регулярно получают уникальные промокоды и бонусные предложения, доступные только для участников Телеграм. Это отличный способ увеличить свои шансы на выигрыш.
3. **Простота использования**
Доступ к каналу возможен с любого устройства – смартфона, планшета или компьютера. Всё, что нужно, – установить Телеграм и подписаться на канал Вавада.
4. **Обратная связь**
На платформе предусмотрены удобные способы связи с техподдержкой. Вы можете задать вопросы о работе казино, играх или акциях и получить быстрый ответ.
5. **Обучение и советы**
Для новичков Телеграм-канал становится отличным источником информации. Здесь публикуются советы по игре, стратегии и разбор популярных автоматов, что помогает освоиться даже тем, кто только начинает свой путь в онлайн-казино.
### Почему лицензированное казино – это важно?
Вавада – это лицензированное казино, что гарантирует честную игру и надёжную защиту данных пользователей. Телеграм-канал позволяет не только оставаться в курсе событий, но и быть уверенным в безопасности и легальности всего контента.
### Что предлагает Вавада Телеграм для новичков?
Для новых пользователей предусмотрены:
– **Приветственные бонусы.** Подписавшись на канал, вы сможете получить инструкции по активации стартового пакета.
– **Демо-режимы игр.** В Телеграме часто рассказывают о новых слотах, которые можно попробовать бесплатно.
– **Сообщество.** Быть частью канала – это не только выгодно, но и интересно. Вы сможете участвовать в обсуждениях и делиться своим опытом с другими подписчиками.
### Как подписаться на Вавада Телеграм?
1. Установите приложение Telegram на своём устройстве.
2. Найдите официальный канал Вавада через поиск или воспользуйтесь ссылкой с сайта казино.
3. Нажмите «Подписаться» – и начните пользоваться всеми преимуществами.
### Заключение
**Вавада официальный Телеграм** – это не просто информационный ресурс, а полноценная платформа для общения, обучения и развлечений. Подписывайтесь на канал, чтобы первыми узнавать о лучших предложениях, получать эксклюзивные бонусы и наслаждаться игрой в одном из лучших лицензированных онлайн-казино. Ваш успех начинается с правильного выбора!
https://marketplace.vanuatumade.com.vu/groups/qvavada-89n/members/
**Почему Вавада Официальный Телеграм – Идеальный Выбор для Любителей Казино**
Сегодня социальные сети стали неотъемлемой частью жизни, и топовые операторы онлайн-казино успешно используют их для общения с пользователями. Одним из таких примеров является **Вавада официальный Телеграм** – канал, который стал настоящей находкой для десятков тысяч подписчиков и новичков. Давайте разберём, почему этот канал заслуживает вашего внимания и какие преимущества он предоставляет.
### Преимущества Вавада Телеграм
1. **Оперативная информация**
В Телеграм-канале вы всегда найдёте свежие новости о бонусах, акциях, турнирах и специальных предложениях. Пользователи получают доступ к актуальной информации без необходимости искать её на сайте.
2. **Эксклюзивные бонусы**
Подписчики канала регулярно получают уникальные промокоды и бонусные предложения, доступные только для участников Телеграм. Это отличный способ увеличить свои шансы на выигрыш.
3. **Простота использования**
Доступ к каналу возможен с любого устройства – смартфона, планшета или компьютера. Всё, что нужно, – установить Телеграм и подписаться на канал Вавада.
4. **Обратная связь**
На платформе предусмотрены удобные способы связи с техподдержкой. Вы можете задать вопросы о работе казино, играх или акциях и получить быстрый ответ.
5. **Обучение и советы**
Для новичков Телеграм-канал становится отличным источником информации. Здесь публикуются советы по игре, стратегии и разбор популярных автоматов, что помогает освоиться даже тем, кто только начинает свой путь в онлайн-казино.
### Почему лицензированное казино – это важно?
Вавада – это лицензированное казино, что гарантирует честную игру и надёжную защиту данных пользователей. Телеграм-канал позволяет не только оставаться в курсе событий, но и быть уверенным в безопасности и легальности всего контента.
### Что предлагает Вавада Телеграм для новичков?
Для новых пользователей предусмотрены:
– **Приветственные бонусы.** Подписавшись на канал, вы сможете получить инструкции по активации стартового пакета.
– **Демо-режимы игр.** В Телеграме часто рассказывают о новых слотах, которые можно попробовать бесплатно.
– **Сообщество.** Быть частью канала – это не только выгодно, но и интересно. Вы сможете участвовать в обсуждениях и делиться своим опытом с другими подписчиками.
### Как подписаться на Вавада Телеграм?
1. Установите приложение Telegram на своём устройстве.
2. Найдите официальный канал Вавада через поиск или воспользуйтесь ссылкой с сайта казино.
3. Нажмите «Подписаться» – и начните пользоваться всеми преимуществами.
### Заключение
**Вавада официальный Телеграм** – это не просто информационный ресурс, а полноценная платформа для общения, обучения и развлечений. Подписывайтесь на канал, чтобы первыми узнавать о лучших предложениях, получать эксклюзивные бонусы и наслаждаться игрой в одном из лучших лицензированных онлайн-казино. Ваш успех начинается с правильного выбора!
http://goutergallery.com/bbs/board.php?bo_table=free&wr_id=432598
Многим военным тепловизоры позволяют вести операции с минимальными рисками.
Also visit my site … http://sp11.intipia.co.kr/bbs/board.php?bo_table=free&wr_id=12867
Многим военным тепловизоры позволяют вести операции с минимальными рисками.
Also visit my site … http://sp11.intipia.co.kr/bbs/board.php?bo_table=free&wr_id=12867
**Почему Вавада Официальный Телеграм – Идеальный Выбор для Любителей Казино**
Сегодня социальные сети стали неотъемлемой частью жизни, и топовые операторы онлайн-казино успешно используют их для общения с пользователями. Одним из таких примеров является **Вавада официальный Телеграм** – канал, который стал настоящей находкой для десятков тысяч подписчиков и новичков. Давайте разберём, почему этот канал заслуживает вашего внимания и какие преимущества он предоставляет.
### Преимущества Вавада Телеграм
1. **Оперативная информация**
В Телеграм-канале вы всегда найдёте свежие новости о бонусах, акциях, турнирах и специальных предложениях. Пользователи получают доступ к актуальной информации без необходимости искать её на сайте.
2. **Эксклюзивные бонусы**
Подписчики канала регулярно получают уникальные промокоды и бонусные предложения, доступные только для участников Телеграм. Это отличный способ увеличить свои шансы на выигрыш.
3. **Простота использования**
Доступ к каналу возможен с любого устройства – смартфона, планшета или компьютера. Всё, что нужно, – установить Телеграм и подписаться на канал Вавада.
4. **Обратная связь**
На платформе предусмотрены удобные способы связи с техподдержкой. Вы можете задать вопросы о работе казино, играх или акциях и получить быстрый ответ.
5. **Обучение и советы**
Для новичков Телеграм-канал становится отличным источником информации. Здесь публикуются советы по игре, стратегии и разбор популярных автоматов, что помогает освоиться даже тем, кто только начинает свой путь в онлайн-казино.
### Почему лицензированное казино – это важно?
Вавада – это лицензированное казино, что гарантирует честную игру и надёжную защиту данных пользователей. Телеграм-канал позволяет не только оставаться в курсе событий, но и быть уверенным в безопасности и легальности всего контента.
### Что предлагает Вавада Телеграм для новичков?
Для новых пользователей предусмотрены:
– **Приветственные бонусы.** Подписавшись на канал, вы сможете получить инструкции по активации стартового пакета.
– **Демо-режимы игр.** В Телеграме часто рассказывают о новых слотах, которые можно попробовать бесплатно.
– **Сообщество.** Быть частью канала – это не только выгодно, но и интересно. Вы сможете участвовать в обсуждениях и делиться своим опытом с другими подписчиками.
### Как подписаться на Вавада Телеграм?
1. Установите приложение Telegram на своём устройстве.
2. Найдите официальный канал Вавада через поиск или воспользуйтесь ссылкой с сайта казино.
3. Нажмите «Подписаться» – и начните пользоваться всеми преимуществами.
### Заключение
**Вавада официальный Телеграм** – это не просто информационный ресурс, а полноценная платформа для общения, обучения и развлечений. Подписывайтесь на канал, чтобы первыми узнавать о лучших предложениях, получать эксклюзивные бонусы и наслаждаться игрой в одном из лучших лицензированных онлайн-казино. Ваш успех начинается с правильного выбора!
http://shalomsilver.kr/bbs/board.php?bo_table=free&wr_id=696201
Военные тепловизоры часто защищены от ударов и выдерживают экстремальные условия.
my blog :: https://ciscostore.co.kr/bbs/board.php?bo_table=free&wr_id=335479
Военные тепловизоры часто защищены от ударов и выдерживают экстремальные условия.
my blog :: https://ciscostore.co.kr/bbs/board.php?bo_table=free&wr_id=335479
Военные тепловизоры часто защищены от ударов и выдерживают экстремальные условия.
my blog :: https://ciscostore.co.kr/bbs/board.php?bo_table=free&wr_id=335479
Военные тепловизоры часто защищены от ударов и выдерживают экстремальные условия.
my blog :: https://ciscostore.co.kr/bbs/board.php?bo_table=free&wr_id=335479
Военные тепловизоры часто защищены от ударов и выдерживают экстремальные условия.
my blog :: https://ciscostore.co.kr/bbs/board.php?bo_table=free&wr_id=335479
Военные тепловизоры часто защищены от ударов и выдерживают экстремальные условия.
my blog :: https://ciscostore.co.kr/bbs/board.php?bo_table=free&wr_id=335479
Военные тепловизоры часто защищены от ударов и выдерживают экстремальные условия.
my blog :: https://ciscostore.co.kr/bbs/board.php?bo_table=free&wr_id=335479
Монтаж септика быстро и профессионально: ваши проблемы решены
септики септики .
Тепловизоры помогают военным обнаруживать движущиеся цели на поле боя.
Feel free to surf to my site; http://ncis.zone.free.fr/spip.php?article86
Вывод из запоя в Самаре: безопасный процесс с поддержкой специалистов
круглосуточный вывод из запоя самара http://vivod-iz-zapoya-63.ru/ .
How to Choose the Best Online Stamp Maker for Custom Stamps
rubber stamp maker online http://www.stampingandblogging.com/ .
### Бизнес-реклама на авто: мобильный способ продвигать ваш бренд
Современный бизнес требует оригинальных и эффективных способов продвижения. Одним из таких решений является реклама на автомобиле. Этот метод не только привлекает внимание, но и обеспечивает мобильность вашего рекламного сообщения, охватывая самые разные аудитории.
#### Что такое реклама на авто?
Реклама на авто представляет собой размещение рекламных изображений, логотипов или слоганов компании на транспортном средстве. Это могут быть личные или корпоративные автомобили, которые ежедневно перемещаются по городу, обеспечивая бренду максимальную видимость.
#### Почему реклама на авто эффективна?
1. **Широкий охват аудитории**
Автомобиль с рекламой проезжает по улицам, где его видят сотни или даже тысячи людей ежедневно. Это идеальный способ привлечь внимание в разных районах города и даже за его пределами.
2. **Экономичность**
В отличие от традиционных рекламных площадок, таких как билборды или телевидение, реклама на авто обходится дешевле. Единожды вложившись в разработку и нанесение дизайна, вы получаете долгосрочный рекламный эффект.
3. **Выделение среди конкурентов**
Движущийся автомобиль с ярким и креативным дизайном легко привлекает внимание. Это особенно важно в условиях высокой конкуренции.
4. **Гибкость**
Вы можете использовать автомобили в зависимости от задач бизнеса. Например, направить машину с рекламой в оживлённые районы города или на специальные мероприятия.
#### Какие виды рекламы на авто существуют?
– **Виниловые наклейки**
Долговечный и яркий вариант. Они могут покрывать всю поверхность автомобиля или отдельные его части.
– **Магнитные таблички**
Подходят для временной рекламы. Их легко установить и снять, что особенно удобно для частных автомобилей.
– **Реклама на стёклах**
Специальные наклейки на заднее или боковые стёкла, которые не мешают обзору водителя.
#### Как создать эффективную рекламу на авто?
1. **Привлекательный дизайн**
Дизайн должен быть ярким, запоминающимся и понятным с первого взгляда. Укажите контактные данные и ключевые услуги компании.
2. **Качественные материалы**
Используйте стойкие к погодным условиям материалы, чтобы реклама оставалась яркой и заметной в любое время года.
3. **Правильное размещение**
Наиболее заметные зоны автомобиля – боковые двери, капот и заднее стекло. Разместите там основные элементы рекламы.
#### Заключение
Реклама на авто – это уникальная возможность сделать ваш бренд узнаваемым и привлечь новых клиентов. Этот метод сочетает в себе доступность, мобильность и креативность, что делает его идеальным выбором для любого бизнеса. Начните использовать автомобили как рекламную площадку, и ваш бизнес станет заметнее, а клиенты – ближе!
http://rtistrees.com/groups/reklama-na-avto-35q/
Fast Online Stamp Maker for Custom Logo, Address, and Name Stamps
online stamp maker https://stampwebshop.com/ .
Грузовые машины и МКАД: как быстро получить пропуск
сделать пропуск на мкад https://www.propusknamkad111.ru .
Сантехник на дом: быстрое решение аварий и установка нового оборудования
сантехник на дом http://www.vyzov-santeh-nik-spb.ru .
лучшие бездепозитные бонусы казино
https://www.genbecle.com/index.php?title=Utilisateur:JeannaPardue09
бонусы при регистрации в казино
https://morphomics.science/wiki/User:AntonettaWhitela
бездеп бонусы казино
https://jimsusefultools.com/index.php/User:TerrieDonahue3
бездеп бонусы казино
https://jimsusefultools.com/index.php/User:TerrieDonahue3
бездеп бонусы казино
https://jimsusefultools.com/index.php/User:TerrieDonahue3
бездеп бонусы казино
https://jimsusefultools.com/index.php/User:TerrieDonahue3
бездеп бонусы казино
https://jimsusefultools.com/index.php/User:TerrieDonahue3
бездеп бонусы казино
https://jimsusefultools.com/index.php/User:TerrieDonahue3
бездеп бонусы казино
https://jimsusefultools.com/index.php/User:TerrieDonahue3
бездеп бонусы казино
https://jimsusefultools.com/index.php/User:TerrieDonahue3
бездеп бонусы казино
https://jimsusefultools.com/index.php/User:TerrieDonahue3
бездеп бонусы казино
https://jimsusefultools.com/index.php/User:TerrieDonahue3
бездеп бонусы казино
https://jimsusefultools.com/index.php/User:TerrieDonahue3
бездеп бонусы казино
https://jimsusefultools.com/index.php/User:TerrieDonahue3
бездеп бонусы казино
https://jimsusefultools.com/index.php/User:TerrieDonahue3
новые бездепозитные бонусы казино
https://brechobebe.com.br/index.php/author/carlf009664/
бездепозитные бонусы казино с выводом без пополнения
https://taschengeldsexkontakte.at/author/changdowns9/
Фольга алюминиевая для упаковки: широкий выбор и индивидуальный дизайн
кашированная упаковка https://ufalaki.ru/ .
Профессиональная установка септика под ключ: комфорт для вашего дома
септик цена под ключ septik-pod-klych-99.ru .
Вывод из запоя без осложнений и стресса: профессиональные услуги в Самаре
вывод из запоя вывод из запоя .
В тумане или в темноте тепловизор незаменим как для охотников, так и для военных.
Here is my blog post … https://www.yewiki.org/User:Cassandra1353
Fastest Online Stamp Maker for Custom Stamps in Every Style
stamp maker http://www.stampwebshop.com/ .
Прекрасный инструмент для охоты в условиях леса и пересеченной местности.
Feel free to visit my page; http://doctorwhen.com/kiwi/index.php/User:WendellLandale
С тепловизором можно безопасно проводить охоту даже ночью.
Also visit my webpage :: https://brechobebe.com.br/index.php/author/onaportillo/
Ваш личный сантехник: качественный ремонт и устранение аварий
вызов сантехника http://www.vyzov-santeh-nik-spb.ru .
Индивидуальные прыжки с парашютом: подготовка и профессиональная поддержка
прыжок парашютом цена https://www.pryzhki-s-parashyutom-v-spb.ru .
Всегда смотрю новые сезоны своих любимых сериалов онлайн
http://riverflows.kr/board/bbs/board.php?bo_table=review&wr_id=23582
Всегда смотрю новые сезоны своих любимых сериалов онлайн
http://riverflows.kr/board/bbs/board.php?bo_table=review&wr_id=23582
Всегда смотрю новые сезоны своих любимых сериалов онлайн
http://riverflows.kr/board/bbs/board.php?bo_table=review&wr_id=23582
Всегда смотрю новые сезоны своих любимых сериалов онлайн
http://riverflows.kr/board/bbs/board.php?bo_table=review&wr_id=23582
Всегда смотрю новые сезоны своих любимых сериалов онлайн
http://riverflows.kr/board/bbs/board.php?bo_table=review&wr_id=23582
Всегда смотрю новые сезоны своих любимых сериалов онлайн
http://riverflows.kr/board/bbs/board.php?bo_table=review&wr_id=23582
Всегда смотрю новые сезоны своих любимых сериалов онлайн
http://riverflows.kr/board/bbs/board.php?bo_table=review&wr_id=23582
Всегда смотрю новые сезоны своих любимых сериалов онлайн
http://riverflows.kr/board/bbs/board.php?bo_table=review&wr_id=23582
Всегда смотрю новые сезоны своих любимых сериалов онлайн
http://riverflows.kr/board/bbs/board.php?bo_table=review&wr_id=23582
Всегда смотрю новые сезоны своих любимых сериалов онлайн
http://riverflows.kr/board/bbs/board.php?bo_table=review&wr_id=23582
Всегда смотрю новые сезоны своих любимых сериалов онлайн
http://riverflows.kr/board/bbs/board.php?bo_table=review&wr_id=23582
Смотреть сериалы онлайн удобно даже в дороге
https://sehwajob.duckdns.org/bbs/board.php?bo_table=free&wr_id=56277
Смотреть сериалы онлайн удобно даже в дороге
https://sehwajob.duckdns.org/bbs/board.php?bo_table=free&wr_id=56277
Смотреть сериалы онлайн удобно даже в дороге
https://sehwajob.duckdns.org/bbs/board.php?bo_table=free&wr_id=56277
Смотреть сериалы онлайн удобно даже в дороге
https://sehwajob.duckdns.org/bbs/board.php?bo_table=free&wr_id=56277
Смотреть сериалы онлайн удобно даже в дороге
https://sehwajob.duckdns.org/bbs/board.php?bo_table=free&wr_id=56277
Смотреть сериалы онлайн удобно даже в дороге
https://sehwajob.duckdns.org/bbs/board.php?bo_table=free&wr_id=56277
Смотреть сериалы онлайн удобно даже в дороге
https://sehwajob.duckdns.org/bbs/board.php?bo_table=free&wr_id=56277
Смотреть сериалы онлайн удобно даже в дороге
https://sehwajob.duckdns.org/bbs/board.php?bo_table=free&wr_id=56277
Смотреть сериалы онлайн удобно даже в дороге
https://sehwajob.duckdns.org/bbs/board.php?bo_table=free&wr_id=56277
Смотреть сериалы онлайн удобно даже в дороге
https://sehwajob.duckdns.org/bbs/board.php?bo_table=free&wr_id=56277
Смотреть сериалы онлайн удобно даже в дороге
https://sehwajob.duckdns.org/bbs/board.php?bo_table=free&wr_id=56277
Смотреть сериалы онлайн удобно даже в дороге
https://sehwajob.duckdns.org/bbs/board.php?bo_table=free&wr_id=56277
Смотреть сериалы онлайн удобно даже в дороге
https://sehwajob.duckdns.org/bbs/board.php?bo_table=free&wr_id=56277
Смотреть сериалы онлайн удобно даже в дороге
https://sehwajob.duckdns.org/bbs/board.php?bo_table=free&wr_id=56277
Смотреть сериалы онлайн удобно даже в дороге
https://sehwajob.duckdns.org/bbs/board.php?bo_table=free&wr_id=56277
Интернет-магазин шин: огромный выбор зимних и летних моделей
шины и диски http://www.shiny-internet-magazin.ru .
С тепловизором в лесу вы всегда заметите добычу, даже в условиях плохой видимости.
Check out my blog post: https://mbio.me/bbs/board.php?bo_table=free&wr_id=767940
С тепловизором в лесу вы всегда заметите добычу, даже в условиях плохой видимости.
Check out my blog post: https://mbio.me/bbs/board.php?bo_table=free&wr_id=767940
С тепловизором в лесу вы всегда заметите добычу, даже в условиях плохой видимости.
Check out my blog post: https://mbio.me/bbs/board.php?bo_table=free&wr_id=767940
С тепловизором в лесу вы всегда заметите добычу, даже в условиях плохой видимости.
Check out my blog post: https://mbio.me/bbs/board.php?bo_table=free&wr_id=767940
С тепловизором в лесу вы всегда заметите добычу, даже в условиях плохой видимости.
Check out my blog post: https://mbio.me/bbs/board.php?bo_table=free&wr_id=767940
С тепловизором в лесу вы всегда заметите добычу, даже в условиях плохой видимости.
Check out my blog post: https://mbio.me/bbs/board.php?bo_table=free&wr_id=767940
С тепловизором в лесу вы всегда заметите добычу, даже в условиях плохой видимости.
Check out my blog post: https://mbio.me/bbs/board.php?bo_table=free&wr_id=767940
С тепловизором в лесу вы всегда заметите добычу, даже в условиях плохой видимости.
Check out my blog post: https://mbio.me/bbs/board.php?bo_table=free&wr_id=767940
С тепловизором в лесу вы всегда заметите добычу, даже в условиях плохой видимости.
Check out my blog post: https://mbio.me/bbs/board.php?bo_table=free&wr_id=767940
С тепловизором в лесу вы всегда заметите добычу, даже в условиях плохой видимости.
Check out my blog post: https://mbio.me/bbs/board.php?bo_table=free&wr_id=767940
Тепловизоры дают охотникам и военным преимущество в условиях недостаточной видимости.
Feel free to surf to my blog; http://xn--289am1an83atpak3mwna97v0na83dy3jf4b4w6borbh3z.com/bbs/board.php?bo_table=free&wr_id=65189
Тепловизоры дают охотникам и военным преимущество в условиях недостаточной видимости.
Feel free to surf to my blog; http://xn--289am1an83atpak3mwna97v0na83dy3jf4b4w6borbh3z.com/bbs/board.php?bo_table=free&wr_id=65189
Тепловизоры дают охотникам и военным преимущество в условиях недостаточной видимости.
Feel free to surf to my blog; http://xn--289am1an83atpak3mwna97v0na83dy3jf4b4w6borbh3z.com/bbs/board.php?bo_table=free&wr_id=65189
Тепловизоры дают охотникам и военным преимущество в условиях недостаточной видимости.
Feel free to surf to my blog; http://xn--289am1an83atpak3mwna97v0na83dy3jf4b4w6borbh3z.com/bbs/board.php?bo_table=free&wr_id=65189
Тепловизоры дают охотникам и военным преимущество в условиях недостаточной видимости.
Feel free to surf to my blog; http://xn--289am1an83atpak3mwna97v0na83dy3jf4b4w6borbh3z.com/bbs/board.php?bo_table=free&wr_id=65189
Тепловизоры дают охотникам и военным преимущество в условиях недостаточной видимости.
Feel free to surf to my blog; http://xn--289am1an83atpak3mwna97v0na83dy3jf4b4w6borbh3z.com/bbs/board.php?bo_table=free&wr_id=65189
Тепловизоры дают охотникам и военным преимущество в условиях недостаточной видимости.
Feel free to surf to my blog; http://xn--289am1an83atpak3mwna97v0na83dy3jf4b4w6borbh3z.com/bbs/board.php?bo_table=free&wr_id=65189
Тепловизоры дают охотникам и военным преимущество в условиях недостаточной видимости.
Feel free to surf to my blog; http://xn--289am1an83atpak3mwna97v0na83dy3jf4b4w6borbh3z.com/bbs/board.php?bo_table=free&wr_id=65189
Тепловизоры для охоты становятся всё более популярными благодаря своей эффективности.
my blog post – http://xn--9r2b13phzdq9r.com/bbs/board.php?bo_table=free&wr_id=4126720
Тепловизоры для охоты становятся всё более популярными благодаря своей эффективности.
my blog post – http://xn--9r2b13phzdq9r.com/bbs/board.php?bo_table=free&wr_id=4126720
Тепловизоры для охоты становятся всё более популярными благодаря своей эффективности.
my blog post – http://xn--9r2b13phzdq9r.com/bbs/board.php?bo_table=free&wr_id=4126720
Тепловизоры для охоты становятся всё более популярными благодаря своей эффективности.
my blog post – http://xn--9r2b13phzdq9r.com/bbs/board.php?bo_table=free&wr_id=4126720
Тепловизоры для охоты становятся всё более популярными благодаря своей эффективности.
my blog post – http://xn--9r2b13phzdq9r.com/bbs/board.php?bo_table=free&wr_id=4126720
Тепловизоры для охоты становятся всё более популярными благодаря своей эффективности.
my blog post – http://xn--9r2b13phzdq9r.com/bbs/board.php?bo_table=free&wr_id=4126720
Тепловизоры для охоты становятся всё более популярными благодаря своей эффективности.
my blog post – http://xn--9r2b13phzdq9r.com/bbs/board.php?bo_table=free&wr_id=4126720
Тепловизоры для охоты становятся всё более популярными благодаря своей эффективности.
my blog post – http://xn--9r2b13phzdq9r.com/bbs/board.php?bo_table=free&wr_id=4126720
Автозапчасти для ВАЗ: заказать детали с доставкой за 24 часа
запчасти на ваз http://www.avtozapchasti-vaz1.ru/ .
Проект каркасного дома: стильные и функциональные решения
каркасные дома спб под ключ http://karkasnye-doma-v-spb-pod-kluch.ru/ .
Установка септика под ключ: быстро, качественно, с гарантией
купить септик под ключ http://www.septik-pod-klych-99.ru/ .
Септик под ключ: профессиональный подход и долгосрочная гарантия
купить септик с установкой под ключ septic-pod-kluch-msk.ru .
В военных целях тепловизоры помогают избегать опасных столкновений.
Feel free to visit my web page :: http://poscotech.co.kr/bbs/board.php?bo_table=free&wr_id=285112
В военных целях тепловизоры помогают избегать опасных столкновений.
Feel free to visit my web page :: http://poscotech.co.kr/bbs/board.php?bo_table=free&wr_id=285112
В военных целях тепловизоры помогают избегать опасных столкновений.
Feel free to visit my web page :: http://poscotech.co.kr/bbs/board.php?bo_table=free&wr_id=285112
В военных целях тепловизоры помогают избегать опасных столкновений.
Feel free to visit my web page :: http://poscotech.co.kr/bbs/board.php?bo_table=free&wr_id=285112
В военных целях тепловизоры помогают избегать опасных столкновений.
Feel free to visit my web page :: http://poscotech.co.kr/bbs/board.php?bo_table=free&wr_id=285112
В военных целях тепловизоры помогают избегать опасных столкновений.
Feel free to visit my web page :: http://poscotech.co.kr/bbs/board.php?bo_table=free&wr_id=285112
В военных целях тепловизоры помогают избегать опасных столкновений.
Feel free to visit my web page :: http://poscotech.co.kr/bbs/board.php?bo_table=free&wr_id=285112
В военных целях тепловизоры помогают избегать опасных столкновений.
Feel free to visit my web page :: http://poscotech.co.kr/bbs/board.php?bo_table=free&wr_id=285112
С тепловизором можно уверенно передвигаться по лесу, видя в темноте.
My blog post: https://www.yozgatblog.com/question/teplovizor-50a/
Многие тепловизоры поддерживают запись видео, что удобно для анализа.
Feel free to visit my website … http://theaesoon.co.kr/bbs/board.php?bo_table=free&wr_id=142291
Многие тепловизоры поддерживают запись видео, что удобно для анализа.
Feel free to visit my website … http://theaesoon.co.kr/bbs/board.php?bo_table=free&wr_id=142291
Многие тепловизоры поддерживают запись видео, что удобно для анализа.
Feel free to visit my website … http://theaesoon.co.kr/bbs/board.php?bo_table=free&wr_id=142291
Многие тепловизоры поддерживают запись видео, что удобно для анализа.
Feel free to visit my website … http://theaesoon.co.kr/bbs/board.php?bo_table=free&wr_id=142291
Многие тепловизоры поддерживают запись видео, что удобно для анализа.
Feel free to visit my website … http://theaesoon.co.kr/bbs/board.php?bo_table=free&wr_id=142291
Многие тепловизоры поддерживают запись видео, что удобно для анализа.
Feel free to visit my website … http://theaesoon.co.kr/bbs/board.php?bo_table=free&wr_id=142291
Многие тепловизоры поддерживают запись видео, что удобно для анализа.
Feel free to visit my website … http://theaesoon.co.kr/bbs/board.php?bo_table=free&wr_id=142291
Многие тепловизоры поддерживают запись видео, что удобно для анализа.
Feel free to visit my website … http://theaesoon.co.kr/bbs/board.php?bo_table=free&wr_id=142291
Многие тепловизоры поддерживают запись видео, что удобно для анализа.
Feel free to visit my website … http://theaesoon.co.kr/bbs/board.php?bo_table=free&wr_id=142291
Многие тепловизоры поддерживают запись видео, что удобно для анализа.
Feel free to visit my website … http://theaesoon.co.kr/bbs/board.php?bo_table=free&wr_id=142291
Деревянные дома под ключ: современные технологии и традиции строительства
строительство деревянных домов москва http://www.derevyannye-doma-pod-klyuch777.ru .
Каркасный дом с удобной планировкой: комфорт для всей семьи
каркасные дома в спб http://www.karkasnye-doma-v-spb178.ru .
Верификация проходит быстро, что тоже радует.
http://www.annunciogratis.net/author/wardballent
Верификация проходит быстро, что тоже радует.
http://www.annunciogratis.net/author/wardballent
Верификация проходит быстро, что тоже радует.
http://www.annunciogratis.net/author/wardballent
Верификация проходит быстро, что тоже радует.
http://www.annunciogratis.net/author/wardballent
Верификация проходит быстро, что тоже радует.
http://www.annunciogratis.net/author/wardballent
Верификация проходит быстро, что тоже радует.
http://www.annunciogratis.net/author/wardballent
Верификация проходит быстро, что тоже радует.
http://www.annunciogratis.net/author/wardballent
Верификация проходит быстро, что тоже радует.
http://www.annunciogratis.net/author/wardballent
Верификация проходит быстро, что тоже радует.
http://www.annunciogratis.net/author/wardballent
Верификация проходит быстро, что тоже радует.
http://www.annunciogratis.net/author/wardballent
Ощущение безопасности и прозрачности придает уверенности.
https://ratemywifey.com/author/ryderstgeor/
Настоящий рай для любителей рулетки и блекджека.
https://www.spairkorea.co.kr:443/gnuboard/bbs/board.php?bo_table=g_inquire&wr_id=3132849
Настоящий рай для любителей рулетки и блекджека.
https://www.spairkorea.co.kr:443/gnuboard/bbs/board.php?bo_table=g_inquire&wr_id=3132849
Настоящий рай для любителей рулетки и блекджека.
https://www.spairkorea.co.kr:443/gnuboard/bbs/board.php?bo_table=g_inquire&wr_id=3132849
Настоящий рай для любителей рулетки и блекджека.
https://www.spairkorea.co.kr:443/gnuboard/bbs/board.php?bo_table=g_inquire&wr_id=3132849
Настоящий рай для любителей рулетки и блекджека.
https://www.spairkorea.co.kr:443/gnuboard/bbs/board.php?bo_table=g_inquire&wr_id=3132849
Настоящий рай для любителей рулетки и блекджека.
https://www.spairkorea.co.kr:443/gnuboard/bbs/board.php?bo_table=g_inquire&wr_id=3132849
Настоящий рай для любителей рулетки и блекджека.
https://www.spairkorea.co.kr:443/gnuboard/bbs/board.php?bo_table=g_inquire&wr_id=3132849
Настоящий рай для любителей рулетки и блекджека.
https://www.spairkorea.co.kr:443/gnuboard/bbs/board.php?bo_table=g_inquire&wr_id=3132849
Настоящий рай для любителей рулетки и блекджека.
https://www.spairkorea.co.kr:443/gnuboard/bbs/board.php?bo_table=g_inquire&wr_id=3132849
Настоящий рай для любителей рулетки и блекджека.
https://www.spairkorea.co.kr:443/gnuboard/bbs/board.php?bo_table=g_inquire&wr_id=3132849
Удобно, что здесь принимают сразу несколько криптовалют.
https://farmfruitbasket.com/2024/12/18/cryptoboss-casino-16c/
Удобно, что здесь принимают сразу несколько криптовалют.
https://farmfruitbasket.com/2024/12/18/cryptoboss-casino-16c/
Удобно, что здесь принимают сразу несколько криптовалют.
https://farmfruitbasket.com/2024/12/18/cryptoboss-casino-16c/
Удобно, что здесь принимают сразу несколько криптовалют.
https://farmfruitbasket.com/2024/12/18/cryptoboss-casino-16c/
Удобно, что здесь принимают сразу несколько криптовалют.
https://farmfruitbasket.com/2024/12/18/cryptoboss-casino-16c/
Удобно, что здесь принимают сразу несколько криптовалют.
https://farmfruitbasket.com/2024/12/18/cryptoboss-casino-16c/
Удобно, что здесь принимают сразу несколько криптовалют.
https://farmfruitbasket.com/2024/12/18/cryptoboss-casino-16c/
Удобно, что здесь принимают сразу несколько криптовалют.
https://farmfruitbasket.com/2024/12/18/cryptoboss-casino-16c/
Тепловизор идеально подходит для охоты на диких животных в темное время суток.
my website; http://fairviewumc.church/bbs/board.php?bo_table=free&wr_id=4347154
Удобно, что здесь принимают сразу несколько криптовалют.
https://farmfruitbasket.com/2024/12/18/cryptoboss-casino-16c/
Тепловизор идеально подходит для охоты на диких животных в темное время суток.
my website; http://fairviewumc.church/bbs/board.php?bo_table=free&wr_id=4347154
Удобно, что здесь принимают сразу несколько криптовалют.
https://farmfruitbasket.com/2024/12/18/cryptoboss-casino-16c/
Тепловизор идеально подходит для охоты на диких животных в темное время суток.
my website; http://fairviewumc.church/bbs/board.php?bo_table=free&wr_id=4347154
Удобно, что здесь принимают сразу несколько криптовалют.
https://farmfruitbasket.com/2024/12/18/cryptoboss-casino-16c/
Тепловизор идеально подходит для охоты на диких животных в темное время суток.
my website; http://fairviewumc.church/bbs/board.php?bo_table=free&wr_id=4347154
Кэшбэк — это отличная фишка, возвращает часть проигранного.
https://web.semestaalam.com/forums/topic/cryptoboss-casino-49v/
Кэшбэк — это отличная фишка, возвращает часть проигранного.
https://web.semestaalam.com/forums/topic/cryptoboss-casino-49v/
Кэшбэк — это отличная фишка, возвращает часть проигранного.
https://web.semestaalam.com/forums/topic/cryptoboss-casino-49v/
Кэшбэк — это отличная фишка, возвращает часть проигранного.
https://web.semestaalam.com/forums/topic/cryptoboss-casino-49v/
Кэшбэк — это отличная фишка, возвращает часть проигранного.
https://web.semestaalam.com/forums/topic/cryptoboss-casino-49v/
Кэшбэк — это отличная фишка, возвращает часть проигранного.
https://web.semestaalam.com/forums/topic/cryptoboss-casino-49v/
Кэшбэк — это отличная фишка, возвращает часть проигранного.
https://web.semestaalam.com/forums/topic/cryptoboss-casino-49v/
Кэшбэк — это отличная фишка, возвращает часть проигранного.
https://web.semestaalam.com/forums/topic/cryptoboss-casino-49v/
Кэшбэк — это отличная фишка, возвращает часть проигранного.
https://web.semestaalam.com/forums/topic/cryptoboss-casino-49v/
Кэшбэк — это отличная фишка, возвращает часть проигранного.
https://web.semestaalam.com/forums/topic/cryptoboss-casino-49v/
Кэшбэк — это отличная фишка, возвращает часть проигранного.
https://web.semestaalam.com/forums/topic/cryptoboss-casino-49v/
Кэшбэк — это отличная фишка, возвращает часть проигранного.
https://web.semestaalam.com/forums/topic/cryptoboss-casino-49v/
Ощущение безопасности и прозрачности придает уверенности.
https://www.pokedexia.net/Benutzer:AlexJulius90
Удачные ставки — это реальность в Криптобосс!
https://reuse.constantvzw.org/index.php?title=User:ShaneChe46638390
Отличное место для развлечений с реальными шансами на выигрыш.
https://njspmaca.in/2024/12/19/cryptoboss-casino-37s/
Отличное место для развлечений с реальными шансами на выигрыш.
https://njspmaca.in/2024/12/19/cryptoboss-casino-37s/
Отличное место для развлечений с реальными шансами на выигрыш.
https://njspmaca.in/2024/12/19/cryptoboss-casino-37s/
Отличное место для развлечений с реальными шансами на выигрыш.
https://njspmaca.in/2024/12/19/cryptoboss-casino-37s/
Отличное место для развлечений с реальными шансами на выигрыш.
https://njspmaca.in/2024/12/19/cryptoboss-casino-37s/
Отличное место для развлечений с реальными шансами на выигрыш.
https://njspmaca.in/2024/12/19/cryptoboss-casino-37s/
Отличное место для развлечений с реальными шансами на выигрыш.
https://njspmaca.in/2024/12/19/cryptoboss-casino-37s/
Отличное место для развлечений с реальными шансами на выигрыш.
https://njspmaca.in/2024/12/19/cryptoboss-casino-37s/
Отличное место для развлечений с реальными шансами на выигрыш.
https://njspmaca.in/2024/12/19/cryptoboss-casino-37s/
Отличное место для развлечений с реальными шансами на выигрыш.
https://njspmaca.in/2024/12/19/cryptoboss-casino-37s/
Отличное место для развлечений с реальными шансами на выигрыш.
https://njspmaca.in/2024/12/19/cryptoboss-casino-37s/
Отличное место для развлечений с реальными шансами на выигрыш.
https://njspmaca.in/2024/12/19/cryptoboss-casino-37s/
Отличное место для развлечений с реальными шансами на выигрыш.
https://njspmaca.in/2024/12/19/cryptoboss-casino-37s/
Тепловизоры – это не только удобство, но и безопасность на охоте и в тактических операциях.
Review my webpage https://www.batikmall.co.kr/bbs/board.php?bo_table=free&wr_id=198606
Тепловизоры – это не только удобство, но и безопасность на охоте и в тактических операциях.
Review my webpage https://www.batikmall.co.kr/bbs/board.php?bo_table=free&wr_id=198606
Тепловизоры – это не только удобство, но и безопасность на охоте и в тактических операциях.
Review my webpage https://www.batikmall.co.kr/bbs/board.php?bo_table=free&wr_id=198606
Тепловизоры – это не только удобство, но и безопасность на охоте и в тактических операциях.
Review my webpage https://www.batikmall.co.kr/bbs/board.php?bo_table=free&wr_id=198606
Тепловизоры – это не только удобство, но и безопасность на охоте и в тактических операциях.
Review my webpage https://www.batikmall.co.kr/bbs/board.php?bo_table=free&wr_id=198606
Тепловизоры – это не только удобство, но и безопасность на охоте и в тактических операциях.
Review my webpage https://www.batikmall.co.kr/bbs/board.php?bo_table=free&wr_id=198606
Тепловизоры – это не только удобство, но и безопасность на охоте и в тактических операциях.
Review my webpage https://www.batikmall.co.kr/bbs/board.php?bo_table=free&wr_id=198606
Тепловизоры – это не только удобство, но и безопасность на охоте и в тактических операциях.
Review my webpage https://www.batikmall.co.kr/bbs/board.php?bo_table=free&wr_id=198606
Прыжки с парашютом: сделайте шаг к незабываемым впечатлениям
прыжок с парашютом досааф https://pryzhki-s-parashyutom-v-spb.ru/ .
Лизинг грузового транспорта: доступный способ обновления автопарка
лизинг грузового транспорта https://lizing-gruzovyh-avto.ru .
It’s so convenient to play online casino games on my phone anytime, anywhere.
https://montewiki.com/index.php/Best_Casino_Apps_1
Наркологическая клиника Санкт-Петербурга: круглосуточная поддержка
клиника наркологической помощи narkologicheskaya-klinika-spb-1.ru .
Наркологическая клиника: шаг к свободной и здоровой жизни
наркология в спб https://narkologicheskaya-klinika-spb-0.ru/ .
Вашият мечтан дом със сглобяема къща: съвременен стил и уют
метални сглобяеми къщи метални сглобяеми къщи .
Охота с тепловизором – это новый уровень мастерства и комфорта.
Here is my web blog: купить тепловизор для военных (http://www.wizchem.com/bbs/board.php?bo_table=free&wr_id=177148)
Охота с тепловизором – это новый уровень мастерства и комфорта.
Here is my web blog: купить тепловизор для военных (http://www.wizchem.com/bbs/board.php?bo_table=free&wr_id=177148)
Охота с тепловизором – это новый уровень мастерства и комфорта.
Here is my web blog: купить тепловизор для военных (http://www.wizchem.com/bbs/board.php?bo_table=free&wr_id=177148)
Охота с тепловизором – это новый уровень мастерства и комфорта.
Here is my web blog: купить тепловизор для военных (http://www.wizchem.com/bbs/board.php?bo_table=free&wr_id=177148)
Охота с тепловизором – это новый уровень мастерства и комфорта.
Here is my web blog: купить тепловизор для военных (http://www.wizchem.com/bbs/board.php?bo_table=free&wr_id=177148)
Охота с тепловизором – это новый уровень мастерства и комфорта.
Here is my web blog: купить тепловизор для военных (http://www.wizchem.com/bbs/board.php?bo_table=free&wr_id=177148)
Охота с тепловизором – это новый уровень мастерства и комфорта.
Here is my web blog: купить тепловизор для военных (http://www.wizchem.com/bbs/board.php?bo_table=free&wr_id=177148)
Охота с тепловизором – это новый уровень мастерства и комфорта.
Here is my web blog: купить тепловизор для военных (http://www.wizchem.com/bbs/board.php?bo_table=free&wr_id=177148)
Наклейки со смолой: идеальное решение для брендов и промо-материалов
наклейки из эпоксидной смолы на заказ xn—–7kcbbyacb2akkclkqcl8a3dxf3b0a4b.xn--p1ai .
Купить камеру заднего вида для грузовика: широкий выбор и доступные цены
камера заднего вида для прицепа https://www.kamera-dlya-gruzovika.ru .