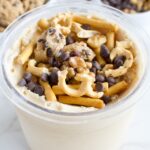
Ninja Creami Kitchen Sink Ice Cream (Gluten Free, Dairy Free)
Why choose one dessert when you can have them all? This Ninja Creami kitchen sink ice cream starts with a creamy dairy free vanilla base, homemade gluten free cookie dough, and is loaded with sweet and salty mix-ins. Completely gluten free and customizable to your favorite allergy friendly add-ins!
Servings 1 pint
Equipment
Ingredients
Ice Cream Base
- ½ cup dairy free yogurt I use coconut yogurt
- 1 cup dairy free milk of choice
- 2-4 tablespoon maple syrup
- 1 teaspoon vanilla extract
- 1 scoop pea protein optional
- pinch of salt optional
Cookie Dough
- 1 cup gluten free flour
- ½ cup dairy free butter or coconut oil melted
- ½ cup coconut sugar
- 1 teaspoon vanilla extract
- ¼ teaspoon salt
- ½ cup mini chocolate chips
Add-Ins
- Gluten free pretzels
- Potato Chips
- Extra chocolate chips or m&m's
- Brownie pieces
- Nuts or seeds
- Caramel or toffee pieces
- Coconut shreds
- Almond or peanut butter or
- Granola butter
- Pumpkin seed butter
- Peanut/almond butter cups or other candy bars
Instructions
- First step is to make the ice cream base. Whisk or blend all of the ingredients together for the ice cream base until smooth.
- Pour base mixture into a Ninja Creami pint container to the max fill line, place storage lid on top, and freeze for 12-24 hours. Be sure the pint is sitting on a level surface in the freezer.
- While ice cream is freezing, make the cookie dough. First, heat treat the flour so it's safe to consume raw. You can do this by microwaving it at 30 second intervals until the temperature reaches 160F, then let the flour cool off before using.
- Whisk together the melted butter/oil with the coconut sugar and vanilla until smooth. Add the flour and salt and mix until just combined. Fold in chocolate chips.
- Scoop 1 tsp-½ tablespoon sized bits of dough onto a parchment lined baking sheet or cutting board and pop in the freezer for 30 minutes, then keep stored in the fridge in an airtight container.
- Before spinning the ice cream, microwave the frozen mixture for 30 seconds or run the outside of the pint container under hot water for a minute.
- Add the pint to the Ninja Creami container and add the outer bowl lid.
- Spin on the lite ice cream setting. If the ice cream is chalky after the first spin, that's okay, don't re-spin.
- Scoop out some a little bit of the middle of the ice cream if needed then pile in your add-ins and spin on the mix-in setting. It may sound loud, but let the Ninja Creami work, it's going to be okay!
- Enjoy with extra toppings or sauces.