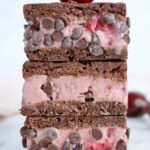
Chocolate Cherry Ice Cream Sandwiches (Gluten Free, Dairy Free)
These gluten free cherry ice cream sandwiches feature a baked chocolate cookie base filled with homemade dairy free cherry chocolate chip ice cream. They are part of my ice cream sandwich series made in memory of a cherry-loving dad.
Servings 8 sandwiches
Equipment
Ingredients
Cookie Base
- ½ cup 1:1 gluten free flour
- 2 tablespoon tapioca starch
- ⅓ cup cocoa powder
- ½ teaspoon baking powder
- ¼ teaspoon salt
- ½ cup vegan melted butter or coconut oil
- ¾ cup coconut sugar
- 1 egg
- 1 egg yolk
- 2 tablespoon milk of choice
- 2 teaspoon vanilla extract
Ice Cream
- 2 pints homemade cherry ice cream or you can use store bought
Instructions
Ice Cream
- If you are making your own ice cream, be sure to make this ahead of time so it is ready to go. If using the Ninja Creami, spin ice cream once before assembly. If using store bought, leave out for 10-20 minutes to soften before assembly,
Cookie Base
- Preheat oven to 350F.
- Whisk the flours, cocoa powder, baking powder, and salt together in a bowl and set aside.
- Beat the melted butter and sugar together until combined. Add the egg, egg yolk, milk, and vanilla and beat to combine.
- Add the dry ingredients to the wet and beat on low until just combined.
- Line a 10x15inch baking pan with parchment paper (You could get away with using a bigger pan and not spreading the batter all the way out or use a 9x13 inch baking dish. Your cookies will just be slightly thicker and sandwiches slightly smaller).
- Spread the batter out evenly over the baking pan, trying to get even edges and a nice thin layer.
- Bake the cookie base for 10 minutes.
- Let the base completely cool for at least an hour before assembling the sandwiches.
Assembly
- Place a medium cutting board or flat plate that is freezer safe (and fits into your freezer- check this before starting!) on the counter. Next, place two long pieces of plastic wrap in a cross over the cutting board.
- Trim the edges of your ice cream sandwich cookie base if desired then cut in half. GENTLY slide one half into the middle of your cutting board/plastic wrap.
- Scoop 1-1.5 pints cherry ice cream over the cookie. Work gently to spread it evenly over the cookie base and use as much or as little ice cream as you want. I like about an inch thick of ice cream.
- Adding the top part of the cookie is hard since it is fragile, but do your best to flip the other half of the cookie base onto the top of your ice cream. Line everything up then tightly wrap up the sandwiches in the plastic wrap. Wrapping tightly holds everything together while the ice cream is soft. The plate/cutting board provides a sturdy support as the sandwiches freeze.
- Place the sandwiches in the freezer for at least 4-6 hours, preferably overnight to allow the ice cream to fully set.
- When ready, slice into 8 sandwiches.
- I like to wrap each sandwich individually in plastic wrap or parchment paper then store in a freezer safe bag or container until ready to eat. Pull one out on a hot summer afternoon and enjoy!
Notes
*See substitutions and tips section in post above for help.
**Place baked cookie base in the fridge for 15-30 minutes before assembly so it is easier to handle.